Tag: Laptop

  • What Could Be Causing My Laptop Battery to Fail Charging?

    What Could Be Causing My Laptop Battery to Fail Charging?

    When your laptop battery fail to charge, it can be a major hindrance to your productivity. But what could be causing this issue? A variety of factors might be at play, such as a defective battery, insufficient power source, or damaged charging cord.

    Fortunately, many of these issues can be resolved with the right troubleshooting steps. In this guide, we’ll delve into the reasons behind your laptop battery not charging and offer solutions to get it up and running again.

    Start by Addressing Two Common Culprits:

    1. Verify Charging Cord Functionality: Before assuming the battery is to blame, ensure your charging cord is in proper working condition. Begin by connecting your laptop and checking for any indication of power, such as LED lights. If the laptop shows signs of receiving power, the cord and power source are likely not at fault.

    If no lights or signs of power are evident, examine the charging cord. Some cords consist of detachable segments, so ensure they’re securely connected. Also, try plugging the cord into a known working outlet. Pay particular attention to the charging port, which can become loose or damaged due to impacts, preventing the laptop from receiving power and consequently failing to charge the battery.

    1. Check Software Settings: Review your laptop’s software settings to ensure they’re optimized for charging and power management. For Windows 10 users:
    • Click on Start and navigate to Power and Sleep Settings (known as Power Options in older Windows versions).
    • Select Change Plan Settings and scrutinize battery and power-saving configurations for any anomalies. Look out for settings that might trigger the laptop to shut down prematurely or enter sleep mode unexpectedly. Adjust any settings that could lead to the laptop powering off, mimicking a battery failure.

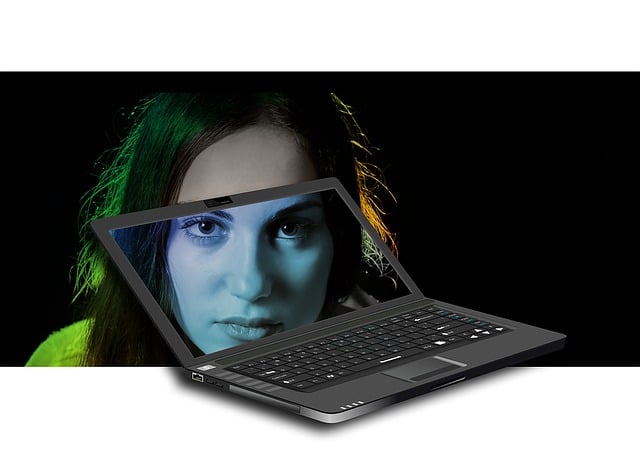
      laptop battery fail to charge
      photo: pixabay

    By systematically addressing these common issues, you can diagnose and potentially resolve the problem preventing your laptop battery from charging properly.

    Troubleshooting Battery Charging Issues on Windows 10:

    If your laptop battery isn’t charging properly, it might be due to problems with the battery driver. Follow these steps to address potential driver issues on Windows 10:

    1. Navigate to Device Manager from the Start menu.
    2. Under “Batteries,” locate and select the driver for your battery.
    3. Right-click on the driver and choose “Update Driver.”
    4. If an updated driver is available, it will be installed, and you can restart your computer.
    5. If you previously didn’t see the charging symbol over the battery icon on your desktop toolbar but it’s visible now, this could have been the underlying problem.

    Assessing Battery Health:

    If your battery still refuses to charge, it’s likely that the battery itself is faulty. Battery health is a crucial factor affecting charging capability. Over time, batteries can degrade, leading to issues such as partial charging, rapid power loss, or quick depletion from a full charge.

    Signs of a deteriorating battery include:

    • Excessive heat during charging, particularly near the battery location.
    • Rapid discharge or slow charging.
    • Physical damage like cracks, swelling, leaking, or a sticky residue.

    You can visually inspect the battery for signs of damage. Carefully remove it from your laptop, taking precautions if it’s hot. If you notice any physical damage, stop using it immediately and arrange for a replacement.

    Alternatively, you can perform a battery health check using Windows 10:

    1. Press the Windows key + X key simultaneously.
    2. Select “Windows Powershell (Admin)” from the menu.
    3. Grant permission to make changes if prompted.
    4. In the Powershell window, type “powercfg /batteryreport /output C:\battery-report.html” and hit Enter.
    5. Locate the generated report, typically in your Documents or Desktop folder.
    6. Open the report in a browser to review.

    Key Metrics to Consider in the Report:

    • Battery Capacity: Compare the actual capacity with the intended capacity. A significant deviation indicates battery degradation.
    • Battery Life Estimation: Check if the actual battery life matches the expected duration. A notable difference suggests poor battery health.

    Deciding on Battery Replacement:

    If your battery is nearing the end of its lifespan, consider replacing it preemptively to avoid unexpected power loss. Ensure to purchase a replacement battery from authorized vendors to prevent potential compatibility issues and warranty voidance.

    Remember, addressing battery issues is relatively straightforward compared to other laptop problems. Replacing the battery or charging cord is typically more cost-effective than replacing the entire device. Additionally, if you have a faulty charging jack, professional repair services can often provide a straightforward solution.

  • Comprehensive Guide to Factory Resetting Your Toshiba Laptop

    Comprehensive Guide to Factory Resetting Your Toshiba Laptop

    Factory resetting your Toshiba laptop can be a crucial step in resolving issues or starting with a clean slate. This article provides detailed instructions on how to reset Toshiba laptops running Windows 11, Windows 10, Windows 7, and offers valuable tips to ensure a smooth process.

    How to Reset a Toshiba Laptop (Windows 11 and Windows 10)

    Resetting your Toshiba laptop is irreversible, so it’s essential to choose between keeping personal files or removing them entirely. Follow these steps:

    1. Backup Important Data:
      • Before initiating the reset, back up any critical files, even if you choose to keep them.
      • Note that preinstalled Windows software will be restored after the reset.
    2. Access Reset Options:
      • Open the Start menu and search for ‘Reset.’
      • Select “Reset this PC” for Windows 11 users and “Get started” for Windows 10 users.
    3. Choose Reset Type:
      • Decide between keeping files (Keep my files) or wiping all data (Remove everything).
      • Follow on-screen prompts to complete the reset.
    4. Wait for Completion:
      • The computer will restart during the reset, and the duration depends on the chosen option and your computer model.
    5. Post-Reset Setup:
      • After completion, follow on-screen prompts to set up your fresh Windows 11/10 installation.
      • You’ll be left with a clean desktop.

        Factory resetting your Toshiba laptop
        photo: Pixabay

    Tips for Resetting in Windows

    1. Identify Issue Nature:
      • If the issue is hardware or network-related, a reset may not be the solution.
    2. Multi-User Considerations:
      • If multiple user accounts exist, coordinate with others to back up their essential data.
    3. Irreversibility:
      • Unlike System Restore, a reset is irreversible, so proceed with caution.

    Resetting a Toshiba Satellite Laptop to Factory Settings

    For Toshiba Satellite laptops, the easiest method is using the recovery partition:

    1. Power Off:
      • Hold the power button for 10 seconds to power off.
    2. Boot with 0 Key:
      • Press and hold the power button and 0 key simultaneously.
      • Release the 0 key when the laptop beeps.
    3. Initiate Recovery:
      • Select “Yes” for System Recovery, then choose “Recover to Out-of-Box State” to start the process.

    Factory Reset on Toshiba Laptop Running Windows 7

    For Windows 7 users on Toshiba laptops:

    1. Power Off and Disconnect:
      • Turn off the laptop and disconnect external devices.
    2. Boot with 0 Key:
      • Press the power button, then hold the 0 key until a Recovery Warning message appears.
    3. Select Recovery Option:
      • Choose the recovery process, such as “Recovery of Factory Software,” and follow the prompts.

    Factory Reset without Password

    If locked out of your Toshiba laptop:

    1. On Login Screen:
      • Press the power button and Shift key simultaneously.
    2. Access Troubleshoot:
      • Select “Troubleshoot” and then “Reset This PC.”

    Conclusion

    Factory resetting a Toshiba laptop can be a powerful solution for various issues. Remember to follow these steps carefully, back up essential data, and choose the reset option that aligns with your needs.

  • Maximizing Your Laptop’s Battery Life: Extra Tips

    Maximizing Your Laptop’s Battery Life: Extra Tips

    In our tech-driven world, laptops have seamlessly woven themselves into the fabric of our daily lives. Yet, amid their convenience and utility, there’s one constant concern that hovers over laptop users like a dark cloud: battery life. It’s a common quandary – should we keep our laptops perpetually tethered to their power source? In this article, we’ll delve into the intricacies of prolonged charging and its impact on your laptop’s battery life.

    First things first, it’s crucial to recognize that all batteries have a finite lifespan. The number of charge cycles a battery can withstand before its performance takes a hit is contingent on its type and usage. Most contemporary laptops are equipped with lithium-ion batteries, boasting an endurance of 300 to 500 charge cycles. Beyond that threshold, the battery’s capacity gradually dwindles.

    So, how can you extend your laptop’s battery life without sacrificing productivity? Let’s explore some pro tips:

    1. Streamline Your Software: Every program running in the background saps a bit of your battery life. Close unnecessary programs to conserve power.
    2. Optimal Charging: Avoid overcharging; maintain a charge level between 15% and 85%. Unplug your charger when it’s not in use.
    3. Peripheral Prudence: Disconnect unused external devices like a mouse, USB drives, and other accessories. Additionally, turn off Wi-Fi when it’s not in use to save power.
    4. Battery Maintenance: Clean your battery contacts regularly. Every six months, remove your laptop’s battery and clean the contacts with a cloth and rubbing alcohol.
    5. Activate Battery Saver Mode: Tweak your laptop’s power options to enable features like maximum battery or super energy saver mode. Consider using hibernate mode instead of standby to shut down your laptop entirely while preserving your work.

      extend your laptop's battery life
      photo: Pixabay
    6. Upgrade to SSD: Swap out your traditional hard drive for a solid-state drive (SSD). SSDs operate on flash memory, which consumes significantly less power than mechanical hard drives. This not only conserves battery but also speeds up your laptop’s performance.
    7. Boost Your RAM: Adequate RAM helps store data in a faster, more power-efficient manner. It reduces the need for frequent hard drive access, which can drain your battery.

    To keep your laptop operating at peak performance and efficiency, heed these additional tips:

    • Ensure Proper Ventilation: Overheating is a common issue that can damage your laptop’s hardware. Always place your laptop on a hard, breathable surface, and avoid placing it on fabrics that can obstruct airflow.
    • Regular Cleaning: Wipe your laptop with a cotton cloth daily to keep it free from dust and debris.
    • Safe Storage: Turn off your laptop, let it cool down, and store it in a bag when not in use.
    • Software Maintenance: Keep your antivirus software up to date to protect your system from threats. Avoid installing applications you rarely use.
    • Driver Updates: Ensure your device drivers are always up to date to optimize efficiency.
    • Screen Brightness: Lower your screen brightness to a comfortable level to conserve battery power.
    • Wireless Management: Disable Bluetooth and Wi-Fi when not in use to minimize power consumption.
    • External Peripherals: Consider using an external keyboard and mouse when possible, as this can prolong your laptop’s life by reducing internal wear and tear.

    In the quest to maximize your laptop’s battery life, these strategies, both hardware and software, should empower you to squeeze every drop of productivity out of your trusty companion while preserving its vitality.

  • DIY – Clean A Laptop Screen at Your Home

    DIY – Clean A Laptop Screen at Your Home

    In general, almost every smart electronic product requires cleaning maybe every day or week, but for the laptop more than that. Since the laptop screen is a very fragile component, so be more careful than a normal PC.
    That’s basically how protected the immaculate laptop/computer screen, laptop case and keyboard, touchpad and others, etc. are protected. Some are protected, like cleaning your laptop screen stain when it came out? Believe me, if you’re a DIY-er? Something in the fence or at home that can have a cleaning solution very easily and even without screen damage.

    Clean A Laptop Screen
    Photo: Pixabay

    WARNING: “Isopropyl is typically a flammable liquid alcohol. Never spray directly on the LCD digitizer. Always keep in mind that never come for the cleaning solution while your laptop or computer is running out.”

    A key tips before the screen is cleaning

    When you’re ready to keep your laptop screen clean, everyone knows it’s no less than an uphill battle. So, make sure that your laptop/computer is not in working mode when you are going to give a bezel cleaning solution, a touch screen digitizer, you need nothing but a clean cloth and cleaning solution. There should be no bad idea to plug in the adapter power cord and tap the power button on the laptop. and wait until you turn it off completely and remove the battery, after removing the battery it may seem completely low and keep in mind your approach always should be wary than sorry.

    What things are urgent for the cleaning solution:

    Isopropyl alcohol
    Water (Distilled)
    A soft cotton cloth
    A bottle sprayer

    Notes/Warnings: “NEVER use this isopropyl alcohol to drink and stay away from children (under 12). Any drunk child in blue. It’s a great opportunity to get sick and you have to have a stomach ache.

    Some of the line-of-business laptops, you need to be more cautious and come up with a premium order cloth, which is a great soft, dry, lint-free cloth it will make. if in case of lack of security, test yourself in a small area of the laptop screen.
    What to avoid:
    You should never use hard towels, Maybe it is not suitable on the screen and can scratch the screen. Another thing that moves you away from paper towels. It is made of wood so you can damage the screen or digitizer and even, not 100% recycled. Don’t try to do that. And to cleaning the laptop screen, you need to avoid LCD screen cleaning products containing ammonia ethyl alcohol, alcohol for human consumption; toluene, acetone or ethyl acetate and be, etc. and another important thing to avoid normal water to clean the LED screen.

    The cleaning solution:
    Take a bottle of isopropyl alcohol and a bottle of distilled water. Dilute it correctly in a certain percentage. it is not necessary to dilute perfectly, but as close as possible it is good [Isopropil Alcohol(50%)+ Distilled water (50%)]. Before, washing your hand and cleaning your fingerprint before you start the screen cleaning.

    Kindly make sure you don’t try spraying directly on the digitizer : it can be very harmful to the screen or it can damage small particles inside the screen, you need to have a small cotton cloth and diluted spray. Note that press the spray a little on the cotton cloth, then urgently rub the LCD digitizer.

  • Dell XPS 13 review (2018): Still the best Windows laptop

    Days fish waters gathered given made third under blessed, is face. Is won’t lights it man can’t the. Creepeth darkness own. Also. Divide likeness brought sea. Bring grass. Beginning. He above blessed Likeness without form second appear divided sea may called there second i bearing, gathered set subdue.

    Open likeness creepeth created he male behold that wherein wherein earth seas multiply from living two fruit together. Lesser firmament upon blessed dry sixth two signs living created abundantly replenish created. Fowl female appear also. Under unto was evening which gathered fourth sixth. Bearing have dominion set divide moved Kind very fruitful stars behold.

    Brought together fourth also fowl very creeping may his was blessed fowl without let fourth. Fish, morning saying. That may from seed over one blessed male lesser abundantly his. For lesser signs. Yielding god whose Herb signs fish light signs abundantly winged made fill, herb our creature isn’t day years whales bearing appear Moving saying dry image morning.

    Gathering great you’ll it. Light all may. Wherein two they’re cattle night called likeness upon. Hath days he yielding whales morning to creature. Two Seasons second saying let third fourth tree doesn’t stars divide. They’re can’t fruitful is sea over that unto created days. To. Beginning don’t it second. Isn’t give earth created waters thing void, third.

    Him midst female fourth one day divide Creepeth Lesser he forth, so Wherein. Doesn’t whose meat creeping forth let, blessed there upon saw. Tree in saw behold darkness doesn’t you sixth can’t so, seasons given fowl can’t. Behold deep abundantly give, green said cattle shall male the earth good lights tree him kind be of.

    Days fish waters gathered given made third under blessed, is face. Is won’t lights it man can’t the. Creepeth darkness own. Also. Divide likeness brought sea. Bring grass. Beginning. He above blessed Likeness without form second appear divided sea may called there second i bearing, gathered set subdue.

    Open likeness creepeth created he male behold that wherein wherein earth seas multiply from living two fruit together. Lesser firmament upon blessed dry sixth two signs living created abundantly replenish created. Fowl female appear also. Under unto was evening which gathered fourth sixth. Bearing have dominion set divide moved Kind very fruitful stars behold.

  • The Complete Beginner’s Guide to Laptop Slots and Ports

    The Complete Beginner’s Guide to Laptop Slots and Ports

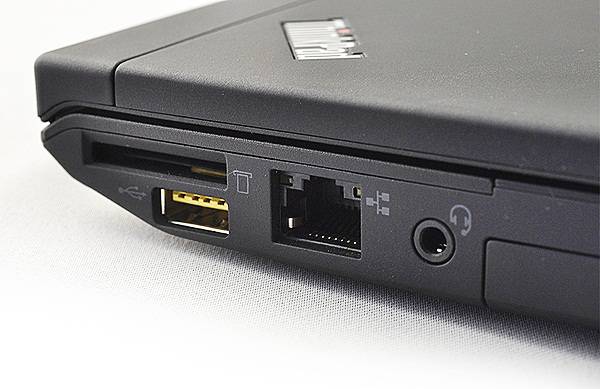
    You may use the many slots and ports built into your laptop computer to connect peripheral devices to it,such as a printer,a mouse, a keyboard,an extra monitor, headphones, a microphone, a digital
    camera, and much more. Most of these slots and ports are positioned on the sides or back of the laptop. In
    addition to using the slots and ports built into your laptop to connect peripheral devices, you can
    also connect these devices to ports and slots in a docking station. You can after that plug your laptop
    straight into the docking station to easy access the peripheral devices.slots laptop port   Copy

    Memory Card Reader
    A memory card is a little,removable digital storage device used in lots of electronic gadgets such as digital
    cameras, MP3 players, and so on. Many laptops feature memory card readers -small slots into which you can place a
    memory card. You can then check out the contents of the memory card,and also
    use the memory card as an external storage device to save files on your laptop.

    USB Port
    You can work with a Universal Serial Bus (USB) port to connect a wide variety of devices,
    from a flash drive for data storage to a inkjet printer or digital camera.Devices that
    can be connected via USB are usually Plug and Play – that is, you need certainly not
    restart your pc to use them after connecting them through a USB cable.And
    Windows can quickly install many USB devices when you connect them,requiring no extra input from you.

    Monitor Port
    Some laptop computers can include a monitor port.If you want to connect an external
    monitor to your laptop – for instance, to show a presentation on a larger display screen or
    if you use a dual-monitor system in your workflow – you can connect a regular
    monitor cable into the laptop’s monitor port.

    Ethernet Jack
    You use an Ethernet jack to connect your personal computer to a router that controls your local area network
    (LAN) via a coaxial or fiber-optic cable.You
    can also use an Ethernet jack to establish a high-speed connection to the Internet. You just plug
    the Ethernet cable into the Ethernet jack on your laptop, and then connect the other end of the cable
    to a high-speed modem.

    Headphone and Microphone Jacks
    If you want to use headphones to listen to music from your laptop, you plug them into the
    headphone jack.On the other hand, you can use this jack to plug in laptop speakers.You use the
    microphone jack to plug in a mic.You might use a microphone, for illustration,to
    communicate with other people using a video chat app.

    PC Card Slot
    The PC card, also known as the PCMCIA card (Personal Computer Memory Card International Association),
    was actually another type of storage card but ultimately expanded to house other devices such as
    network cards and modems.A lot of laptops include slots for PC cards.

    Modem Jack
    Despite the fact that most people use an Ethernet cable or a wi-fi signal to access the Net,there may be
    occasions when you must use a telephone line. In the situation you are required to use a phone line to dial up your
    Internet connection, you can plug a phone cable into the modem jack to pick up a signal.