GIGABYTE has announced an exciting collaboration with NVIDIA, offering the highly anticipated CONTROL Resonant game bundle with eligible graphics cards, laptops, and gaming desktops. To qualify, systems must be powered by an NVIDIA GeForce RTX 5070 or above GPU (including Laptop GPUs). This partnership combines NVIDIA’s next-gen tech—like path tracing and DLSS 4.5—with GIGABYTE’s advanced cooling to deliver ultimate visual fidelity and performance.image: GIGABYTE
Eligible Hardware & Key Features
Graphics Cards: Features the AORUS GeForce RTX 50 INFINITY Series (RTX 5090, 5080, 5070 Ti, and 5070) equipped with WINDFORCE HYPERBURST cooling. The 5080, 5070 Ti, and 5070 models utilize a clean STEALTH cable-management design. The water-cooled GIGABYTE RTX 5090 AI BOX is also included.
Gaming Laptops: Includes the AORUS MASTER 16 GEN 2 (featuring WINDFORCE INFINITY EX cooling), alongside the GIGABYTE AERO X16 and GAMING A16 PRO. These laptops leverage GIGABYTE’s GiMATE AI agent for intelligent, real-time system optimization.
Gaming Desktops: Includes select AORUS PRIME 5 and PRIME 3 models, built for an effortless, plug-and-play experience with all-around thermal management.
Promotion Timeline & Redemption
Purchase Window: Buy an eligible GIGABYTE product between August 25 and September 29, 2026.
Redemption Deadline: You must redeem your CONTROL Resonant game code by October 27, 2026.
For eligible products, redemption details, and full campaign information, please visit the campaign page.
Netflix subtitles can make movies and TV shows easier to follow, especially when you’re watching content in another language or dealing with unclear dialogue. However, subtitles are not always necessary. You may prefer to watch without text on the screen, or you might want to change the subtitle language, font size, style, or appearance.
Fortunately, Netflix makes it relatively easy to remove or change subtitles. The exact steps can vary slightly depending on whether you’re watching Netflix on a computer, smartphone, smart TV, streaming device, or game console.
In this guide, we’ll explain how to remove or change subtitles on Netflix across different devices, along with solutions for situations where subtitles won’t disappear or keep turning back on.
How to Remove Subtitles on Netflix
The quickest way to turn subtitles off is to open the playback controls while a movie or TV show is playing.
Start playing the content you want to watch and bring up the playback controls. Depending on your device, you may need to move the mouse, tap the screen, press a button on your remote, or press a controller button.
Look for the Audio & Subtitles icon. On many devices, it looks like a speech bubble.
Select it and look for the Subtitles section. Choose Off to remove subtitles.
The change normally takes effect immediately, so you can return to the video and continue watching without subtitles.
Keep in mind that Netflix remembers some playback preferences, but subtitle behavior can also depend on the title, profile, language settings, and device you’re using.
photo – pixabay
How to Turn Off Netflix Subtitles on a Computer
If you’re watching Netflix in a web browser on a Windows PC, Mac, or Chromebook, you can remove subtitles in just a few steps.
Open Netflix and start playing a movie or TV show.
Move your mouse over the video to display the playback controls.
Select the Audio & Subtitles icon.
Under Subtitles, select Off.
Click outside the menu to return to the video.
The subtitles should disappear immediately.
This method works in common desktop browsers, although the exact appearance of Netflix’s playback controls can change as the service updates its interface.
How to Remove Subtitles on Netflix on a Phone or Tablet
Netflix is also available on Android phones, iPhones, iPads, and other compatible mobile devices.
To turn subtitles off:
Open the Netflix app.
Start playing the movie or TV show.
Tap the screen to display the playback controls.
Tap Audio & Subtitles.
Find the Subtitles section.
Select Off.
Tap Apply or close the menu, depending on the version of the app.
The subtitles should disappear from the video.
If you’re watching with headphones or in a noisy environment, you may want to keep subtitles enabled. Otherwise, turning them off gives you a cleaner viewing experience without text covering part of the picture.
How to Change Subtitle Language on Netflix
You don’t necessarily have to disable subtitles completely. Netflix supports multiple subtitle languages for many movies and TV shows.
If you want to switch to another language, open the Audio & Subtitles menu while the video is playing.
Under Subtitles, select the language you want to use.
For example, depending on the title and your region, you might see options such as English, Spanish, French, German, Italian, or other languages.
Not every title has the same selection of languages. Available subtitle and audio languages can depend on the title, your location, licensing agreements, and other factors.
If the language you want isn’t listed, Netflix may simply not offer that subtitle track for the particular movie or show.
How to Change Subtitle fonts or text size on Netflix
Netflix also provides options for changing how subtitles look. This can be particularly useful if the default text is too small, too large, or difficult to read against bright scenes.
On supported Netflix settings, you can adjust aspects of subtitle appearance such as:
Font
Text size
Style
Color
Shadow
Background
Window or text appearance
To change subtitle appearance, open Netflix’s account or profile settings and look for the subtitle appearance option.
The exact menu location can change over time as Netflix updates its website and account interface.
After changing the appearance, start or resume a movie or TV show to check the result.
If the new appearance isn’t immediately visible, close and reopen the Netflix app or refresh the browser.
Why Can’t I Turn Off Netflix Subtitles?
Sometimes subtitles continue appearing even after you select Off. Several things can cause this.
The subtitle setting wasn’t saved
The first thing to try is opening the Audio & Subtitles menu again and selecting Off. Continue playing the video for a few seconds to see whether the change takes effect.
Your profile settings may affect playback
Netflix uses individual profiles, and different profiles can have different viewing preferences. Make sure you’re using the profile where you changed your subtitle settings.
If several people use the same Netflix account, another profile may have different language or subtitle preferences.
The Netflix app needs to be restarted
If subtitles remain on despite being disabled, completely close the Netflix app and reopen it.
On a phone or tablet, remove the app from your recent applications before opening it again. On a smart TV or streaming device, you may need to exit Netflix and launch it again.
The title may have forced subtitles
Some movies and shows include subtitles that are part of the content itself.
For example, a scene may contain dialogue in another language that the filmmakers expect viewers to understand through subtitles. These subtitles can be embedded directly into the video rather than being part of Netflix’s selectable subtitle track.
In such cases, selecting Off won’t necessarily remove the text.
How to Remove Subtitles on a Smart TV
The procedure on a smart TV is similar, although the controls depend on the television and Netflix app.
Start playing your movie or show and press a button on the remote to bring up Netflix’s playback controls.
Select Audio & Subtitles, then choose Off under subtitles.
On some TVs, you may need to press the up, down, or directional buttons on the remote before the playback menu appears.
If you cannot find the subtitle option, check that you’re using the Netflix app rather than a television’s separate accessibility or closed-captioning system.
Some TVs have their own caption settings, which can sometimes affect how subtitles or captions are displayed.
How to Turn Off Subtitles on Roku, Fire TV, Apple TV, and Other Devices
Netflix can be used on many streaming devices, including Roku, Amazon Fire TV, Apple TV, Chromecast-compatible devices, and various media players.
The basic process remains the same:
Start playing a Netflix title.
Open the playback controls.
Select Audio & Subtitles.
Go to Subtitles.
Select Off.
Some devices may also have their own accessibility settings for captions. If subtitles continue appearing, check both Netflix’s subtitle menu and the device’s accessibility settings.
Why Do Netflix Subtitles Keep Turning On?
If Netflix repeatedly enables subtitles, check whether the issue happens with one particular title or everything you watch.
If it happens only with one movie or show, the title may have different subtitle behavior or forced subtitles.
If it happens across multiple titles, try switching to another Netflix profile and checking the subtitle settings again. You can also restart the app and make sure Netflix is updated.
Another useful troubleshooting step is signing out of Netflix and signing back in. This can refresh account and profile settings that may not have been applied correctly.
How to Change Netflix Audio and Subtitles Together
Netflix allows you to control both audio and subtitles from the same playback menu.
For example, you can watch a movie with:
Audio: English Subtitles: English
Or you could choose:
Audio: Spanish Subtitles: English
The available combinations depend on the title and your location.
This feature is particularly useful for people learning a language. Watching content in the language you’re studying while keeping subtitles in your native language can make dialogue easier to understand.
Alternatively, using the same language for both audio and subtitles can help you learn vocabulary and improve listening comprehension.
What If Subtitles Are Still Visible?
If subtitles remain visible after selecting Off, first determine whether they’re Netflix subtitles or part of the video itself.
Netflix subtitles that can be controlled through Audio & Subtitles should disappear when you select Off.
Text that is permanently included in the video cannot normally be removed because it is part of the original picture.
You should also check your TV, streaming device, or accessibility settings if captions continue to appear unexpectedly.
Restarting Netflix is another simple troubleshooting step and can resolve temporary playback or settings issues.
Frequently Asked Questions
Can I permanently turn off Netflix subtitles?
You can select Off whenever subtitles are enabled, but Netflix’s behavior can vary depending on your profile, title, device, and language settings. If subtitles keep appearing, check your profile and playback settings.
Can I change Netflix subtitle size?
Yes. Netflix provides subtitle appearance controls on supported account settings, allowing you to adjust options such as text size and style.
Why doesn’t Netflix offer my language?
Netflix does not provide every subtitle language for every title. Available languages vary by title, region, licensing, and other factors.
Can I remove subtitles that are part of a movie?
Usually not. If the text is embedded directly into the video, it isn’t a selectable Netflix subtitle track and cannot be removed through Netflix’s subtitle controls.
Do Netflix subtitle settings apply to every profile?
Netflix profiles can have separate preferences, so check the profile you’re currently using if your subtitle settings don’t behave as expected.
Knowing how to remove or change subtitles on Netflix can make watching movies and TV shows much more comfortable. In most cases, you simply need to open the Audio & Subtitles menu during playback and select Off or choose another language.
If you’re watching Netflix on a computer or mobile device, the process is straightforward. Smart TVs, streaming players, and game consoles use a similar system, although the controls may look slightly different.
When subtitles refuse to disappear, check whether they’re forced or embedded into the video, restart Netflix, and review the settings for the profile you’re using.
Whether you prefer watching without subtitles, need them in another language, or simply want to make the text easier to read, Netflix provides several options for customizing your viewing experience.
Checking your laptop battery health allows you to see how much capacity your battery has retained compared to when it was brand new. Here is how to check battery health on both Windows and macOS:
Windows 10 & Windows 11
Windows includes a built-in tool that generates a detailed HTML battery report.
Open Command Prompt:
Press the Windows Key, type cmd, right-click on Command Prompt, and select Run as administrator.
Generate the Report:
Type or paste the following command and press Enter:
DOS
powercfg /batteryreport
You will see a message indicating that a battery life report has been saved to a specific folder path (usually C:\Windows\System32\battery-report.html or C:\Users\[YourUsername]\battery-report.html).
View the Report:
Open File Explorer, navigate to the designated folder path, and double-click battery-report.html to open it in any web browser.
Interpret the Results:
Look at the Installed batteries section for two key values:
Design Capacity: The maximum charge capacity the battery was manufactured with.
Full Charge Capacity: The current maximum charge capacity the battery can hold.
Health Calculation: Divide Full Charge Capacity by Design Capacity and multiply by 100 to get your current battery health percentage.
photo: pixabay
macOS
MacBooks offer both a quick system status check and detailed battery metrics natively.
Quick Check (Battery Status)
macOS Ventura & Later: Go to System Settings > Battery, then click the (i) info icon next to Battery Health.
macOS Monterey & Earlier: Go to System Preferences > Battery > Battery Health.
Condition States:
Normal: The battery is functioning properly.
Service Recommended: The battery capacity has dropped significantly or is experiencing an issue and should be inspected.
Detailed Check (Cycle Count & Capacity)
Hold down the Option (⌥) key, click the Apple logo () in the top-left corner of your screen, and select System Information.
Under the Hardware sidebar menu, select Power.
Locate the Health Information section:
Cycle Count: The total number of full discharge/charge cycles completed. (Most modern MacBooks are designed for 1,000 cycles before performance degrades).
Maximum Capacity (or Full Charge Capacity): Displays your battery’s current maximum charge relative to when it was new.
Extending your laptop’s daily battery life and protecting its long-term battery health boils down to two distinct goals: reducing immediate power consumption and minimizing chemical degradation.
Here are the most effective strategies for both Windows and macOS:
1. Long-Term Health: Manage Charging & Heat
Lithium-ion batteries degrade faster when kept at 100% state of charge or exposed to high heat.
Cap Max Charge to 80%: If you regularly use your laptop plugged into a desk monitor, limiting the max charge prevents stress on the battery cell.
macOS: Turn on Optimized Battery Charging in System Settings > Battery (or use third-party utilities like AlDente to hard-cap charge at 80%).
Windows: Most manufacturers include a charge threshold tool in their companion software (e.g., Lenovo Vantage, MyASUS, Dell Power Manager, or HP Command Center). Set the battery threshold to 80% or Balance / Conservation Mode.
Prevent Thermal Throttling: Never use your laptop on soft surfaces like beds, couches, or blankets that block cooling vents. Heat is the single fastest way to permanently lose battery capacity.
Long-Term Storage Rule:If you store your laptop for several weeks without using it, leave the charge level at roughly 50% and keep it in a cool environment. Storing it completely full or empty damages the cell chemistry.
2. Daily Runtime: Tweak Display & System Settings
The display and CPU are the two biggest power consumers on any system.
Lower Display Brightness: Dropping your screen brightness to 50%–60% yields the largest immediate jump in battery runtime.
Enable Low Power / Saver Mode:
Windows:Click the battery icon in the taskbar and toggle Battery Saver, or set it to activate automatically at 20–30% in Settings > System > Power & battery.
macOS: Go to System Settings > Battery and set Low Power Mode to Always or On Battery.
Reduce Screen Refresh Rate: If your laptop features a high-refresh screen (120Hz or 145Hz), drop it down to 60Hz in your display settings while working on battery power.
Reduce Display Timeout: Set your screen to turn off after 2 to 3 minutes of inactivity.
3. Software Optimization: Tame Apps & Browsers
Use Browser Power Efficiency Features:Browsers consume significant RAM and processing power.Enable Memory Saver and Energy Saver modes in Chrome, Edge, or Safari to automatically sleep inactive tabs.
Identify Rogue Background Apps:
Windows: Go to Settings > System > Power & battery > Battery usage to see which apps are draining energy in the background.
macOS: Open Activity Monitor, click the Energy tab, and sort by Energy Impact or 12-hr Power usage to locate heavy drainers.
Unplug Unused Peripherals: USB flash drives, external mice, wireless dongles, and external hard drives draw power directly from the laptop logic board even when idle. Disconnect them when working on battery.
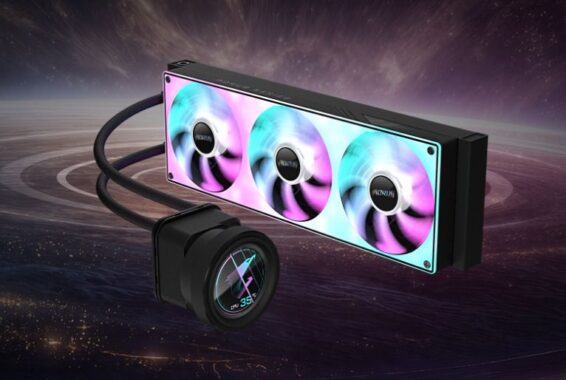
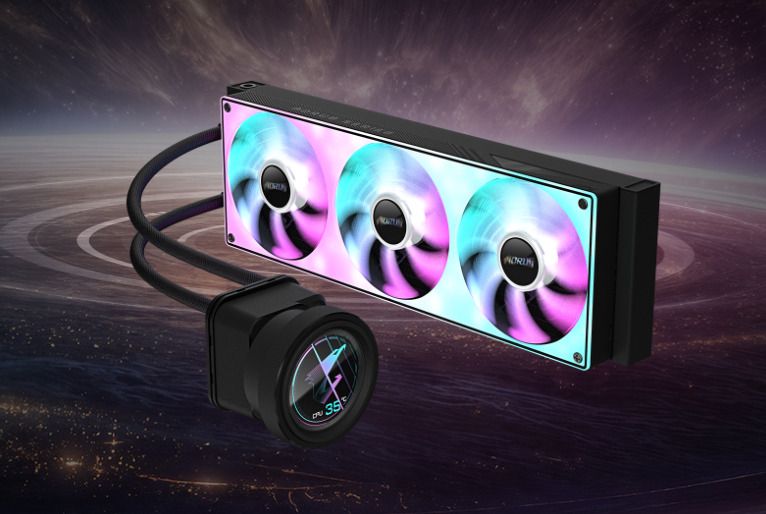
GIGABYTE has expanded its cooling portfolio with the launch of the new AORUS ELITE series of all-in-one (AIO) liquid CPU coolers. The lineup debuts with the flagship AORUS ELITE 360, alongside the more compact AORUS ELITE 240, offering support for a wide range of gaming and high-performance PC builds. Both models will be available in black and white color options.
The new series combines high-performance liquid cooling with extensive customization features, including a built-in LCD display and advanced RGB lighting.
Full-Color LCD for Real-Time System Monitoring
A key feature of the AORUS ELITE series is its integrated full-color LCD display, which supports GIGABYTE’s LCD Edge View technology. The screen can display up to 11 different hardware statistics, including CPU, GPU, and memory information, with as many as four monitoring panels visible simultaneously.
AORUS ELITE AIO Liquid Coolers
In addition to displaying system information, users can personalize the LCD with custom images, animated GIFs, or video clips, allowing the cooler to become a visual centerpiece inside the PC chassis.
Extensive RGB Customization
The flagship AORUS ELITE 360 incorporates 87 addressable LEDs, enabling highly detailed lighting effects. GIGABYTE’s dual-zone RGB implementation allows the fan blades and fan frames to be controlled independently through the GIGABYTE Control Center (GCC) software.
This approach provides greater flexibility when creating synchronized lighting profiles or unique color combinations to match individual system builds.
Designed for Efficient and Quiet Cooling
The AORUS ELITE series utilizes a dual-chamber pump design that separates hot and cooled liquid, improving thermal efficiency by reducing heat recirculation. According to GIGABYTE, this design enables faster and more consistent heat transfer away from the processor.
Cooling performance is further enhanced by 120 mm Hawk fans featuring a seven-blade design, which aims to increase airflow and static pressure while keeping operating noise below 40 dBA. The fans also use Fluid Dynamic Bearings (FDB) to improve durability and reduce vibration.
The cooling system is completed by a high-density aluminum radiator with dedicated coolant channels and a copper cold plate featuring micro-fin technology to maximize the contact surface for heat dissipation.
Simplified Installation
GIGABYTE has also focused on making installation easier for PC builders.
The AORUS ELITE liquid coolers feature a single-frame fan assembly designed to simplify mounting while reducing vibration. A universal mounting bracket supports both Intel LGA 1851/1700 and AMD AM5/AM4 platforms, eliminating the need for multiple mounting kits.
To further streamline installation, the coolers arrive with thermal paste pre-applied, helping ensure proper contact between the CPU and cold plate. An integrated cable management design also reduces the number of required cables from as many as nine to just three, resulting in a cleaner build and easier cable routing.
Availability
The AORUS ELITE series consists of the AORUS ELITE 360 and AORUS ELITE 240, with both models offered in black and white finishes. Pricing and regional availability have not yet been announced.
Wi-Fi 6 vs Wi-Fi 7 Routers: A Deep Analysis of the Differences, Performance, Features, and Which One You Should Buy
Wireless networking has evolved rapidly over the last few years. Wi-Fi 6 introduced major improvements in efficiency, capacity, and performance compared with older Wi-Fi 5 routers. Now, Wi-Fi 7 represents the next major step forward, promising dramatically higher speeds, lower latency, better performance in congested environments, and more intelligent use of multiple wireless bands.
However, the difference between Wi-Fi 6 and Wi-Fi 7 is not simply that “Wi-Fi 7 is faster.” The real differences involve how the wireless connection is organized, how multiple channels are used, how data is modulated, and how the router manages congestion and latency.
For many households, Wi-Fi 6 remains more than sufficient. For users with multi-gigabit internet, modern laptops, gaming PCs, high-end smartphones, large homes, multiple demanding devices, or a long-term upgrade strategy, Wi-Fi 7 can offer significant advantages.
1. The Basic Difference: Wi-Fi 6 vs Wi-Fi 7
Wi-Fi 6 is based on the IEEE 802.11ax standard, while Wi-Fi 7 is based on 802.11be, commonly known as Extremely High Throughput.
The most important difference is that Wi-Fi 6 focused heavily on improving efficiency. It was designed to allow more devices to communicate effectively with the same router, especially in busy environments such as apartments, offices, schools, and public spaces.
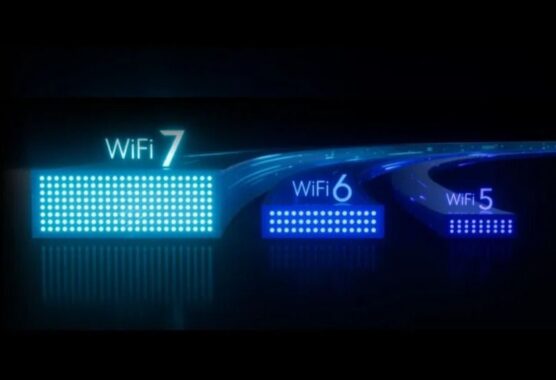
Wi-Fi 7 continues this approach but adds significantly wider channels, more advanced modulation, and the ability to combine multiple wireless links.
Wi-Fi 6 key technologies:
OFDMA
1024-QAM
MU-MIMO
BSS Coloring
Target Wake Time
Up to 160 MHz channel width
Operation across 2.4 GHz and 5 GHz
Wi-Fi 6E extends the technology into the 6 GHz band
Wi-Fi 7 key technologies:
Multi-Link Operation (MLO)
4096-QAM
Up to 320 MHz channel width
Enhanced MU-MIMO
Multi-RU and preamble puncturing
Operation across 2.4 GHz, 5 GHz, and 6 GHz
Much higher theoretical throughput
The result is that Wi-Fi 7 is not merely a faster version of Wi-Fi 6. It is a more flexible wireless architecture.
2. Speed: Wi-Fi 7 Has a Major Theoretical Advantage
The most obvious difference between the two standards is speed.
Wi-Fi 6 can theoretically achieve extremely high aggregate wireless speeds, depending on the number of antennas, channel width, modulation, and spatial streams. However, typical consumer Wi-Fi 6 routers commonly advertise speeds ranging from approximately 1.8 Gbps to 10 Gbps of combined theoretical throughput.
The main reason is the combination of 320 MHz channels and 4096-QAM modulation.
Wi-Fi 6 uses 1024-QAM, which allows more data to be transmitted in each symbol compared with previous generations. Wi-Fi 7 increases this to 4096-QAM. Under ideal conditions, this can provide approximately 20 percent higher transmission efficiency.
However, the larger improvement comes from channel width.
A Wi-Fi 6 router can support channels up to 160 MHz wide. Wi-Fi 7 can support channels up to 320 MHz wide, effectively doubling the maximum channel width.
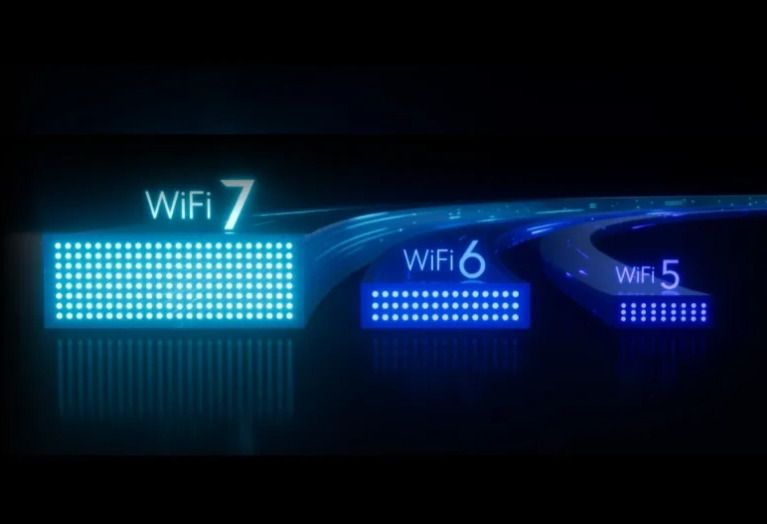
A wider channel can carry more data simultaneously. This is similar to comparing a two-lane road with a four-lane highway: more information can move at the same time.
In theory, Wi-Fi 7 can reach aggregate wireless speeds approaching tens of gigabits per second. However, real-world performance is always lower because of distance, interference, walls, client hardware, network overhead, and the capabilities of the connected device.
For example, a Wi-Fi 7 router does not automatically make an older Wi-Fi 6 smartphone operate at Wi-Fi 7 speeds.
The client device must also support Wi-Fi 7.
3. Multi-Link Operation Is Probably the Biggest Real-World Innovation
One of the most important features of Wi-Fi 7 is Multi-Link Operation, commonly called MLO.
Traditional Wi-Fi devices typically connect to one wireless band or one channel at a time. A device may connect to 5 GHz, for example, while another device connects to 2.4 GHz.
Wi-Fi 7 allows compatible devices to use multiple wireless links simultaneously.
For example, a Wi-Fi 7 laptop could potentially use the 5 GHz and 6 GHz bands together. Instead of relying on a single wireless connection, the device and router can intelligently distribute traffic across multiple links.
This creates several advantages.
Higher throughput
Data can potentially be transmitted through more than one band at the same time.
Lower latency
If one link becomes congested, traffic may be sent through another available link.
Better reliability
If interference affects one band, the connection may continue using another link.
Faster recovery
A device can switch or distribute traffic between links more intelligently than traditional single-band Wi-Fi.
This can be especially useful for online gaming, video conferencing, cloud applications, wireless virtual reality, and high-speed file transfers.
Wi-Fi 6 does not offer this same native multi-link architecture.
This is one of the reasons Wi-Fi 7 can feel more responsive even when the theoretical speed difference is not fully realized.
4. Channel Width: 160 MHz vs 320 MHz
Channel width has a major effect on wireless speed.
Wi-Fi 6 supports channels up to 160 MHz wide. This can provide excellent performance, particularly on the 5 GHz band.
Wi-Fi 7 doubles the maximum width to 320 MHz.
However, there is an important limitation: 320 MHz channels are primarily associated with the 6 GHz spectrum, where regulatory conditions permit them.
This means Wi-Fi 7’s maximum performance depends heavily on whether the 6 GHz band is available in your country and whether your router and client device support it.
The 6 GHz band provides more relatively clean spectrum than the crowded 2.4 GHz and 5 GHz bands. This makes it ideal for wide channels.
However, 6 GHz signals generally have shorter range and weaker wall penetration than lower-frequency signals.
Therefore, a Wi-Fi 7 router may deliver extraordinary performance when your device is relatively close to the router, but the connection may fall back to 5 GHz or 2.4 GHz as distance increases.
This is another reason why Wi-Fi 7 should not be judged solely by its advertised maximum speed.
5. 4096-QAM: More Data Per Wireless Signal
Another important difference is modulation.
Wi-Fi 6 introduced 1024-QAM. Wi-Fi 7 increases this to 4096-QAM.
QAM, or Quadrature Amplitude Modulation, determines how much information can be encoded into each radio signal.
Higher-order modulation allows more data to be transmitted within the same amount of radio spectrum.
However, higher modulation requires a stronger and cleaner signal.
In practical terms, 4096-QAM works best when your device is relatively close to the router and interference is limited.
Therefore, Wi-Fi 7’s 4096-QAM advantage is most noticeable in favorable conditions.
It is not a technology that guarantees a 20 percent speed increase throughout an entire home.
At longer distances, the connection may automatically use a lower modulation level to maintain stability.
6. Performance in Crowded Networks
This is where Wi-Fi 6 already performs extremely well.
Wi-Fi 6 introduced OFDMA, which allows the router to divide a wireless channel into smaller resource units and efficiently serve multiple devices.
Instead of allowing devices to compete for an entire channel, the router can allocate smaller portions of the channel to different devices.
This improves efficiency in networks with many connected devices.
Wi-Fi 7 improves this concept further through technologies such as Multi-RU and enhanced resource allocation.
One particularly important feature is preamble puncturing.
Suppose a wide channel contains a small section affected by interference. Older systems may be forced to avoid using the entire channel. Wi-Fi 7 can potentially ignore or “puncture” the problematic section while continuing to use the remaining clean spectrum.
This can improve performance in environments where interference is unpredictable.
For apartment buildings, offices, universities, and dense urban environments, these improvements can be more valuable than maximum theoretical speed.
7. Latency and Gaming Performance
Gamers often ask whether Wi-Fi 7 is significantly better than Wi-Fi 6.
The answer is: potentially, but not automatically.
Wi-Fi 7 can reduce latency through:
Multi-Link Operation
Better congestion management
Wider channels
More efficient resource allocation
Faster use of alternative wireless links
For online gaming, however, your internet connection, ISP routing, server distance, and network congestion often have a greater effect than the Wi-Fi standard alone.
A Wi-Fi 7 router cannot eliminate latency caused by a distant game server or poor internet routing.
Nevertheless, inside the local network, Wi-Fi 7 can provide a more stable and responsive connection, particularly when multiple users are simultaneously streaming, downloading, gaming, or using cloud services.
For wireless virtual reality, high-resolution game streaming, and large local network transfers, Wi-Fi 7 has a particularly strong advantage.
8. Wi-Fi 6E Is an Important Middle Ground
Many buyers confuse Wi-Fi 6E with Wi-Fi 7.
Wi-Fi 6E is essentially an extension of Wi-Fi 6 into the 6 GHz band.
It provides access to additional spectrum and can offer excellent performance with less congestion.
A high-quality Wi-Fi 6E router can therefore be much faster and less congested than a basic Wi-Fi 6 router operating only on 2.4 GHz and 5 GHz.
However, Wi-Fi 6E does not include the full Wi-Fi 7 feature set.
It generally does not provide:
320 MHz channels
4096-QAM
Full Wi-Fi 7 Multi-Link Operation
For users who want access to cleaner 6 GHz spectrum but do not need the latest technology, Wi-Fi 6E can still be a very attractive option.
9. Range: Wi-Fi 7 Is Not Automatically Better
One common misconception is that a Wi-Fi 7 router will always provide better range.
That is not necessarily true.
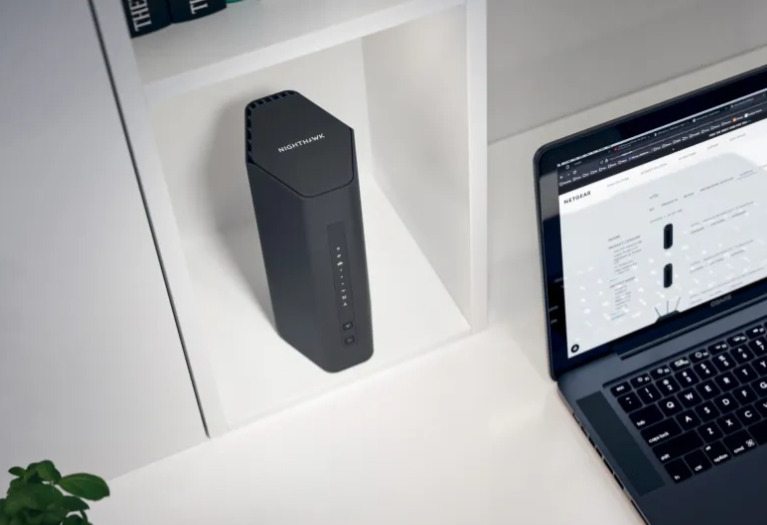
WiFi Routers – difference between Wi-Fi 6 and Wi-Fi 7
Wireless range depends on:
Frequency
Transmit power
Antenna design
Building materials
Router placement
Interference
Client device capabilities
The 2.4 GHz band generally travels farther and penetrates walls better than 5 GHz and 6 GHz.
The 6 GHz band, despite offering exceptional capacity, usually has shorter effective range.
Therefore, a Wi-Fi 7 router may deliver much faster speeds near the router but rely on 5 GHz or 2.4 GHz for longer-distance coverage.
For a large home, a Wi-Fi 7 mesh system may be more important than simply purchasing a single extremely powerful router.
10. Hardware and Ethernet Ports Matter
A major mistake is to buy a powerful Wi-Fi 7 router while ignoring the wired network ports.
If your internet connection is only 500 Mbps or 1 Gbps, an expensive high-end Wi-Fi 7 router may not provide a noticeable internet-speed advantage.
However, Wi-Fi 7 becomes more valuable when combined with:
2.5 Gbps internet
5 Gbps internet
10 Gbps local networking
NAS storage
High-speed PC transfers
Multiple high-performance wireless clients
Many modern Wi-Fi 7 routers include 2.5GbE, 5GbE, or 10GbE ports.
These ports are essential if you want to take full advantage of multi-gigabit wireless performance.
A router advertised with extremely high Wi-Fi speeds but only basic Gigabit Ethernet ports may create a bottleneck in certain network configurations.
11. Compatibility: Your Devices Matter More Than the Router
A Wi-Fi 7 router can connect to older Wi-Fi 6, Wi-Fi 5, and Wi-Fi 4 devices.
However, older devices will not suddenly gain Wi-Fi 7 features.
To experience the full benefits of Wi-Fi 7, you need compatible:
Smartphones
Laptops
Desktop Wi-Fi adapters
Tablets
Gaming devices
Mesh nodes
If most of your devices are Wi-Fi 5 or Wi-Fi 6, upgrading the router to Wi-Fi 7 may improve network management and provide future-proofing, but it may not dramatically increase the speed of those existing devices.
The greatest benefits appear when both the router and client support Wi-Fi 7.
12. Which Router Should You Buy?
Wi-Fi 6 is still the better choice for many people.
Choose Wi-Fi 6 if:
Your internet connection is 1 Gbps or slower
Most of your devices use Wi-Fi 5 or Wi-Fi 6
You want excellent value
You have a normal number of connected devices
You do not need multi-gigabit wireless speeds
Wi-Fi 7 is more attractive if:
You have multi-gigabit internet
You own modern Wi-Fi 7 devices
You transfer large files across a local network
You use high-resolution wireless streaming
You are a serious gamer
You use wireless VR
You live in a highly congested wireless environment
You want a router that will remain modern for many years
The key question is not simply, “Which standard is faster?”
The better question is, “Will my network and devices take advantage of the additional capability?”
The difference between Wi-Fi 6 and Wi-Fi 7 is significant.
Wi-Fi 6 revolutionized wireless networking by improving efficiency, capacity, and performance in networks with many devices. It remains an excellent standard and is sufficient for the majority of households.
Wi-Fi 7 takes wireless networking further with 320 MHz channels, 4096-QAM modulation, Multi-Link Operation, improved spectrum utilization, and more advanced congestion management.
Its biggest advantage is not just raw speed. Wi-Fi 7 can make wireless connections more flexible, responsive, and resilient.
However, the benefits depend heavily on your environment and hardware. A Wi-Fi 7 router connected to older devices and a 500 Mbps internet connection may provide little practical improvement over a good Wi-Fi 6 router.
On the other hand, a Wi-Fi 7 router combined with modern Wi-Fi 7 devices, multi-gigabit internet, 6 GHz spectrum, and multi-gigabit Ethernet can deliver a dramatic improvement in wireless performance.
For most users today, Wi-Fi 6 remains the value champion. For enthusiasts, professionals, gamers, power users, and people building a long-term high-performance network, Wi-Fi 7 is the more advanced and future-ready choice.
ASUS continues to dominate the monitor market in 2026 with an impressive lineup of gaming, professional, and productivity displays. Whether you’re a competitive gamer, content creator, programmer, or office user, ASUS offers a monitor that balances performance, image quality, and advanced features. This guide explores four of the best ASUS monitors available in 2026, covering their specifications, performance, advantages, disadvantages, and ideal use cases.
1. ASUS ROG Swift OLED PG27UCDM
Best Overall Gaming Monitor
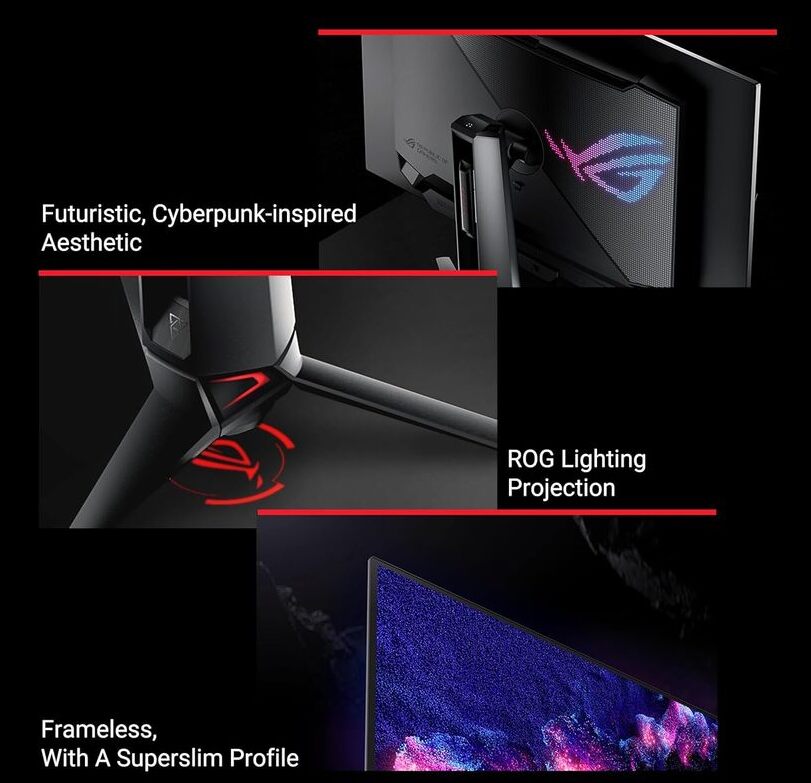
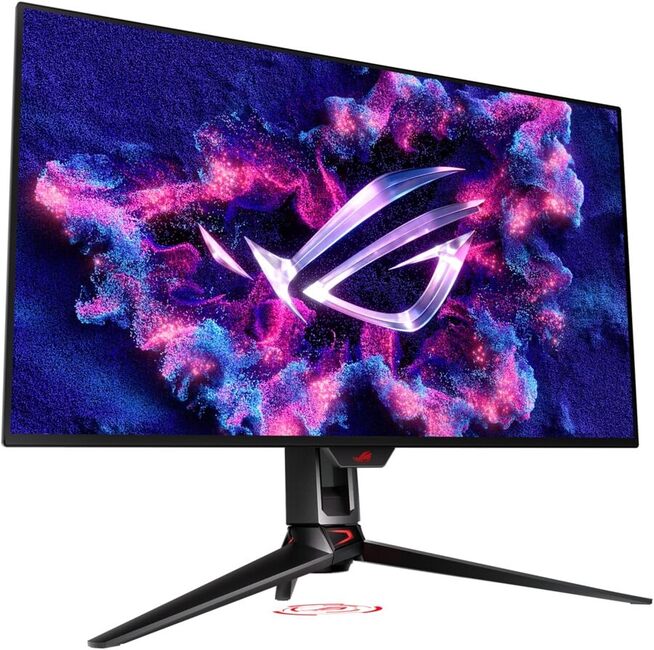
The ASUS ROG Swift OLED PG27UCDM is widely considered one of the finest gaming monitors of 2026. It combines a stunning 27-inch 4K QD-OLED panel with a blazing-fast 240Hz refresh rate, making it ideal for both esports and immersive AAA gaming. Independent reviews consistently rank it among the top gaming displays available.
Key Specifications
Screen Size: 27 inches
Resolution: 3840 × 2160 (4K UHD)
Panel Type: QD-OLED
Refresh Rate: 240Hz
Response Time: 0.03ms
HDR Support
Adaptive Sync
Performance
The monitor delivers exceptional color accuracy, perfect blacks, infinite contrast, and virtually instant pixel response. Motion clarity is outstanding, while 4K resolution provides razor-sharp images.
Pros
Outstanding OLED image quality
True 4K at 240Hz
Extremely fast response time
Excellent HDR performance
Premium gaming features
Cons
Expensive
OLED burn-in remains a long-term consideration
Requires a powerful GPU to maximize performance
Best For
Competitive gamers
High-end PC enthusiasts
Streamers
AAA gaming
2. ASUS ROG Swift OLED PG32UCDMR
Best Premium 32-inch Gaming Monitor
For users who want a larger screen without sacrificing speed, the PG32UCDMR offers a spectacular 32-inch 4K OLED experience at 240Hz.
The larger display enhances immersion while maintaining exceptional motion clarity. Colors are vibrant, blacks are truly black, and HDR content looks stunning.
Pros
Larger immersive display
Exceptional contrast
Excellent color reproduction
Fast gaming performance
Premium build quality
Cons
High price
Large desk space required
OLED care is recommended
ASUS ROG Swift OLED PG32UCDMR
Best For
Console gamers
PC enthusiasts
Single-monitor gaming setups
3. ASUS ProArt PA32UCDM
Best Professional Creator Monitor
The ProArt PA32UCDM is designed for professionals who require outstanding color accuracy for photography, filmmaking, graphic design, and video editing.
Key Specifications
32-inch 4K QD-OLED
Factory color calibrated
99% DCI-P3
Thunderbolt 4 connectivity
HDR support
Professional color management tools
Performance
This monitor delivers precise colors, uniform brightness, and exceptional HDR capabilities. It is one of the best displays for professional creative workflows.
Pros
Industry-leading color accuracy
Excellent HDR quality
Wide connectivity options
Premium build
Ideal for creative professionals
Cons
Very expensive
Overkill for casual users
Lower value for gaming-focused buyers
Best For
Video editors
Photographers
Graphic designers
Content creators
4. ASUS TUF Gaming VG27UQ1A
Best Value Gaming Monitor
The TUF Gaming VG27UQ1A offers impressive gaming performance at a much more affordable price than ASUS’s flagship OLED models.
Key Specifications
27-inch Fast IPS
4K UHD
Up to 160Hz
1ms response time
Adaptive Sync
DisplayHDR support
What is Fast IPS panel?
A Fast IPS (In-Plane Switching) panel is an improved version of a standard IPS LCD display. It is designed to keep the excellent color accuracy and wide viewing angles of IPS while significantly reducing response times, making it ideal for gaming.
How Fast IPS Works
Like a regular IPS panel, Fast IPS uses liquid crystals that align parallel to the screen. The “Fast” designation means the panel has been optimized to switch pixels more quickly, reducing motion blur and ghosting during fast-moving scenes.
Key Features
Fast response times: Typically 1 ms (GtG), compared to 4–5 ms on many traditional IPS panels.
High refresh rates: Commonly available at 144 Hz, 165 Hz, 180 Hz, 240 Hz, and even higher.
Excellent color accuracy: Produces vibrant, accurate colors, making it suitable for gaming, content creation, and everyday use.
Wide viewing angles: Colors and brightness remain consistent even when viewed from the side.
Low motion blur: Fast pixel transitions make moving objects appear sharper.
Pros
Great color reproduction
Wide viewing angles
Fast response times for gaming
Smooth performance with high refresh rates
Better overall image quality than most TN panels
Cons
Lower contrast than OLED or VA panels, so blacks appear more gray in dark rooms
HDR performance is usually limited unless the monitor has advanced local dimming
Can be more expensive than basic IPS monitors
Fast IPS vs. Other Panel Types
Panel Type
Colors
Contrast
Speed
Best For
Fast IPS
Excellent
Good
Excellent
Gaming, mixed use
OLED
Outstanding
Perfect
Outstanding
Premium gaming, movies
VA
Very good
Excellent
Good
Movies, immersive gaming
TN
Fair
Fair
Very fast
Competitive esports (less common today)
Who Should Choose a Fast IPS Monitor?
A Fast IPS monitor is an excellent choice if you want:
Smooth gameplay with minimal motion blur
Accurate colors for work and entertainment
A display that balances gaming and productivity
Better viewing angles than TN panels
In short, Fast IPS offers one of the best all-around experiences, making it a popular choice for gamers, students, professionals,
Performance
While it lacks OLED’s infinite contrast, the Fast IPS panel provides excellent color reproduction, strong brightness, and smooth gameplay, making it an excellent value.
Pros
Affordable compared to premium OLED models
Sharp 4K resolution
High refresh rate
Good gaming performance
Excellent value for money
Cons
Lower contrast than OLED
HDR performance is limited
Blacks are not as deep as OLED
Best For
Budget-conscious gamers
Students
Everyday gaming
Mixed productivity and entertainment
The 4 Best ASUS Monitors – Quick Comparison
Monitor
Best For
Resolution
Refresh Rate
Panel
ASUS ROG Swift OLED PG27UCDM
Overall Gaming
4K
240Hz
QD-OLED
ASUS ROG Swift OLED PG32UCDMR
Premium Gaming
4K
240Hz
QD-OLED
ASUS ProArt PA32UCDM
Content Creation
4K
240Hz
QD-OLED
ASUS TUF Gaming VG27UQ1A
Best Value
4K
160Hz
Fast IPS
Final Verdict
ASUS offers outstanding monitors for virtually every type of user in 2026.
Best Overall: ASUS ROG Swift OLED PG27UCDM
Best Premium Choice: ASUS ROG Swift OLED PG32UCDMR
Best for Professionals: ASUS ProArt PA32UCDM
Best Budget-Friendly Option: ASUS TUF Gaming VG27UQ1A
If gaming performance is your priority, the ROG Swift OLED series delivers class-leading speed and image quality. Creative professionals will appreciate the exceptional color accuracy of the ProArt series, while gamers seeking excellent value can confidently choose the TUF Gaming VG27UQ1A.
Android 16, codenamed “Baklava,” arrived on June 10, 2025, earlier than the traditional fall release cycle, signaling Google’s intent to align its mobile operating system with the rapid pace of device launches.
Unveiled at Google I/O 2025, this sixteenth major release of Android—technically the 36th in its nearly two-decade lineage—brings a mix of under-the-hood optimizations, user-facing tweaks, and a foundation for more transformative features slated for later in the year. While some might call it a “humdrum” update, Android 16 is anything but stagnant, laying the groundwork for a more cohesive, secure, and adaptive ecosystem. In this review, we’ll dive into its new functions, specs, and what it means for Android users and developers alike.
Android 16: Why So Early?
For years, Android’s major releases landed in Q3 or Q4, often leaving manufacturers like Samsung, Xiaomi, and OnePlus scrambling to integrate the latest OS into their flagship devices. Android 16 breaks this mold, launching in Q2 to give OEMs like Samsung—whose Galaxy Z Fold 7 and Flip 7 will ship with Android 16-based One UI 8—more breathing room. Google’s rationale is clear: reduce fragmentation and ensure new devices hit the market with the latest software. The Pixel 10 series, expected later this year, will likely be the first to showcase Android 16 in its full glory, but for now, Pixel 6 and newer devices are the first to receive the stable update.
photo: Pixabay
This accelerated timeline comes with a catch: Android 16 feels like the first half of a two-part story. Google has already teased a Q4 2025 “minor” release, Android 16 QPR1, which will bring heavy-hitters like the Material 3 Expressive design language, desktop windowing, and Connected Displays. This split-release strategy might leave early adopters feeling like they’re getting an appetizer rather than the main course, but it reflects Google’s shift toward a more modular, iterative update cycle.
Design and User Interface: Subtle Refinements
Android 16 doesn’t overhaul the interface but introduces subtle refinements that enhance usability. The lock screen now dynamically adapts based on notification visibility, hiding or revealing details like weather and date for a cleaner look. Notifications and settings menus feature a blurred background effect, creating a visual hierarchy that feels modern and polished. These changes align with Google’s ongoing push for a cohesive aesthetic across its ecosystem.
Video: In Depth Tech Reviews
The Quick Settings drawer is more customizable, allowing users to squeeze in additional toggles like Flashlight or Do Not Disturb for quicker access. The Recents app menu adds new options—Screenshot, Select, and Close—when long-pressing app icons, streamlining multitasking. Google has also removed the “beta” tag from themed icons in the Wallpaper & Style settings, signaling confidence in their polish. Sliders in menus like Vibration & Haptics are thicker, and colorful line guides in Sound & Vibration settings improve clarity. These tweaks might seem minor, but they add up to a smoother, more intuitive experience.
The much-anticipated Material 3 Expressive design, with its vibrant animations, dynamic color themes, and emphasis on personalization, is notably absent from this initial release. It’s slated for the QPR1 update later in 2025, which will also bring lock screen widgets for phones and tablets. For now, users can get a taste of Material 3 Expressive by enrolling in the Android Beta Program, but the full rollout is still months away.
Android 16 new features: Productivity and Convenience
Android 16 introduces several user-facing features that prioritize productivity and convenience. One standout is Live Updates, a new notification class inspired by Apple’s Live Activities. Designed for progress-centric tasks like ridesharing, food delivery, or navigation, Live Updates pin persistent, detail-rich notifications to the lock screen and always-on display. For example, an Uber notification might show your driver’s ETA without requiring you to unlock your phone. The ProgressStyle notification template ensures consistency across apps, though adoption by third-party developers is still in its early stages.
Another welcome addition is the Notification Cooldown feature, which debuted on Pixels with the March 2025 Feature Drop and is now standard in Android 16. When an app sends a burst of notifications, the system gradually lowers their alert volume for up to a minute, reducing sensory overload. Users can toggle this in Settings > Notifications.
The App Functions API is a quieter but potentially game-changing feature. It allows developers to expose key app functionalities to Google’s Gemini assistant, enabling actions like ordering food or booking a ride directly through the assistant. While backward-compatible via the App Functions Jetpack library, Google’s lack of marketing for this feature means its impact depends on developer adoption.
Android 16 also enhances cross-device functionality. The Universal Clipboard lets users copy content on one device and paste it on another, including tablets and Chromebooks, as long as they’re signed into the same Google account. Seamless Task Continuity allows activities started on one device to resume on another with minimal interruption, boosting productivity across the Android ecosystem.
Android 16 brings significant improvements for content creators. The Camera2 API now supports hybrid auto-exposure modes, allowing manual control over ISO or exposure time while the auto-exposure algorithm handles the rest. This is a boon for professional photographers and videographers seeking precise control. Support for Ultra HDR photography in HEIC format and precise color temperature adjustments enhances image quality, particularly for night mode and motion photos.
True HDR Screenshots Android 16 introduces full support for capturing HDR screenshots. Previously, screenshots of HDR content often suffered from clipped highlights or were tone-mapped, resulting in a loss of dynamic range. With Android 16, screenshots are saved as PNG files that can include an HDR gain map. This allows them to display in full HDR on compatible screens while still appearing as standard SDR images on devices that don’t support HDR.
Customizable Keyboard Shortcuts Android has long offered keyboard shortcuts for system actions and app launches, but they were not customizable in earlier versions. Android 16 changes this by allowing users to edit shortcuts. For example, you can now assign a custom combination like Meta + Shift + B to launch the Chrome browser.
Enhanced Hearing Aid Controls Android 16 adds new features for users of LE Audio hearing aids, including an ambient volume control that lets you adjust the level of environmental sound captured by the hearing aid’s microphones. The update also allows you to use the phone’s microphone for calls instead of the hearing aid’s microphones, which can lead to clearer call quality in noisy environments.
The photo picker tool has been upgraded with a search function, making it easier to find specific photos or videos in local and cloud storage. It also adapts to configuration changes like screen orientation or theme, improving usability.
Android 16 includes performance and battery optimizations that make it a solid incremental upgrade. The SystemHealthManager API provides games and resource-intensive apps with estimates of available CPU and GPU resources, reducing stutter and lag. Native support for adaptive refresh rate leverages LTPO display technology to balance smoothness and battery life. A new getStartComponent() API optimizes app startup processes, improving efficiency.
Android 16 emphasizes adaptability across form factors. Apps targeting API level 36 on large screens (over 600dp) can no longer restrict orientation or resizability, with an opt-out option available until 2026. This encourages developers to create fluid, adaptive layouts for foldables and tablets. The live wallpaper framework introduces new APIs for dynamic, user-driven wallpapers, enhancing personalization.
Google’s adoption of Vulkan as the official graphics API is a significant move for developers. It enables immersive visuals, ray tracing, and multithreading, leveraging modern smartphone GPUs.
Health Connect in Android 16 supports FHIR format for reading and writing medical records, enhancing interoperability across healthcare systems. This is a step toward making Android a hub for health data management.
The absence of Material 3 Expressive, Connected Displays, and lock screen widgets in the initial release is a letdown, but these are slated for QPR1 in late 2025. The Linux Terminal feature, expanded from Android 15, allows users to run Linux applications in a virtual machine, blurring the line between mobile and desktop computing.
Android 16 is a refined, forward-thinking update that prioritizes ecosystem alignment, security, and developer tools over flashy features. Its early release ensures broader device adoption, but the most exciting changes are yet to come. For Pixel users, it’s a solid upgrade, with Live Updates, security enhancements, and camera improvements standing out. For others, the wait for OEM updates continues, but Android 16 sets a strong foundation for 2025’s mobile landscape.
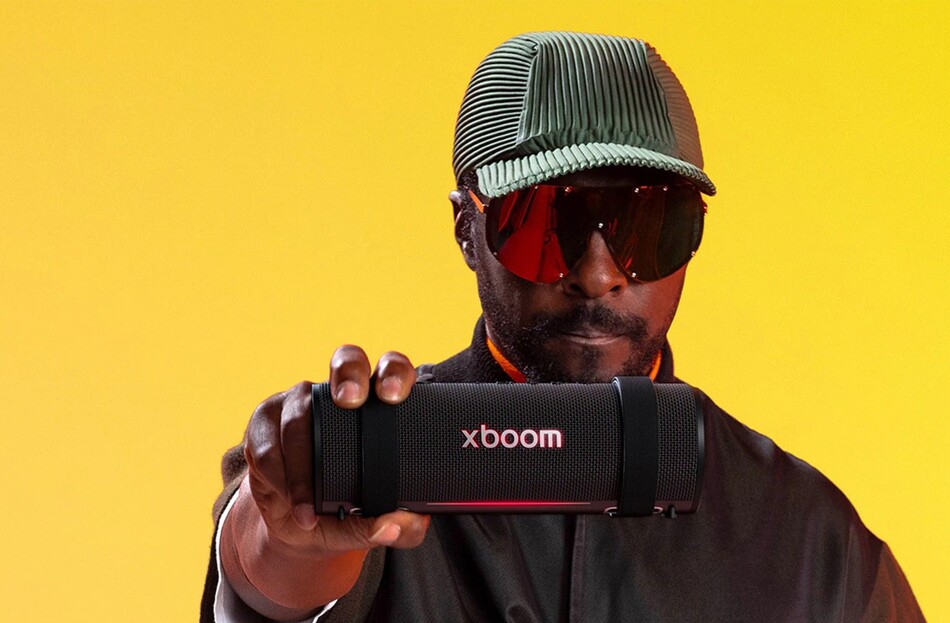
The LG XBOOM Grab by will.i.am is part of LG’s new generation of portable Bluetooth speakers developed in collaboration with the artist and producer. Positioned in the highly competitive mid-range portable speaker market, the XBOOM Grab aims to combine durability, portability, intelligent audio enhancements, and long battery life in a compact package.
With an emphasis on outdoor usability and AI-assisted sound tuning, the speaker competes directly with popular models such as the JBL Flip series and Sony’s portable Bluetooth offerings. After examining its design, performance, features, and value proposition, the XBOOM Grab emerges as a capable all-rounder, though not without a few compromises.
LG XBOOM Grab by will.i.am
Design and Build Quality
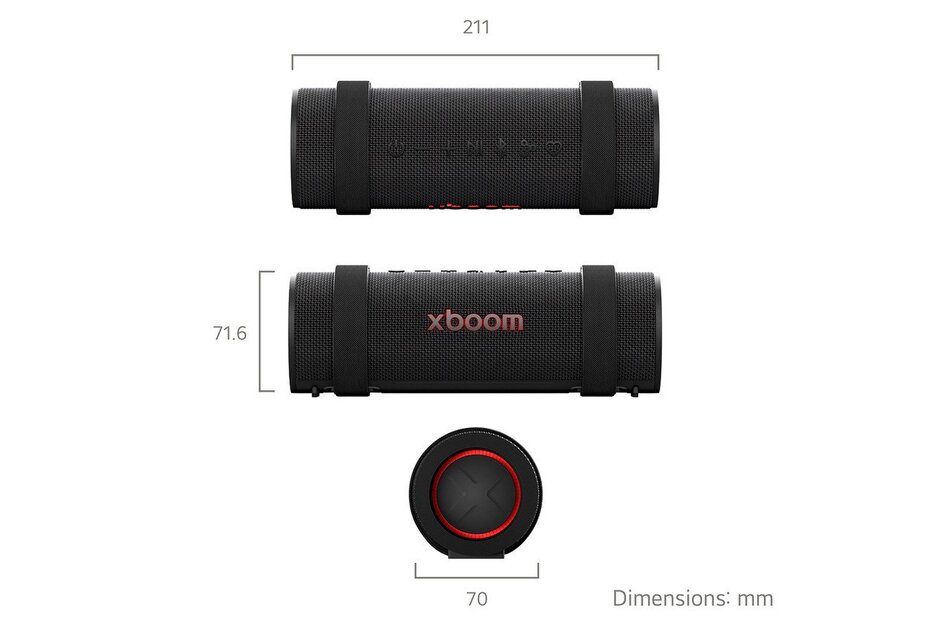
One of the XBOOM Grab’s strongest attributes is its physical design. The speaker adopts a cylindrical form factor that feels familiar yet refined. Wrapped in durable fabric mesh with reinforced rubberized ends, it balances modern aesthetics with practical durability. At approximately 700 grams (1.5 pounds), it remains portable enough for everyday travel while still feeling substantial in hand.
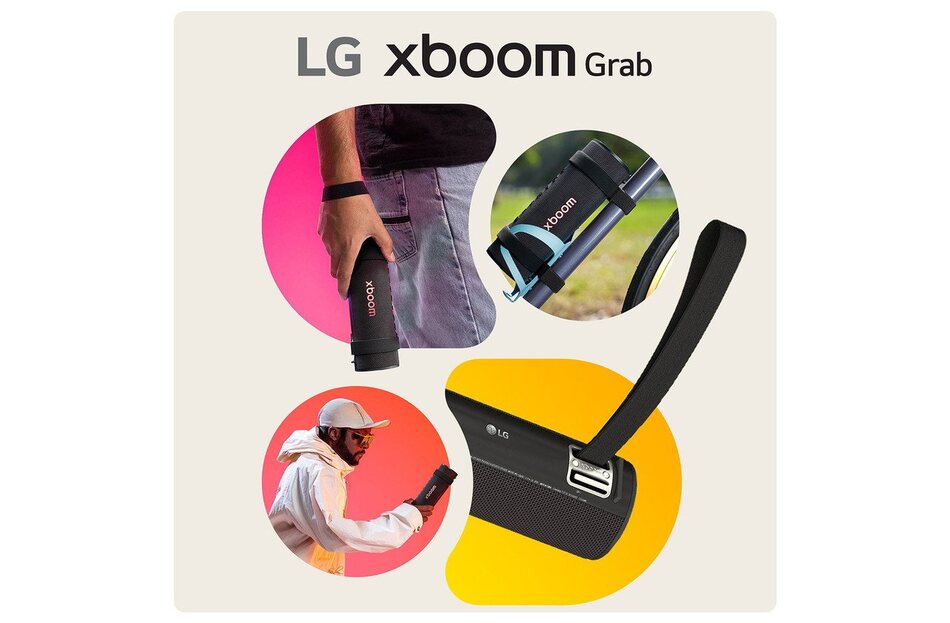
A standout feature is the inclusion of adjustable elastic straps that allow the speaker to be attached to bicycles, backpacks, railings, or other objects. This adds a level of versatility that many competing speakers lack.
Durability is another major selling point. The XBOOM Grab carries an IP67 rating for dust and water resistance, meaning it can withstand exposure to dust, rain, and temporary submersion in water. LG also states that the speaker has passed seven military-standard durability tests covering conditions such as vibration, shock, rain, and temperature exposure.
The integrated LED lighting strip adds visual flair without being overly flashy. Through the companion app, users can customize lighting effects to match their mood or music.
Overall, the design successfully combines ruggedness, portability, and contemporary styling.
Performance
The XBOOM Grab uses a 2-way speaker configuration consisting of:
One 80 x 45 mm racetrack woofer
One 16 mm dome tweeter
Dual passive radiators
This setup is designed to provide a fuller sound than many compact portable speakers.
In everyday listening, the speaker delivers energetic and engaging audio. Bass response is strong, particularly with the default Bass Boost tuning. Pop, hip-hop, electronic music, and modern rock tracks benefit from the extra low-end presence.
However, the default tuning can sometimes overwhelm the midrange frequencies, causing vocals and instruments to sound slightly recessed. Switching to the Standard EQ setting significantly improves balance and clarity. Users willing to spend a few minutes adjusting the EQ through the app can achieve a noticeably more refined sound signature.
The dedicated tweeter contributes clear treble performance, helping vocals and higher-frequency details remain distinct. At moderate listening levels, the speaker sounds warm and surprisingly spacious for its size.
At very high volumes, performance becomes less consistent. Some reviewers and users report increased distortion and reduced balance when volume exceeds roughly 50–70 percent. While this is not unusual for speakers in this category, audiophiles may notice the limitations.
For casual listening, outdoor gatherings, travel, and everyday use, sound quality remains competitive and enjoyable.
Battery Life
Battery performance is one of the speaker’s strongest selling points.
LG rates the XBOOM Grab for up to 20 hours of playback on a single charge using its 4,700mAh lithium-ion battery. Charging takes approximately three hours via USB-C.
Real-world battery life naturally varies depending on volume levels, lighting usage, and audio content. Under moderate listening conditions, users can reasonably expect all-day operation without needing a recharge. Independent testing and reviews generally support LG’s claim that battery endurance is among the better offerings in this size class.
For travelers, cyclists, campers, and outdoor enthusiasts, the extended battery life adds meaningful convenience.
Connectivity and Ports
The XBOOM Grab focuses primarily on wireless functionality.
Wireless Connectivity
Bluetooth 5.3
Multipoint Bluetooth pairing
Auracast support
Smartphone voice assistant compatibility (Google Assistant and Siri via connected device)
Speakerphone functionality for calls
Multipoint connectivity allows two devices to remain connected simultaneously, making it easy to switch between a phone and tablet or between different users. Auracast support is particularly noteworthy, enabling audio sharing with compatible speakers and devices.
Ports
The physical port selection is minimal:
USB-C charging port
Notably absent are:
3.5mm auxiliary input
USB audio playback
Memory card support
Users who still rely on wired audio sources may find this limiting.
Software and Features
LG complements the hardware with a robust companion app available for both Android and iOS devices.
Key software features include:
AI Sound Optimization
The speaker incorporates adaptive audio technologies that analyze both the listening environment and content type to optimize sound output automatically. LG promotes this as part of its AI-enhanced listening experience developed alongside will.i.am.
In practice, results are mixed. Some users appreciate the automated adjustments, while others report that manual EQ customization delivers more noticeable improvements.
EQ Controls
Users can choose from multiple presets, including:
Standard
Sound Boost
Clear Voice
User-defined EQ
These options provide flexibility for different music genres and listening preferences.
Customizable Lighting
The built-in LED lighting strip can be customized through the app, adding personality without significantly impacting battery life.
Speaker Linking
Auracast and Party Link functionality allow users to connect multiple compatible speakers for a larger soundstage and party-oriented setups.
Price and Value
With a retail price of approximately $149.99 in the United States, the XBOOM Grab sits squarely in the premium portable speaker segment.
At this price point, buyers receive:
Rugged IP67 construction
Military-tested durability
20-hour battery life
Bluetooth 5.3 with multipoint support
Auracast compatibility
Companion app with AI features
Customizable lighting
Strong overall sound performance
The biggest challenge comes from fierce competition. Alternatives from JBL and Sony may offer slightly more refined audio performance in some situations. However, LG counters with longer battery life, unique mounting straps, and a richer feature set.
XBOOM Grab
For users who prioritize portability, durability, and versatility alongside good sound quality, the XBOOM Grab represents solid value.
Convenient adjustable carrying and mounting straps
Clear highs thanks to dedicated tweeter
Bluetooth multipoint support
Auracast compatibility
Useful companion app with EQ controls
Customizable LED lighting
USB-C charging
Cons
Bass-heavy default tuning may not appeal to everyone
Sound quality can deteriorate at very high volumes
No 3.5mm auxiliary input
AI audio features provide limited real-world impact
Companion app experience may feel overly complex for some users
Slightly heavier than certain competitors
The LG XBOOM Grab by will.i.am is a thoughtfully designed portable Bluetooth speaker that prioritizes durability, battery life, and versatility without sacrificing sound quality. While it may not be the absolute best-sounding speaker in its price category, it delivers a well-rounded package that excels in outdoor use and everyday portability.
Its rugged construction, long battery endurance, customizable features, and practical mounting system help distinguish it from many rivals. Users seeking a dependable speaker for travel, cycling, camping, beach outings, or casual home listening will find plenty to like. Those focused solely on achieving the most refined audio reproduction may prefer some competing models, but for most buyers, the XBOOM Grab strikes an attractive balance between performance, features, and value.
Garmin is helping runners take their training one step further with the introduction of Forerunner® 70 and Forerunner 170. These purpose-built running smartwatches are easy-to-use and loaded with features to kick-start a running journey or help dial in training. Both models boast vibrant 1.2-inch AMOLED displays, responsive touchscreens and a traditional 5-button design for extra ease of use. And runners can access everyday health features, advanced training tools, smart notifications and more—all without having to recharge their watch every night.
“Purposefully designed with everything a runner needs to start their running journey, Forerunner 70 and Forerunner 170 include premium running and training features pulled in from our more advanced Forerunners, plus popular health and wellness metrics. No matter the goal, these smartwatches are the perfect tools to help new and aspiring runners alike make every step count.” —Susan Lyman, Garmin Vice President of Consumer Sales and Marketing
Garmin Forerunner 70
Loaded with features for runners of all levels, Forerunner 70 is ready for every step of the journey.
Train with the essentials, including built-inGPS, time, distance, pace and wrist-based heart rate.
New quick workouts simplify training by creating workout suggestions tailored to a runner’s fitness level and require minimal input to set up: just desired time and intensity level.
Garmin Forerunner 70
Train for an event, achieve a milestone or improve fitness with Garmin Coach training plans that adapt daily based on health and recovery metrics. In addition to popular plans for more intense training, Garmin Run Coach provides new plans with run/walk workouts and lower volume training.
Receive daily suggested workouts – including new run/walk workouts – that adapt after every run to match performance and recovery.
Dial in with advanced training features powered by the Garmin Human Performance Lab, including training readiness, training status, wrist-based running power and running dynamics. And tap into more than 80 built-in sports apps, including swimming, cycling, strength training and more to stay active in different ways.
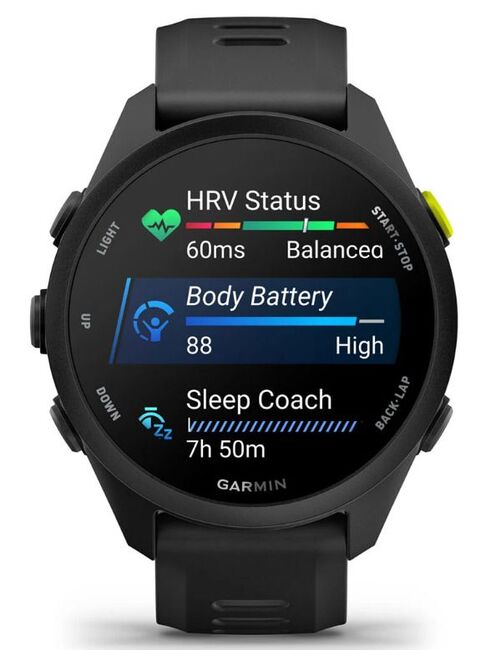
Monitor overall health and wellness 24/7 with advanced sleep tracking, sleep coach, breathing variations, heart rate variability (HRV) status, Pulse Ox, lifestyle logging and Health Status.
Stay connected with smart notifications, safety and tracking features, LiveTrack and more.
Forerunner 70 features up to 13 days of battery life in smartwatch mode and is offered in fun and popular colors like citron, soft pink, tidal blue, cool lavender, black and whitestone.
Garmin Forerunner 170
Building upon Forerunner 70, Forerunner 170 adds on-the-go features like Garmin Pay™ contactless payments so runners can stop for a mid-run snack or water bottle and quickly pay from their wrist (with a supported bank and payment network). And for those who like to energize their runs by listening to their favorite playlists, Forerunner 170 Music lets users download songs, podcasts and more from popular third-party music services (subscription required) right to their watch to listen phone-free with wireless headphones.
Forerunner® 170 – images: Garmin
Both Forerunner 170 and Forerunner 170 Music get up to 10 days of battery life in smartwatch mode and are offered in black with a black/amp yellow band and whitestone with a whitestone/cloud blue band. Forerunner 170 Music also comes in vibrant colors like teal green with a teal green/citron band and red pink with a red pink/mango band.
Available to purchase on garmin.com starting May 15, 2026, Forerunner 70 has a suggested retail price of $249.99, Forerunner 170 is $299.99 and Forerunner 170 Music is $349.99.
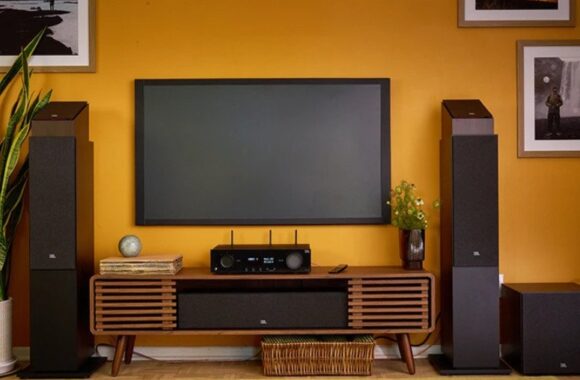
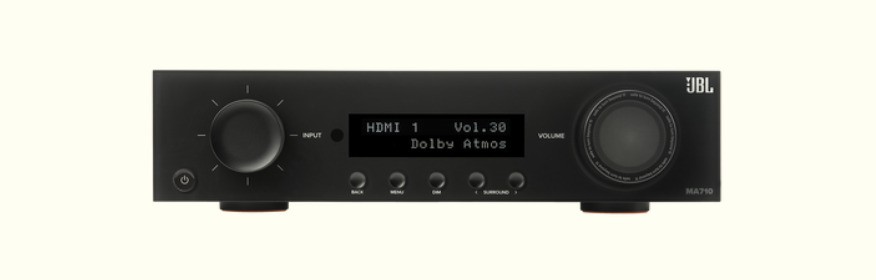
I have spent the past several months using the JBL MA710 AV Receiver in my home theater setup, and I feel well-positioned to provide an in-depth evaluation based on firsthand experience. When I first unboxed the receiver, my immediate impression was of its solid build quality. The unit has a substantial weight that signals durability, and its brushed metal front panel gives it a premium aesthetic without being overly flashy. The design feels modern yet understated, and it fits seamlessly with my existing home theater components.
JBL MA710 AV Receiver – Setup and User Interface
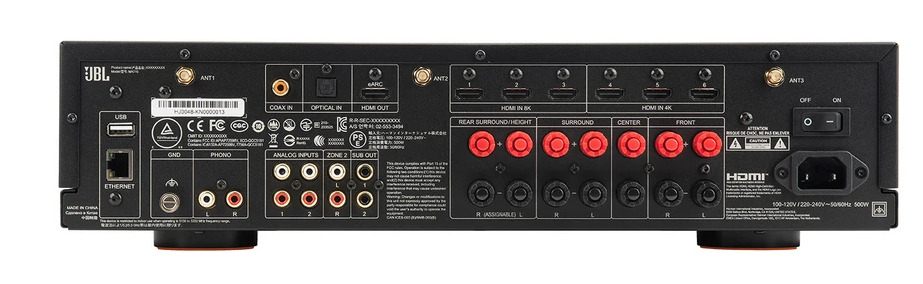
From a setup perspective, the JBL MA710 AV Receiver proved to be remarkably intuitive. I appreciated that the manufacturer included a clear, detailed manual, but even without it, the on-screen setup wizard guided me efficiently through the process. The interface is logically organized, making it easy to connect multiple devices. I hooked up my Blu-ray player, gaming console, streaming box, and turntable without any complications. The receiver’s multiple HDMI inputs, including support for HDMI 2.1, meant I could future-proof my system for the next generation of high-definition content and gaming.
One of the standout features of the JBL MA710 AV Receiver is its audio performance. Having spent years testing various AV receivers, I’ve become sensitive to the subtle differences in sound staging, clarity, and power. The MA710 impressed me immediately with its clean, detailed audio reproduction. The midrange is particularly well-balanced, producing crystal-clear dialogue in movies without any harshness. Bass response is tight and authoritative, capable of filling a large room without distortion. When watching action films or listening to orchestral music, the depth and precision of the sound were immediately noticeable. I also ran a series of comparisons with other receivers in its price range, and the JBL consistently delivered a more refined and immersive listening experience.
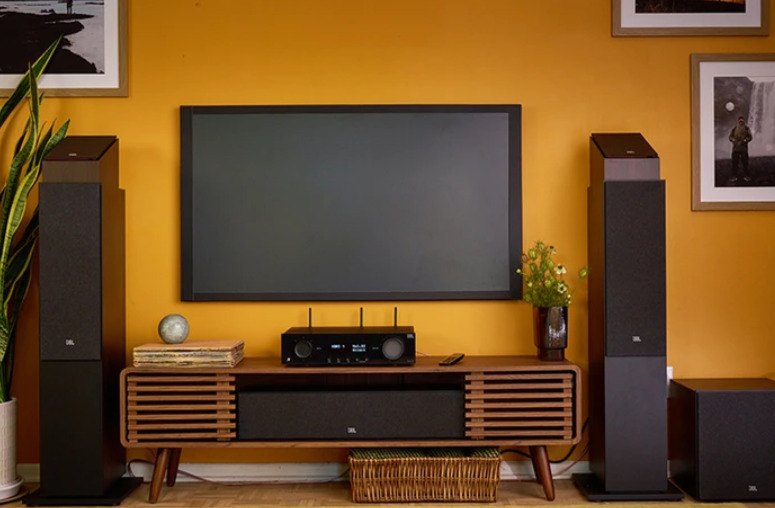
JBL MA710 AV Receiver
The receiver supports Dolby Atmos and DTS:X, and I found these object-based audio formats to be executed with remarkable fidelity. I set up a 7.2.4 speaker configuration in my living room, and the effect was transformative. Height channels added a new dimension to films like Inception and Mad Max: Fury Road, creating a more enveloping soundstage that truly places the viewer inside the environment. The JBL MA710 AV Receiver’s processing capabilities ensure that spatial cues are precise, making it easy to detect where each sound originates in three-dimensional space. I noticed this particularly in action sequences, where the movement of projectiles, footsteps, and ambient noise was accurately rendered, enhancing immersion.
Another aspect I value in a receiver is user control, and the JBL MA710 AV Receiver excels here as well. The remote control is ergonomically designed, with intuitive buttons that are logically arranged. While I primarily used the on-screen menu for deeper settings, the remote is sufficient for everyday adjustments like volume, input selection, and sound mode changes. The unit also supports control via a mobile app, which is a convenient feature for my household. I can adjust settings, switch sources, or fine-tune the equalizer from my phone without having to get up. This level of control is particularly useful when entertaining guests or when multiple people want to use the system simultaneously.
In terms of connectivity, the JBL MA710 AV Receiver provides a comprehensive suite of options. It features multiple HDMI outputs, including one with eARC support, allowing me to pass high-definition audio from my TV back to the receiver. The digital and analog inputs accommodate older devices, ensuring backward compatibility. I connected a vintage turntable via a dedicated phono input, and the analog warmth it produced was well-represented without any noise or interference. For wireless connectivity, the receiver includes Bluetooth and Wi-Fi support, which I used for streaming music from my smartphone and laptop. The integration with popular music services worked seamlessly, with minimal setup required. Additionally, the receiver supports multi-room audio, enabling me to synchronize music in different areas of my home—a feature I found particularly useful during social gatherings.
The JBL MA710 AV Receiver also offers advanced calibration features. It comes with a room correction system that uses a supplied microphone to analyze acoustics and automatically adjust speaker levels and equalization. I ran the calibration multiple times, tweaking the settings slightly based on personal preference, and the difference was remarkable. My listening room is irregularly shaped, and without correction, certain frequencies would either dominate or disappear. After calibration, the sound became balanced and cohesive, with no noticeable dead spots. This capability makes the receiver highly adaptable to a variety of room layouts, which is crucial for achieving optimal sound quality.
Power handling is another area where the JBL MA710 AV Receiver stands out. Rated at 100 watts per channel into 8 ohms, it provides enough headroom to drive demanding speakers with ease. I pushed it to high volumes during testing, and it remained clean and controlled, without any hint of strain. The thermal management system also impressed me; even during extended listening sessions at high output levels, the receiver stayed cool and operated silently. This reliability is critical for someone like me who enjoys long movie nights or hosting movie marathons with friends and family.
I also explored the receiver’s performance with gaming. Using my latest console, the combination of HDMI 2.1 features and low-latency audio processing delivered a highly responsive experience. The MA710’s ability to handle 4K at 120Hz ensured that fast-paced games appeared smooth and lifelike. The audio lag was negligible, which is essential for competitive gaming, and the immersive soundstage enhanced spatial awareness within games. Explosions, environmental effects, and character dialogue were all rendered with impressive clarity, which contributed to a more engaging and realistic experience.
Despite its numerous strengths, the JBL MA710 AV Receiver is not without minor drawbacks. The unit is relatively heavy and may be cumbersome for some to position in tighter entertainment centers. Additionally, while the interface is generally user-friendly, some advanced audio settings require navigating multiple menus, which could be daunting for beginners. I found myself consulting the manual a few times when exploring more sophisticated tuning options, but once familiar, these features are highly rewarding. Another consideration is that while the receiver supports a wide range of modern formats, it does not have a built-in voice assistant, which could be a limitation for users who prefer voice control integration.
The receiver’s energy efficiency is respectable but not exceptional. During normal use, it consumes a reasonable amount of power, but running multiple channels at high volume increases consumption noticeably. It does have an auto-standby feature, which helps mitigate unnecessary energy usage when idle. For me, this was sufficient, but energy-conscious users may want to consider this aspect.
Overall, my experience with the JBL MA710 AV Receiver has been overwhelmingly positive. The combination of robust construction, exceptional sound quality, flexible connectivity, and user-friendly features makes it a standout option in its class. It excels in both cinematic and musical applications, providing a level of immersion and fidelity that surpasses many competitors I’ve tested. I found it particularly effective in reproducing subtle audio details, maintaining clarity at high volumes, and delivering a coherent, three-dimensional soundstage. For anyone serious about home theater or high-fidelity audio, the MA710 represents a significant step up from entry-level receivers without venturing into overly complex or prohibitively expensive territory.
JBL MA710
Pros:
Excellent sound quality with tight bass and clear midrange
Robust build and premium aesthetics
Supports Dolby Atmos and DTS:X
Comprehensive connectivity including HDMI 2.1 and eARC
Room calibration delivers balanced sound
Cons:
Heavy unit, less ideal for small spaces
Advanced menu settings can be complex for beginners
No built-in voice assistant
Average energy efficiency under heavy use
The JBL MA710 AV Receiver has proven itself as a versatile and high-performing centerpiece for my home theater system. Its thoughtful design, impressive audio capabilities, and extensive feature set make it a device I can rely on for years to come. While there are minor considerations regarding size, menu complexity, and power consumption, these are outweighed by the receiver’s strengths. My personal experience has been that the MA710 delivers a rich, immersive, and satisfying audio experience, whether I am watching films, gaming, or listening to music. It combines the professional-grade performance that audiophiles seek with the convenience and usability that everyday users appreciate, making it a compelling choice for anyone looking to elevate their home entertainment setup.