Home Blog Page 2

How to Connect a PC to Apple TV: Mirror, Wireless, and Bluetooth

0

Apple TV, with its sleek design and powerful features, offers an excellent way to stream content from your devices to your television. While it is designed to work seamlessly with Apple products, connecting a Windows PC to an Apple TV can enhance your entertainment experience. Whether you want to mirror your screen, stream media wirelessly, or use Bluetooth for audio, this guide will walk you through the best ways to achieve these connections. Let’s explore how to mirror your PC to Apple TV, wirelessly stream content, and even connect via Bluetooth.

1. Mirror PC to Apple TV Using AirPlay

Apple’s AirPlay is one of the best features for mirroring your screen to an Apple TV. While AirPlay is natively available on macOS and iOS devices, Windows PCs do not come with built-in AirPlay functionality. Fortunately, there are third-party apps that allow you to mirror your PC’s screen to an Apple TV, and it can be done over Wi-Fi.

Steps to Mirror Your PC Screen Using AirPlay:

Step 1: Install an AirPlay Receiver on Your PC

To mirror your PC screen to Apple TV, you’ll first need to install a third-party AirPlay receiver on your Windows PC. There are several options available, including:

  • 5KPlayer – This is a popular free tool that supports AirPlay mirroring.

  • AirParrot – Another excellent tool that allows screen mirroring and media streaming.

  • Mirroring360 – A versatile screen mirroring solution that works well with Apple TV.

Once you’ve chosen a tool, download and install it on your PC.

Step 2: Ensure Both Devices Are on the Same Wi-Fi Network

For the AirPlay mirroring to work, both your Apple TV and PC need to be on the same Wi-Fi network. Check your PC’s Wi-Fi connection and ensure that your Apple TV is connected to the same network.

PC to Apple TV
photo: pixabay
Step 3: Enable AirPlay on Your Apple TV

AirPlay should be enabled by default on your Apple TV. However, it’s a good idea to double-check:

  1. Open the Settings app on your Apple TV.

  2. Navigate to AirPlay and HomeKit.

  3. Ensure that AirPlay is turned on.

Step 4: Start Mirroring from Your PC

Now, on your PC, open the AirPlay receiver tool you installed. For example, in 5KPlayer, follow these steps:

  1. Open 5KPlayer on your PC.

  2. Click on the AirPlay icon.

  3. Select your Apple TV from the list of available devices.

Your PC’s screen should now be mirrored to your Apple TV. You can adjust settings within the AirPlay software for video quality and other preferences.

Troubleshooting:

If you experience any lag or disconnections, try the following:

  • Ensure your Wi-Fi network is stable and fast enough for streaming.

  • Close unnecessary apps or programs on your PC that may be using bandwidth.

  • Restart your Apple TV and PC if the connection isn’t working.

2. Wirelessly Stream Content from PC to Apple TV

If you don’t want to mirror your screen but simply wish to stream media files (videos, music, photos, etc.) from your PC to your Apple TV, you can use several wireless methods.

Option 1: Use iTunes for Streaming

If you have iTunes installed on your PC, you can stream music, videos, and movies to your Apple TV over your Wi-Fi network. This method works well for content stored in your iTunes library.

Steps to Stream Content from iTunes:
  1. Open iTunes on your PC and ensure it’s connected to the same Wi-Fi network as your Apple TV.

  2. Click the AirPlay icon in the bottom-right corner of iTunes (next to the volume slider).

  3. From the list of available devices, select your Apple TV.

Your content will begin streaming to your Apple TV. You can also control playback directly from iTunes.

Option 2: Use Plex for Media Streaming

Plex is a media server app that allows you to stream your media library (videos, music, photos) to a variety of devices, including Apple TV. It’s ideal if you have a large collection of media files that you want to stream wirelessly.

Steps to Stream with Plex:
  1. Install Plex Media Server on your Windows PC.

  2. Add your media library to Plex by specifying the folders that contain your movies, TV shows, and music.

  3. On your Apple TV, download the Plex app from the App Store.

  4. Open the Plex app on your Apple TV, and log in to your account.

  5. Navigate to your media library and select the content you want to stream.

Plex offers a smooth, high-quality streaming experience, and it supports almost all media formats.

3. Bluetooth: Connect PC to Apple TV for Audio

While Bluetooth on Apple TV is generally designed for connecting headphones, speakers, or controllers, you can also connect your PC to Apple TV for audio playback using Bluetooth.

Step 1: Enable Bluetooth on Your PC

Ensure that your PC has Bluetooth functionality. If your PC doesn’t have built-in Bluetooth, you can use a Bluetooth USB adapter.

  1. Open Settings on your PC and go to Devices.

  2. Make sure that Bluetooth is turned on.

  3. If Bluetooth isn’t already paired with your Apple TV, click Add Bluetooth or other device and choose Bluetooth from the options.

Step 2: Enable Bluetooth on Apple TV

To enable Bluetooth on Apple TV, follow these steps:

  1. Open the Settings app on your Apple TV.

  2. Navigate to Remotes and Devices.

  3. Select Bluetooth and make sure it’s turned on.

Step 3: Pair Your PC and Apple TV

  1. On your PC, click on Add Bluetooth or other device and select Bluetooth.

  2. From the list of available devices, choose Apple TV.

  3. Your PC will now be connected to the Apple TV, and you can stream audio wirelessly.

Step 4: Play Audio from Your PC

Once paired, any audio you play on your PC (music, videos, etc.) will be streamed directly to the Apple TV. You can adjust the volume using the Apple TV remote or the controls on your PC.

4. Troubleshooting Tips

While connecting a PC to an Apple TV can be straightforward, there are a few issues that can arise:

  • Wi-Fi Connectivity: Both devices must be on the same Wi-Fi network. If you have a dual-band router, ensure both the Apple TV and the PC are connected to the same band (either 2.4GHz or 5GHz).

  • AirPlay Delay: If there is a noticeable delay while mirroring or streaming, it could be due to network congestion. Try using a wired Ethernet connection for both devices or reducing the load on your Wi-Fi.

  • App-Specific Issues: If you’re using a third-party app like 5KPlayer or AirParrot and it’s not working, make sure the app is updated to the latest version. Restarting both your PC and Apple TV can also help resolve some issues.

5. Other Useful Tips

  • Resolution Settings: If the resolution appears off when mirroring or streaming, you can adjust the display settings on your PC to match your TV’s resolution (usually 1080p or 4K, depending on the Apple TV model).

  • Use a Wired Connection: If you’re dealing with heavy lag or poor quality, consider using an Ethernet cable to connect both your PC and Apple TV directly to your router.

  • Upgrade to Apple TV 4K: If you’re still using an older Apple TV model, upgrading to the Apple TV 4K will provide better streaming quality, faster performance, and better compatibility with various devices.

Connecting your Windows PC to an Apple TV can greatly enhance your entertainment experience, whether you’re looking to mirror your screen, stream content wirelessly, or connect via Bluetooth. By following the steps outlined above, you can easily enjoy media from your PC on the big screen, control playback, and improve your overall setup. Whether you’re watching movies, presenting slideshows, or listening to music, your Apple TV can act as a central hub for your media needs.

How to Use KMPlayer: A Complete Guide

0

KMPlayer is one of the most versatile and widely used media players available today. Known for its rich features, ease of use, and support for a wide variety of file formats, KMPlayer is the go-to tool for many people who want a high-quality media experience. Whether you’re watching a movie, listening to music, or viewing any other form of multimedia, KMPlayer provides you with numerous options to customize your experience.

In this comprehensive guide, we will walk you through the process of using KMPlayer effectively, with a special focus on essential features like changing the language, adding subtitles, and more. If you’re new to KMPlayer or looking to expand your knowledge, this guide is tailored for you.

1. What Is KMPlayer?

KMPlayer is a free multimedia player that supports a wide array of video and audio formats. It’s known for its user-friendly interface and customizable options that allow users to fine-tune their viewing experience. Apart from playing local files, it also supports streaming and watching content online.

KMPlayer is an excellent free media player
KMPlayer – excellent media player – image: KM

Some of the features that make KMPlayer stand out include:

  • Multi-format support: It supports formats such as MP4, AVI, MKV, MOV, and many more.

  • High-definition video playback: KMPlayer supports 4K and 8K video playback, making it a great choice for high-quality content.

  • Audio and video adjustments: You can tweak various settings to improve video and audio quality.

  • Subtitle support: It allows users to add and sync subtitles with ease.

  • Customization: KMPlayer lets users change the interface, skins, and themes to suit their preferences.

Let’s dive into how to use these features efficiently.

2. Installing KMPlayer

Before you can start using KMPlayer, you need to install it on your computer. Follow these simple steps:

  1. Visit the Official Website: Go to KMPlayer’s official website to download the latest version.

  2. Download: Choose the correct version for your operating system (Windows or Mac). If you’re using a mobile device, you can download the app from Google Play (for Android) or the App Store (for iOS).

  3. Install: After downloading, open the installer and follow the on-screen instructions to install KMPlayer.

  4. Launch KMPlayer: Once installed, open the application. You’ll see the default interface, which can be customized to your liking.

3. How to Change the Language in KMPlayer

One of the first things you might want to do after installing KMPlayer is to change the interface language to something more comfortable for you. Here’s how you can change the language in KMPlayer:

  1. Open KMPlayer: Launch the KMPlayer application.

  2. Access the Settings Menu: In the top-left corner of the window, click on the “K” icon (or press Ctrl + P).

  3. Go to General Settings: Select General from the left panel under the “Preferences” menu.

  4. Change Language: In the “Language” section, you will see a dropdown list of available languages. Choose the language you prefer.

  5. Save Changes: After selecting the language, click Apply and then OK to save your changes.

  6. Restart KMPlayer: To ensure the language change takes effect, restart KMPlayer.

Now, your KMPlayer interface should be displayed in the selected language.

4. How to Add Subtitles in KMPlayer

Subtitles are a great way to enhance your media experience, especially if you’re watching content in a foreign language or prefer reading along with the video. Here’s how to add subtitles to your video in KMPlayer:

Method 1: Adding External Subtitle Files

If you have a subtitle file (such as an SRT or ASS file), you can easily add it to your video in KMPlayer:

  1. Open Your Video: Start by playing the video file you want to watch.

  2. Add Subtitles: Right-click anywhere on the video and select Subtitle > Load Subtitle from the context menu.

  3. Browse for the Subtitle File: Navigate to the folder where your subtitle file is located, select it, and click Open.

  4. Subtitle Synchronization: If the subtitles are out of sync with the video, you can adjust them by pressing the F2 key to open the subtitle settings. From there, you can delay or advance the subtitle timing.

Method 2: Downloading Subtitles Automatically

KMPlayer also has an in-built feature that allows you to automatically download subtitles for your media. Here’s how:

  1. Open Your Video: Launch the video that you want subtitles for.

  2. Right-click the Video: From the context menu, go to Subtitle > Download Subtitle.

  3. Search for Subtitles: KMPlayer will search for available subtitles online. Once found, it will display the available options.

  4. Choose and Apply: Select the desired subtitle language and click OK to load the subtitle onto your video.

This feature is particularly useful if you don’t have subtitles in advance.

5. How to Change Video Settings and Customize Your Viewing Experience

KMPlayer gives you control over how your videos look and sound, which allows you to fine-tune your media experience. Here are some key settings you can adjust:

Brightness, Contrast, and Saturation

To adjust video quality, KMPlayer offers an intuitive interface for changing brightness, contrast, and saturation:

  1. Right-click on the Video: Right-click anywhere on the video and select Video > Video Color.

  2. Adjust Settings: Use the sliders for brightness, contrast, and saturation to achieve your desired video quality.

  3. Apply and Save: After adjusting the settings, click OK to apply them.

Change Video Resolution

For higher quality viewing, you can change the video resolution in KMPlayer:

  1. Open the Video: Load the video you want to watch.

  2. Right-click: Right-click the video and select Video > Video Resolution.

  3. Select a Resolution: Choose from a list of available resolutions (for HD, 4K, or even 8K content).

Audio Settings

KMPlayer lets you tweak audio settings to improve sound quality:

  1. Right-click the Video: Again, right-click on the video.

  2. Go to Audio > Equalizer: In the equalizer menu, you can adjust frequency settings for the best sound quality.

  3. Enable Audio Effects: You can also activate various audio effects, such as reverb and echo, under the Audio Effects menu.

6. How to Create Playlists in KMPlayer

If you often listen to music or watch a collection of videos, you may want to create playlists in KMPlayer. Here’s how:

  1. Open the Playlist: Press Ctrl + L or go to Playlist > Show Playlist to open the playlist window.

  2. Add Files to the Playlist: Drag and drop the files you want to add or click on the Add Files button to select files from your computer.

  3. Save Playlist: Once you have all your media files in the playlist, click File > Save Playlist to save it for future use.

  4. Play the Playlist: You can play the entire playlist by clicking on the Play All button.

This feature is perfect for users who want to organize and streamline their media consumption.

7. How to Stream Content Online with KMPlayer

KMPlayer also allows you to stream content directly from the internet. Whether you’re watching YouTube videos or streaming from other sources, the process is simple:

  1. Open the Streaming Option: From the top menu bar, click File > Open URL.

  2. Enter the URL: Paste the URL of the video you wish to stream and click OK. KMPlayer will open and start streaming the video.

  3. Adjust Streaming Settings: Use the standard video and audio settings to customize your streaming experience, such as adjusting video quality or enabling subtitles.

8. Advanced Features in KMPlayer

KMPlayer also comes with a range of advanced features that can enhance your media experience. These include:

  • Screen Capture: You can capture screenshots of your video by pressing Ctrl + Alt + C or going to Capture > Video Capture.

  • VR Mode: KMPlayer supports virtual reality video playback, offering a more immersive experience for compatible devices.

  • Custom Skins: You can change the look of KMPlayer by downloading custom skins from the internet. To do this, go to Preferences > General and select Skins.

9. Troubleshooting Common Issues in KMPlayer

Despite its many features, sometimes things may not work as expected. Here are a few common troubleshooting tips:

  • No Sound: Check if the volume is muted or set too low. Also, make sure your audio drivers are up-to-date.

  • Subtitles Not Showing: Ensure that you’ve correctly loaded the subtitle file and that it’s in sync with the video.

  • KMPlayer Crashes: If KMPlayer crashes frequently, try reinstalling the software or updating it to the latest version.

Conclusion

KMPlayer is an excellent media player that offers a wealth of features to enhance your video and audio experience. Whether you want to change the language, add subtitles, or fine-tune your video settings, KMPlayer has you covered. With this guide, you now have the tools to navigate and customize the player to your liking.

JBL MA310 AV Receiver Review: Power + Performance

0

The JBL MA310 AV receiver is a product that aims to blend the trusted JBL reputation with a versatile home theater experience. As an entry-level to mid-range AV receiver, the MA310 is designed for users who want to elevate their audio-visual setup without breaking the bank. In this review, we’ll explore the design, build quality, connectivity options, audio performance, user experience, and overall value of the JBL MA310 to help you decide if it’s the right fit for your home entertainment needs.

Design and Build Quality

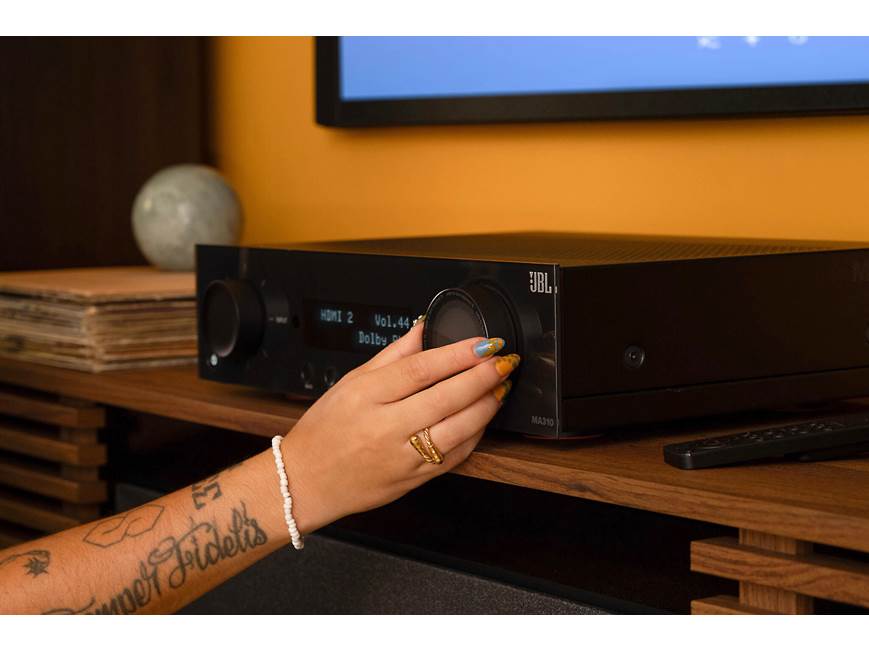
The JBL MA310 sports a modern yet straightforward aesthetic, aligning with the typical look of contemporary AV receivers. Its sleek, matte black finish gives it a professional and unobtrusive presence in any entertainment center. The front panel features a clear, easy-to-read display along with a rotary volume knob and a few essential buttons for quick control. While it doesn’t boast the flashy LED lighting or touchscreen interfaces seen in some high-end models, its minimalist design will appeal to those who prefer functionality over form.

JBL MA310
JBL MA310

The build quality is robust, reflecting JBL’s commitment to durability. The chassis is solid and well-ventilated with adequate heat dissipation, which is crucial for maintaining performance during extended use. The buttons and knobs exhibit good tactile feedback, instilling confidence in the device’s longevity. Overall, the MA310 feels like a well-constructed unit that can withstand daily operation without any compromises.

Connectivity and Features

One of the most critical aspects of an AV receiver is its connectivity options, and the JBL MA310 offers a commendable selection for its price bracket. The unit includes multiple HDMI inputs and outputs, supporting 4K video passthrough, which is essential for modern 4K TVs and gaming consoles. This ensures that users can connect their Blu-ray players, gaming systems, streaming devices, and other HDMI-compatible gear without hassle.

Additionally, the JBL MA310 AV receiver provides standard analog and digital audio inputs, including optical and coaxial ports, which are perfect for legacy audio sources. It also features USB connectivity, allowing for direct playback from flash drives loaded with compatible media files. However, it is worth noting that the receiver does not support wireless connectivity options like Bluetooth or Wi-Fi, which may be a limitation for users looking to stream audio wirelessly or integrate with smart home systems.

The receiver supports a range of surround sound formats, including Dolby Digital and DTS, enabling immersive audio experiences in home theater setups. It also allows for 5.1 channel audio output, which is standard for most home theater configurations, providing a surround sound experience that enhances movie watching and gaming.

Audio Performance

JBL is a brand synonymous with quality audio, and the MA310 does not disappoint in delivering clear, powerful sound. The receiver is rated to deliver a solid wattage per channel, making it capable of filling a medium-sized room with rich, dynamic audio. The sound signature leans towards a balanced profile, with clear mids, punchy bass, and crisp highs. This makes it versatile for a variety of content, from dialogue-heavy television shows and movies to music and gaming soundtracks.

In testing, the MA310 handles dialogue well, ensuring voices come through distinctly without being overshadowed by background effects or music. The bass response is impressive for the class, providing depth and impact without overwhelming the other frequencies. The surround sound implementation creates a convincing spatial experience, allowing users to feel enveloped by the action on screen.

JBL MA310 AV Receiver

One highlight is the receiver’s ability to maintain audio clarity even at higher volumes, which is crucial for home theater enthusiasts who enjoy immersive experiences without distortion. While audiophiles may find the soundstage less refined compared to premium receivers, the MA310 offers excellent performance that will satisfy most home users.

User Experience and Setup

Setting up the JBL MA310 is straightforward, even for those new to AV receivers. The user manual provides clear, step-by-step instructions for connecting speakers, input devices, and configuring settings. The receiver’s on-screen menu is intuitive, allowing users to navigate through options such as speaker calibration, sound modes, and input selection with ease.

The MA310 includes several preset sound modes tailored for different content types, including movie, music, and gaming modes. These presets optimize the audio output for the specific experience, saving users from manual tweaking. For those who prefer customization, the receiver also offers manual equalizer settings to fine-tune the sound to personal preference.

Remote control is included and is simple to operate, with well-labeled buttons for quick access to essential functions. While it lacks some of the advanced app-based controls seen in higher-end models, the remote does its job effectively.

JBL MA310 AV Receiver Pros and Cons

Pros:

  • Solid build quality with a sleek, minimalist design
  • Multiple HDMI inputs with 4K passthrough support
  • Clear, balanced audio performance with strong bass response
  • Supports key surround sound formats including Dolby Digital and DTS
  • Easy setup and user-friendly interface
  • Value for money, offering features typically seen in higher-priced models

Cons:

  • No wireless connectivity (Bluetooth/Wi-Fi) limits streaming options
  • Lacks advanced features such as room calibration microphones or app control
  • Soundstage and refinement may not satisfy audiophiles seeking premium quality
  • Limited to 5.1 channel output, no support for newer multi-channel formats

Comparison to Market Alternatives

While this review focuses on the JBL MA310, it’s important to consider where it stands in the market. Compared to other entry-level AV receivers, the MA310 holds its own with reliable performance and essential features. Its main competition would come from brands like Yamaha, Sony, and Onkyo, which offer similar price-point models.

The JBL MA310’s strengths lie in its audio performance and build quality, areas where JBL’s expertise in sound technology shines through. However, some competitors may offer more modern features like wireless connectivity or app controls. The decision largely depends on the user’s priorities—whether they value audio fidelity and physical connectivity over wireless convenience.

Who Should Buy the JBL MA310 AV Receiver?

The JBL MA310 is an excellent choice for users who want a no-nonsense AV receiver that delivers solid sound and reliable performance at a reasonable price. It suits those setting up a basic home theater system with 5.1 surround sound and multiple HDMI devices. It is particularly appealing to users who prioritize audio quality and ease of use over advanced connectivity options.

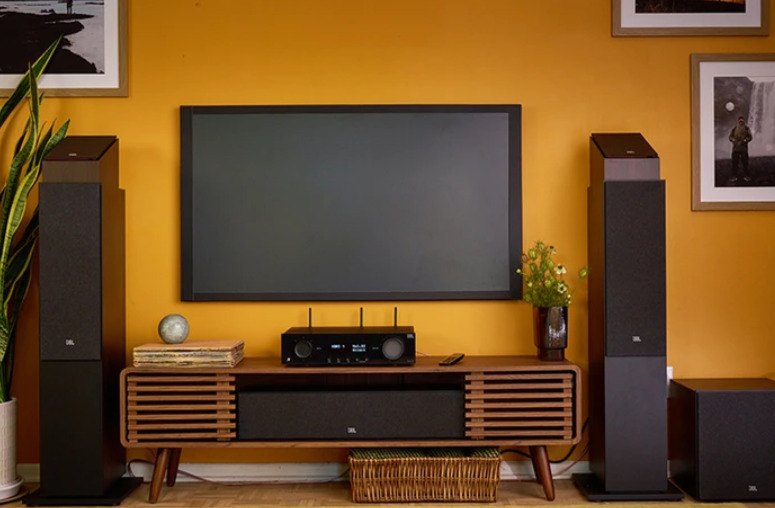
JBL MA310 AV Receiver
JBL MA310 AV Receiver – images: JBL

If you are a casual movie watcher, a gamer looking to enhance your audio experience, or a music lover who prefers a balanced sound profile, the MA310 will meet your needs effectively. However, if you require wireless streaming, multi-room audio, or support for the latest immersive audio formats, you might want to explore higher-end models or different brands.

Final Verdict

The JBL MA310 AV Receiver is a reliable and capable device that brings JBL’s renowned audio expertise into an accessible home theater package. It delivers clear, dynamic sound suitable for various content types and offers enough connectivity options to support most modern entertainment setups.

While it lacks some of the bells and whistles of more expensive models, its solid build, straightforward usability, and good sound quality make it a worthy consideration for anyone upgrading from basic stereo systems or entry-level AV receivers.

For those seeking an affordable yet powerful receiver that doesn’t compromise on audio performance, the JBL MA310 represents a practical and sound investment.

Cambridge Audio MXW70 Review — Small Form, Big Sound

0

As someone who’s lived with the Cambridge Audio MXW70 for several weeks now — integrating it across multiple listening systems — I can say with confidence that this compact amplifier defies expectations. At first glance it’s a modest box: half‑width, unassuming in Lunar Grey, and devoid of flashy embellishments. But in use, it reveals performance far beyond what its size suggests.

Cambridge Audio clearly had a goal with the MXW70: excellent sound without traditional amp bulk. The result is one of the most compelling compact power amplifiers available in 2025. It blends modern engineering with a traditional hi‑fi ethos, making it a versatile choice for both minimal systems and serious stereo rigs.

Design & Build — Understated British Engineering

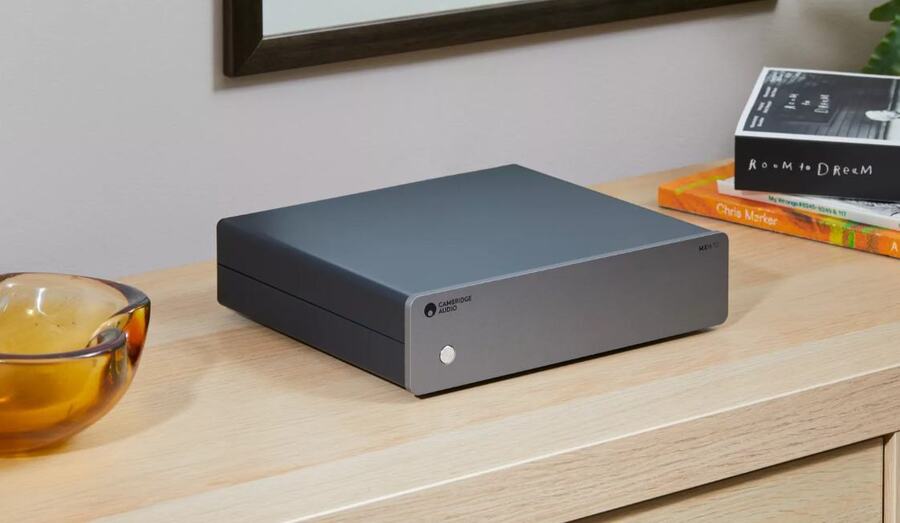
Out of the box, the MXW70 impresses with its build quality. Its all‑metal chassis in Cambridge’s trademark Lunar Grey feels rock‑solid and durable, yet refined rather than industrial. The minimalist front panel — just a power button — signals that this is a component built for purpose rather than show.

Cambridge Audio MXW70
Cambridge Audio MXW70 – images – Cambridge Audio

The amplifier’s diminutive footprint — roughly 215 mm wide — means it slips easily into a desk setup, media shelf, or compact entertainment unit. The design language is clean and neutral, allowing the MXW70 to blend into environments where aesthetics matter as much as performance.

While some might see its simplicity as plain, I’d argue it’s intentional: there’s nothing extraneous to clutter the experience. It doesn’t shout premium trophy gear — but it whispers mature, capable engineering. Frankly, after spending time with it, I appreciate this restraint.

Connectivity & Flexibility

At the rear, Cambridge Audio equips the MXW70 with straightforward yet practical connectivity:

  • Balanced XLR inputs — rare at this price and a big plus for cleaner signal transmission, especially from quality preamps or DACs.

  • Unbalanced RCA inputs for everyday sources.

  • Speaker binding posts that accept banana plugs or bare wire.

  • 12 V trigger in/out for system automation.

There’s no DAC, no network streamer, and no digital inputs — this is pure amplification. That may seem basic in a world of all‑in‑one boxes, but it’s part of the MXW70’s charm: it does one job, and does it extremely well.

The inclusion of balanced XLR alongside RCA is especially welcome. Many amplifiers in this class skip balanced connectivity, but it brings tangible benefits in noise floor and dynamic expression when paired with quality preamps or streamers equipped with balanced outputs.

Power & Performance — More Than Meets the Eye

Let’s talk numbers and, more importantly, real listening.

Cambridge Audio rates the MXW70 at 70 watts per channel into 8 ohms, rising to 125 W into 4 ohms, with the option to bridge two units into a 250 W mono amplifier. These specs might read modest compared to large, power‑house amps, but in real rooms they translate to surprisingly confident drive and control.

Everyday Listening: Punchy, Controlled, and Musical

Right away — with a pair of well‑matched bookshelf speakers — the MXW70 impresses. Bass is tight and controlled, yet not overly lean; mids are expressive, and treble is clear without being etched or harsh. The amp doesn’t chase cool statistics — it prioritizes musical coherence and overall “rightness.”

Jazz recordings have body and air. Vocals sit beautifully in the soundstage, neither recessed nor forward; instruments have shape and presence without unforgiving brightness. Rock and electronic tracks thump with authority without sounding bloated, and classical pieces scale into space with convincing dynamics.

Yet what strikes me most as a listener is the sense of composure — even at higher volumes, the MXW70 stays controlled. There’s no strain, no gravelly edge. It simply delivers, which is remarkable given its size.

Driving Tough Loads & Larger Speakers

Pairing the Cambridge Audio MXW70 with larger speakers could have been a challenge — yet in practice it’s rarely an issue. It won’t match the sheer muscle of big integrated amplifiers, but it never feels underpowered in typical living spaces. Even speakers with moderate sensitivity and complex impedance curves remain composed and articulate.

Cambridge Audio MXW70

For listeners with very large rooms or highly inefficient speakers, bridging to mono and using two MXW70 units is a compelling option. At 250 W in mono, the system becomes capable of filling larger spaces with authority without distortion.

Technical Essence — Class D Done Right

The MXW70’s heart is a Hypex NCore Class D module, tailored by Cambridge Audio engineers to avoid the pitfalls often associated with digital amplification.

Far from sounding sterile or clinical — a common criticism of basic Class D amplifiers — the MXW70’s output is neutral without being lifeless. Detail is present without glare. Rhythm and timing are excellent, giving both subtle micro‑dynamics and broader musical flow equal weight.

This comes through whether you’re streaming hi‑res files or playing compressed formats — the amp brings out intrinsic qualities of each recording without imposing its own character. It’s a neutral canvas with muscle and finesse.

Everyday Use — Practical and Pleasant

Using the MXW70 is refreshingly simple. There’s no remote — control comes from your preamp, DAC, or streamer — but this actually suits the minimalist approach. The 12 V trigger works seamlessly with components like the Cambridge Audio MXN10 streamer or DACMagic 200M, auto‑waking the amplifier alongside the source device.

The standby LED behavior can be quirky (anecdotally persisting when powered off), but this is a minor gripe compared to performance.

Some users report very low noise floors and a generally quiet operating character — a nice bonus in sensitive systems such as desktop setups or near‑field listening desks.

Comparisons & Context

In the broader landscape of compact amplifiers, the MXW70 stands out because of its balance of technical capability and musical engagement.

Some compact Class D amps in the sub‑$1000 category can sound clinical, prioritizing measured performance over musicality. Others lack balanced connectivity or suffer from limited power delivery. The MXW70 avoids these traps by offering both technical competence and enjoyable long‑term listening.

Partnering it with Cambridge Audio’s own MXN10 music streamer creates an elegant, half‑width hi‑fi stack that doesn’t eat shelf space but still delivers full‑range performance. Alternatively, pairing it with a strong DAC and your favorite digital feed transforms older gear into a modern streaming rig with authority and finesse.

Who Is This Amplifier For?

The MXW70 is an excellent fit for a variety of listeners:

  • Space‑constrained setups: desktops, apartments, secondary systems. Its size is a major advantage without a big sound compromise.

  • Minimalist audiophiles: those who want pure power amplification without feature overload.

  • System builders: using it as a bridge between a streamer/preamp and speakers.

  • Hi‑fi beginners and experts alike: accessible enough for newcomers but deep enough for seasoned listeners.

    Cambridge Audio MXW70 f
    Cambridge Audio MXW70

Value & Conclusion

At roughly $599 / £499 / €599, the MXW70 occupies a sweet spot in today’s hi‑fi amplifiers. It isn’t cheap, but it feels worth every dollar because it delivers musically engaging performance that rivals components costing significantly more. Its combination of power, connectivity, flexibility, and sheer listening joy is hard to beat.

In conclusion, the Cambridge Audio MXW70 isn’t just a compact power amplifier — it’s a miniature powerhouse that quietly redefines expectations. Whether you’re building a sleek modern system or upgrading legacy components, this amp brings clarity, control, and dynamics into a package that’s as beautiful to hear as it is simple to use.

If you want high‑fidelity amplification without fuss or bulk, the MXW70 deserves serious consideration. It’s a compelling example of how thoughtful engineering and precise tuning can make a small box deliver a big performance.

WPS Office for Android – free, all-in-one office suite

0

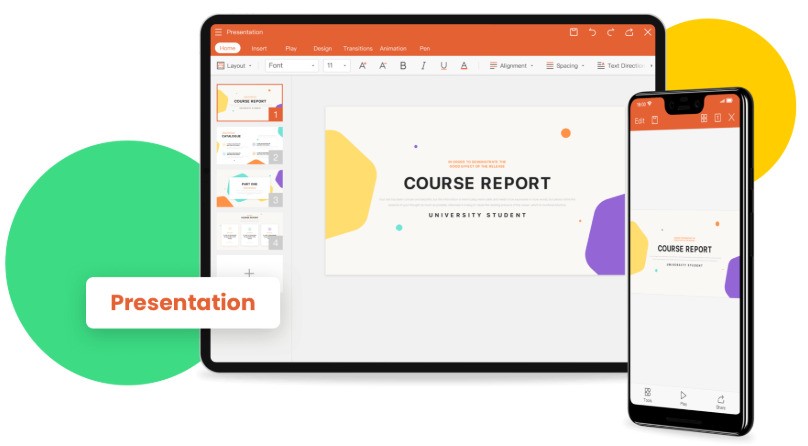
WPS Office for Android is a free, all-in-one office suite that enables users to view, edit, and manage documents on their mobile devices. It is designed to cater to professionals and casual users alike, allowing them to work on documents from anywhere and at any time. The suite includes components for word processing, spreadsheets, presentations, and PDF handling, with features aimed at improving productivity on the go.

  • Writer, Spreadsheet, Presentation, and PDF: These four core components offer a comprehensive set of tools for creating and editing documents, spreadsheets, presentations, and PDFs.

  • PDF Toolkit: A powerful set of PDF tools that include a reader, editor, and converter for transforming PDFs to and from Word, Excel, PowerPoint, and image files.

  • Cloud Integration: Sync documents with popular cloud platforms such as Google Drive, OneDrive, and Evernote, allowing for seamless access and sharing across devices.

  • Multi-Language Support: Available in 46 languages, including English, Hindi, Spanish, and Japanese, catering to a global audience.

User Experience

The app’s interface is intuitive and user-friendly, designed to offer easy navigation across its various tools. The layout is clean and functional, with easy access to all major features. The app ensures that users can easily transition between document editing, PDF management, and cloud syncing.

WPS Office for Android
WPS Office for Android photo

Target Audience

  • Business Professionals: Individuals who need a mobile office suite for document creation and management while on the go.

  • Students and Educators: Those in educational settings who require an efficient tool for presentations, papers, and PDF editing.

  • Casual Users: Users seeking an all-in-one office suite for everyday tasks like managing personal documents and PDFs.

Use Cases

  • On-the-Go Document Editing: Professionals can quickly create, edit, and review documents while traveling or during breaks.

  • Collaboration: Users can collaborate on documents across platforms with cloud syncing.

  • PDF Management: Users needing to convert or edit PDFs for work, school, or personal use.

WPS Office for Android is a highly versatile app that provides a comprehensive suite of tools for document editing, PDF handling, and cloud synchronization. Its ease of use, powerful features, and accessibility make it an ideal solution for a wide range of users, from business professionals to students and casual users, enhancing productivity and document management on the go.

How to create Infographics with AI

0

Infographics, as a powerful visual tool, offer a succinct and engaging way to convey complex information. By combining text, images, and data in an easily digestible format, they help communicate key messages effectively and efficiently. Infographics can be an invaluable asset for content creators, businesses, marketers, and educators.

Traditionally, creating high-quality infographics required graphic design skills, access to design software, and considerable time investment. However, with the rise of Artificial Intelligence (AI) tools, this process has become faster, more accessible, and even more innovative.

This article explores how to create infographics with AI, offering tips, recommended tools, and step-by-step guidance on leveraging AI to streamline the creation of compelling infographics.

Why Use AI to Create Infographics?

Infographics have long been used to condense large amounts of information into visually appealing and shareable content. They are essential for improving engagement, increasing comprehension, and fostering retention. However, creating infographics traditionally involved several laborious steps:

  • Conceptualizing the layout and design

  • Choosing colors, fonts, and images

  • Incorporating data and ensuring proper formatting

AI simplifies this process by automating several of these steps. Some key advantages of using AI for creating infographics include:

  • Speed: AI tools can generate infographics in a fraction of the time it would take manually.

  • Accessibility: Many AI-powered tools are user-friendly, making infographic creation accessible even for non-designers.

  • Customization: AI tools offer templates and design elements that can be tailored to specific needs.

  • Data Visualization: AI can process large datasets and translate them into clear, interactive, and aesthetically pleasing visuals.

  • Cost-effective: Some AI infographic tools are free or offer affordable pricing, making them accessible to small businesses and freelancers.

Steps to Create Infographics Using AI

Now, let’s break down the steps involved in creating infographics with AI. Whether you’re creating an infographic for a marketing campaign, a research presentation, or an educational resource, the following process can guide you through it.

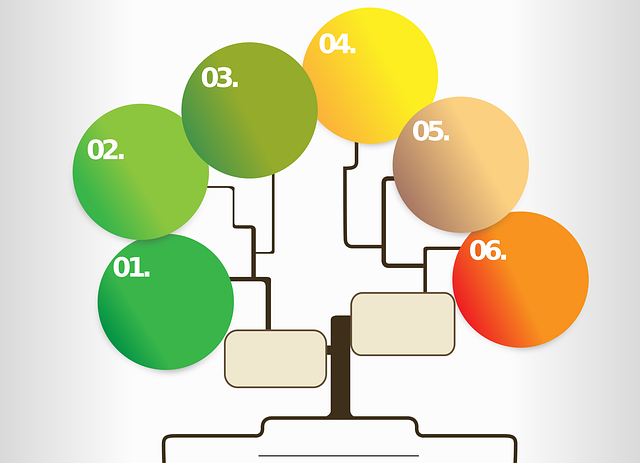
create Infographics with AI
create Infographics with AI – photo: pixabay

Step 1: Define Your Goal and Audience

Before diving into any design process, it’s essential to clarify your objective and understand your audience. The goal of your infographic will dictate its design, tone, and content. Consider the following questions:

  • What message do I want to convey?

  • Who will be viewing the infographic?

  • What action do I want my audience to take after viewing the infographic?

Understanding your audience’s needs will help determine the design elements, colors, and visuals you choose.

Step 2: Choose an AI-Powered Infographic Tool

There are several AI-powered infographic tools available today, each offering unique features, templates, and customization options. Some of the most popular tools include:

  • Canva: Canva’s AI design suggestions and drag-and-drop interface make it easy to create infographics, even for beginners. It offers pre-designed templates that you can customize, and AI tools help suggest colors, fonts, and layouts.

  • Visme: Visme uses AI to help users create dynamic infographics and data visualizations. Its powerful AI helps visualize large datasets and incorporate engaging interactive elements.

  • Venngage: Venngage provides a vast array of customizable templates powered by AI. It’s especially known for its user-friendly interface and ability to create data-driven infographics quickly.

  • Designhill AI Infographic Maker: This tool uses AI to generate infographics by simply entering a title or topic. It can suggest layouts, icons, and visuals suited to your content.

  • Snappa: Snappa’s AI tools help users quickly choose templates and adjust design elements, making it an excellent option for non-designers.

When selecting an AI tool, consider factors like ease of use, pricing, template variety, and the types of data visualizations supported.

Step 3: Gather and Organize Your Data

Infographics are most effective when they’re based on accurate and relevant data. Gather data from credible sources that align with your objective and audience. This could include:

  • Statistical data

  • Survey results

  • Research findings

  • Comparisons

  • Key trends or predictions

Ensure that the data is easy to understand and actionable. Organizing it into clear categories or sections will help AI tools process it more efficiently and ensure the infographic remains clear and focused.

Step 4: Select a Template and Layout

Once you’ve chosen an AI infographic tool, the next step is to select a template or layout. AI tools offer a variety of pre-designed templates that you can use as a starting point. These templates are often designed based on common infographic styles and layouts, making it easier to choose one that fits your content.

When selecting a template, consider the following:

  • Theme and Aesthetics: Choose a template that reflects your brand or the tone of your message.

  • Layout: Select a layout that organizes your data logically and aesthetically. Common infographic layouts include list-based, comparison, flowchart, and timeline formats.

  • Customization: Ensure that the template allows enough customization to suit your needs.

AI tools like Canva, Venngage, and Visme can suggest layouts based on the type of information you are presenting, making the selection process easier.

Step 5: Input Data and Customize Design Elements

After selecting your template, it’s time to input your data into the infographic. This step is made much easier by AI-powered tools, which automatically adjust design elements based on the data you input. For example, when you enter numerical data, AI tools can automatically create bar charts, pie charts, or line graphs to visually represent the information.

Customization options you can explore include:

  • Text: Add titles, headers, and short descriptions to complement the visuals. AI tools can suggest text formatting styles that align with the design.

  • Colors: AI tools can suggest color schemes that fit the infographic’s tone, or you can customize colors to align with your branding.

  • Icons and Images: AI can suggest relevant icons, stock images, and illustrations to enhance your infographic and make it more visually appealing.

  • Fonts: AI tools often suggest fonts that are readable and aesthetically consistent with the rest of the design.

Step 6: Refine and Optimize

Once your infographic is populated with data, it’s time to refine and optimize the design. This step ensures your infographic is not only visually appealing but also easy to read and share. Pay attention to the following:

  • Hierarchy: Make sure the most important information stands out through size, color, and placement.

  • Spacing: Ensure there is enough white space to avoid a cluttered look.

  • Alignment: Proper alignment of elements ensures the infographic looks professional.

  • Visual Flow: The viewer’s eye should naturally flow from one section to the next. Use arrows, numbering, or visual cues to guide the viewer’s journey.

AI tools often provide suggestions or feedback on improving the layout, readability, and overall design of the infographic.

Step 7: Export and Share

Once you’re satisfied with your infographic, it’s time to export and share it. Most AI infographic tools allow you to download your design in various formats such as PNG, JPEG, PDF, or even as an interactive HTML file. Select the format that best suits your distribution channels, whether it’s social media, email campaigns, websites, or presentations.

Tips for Effective Infographic Design

Here are some additional tips to help you create effective and visually striking infographics with AI:

  • Keep it Simple: Focus on a single message and avoid cluttering the design with too much information.

  • Use Data Visualizations: Numbers are easier to comprehend when represented visually. Use charts, graphs, and diagrams to make data more digestible.

  • Brand Consistency: Ensure that your infographic aligns with your brand colors, fonts, and overall style.

  • Limit Text: Infographics are meant to be visually appealing. Use short, punchy text to support the visuals rather than overwhelm the viewer with lengthy paragraphs.

  • Test for Mobile Compatibility: Many users will view your infographic on mobile devices. Ensure that the design is optimized for smaller screens.

  • Use High-Quality Images: Make sure the images and icons you use are high resolution for clarity and professionalism.

4. Review of Top AI Infographic Tools

Let’s briefly review some of the most popular AI infographic tools available:

  • Canva: Canva’s intuitive interface and vast library of templates make it one of the easiest tools for creating infographics. The AI-powered design suggestions make it accessible for non-designers. Ideal for marketers, small businesses, and educators.

  • Venngage: Venngage offers a wide variety of customizable templates, especially for data-driven infographics. Its AI helps automate the design process, allowing you to focus on the content. It’s a great choice for creating infographics based on research or statistics.

  • Visme: Visme excels in creating data-heavy infographics. Its AI tools help with data visualization, turning raw data into clear, visually engaging graphics. It’s perfect for corporate reports or academic presentations.

  • Designhill AI Infographic Maker: This tool allows for quick and easy infographic creation with minimal effort. Enter a topic, and the AI suggests appropriate designs and visuals, making it an excellent choice for beginners.

Creating infographics with AI is a game-changer for businesses, marketers, educators, and content creators. AI-powered tools streamline the entire process, from gathering and organizing data to designing and refining the visuals. With just a few clicks, you can create visually compelling and data-rich infographics that capture your audience’s attention and communicate your message effectively.

By following the steps outlined in this article and leveraging AI’s capabilities, you can quickly produce high-quality infographics with AI that elevate your content and help achieve your goals. Whether you’re a seasoned designer or a complete beginner, AI makes infographic creation accessible, efficient, and enjoyable.

Top 3 budget big-screen smartphones

0

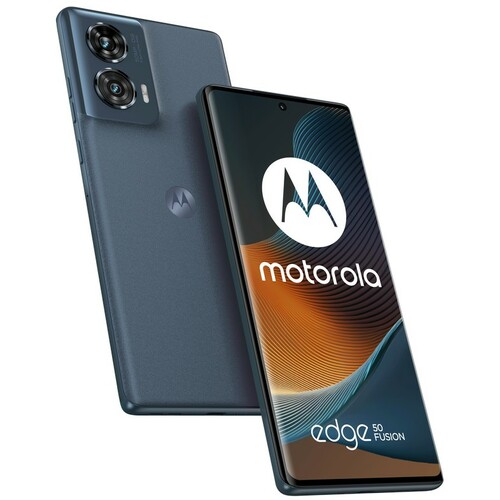
For buyers prioritizing a large, vibrant display and balanced flagship-level performance with fast charging and good cameras, the Motorola Moto Edge 50 Fusion stands out as the best budget big-screen smartphone, offering excellent value and features for the price.

If photography and AI-powered camera features are the top priorities and a premium build is worth the price, the Google Pixel 9 Pro XL is the superior choice despite slower charging and a higher cost, delivering top-tier imaging and AI capabilities on a large screen. The Google Pixel 9 Pro XL features the best camera system. It is highlighted for having a best-in-class camera system with AI-enhanced features and a unique Magic Editor, making it ideal for photography enthusiasts.

For users strictly on a tight budget who want a big screen with solid battery life and decent performance for everyday use, the Motorola Moto G 5G offers the best price-value ratio with a premium-feeling design.

Choosing among these depends on your balance of budget, camera expectations, and performance needs, but the Edge 50 Fusion is the best all-around budget choice, Pixel 9 Pro XL leads in photography, and G 5G wins on entry-level affordability.

Motorola Moto Edge 50 Fusion
├─ Pros
│ ├─ Large 6.7-inch POLED 120Hz display with 1 billion colors
│ ├─ Snapdragon 6 Gen1 chipset with Adreno 710 GPU for smooth performance
│ ├─ Solid camera setup: 50MP wide, 13MP ultrawide, 32MP selfie
│ ├─ Massive 5,000mAh battery with fast 68W charging
│ └─ Dual SIM support for flexibility in carrier usage

Motorola Moto Edge 50 Fusion

├─ Cons
│ ├─ GSM-only network compatibility; may not work with all carriers
│ ├─ No wireless charging or NFC mentioned
│ └─ Build quality less premium compared to flagship-level phones
└─ Suggestions
└─ Ideal for users wanting large high-quality screens, solid cameras, and fast charging on a budget, especially those with compatible GSM carriers

Google Pixel 9 Pro XL
├─ Pros
│ ├─ Premium design and build quality inspired by iPhone aesthetics
│ ├─ Best-in-class camera system with AI-enhanced features and Magic Editor
│ ├─ Large 6.7+ inch Super Actua display with excellent brightness
│ ├─ Strong battery life with improved thermals and 5,060mAh capacity
│ └─ Gemini AI integration for unique utilities in photography and usability

├─ Cons
│ ├─ Slow charging speeds compared to rivals
│ ├─ Gaming performance lags behind top-tier flagship phones
│ └─ Higher price point reflecting flagship status
└─ Suggestions
└─ Best suited for photo enthusiasts and users seeking cutting-edge AI features and a premium big-screen Android experience

Motorola Moto G 5G (Mentioned as budget large screen option)
├─ Pros
│ ├─ Affordable price (~\$163) with large 6.6-inch 120Hz display
│ ├─ Dolby Atmos audio support for enhanced sound experience
│ ├─ 50MP camera and Snapdragon 4 Gen1 processor with 5G connectivity
│ ├─ Large 5,000mAh battery supporting fast charging
│ └─ Premium-feeling design with vegan leather back
├─ Cons
│ ├─ Charger may not be included in the box
│ ├─ Lower-tier processor compared to other options
│ └─ Possibly fewer advanced camera features
└─ Suggestions
└─ Suitable for budget-conscious users wanting a big screen and long battery with basic good performance

Send all your files wirelessly with Software Data Cable

0

Software Data Cable app-Connect phones, PC, tablets, Mac and TV – send contents including files, folders, photos, video etc.,wirelessly at lightning fast speed. One stop solution from all your file transfer needs concerning your Android gadget.

Tips for new users:

Install app “Software Data Cable” via Google Play Store

Open the app and start “CONNECT PC” service

Tap “Connect PC” and scan above QR code with phone to get connected

Advantages WITH SOFTWARE DATA CABLE 
• The fewer cables to carry the better
• Seamlessly data transfer without cost
• Keep files on phone in continuous sync with PC or cloud

Main features
• Send contents (file, folder, app, video, mp3 etc.) to other phones wirelessly
• Send contents to computer (and vice versa) without USB data cable
• Easy to use – scan QR code to connect PC and other phone
• Send contents to nearby devices with single tap
• Sync folders to family storage (PC, laptop etc.) and cloud automatically
• File manager – organize and manage your files and apps
• Transfer speed up to 300Mb/s
• Standard file transfer protocol
• No mobile data plan impact
• Secure data transfer in private network
• Extend mobile storage space without cost

WHAT’S NEW
• Stability improvement (fewer crashes and freezes)
• Usability improvement (sync data with SEND or RECEIVE)
• UI improvement (RECEIVE uses a radar view to search senders)

Connect phones, tablets with single tap and share contents (files, folders, movie, music etc.) freely – no need for a Wi-Fi network or mobile data plan.

One stop solution from all your file transfer needs concerning your Android gadget.

The fewer cables to carry the better; Seamlessly data transfer without cost; Send contents (file, folder, app, game, video, mp3 etc.) to other phones wirelessly.

After downloading and setting up Software Data Cable, you can easily link up and explore your phone’s files and directories from any PC on the shared network. It performs optimally when both your computer and phone are connected to the same Wi-Fi. Simply input your phone’s IP address into a web browser, and you’ll gain full access to its contents, including the ability to transfer, duplicate, or remove files as needed.
If your goal is just to shuttle a file from your desktop to your Android device, Dropbox might already handle that swiftly—and that’s perfectly fine, as it’s often quicker. However, Software Data Cable shines for users wary of entrusting data to cloud services, those without a Dropbox subscription or similar syncing tool, or anyone seeking the convenience of device management right from their computer—especially if you’ve left your USB cable behind.

Read  more and download software data cable

Nothing Phone 3a (12/256GB) Review: Good value for money

0
In a sea of homogenous smartphones, Nothing continues to carve out its niche with devices that prioritize personality without skimping on practicality. The Nothing Phone 3a, particularly in its 12GB RAM and 256GB storage configuration, builds on this ethos, delivering a compelling mid-range option that’s as visually arresting as it is reliable for daily use. Released in early 2025, this phone targets budget-conscious users who crave something beyond the ordinary—think bold aesthetics paired with solid performance and AI smarts. After putting it through its paces, here’s why it stands out in the crowded under-$400 segment, and where it falls short.

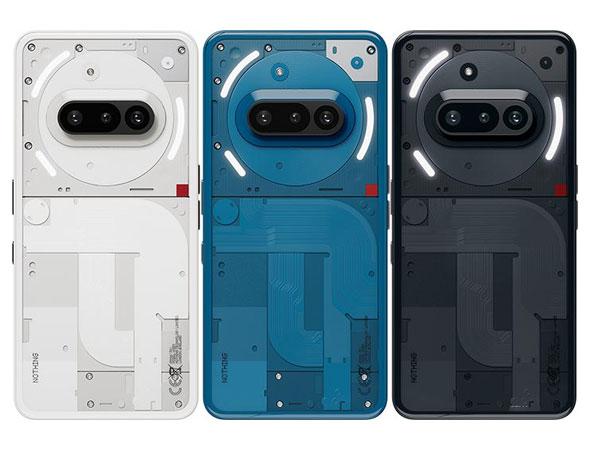
Nothing Phone 3a
Nothing Phone 3a
Design: Transparent Charm with Functional Twists
Nothing’s design language remains a highlight, and the Phone 3a elevates it further. The transparent glass back reveals intricate ribbon cables and screws, giving it an industrial, almost cyberpunk vibe that’s far from the glossy slabs dominating the market. Measuring 6.44 x 3.05 x 0.33 inches and tipping the scales at 7.09 ounces, it’s comfortably wieldy, with a recycled aluminum frame adding durability.

The IP64 rating ensures resistance to dust and splashes, though it’s not fully submersible—practical for everyday mishaps but not for poolside adventures.

A standout feature is the revamped Glyph interface: LED lights on the back that sync with notifications, timers, music, or even act as a flashlight. It’s not just gimmicky; it reduces screen time by letting you glance at alerts face-down. Then there’s the Essential Key on the right side—a programmable button for quick actions like screenshots, voice recordings (with AI transcription), or accessing the Essential Space app. This AI hub organizes photos, notes, and more, with future updates promising deeper integration. Available in black, blue, or white, the phone ships with a USB-C cable but no charger, aligning with eco-friendly trends. Overall, the build feels premium for the price, though the lack of a microSD slot means you’re locked into that 256GB storage—plenty for most, but power users might feel the pinch.

Display: Vibrant and Responsive

The 6.77-inch AMOLED panel is a joy, boasting FHD+ resolution (around 2392 x 1080 pixels) and a silky 120Hz adaptive refresh rate for smooth scrolling and animations.
With a typical brightness of 800 nits and peaks up to 3,000 nits, it’s legible outdoors, though reflections can be an issue in direct sunlight.

Nothing Phone 3a Performance
Nothing Phone 3a


The small punch-hole for the front camera minimizes distractions, and colors pop with 10-bit support. It’s not the sharpest in its class—pixel density hovers around 395 ppi—but for streaming Netflix or browsing social media, it’s more than adequate. Auto-brightness adjusts reliably, making it a strong contender for media consumption on a budget.

Nothing Phone 3a Performance: Punchy for the Price, with Minor Hiccups

Under the hood, the Snapdragon 7s Gen 3 chipset paired with 12GB of RAM handles multitasking with ease, from juggling apps to light gaming.

Benchmark scores like Geekbench 6 (single-core: 1,166; multi-core: 3,287) place it solidly in mid-range territory, comparable to older flagships.
Everyday tasks are snappy, but occasional stutters when opening the app drawer or switching tabs remind you it’s not a powerhouse. Gaming fares well: Titles like Genshin Impact run smoothly at high settings and 60fps, though the back warms up slightly during extended sessions. For casual users—email, web browsing, and social media—it’s overkill in the best way. Heavy multitaskers or gamers might notice the limitations, but at this price, it’s impressive value.

Camera: Capable but Colorful
The triple-camera setup punches above its weight for a budget phone: a 50MP main sensor with OIS for stable shots, a 50MP 2x telephoto for zoomed portraits, and an 8MP ultrawide for landscapes.

The 32MP front camera handles selfies with good detail, though contrast can be aggressive. In good lighting, photos are sharp and vibrant, but colors lean warm and oversaturated—reds and yellows pop dramatically, which some will love for social media flair.

Low-light performance is average, with grain creeping in, and the ultrawide softens edges noticeably. Video tops out at 4K/30fps on the rear (with some jitter) and 1080p/60fps upfront. It’s not Pixel-level magic, but for quick snaps and casual vlogging, it delivers—especially with AI enhancements in the Essential Space for editing.

Nothing Phone 3a -
Nothing Phone 3a images
Battery and Charging: All-Day EnduranceThe 5,000mAh battery is a star performer, easily lasting 14+ hours of mixed use, including streaming and browsing.

Heavy days still leave juice in the tank, and with 50W wired charging, it hits 100% in about an hour—no wireless option, though, which is a miss for convenience seekers.
It’s efficient enough that you won’t be hunting for outlets mid-day, making it ideal for commuters or travelers.

Software: Clean, Customizable, and Future-Proof(ish)
Running Nothing OS 3.1 on Android 15, the interface is near-stock with monochromatic icons, dot-matrix widgets, and deep Glyph customization.

It’s intuitive for Pixel fans, with added flair like theme toggles between colorful and black-and-white modes. Nothing promises three years of OS updates and six years of security patches, which is respectable but trails behind Google’s seven-year commitment.

AI features via Essential Space—auto-transcribing notes or sorting content—are handy, with more on the horizon. Bloatware is minimal, keeping things zippy.

A Stylish Steal for the Right User
The Nothing Phone 3a (12/256GB) earns its “A” grade by blending affordability with allure, scoring around 7-8/10 in my book. At under $400, it offers standout design, marathon battery life, and capable performance that outshines many rivals. If you’re tired of bland phones and value unique features like the Glyphs and Essential Key, this is a no-brainer. However, camera inconsistencies, no wireless charging, and limited US 5G support (join the beta program for access) might steer power users toward alternatives like the Google Pixel 9a. For everyone else, it’s a fresh take on mid-range excellence—proof that Nothing is onto something special.

How to Delete Browsing History on Safari Browser

0

Today, our web browsers store a wealth of data about our online activities. Whether it’s for convenience or to enhance the user experience, web browsers like Safari collect browsing history, cache, cookies, and other data. While this can be helpful in some situations, it can also raise privacy concerns. For users of Apple devices, knowing how to manage and delete browsing history on Safari is essential for protecting personal information, clearing up storage space, and maintaining overall privacy.

This comprehensive guide will walk you through how to delete browsing history on Safari, covering a variety of methods and tips for both macOS and iOS users. By the end of this article, you will understand how to delete your browsing history, cookies, cache, and more in Safari.

What is Browsing History?

Browsing history is a record of the websites you’ve visited. Browsers, including Safari, automatically track this information to offer features such as autocompletion in the address bar and quick access to your most visited sites. However, your browsing history may contain sensitive information, such as login credentials, search terms, and websites you’ve visited, which could be a privacy risk.

delete browsing history on Safari
photo – pixabay

When you browse the web, Safari also stores other types of data, such as:

  • Cookies: Small files stored on your device by websites to remember your preferences and settings.

  • Cache: Temporary data that helps web pages load faster the next time you visit.

  • Web Form Data: Saved usernames, passwords, and other form entries.

Deleting browsing history in Safari not only protects your privacy but also frees up space on your device by removing some of this stored data.

Why Delete Browsing History?

There are several reasons why someone might want to delete their browsing history in Safari. These include:

  • Privacy Protection: If you’re using a shared or public device, you may not want others to know which websites you’ve visited.

  • Freeing Up Storage Space: Cached files and cookies can accumulate over time, taking up valuable storage on your device.

  • Fixing Issues with Safari: Deleting history can help resolve issues like slow performance or problems with website loading.

  • Clearing Auto-Fill Data: Safari automatically stores login details and form data. Deleting browsing history ensures that this data is removed as well.

Deleting Browsing History on Safari for macOS

1. Deleting History via Safari Menu

The easiest way to delete your browsing history on Safari for macOS is by using the built-in menu options.

  1. Open Safari: Launch Safari on your Mac.

  2. Go to the “History” Menu: In the Safari menu bar at the top of your screen, click on the History tab.

  3. Clear History: Scroll to the bottom of the drop-down menu and click Clear History.

  4. Choose the Time Range: A pop-up will appear asking you to select a time range. You can choose from the following options:

    • The last hour

    • Today

    • Today and yesterday

    • All history

  5. Click “Clear History”: Once you’ve selected your preferred time range, click Clear History. Safari will delete the browsing history, along with cached data, cookies, and website data from the selected time frame.

2. Using Safari Preferences to Delete Specific History Data

If you don’t want to delete all your history but would rather clear specific data, Safari allows you to delete individual items.

  1. Open Safari: Launch Safari on your Mac.

  2. Go to Safari Preferences: Click on Safari in the menu bar and select Preferences.

  3. Select the “Privacy” Tab: In the Preferences window, click the Privacy tab.

  4. Manage Website Data: Click the Manage Website Data button. This will show a list of all websites that have stored cookies, cached data, and other information on your device.

  5. Remove Specific Data: You can either select specific websites and click Remove or click Remove All to delete all stored data. This will delete cookies, cache, and other browsing information related to specific sites.

3. Deleting Cache in Safari

Safari also stores cached data to help websites load faster. Sometimes, clearing the cache can resolve issues like slow page loads or outdated content. Here’s how to delete it:

  1. Enable Developer Tools: First, enable the developer tools if they aren’t already. Go to Safari > Preferences > Advanced, then check the box that says Show Develop menu in menu bar.

  2. Clear Cache: From the Safari menu bar, click Develop, and then select Empty Caches. This will remove all cached files from Safari.

4. Clear Cookies in Safari

Cookies store information like login credentials and browsing preferences. While cookies are useful, they can also be used to track your browsing activities. To delete cookies:

  1. Open Safari Preferences: Click Safari > Preferences.

  2. Go to the Privacy Tab: In the Preferences window, click the Privacy tab.

  3. Manage Website Data: Click the Manage Website Data button to view the cookies and other data stored by websites.

  4. Remove Cookies: You can remove cookies from specific websites by selecting them and clicking Remove. Alternatively, you can click Remove All to delete all cookies stored in Safari.

Deleting Browsing History on Safari for iOS

1. Deleting History from the Safari Settings

On an iPhone or iPad, the process of deleting browsing history is just as simple. Here’s how to do it:

  1. Open Settings: Tap on the Settings app on your iOS device.

  2. Scroll to Safari: Scroll down and tap on Safari to open the Safari settings.

  3. Clear History and Website Data: Under the Privacy & Security section, tap on Clear History and Website Data.

  4. Confirm the Action: A confirmation message will appear asking if you’re sure you want to delete your browsing history. Tap Clear History and Data to confirm. This will delete your browsing history, cookies, and cache from Safari.

2. Delete Specific History in Safari for iOS

If you prefer to delete specific browsing history rather than clearing everything, you can do so from within the Safari app:

  1. Open Safari: Launch Safari on your iPhone or iPad.

  2. Go to History: Tap the Book icon at the bottom of the screen (it might look like a little open book). Then, tap the Clock icon to open your history.

  3. Delete Specific Items: To delete individual history items, swipe left on the entry you want to delete, then tap Delete. You can do this for any item in your history.

3. Clear Cache and Cookies on iOS

Although clearing the entire browsing history also clears cache and cookies, you can delete cookies and cached data individually by following these steps:

  1. Open Settings: Tap on the Settings app on your device.

  2. Go to Safari Settings: Scroll down and select Safari.

  3. Advanced Settings: Scroll down to the bottom of the Safari settings and tap on Advanced.

  4. Website Data: Tap Website Data, which shows all the cookies and cached data stored on your device.

  5. Delete Website Data: Tap Remove All Website Data to delete the stored cookies and cache.

Advanced Options: Use Private Browsing Mode

For those who want to avoid leaving any browsing history behind, Safari offers a Private Browsing mode. When you use private browsing, Safari does not save your browsing history, cookies, cache, or other data. Here’s how to enable it:

1. Enable Private Browsing on macOS

  1. Open Safari on your Mac.

  2. In the File menu, click New Private Window.

  3. A new window will open, and you’ll notice a darkened address bar, indicating that you’re in private browsing mode.

  4. Browse as usual—once you close the private window, no history or data will be saved.

2. Enable Private Browsing on iOS

  1. Open Safari on your iPhone or iPad.

  2. Tap the Tabs icon at the bottom right.

  3. Tap Private in the lower left corner.

  4. Tap the + icon to open a new private browsing tab.

Deleting your browsing history on Safari is an essential step in protecting your privacy and ensuring that your online activities are not stored or shared. Whether you’re using Safari on macOS or iOS, there are simple and straightforward ways to clear browsing history, cache, cookies, and other data.

Remember to regularly clear your browsing history and data if you want to safeguard your privacy, especially on shared or public devices. For those who want to avoid leaving a trace of their browsing activities altogether, Safari’s Private Browsing mode is a helpful option.

By following the steps outlined in this guide, you can take control of your browsing history and maintain a higher level of privacy and security while using Safari.