Home Blog Page 3

Create M3U Playlist – Step-by-Step Guide

0

How do I go about creating an M3U playlist? Can I create an M3U playlist to stream my favorite videos? Please provide me with detailed steps on how to create an M3U playlist.

An M3U playlist is a compilation of IPTV channels listed in an M3U file format, typically provided by an IPTV service provider. Users can utilize this playlist to stream their preferred channels online on various devices such as TVs, computers, smartphones, and tablets. The M3U file can be opened using media players like VLC player.

Within the M3U file, you will find a list of channels along with the connection details for each channel, including the channel name, channel ID, and the direct address of the channel on the server. You can play the M3U playlist using media players like VLC media player, PotPlayer, or Windows Media Player.

The media player processes the M3U file or URL and displays the channel list. You can select a channel to watch, and upon selection, the player sends a request to the server. In response, the server sends packets that are converted into images on your device, allowing you to watch the channel live.

Now, let’s discuss how to create an M3U playlist. The basic method involves creating a .txt file on your computer, which you can edit using Notepad or any preferred text editor. In this file, you will add the paths to the songs, movies, channels, or video clips you desire, one by one.

m3u list

The M3U playlist is essentially a file that contains index entries for each item, but it is not an actual audio/video file. Each file path should include a two-line description that points to the online source. The source syntax should resemble the following example:

#EXTINF:-1, News 3
http://185.65.30.452:1223/Tv6652

The number following “#EXTINF” indicates the audio length in seconds. If the audio is being streamed online and no length is specified, you will see -1. The M3U URL refers to the relative path of the M3U file.

You can easily add audio/video files to the M3U playlist by dragging and dropping them from your computer. Afterward, you can import the playlist to your preferred app or media player that supports the M3U file format.

This guide will introduce you to four different tools that can assist you in creating an M3U playlist on your computer.

How to Create an M3U Playlist on VLC?

VLC media player, a popular and versatile media player, offers a range of useful features. In addition to playing rare file formats and performing tasks like DVD conversion, video and audio merging, and media file editing, VLC also allows you to create playlists in formats such as M3U, M3U8, and XSPF. If you’re unsure about how to create an M3U playlist using VLC, follow the steps below:

Open VLC media player. If you don’t have the program installed, visit the official website and download the appropriate version for your computer.

Click on “View” in the toolbar and select “Playlist.” Alternatively, you can quickly open the playlist window by pressing Ctrl+L.

Right-click within the playlist window and choose “Add files…” or “Add folder…” to import audio files or an entire folder from your computer into VLC. Alternatively, you can drag and drop the desired files or folder into the playlist window. You can also rearrange the order of the audio files using drag and drop.

When you play the M3U file with VLC in the future, VLC will automatically queue the audio files according to your arrangement.

Select “Media” in the upper-right corner or press the keyboard shortcut Ctrl+Y. Then choose “Save Playlist to File,” specify the output path, rename the file, and save it as an M3U playlist.

Finally, click the “Save” button to create the M3U file. The process will be completed, and you can find the generated M3U files in the output folder you specified earlier.

Creating an M3U Playlist with Windows Media Player?

If you’re using Windows 7 or an older version, you can also utilize Windows Media Player to create an M3U playlist. Windows Media Player 12 allows you to save playlists in the M3U format instead of the program’s default format, WPL. To create an M3U playlist using Windows Media Player, follow these steps:

Create a new folder on your computer and place all the audio files you want to include in the playlist inside it.

Drag the folder into the “Unsaved List” section of Windows Media Player.

You can rearrange the order of the audio files by dragging them up or down within the list.

Click on the drop-down menu and select “Save list as…” to create an M3U playlist.

Rename the file and choose the output format as M3U.

Click “Save” to create the M3U file. By default, the output path is My Music > Playlist, but you can specify a different output path if desired.

Following these steps, you will have successfully created an M3U playlist using Windows Media Player. It shouldn’t take long for you to obtain your M3U playlist.

How to Create an M3U Playlist in iTunes?

iTunes serves not only as a data manager for iOS devices, allowing you to sync and play media files, but also as an M3U playlist creator, enabling easy playlist creation. Once you have accumulated audio and video files in your iTunes library, you can organize them into playlists. Whether you want to arrange videos by the date you added them to the library or create a playlist of road trip songs, you can create an M3U file, which is a text file that retains the order of your files. Follow the steps below to learn how to create an M3U playlist within iTunes on your computer:

Launch iTunes on your computer.

In the left pane of the iTunes window, click on a category such as “Music” or “TV Shows” under the “Library” section, or select a playlist under the “Playlists” option.

Click on “File” in the iTunes menu.

Select the “Library” option.

Click on the “Export Playlist” option. This will open a dialog box.

Choose a folder where you want to create the M3U file.

Click on the drop-down menu next to “Format” and select “M3U.”

Click “Save” to create the M3U file.

Creating an M3U playlist with iTunes is straightforward. Give it a try to see how easy it is.

How to Create an M3U Playlist for IPTV?

If you want to create an M3U playlist for IPTV streaming, you can use the method mentioned above to create your own M3U playlist. Alternatively, you can find pre-defined M3U playlists with TV channels and shows from various sources, such as GitHub. While most playlists are free, they may expire after some time. However, once you sync the playlist with your device, you will have permanent access to it.

To stream IPTV, you need a multimedia player that supports the M3U file format. Depending on the device you’re using, you can find dedicated apps on the Apple Store or Google Store, such as TV Streams, IPTV, or Smart IPTV. Follow the steps below to stream an M3U playlist:

Drag and drop the downloaded or self-created IPTV VLC playlist to the Media Library in the app to save it.

Click on the VLC IPTV playlist drop-down menu and choose a channel, for example, “News 12,” to start streaming.

You can not only create M3U playlists but also play the files with VLC, Windows Media Player, and iTunes. Keep in mind that if the M3U playlist points to audio files on your local device, you won’t be able to play it on other devices since the media player cannot find the file path.

However, if the M3U file points to an online stream, you can easily play and even share it when connected to a Wi-Fi or cellular network. Lastly, note that M3U files are plain text files, so it’s not possible to convert them into playable MP3 or MP4 media files. Nevertheless, you can open an M3U file with Notepad and locate the original path of the actual file.

Bonus: Free download IPTV PRO player – watch IPTV from your Internet provider or TV from any other Internet source on your phone or tablet! Download IPTV Pro v7.1.4 HERE

Application features:
✔️ Support for m3u and xspf playlists
✔️ Playlist history
✔️ Play multicast streams via UDP proxy (proxy must be installed on your local network)
✔️ Display channels as a list, grid or tile
✔️ Support for TV programs in XMLTV and JTV formats (if there is a link to the TV program in the playlist; for JTV only ZIP archives are supported)
✔️ Ability to use built-in or external player to play channels
✔️ Parental controls


And there are some M3u Lists that works very good. Copy the link to the player and enjoy!


M3U lists – 17. Sep

http://tv.streamid.tv:8080/get.php?username=DZk5krF9hx&password=RV5x5dzpTu&type=m3u

http://vod-4k.info:8089/get.php?username=5801316510152&password=5801316510152&type=m3u_plus

http://31.43.191.125:8080/get.php?username=VIP0199169358094917&password=21693580949&type=m3u

http://tv14s.xyz:8080/get.php?username=rossjohn88@hotmail.com&password=KCBKTCnWTU&type=m3u

http://gs01.nxtbox.de/get.php?username=GBErdemsarikaya&password=gFYMwcs&type=m3u

http://obsfullhd.tv:25461/get.php?username=EtWwee4DkH&password=fipo6dHRhg&type=m3u

http://tx.nzrxx.com:8080/get.php?username=JurgenRinkert&password=aoCUhv302x&type=m3u

http://tectonbrand.com/get.php?username=6JHNHCD&password=224R9FW&type=m3u

http://fhd.mail123.info/get.php?username=38095906&password=aHrccdj&type=m3u

http://lunar.pm:8080/get.php?username=LynnB23&password=34yfqEW7mHvY&type=m3u

http://185.191.127.129/get.php?username=me13Oq9R&password=pokUmfTa&type=m3u

http://acosta.nexon.pro/get.php?username=yv33paxg77&password=s57f0zfcz3&type=m3u

http://viebtv5ml4.stexxino2020.xyz/get.php?username=nikonew&password=091022&type=m3u

http://kiktvs.live:8080/get.php?username=AnelRahmanovic&password=fNJ6mYumaKSqx4KD4DSTzNVrzzKWCA8w&type=m3u

http://cm1.portaltv.info:777/get.php?username=ArtonBaxhakuKosove&password=s3Ds7dF8&type=m3u

http://bbmediaiptv.com:80/get.php?username=584.SalihCovic&password=pL2MxOyA555&type=m3u_plus

http://sny57.com:8080/get.php?username=W026eOFO&password=FsC1f5Y4&type=m3u_plus

http://fastopen.live:8080/get.php?username=Fratila&password=VQlMIcx3iE&type=m3u

http://xxxxxxx.ro:8080/get.php?username=AN221961&password=iMhcy5HOZt&type=m3u

http://vaisver.club:8080/get.php?username=tiagoafilhado&password=hKnHQvKJQdBZ&type=m3u_plus

http://pro.platin4k.com:8880/get.php?username=Rafetkollege1&password=uGuVbR76mE7wuY&type=m3u

http://092025.online:2086/get.php?username=775921709518&password=135552110567088d311a30d&type=m3u

http://gold2.info:8089/get.php?username=8593957586249&password=9537521949372&type=m3u

http://ekonomtv.com:25461/get.php?username=Roma0176&password=79P78PR3xv&type=m3u

http://tkosportz.live:25461/get.php?username=gloriamendoza25&password=25768465&type=m3u

http://tv.123tv.to:8080/get.php?username=Fratila&password=VQlMIcx3iE&type=m3u

http://elit64.xyz:2086/get.php?username=Ugurinan&password=LmHzmR3t69&type=m3u

Windows 11 Supported CPU List – Complete Guide

0

Below is a comprehensive review about the Windows 11 supported CPU list, including detailed lists for Intel and AMD processors officially supported by Microsoft as of current releases (including Windows 11 version 25H2).

Since its launch in October 2021, Windows 11 has introduced stricter hardware requirements than previous Windows versions. Among the most important of these is CPU compatibility, enforced not only for performance but also for security and reliability features such as TPM 2.0, Secure Boot, SSE4.2, and POPCNT instruction support.

Microsoft maintains official lists of supported processors for Windows 11, largely focusing on modern generations of Intel and AMD CPUs (along with some ARM‑based Qualcomm processors). These lists are updated periodically, particularly with major OS releases such as version 24H2 and 25H2.

Below, you will find an overview of Windows 11 CPU compatibility and supported Intel and AMD processors based on the latest official documentation, along with explanations of how compatibility works and what it means for users.

review about the Windows 11 supported CPU list
photo: pixabay

Why CPU Compatibility Matters for Windows 11

Windows 11 introduced a more restrictive hardware compatibility model than Windows 10. Key protections such as Secure Boot, TPM 2.0, and required CPU features like SSE4.2 and POPCNT are essential parts of Microsoft’s vision for secure and reliable PC computing.

If a processor does not appear on Microsoft’s supported list, Windows 11 may refuse to install or upgrade in the standard way—even if the CPU technically supports 64‑bit operation and meets other minimum requirements. For older hardware, there are unofficial workarounds, but these are not supported by Microsoft and may block Windows Updates.

Supported Intel CPUs for Windows 11

Microsoft’s official list of supported Intel processors includes a wide range of modern Intel desktop, mobile, and server chips. These span multiple Core generations from the 8th generation Coffee Lake series all the way up to the latest 14th generation Core processors, as well as Pentium, Celeron, and select Xeon families.

Note: The official Microsoft list is comprehensive and includes series and families rather than every single SKU. The major categories below summarize those families as maintained in Microsoft documentation.

Intel Processor Families Supported

Core Series

  • Intel® Core™ 8th Generation (Coffee Lake)
    Includes Core i3, i5, i7, and i9 variants — the minimum supported desktop and mobile CPUs for Windows 11.

  • Intel® Core™ 9th Generation

  • Intel® Core™ 10th Generation

  • Intel® Core™ 11th Generation

  • Intel® Core™ 12th Generation (Alder Lake)

  • Intel® Core™ 13th Generation (Raptor Lake)

  • Intel® Core™ 14th Generation (Raptor Lake Refresh/Core Ultra)
    All Core i3, i5, i7, and i9 families from these generations are supported.

Pentium & Celeron

  • Intel® Pentium® Gold and Silver Series (various U, Y, N, and G series)
    Modern Pentium CPUs (4000 and newer) are included in the Windows 11 supported lineup.

  • Intel® Celeron® Series
    Several newer Celeron families are supported — especially 3000, 4000, 5000, 6000, and 7000 series chips where they meet instruction requirements.

Xeon & Workstation/Server

  • Intel® Xeon® Scalable Processors

  • Intel® Xeon® W Series

  • Other Xeon families included in modern Windows 11 support lists
    These higher‑end server and workstation CPUs are supported when they meet the documented security and instruction requirements.

Supported AMD CPUs for Windows 11

The AMD side of the Windows 11 CPU compatibility list features modern Ryzen, Ryzen Pro, and Threadripper families across desktop, mobile, and enterprise segments. Microsoft’s Windows 11 25H2 supported AMD processors list provides categories that include many series from Ryzen 10 through Ryzen 9000, along with EPYC and Athlon where applicable.

AMD Processor Families Supported

Ryzen Desktop Processors

  • AMD Ryzen™ 10 and 100 Series
    These include early Ryzen CPUs that meet minimum Windows 11 requirements.

  • AMD Ryzen™ 200 Series

  • AMD Ryzen™ 3000 Series G & GE

  • AMD Ryzen™ 4000 Series

  • AMD Ryzen™ 5000 Series

  • AMD Ryzen™ 6000 Series

  • AMD Ryzen™ 7000 Series

  • AMD Ryzen™ 8000 Series

  • AMD Ryzen™ 9000 Series
    All of the above families are listed as supported in the official documentation.

Ryzen AI & Specialized Lines

  • AMD Ryzen™ AI 300 Series / AI Max 300 / AI Z2 Extreme

  • Ryzen™ Z1 / Z2 Series
    These include chips designed for AI and high‑performance mobile segments and are part of Windows 11 compatibility.

Threadripper & Workstation

  • AMD Ryzen™ Threadripper™ Series (3000, 7000, and 9000)

  • AMD Ryzen™ Threadripper™ PRO Series
    Professional workstation parts are supported where they comply with Windows 11 hardware checks.

Athlon & EPYC

  • AMD Athlon™ 7000 U Series (exceptions apply in some sub‑series)

  • AMD EPYC™ (4004, 4005, 7003, 8004, 9004, and 9005 Series)
    These include both client Athlon CPUs and enterprise EPYC server processors.

Key Notes on CPU Compatibility

1. Minimum Generations

Official minimum requirements for Windows 11 CPU support are:

  • Intel: 8th generation Core and later

  • AMD: Ryzen 200 and later (plus specific earlier families where applicable)
    This reflects Microsoft’s emphasis on modern CPU features required for security and stability.

There are rare exceptions (e.g., certain Intel Core 7th Gen chips on OEM‑certified systems), but these are not generally supported for new installations.

2. Security & Feature Requirements

Windows 11 requires several CPU features beyond basic compatibility:

  • TPM 2.0

  • Secure Boot (UEFI firmware)

  • SSE4.2 and POPCNT instruction support
    Without these, even if a CPU is modern, Windows 11 may not install or boot properly.

3. OEM vs. End‑User Compatibility Lists

The official Microsoft supported CPU lists are primarily intended for OEMs building new Windows 11 devices. For existing systems, Microsoft recommends users check compatibility with the PC Health Check app rather than relying solely on the published lists.

4. Unsupported CPUs

Older processors such as pre‑8th‑gen Intel Core, first‑gen Ryzen‑100 series, and many legacy chips lack the necessary instruction sets and security features; hence, they are not supported for Windows 11 without modifications.

How to Check If Your CPU Is Supported

There are several ways to verify Windows 11 CPU compatibility:

  1. PC Health Check App
    Microsoft’s official tool checks if your current system meets Windows 11 requirements.

  2. System Information in Windows Settings
    Compare your listed CPU model against the supported lists above.

  3. Third‑party tools such as CPU‑Z can report support for required instructions like SSE4.2 and POPCNT.

Windows 11’s supported CPU ecosystem reflects Microsoft’s commitment to secure, modern computing. With official lists covering a broad range of Intel and AMD processors — from mainstream desktops and laptops to high‑end workstations and servers — most devices from the last several generations are fully supported as long as they meet additional hardware requirements.

Before purchasing or upgrading a PC, always verify CPU compatibility, especially if planning to run the latest Windows 11 versions (such as 25H2), and use the Microsoft PC Health Check app for the most accurate compatibility status on your exact hardware.

HiSuite software – Easy connection to Huawei Android devices

0

As with other mobile phone manufacturers such as Samsung, Sony, Motorola, etc. Huawei provides users of their devices with a program called HiSuite.

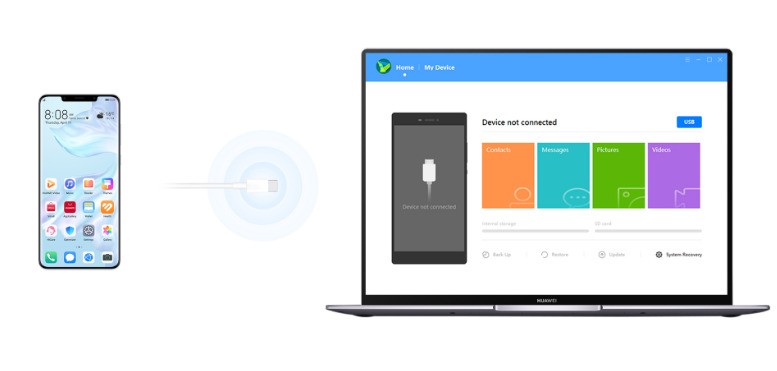
HiSuite is a versatile software tool designed to seamlessly manage your Huawei smartphone from your PC. It gives you full control over key aspects of your device, including contacts, messages, and more. Easily transfer photos, videos, documents, and other files between your phone and computer, and even update your mobile’s operating system with just a few clicks.

Download Huawei HiSuite
Huawei HiSuite
With HiSuite, you can efficiently handle file transfers, organize contacts, customize themes, and manage apps and multimedia content. The user-friendly interface features an attractive design and intuitive navigation, though some main action buttons could benefit from better highlighting for quicker access.
While the features aren’t groundbreaking, they meet the needs of everyday users effectively. You can effortlessly view, install, uninstall, or update applications. Contact management includes adding, editing, deleting, importing, and exporting entries, with similar options available for messages.
For media, browse images and videos in various modes, and import or export them as needed. A standout feature allows you to capture screenshots directly from your PC.

Essentially, it’s a way to use your PC as a way to customize, control and back up your phone.

Huawei HiSuite provides various tools in this program such as managing music, reading and sending SMS messages directly from your PC’s desktop and installing/uninstalling APK applications from your device. This freeware app can be a real-time savings.

Other features here can’t be lost and include synchronizing contacts and contact data, backing up data saved on your phone (such as photos, videos, music, etc.) and more. Huawei HiSuite supports wired USB and WiFi connections and can also function as a remote desktop.

HiSuite is a software that can send SMS messages.

Features and highlights:
-Easily manage your data and applications
-Download and install with a single click from the web
-Improved user experience of the Android smart device
-Easy connection to Huawei phone
-Managing data on devices
-Backing up and restoring data

Overall, HiSuite is a reliable, efficient software that delivers on its promises. It’s completely free, consumes minimal system resources, and simplifies device management. That said, including a built-in user guide—for tasks like creating photo albums or tackling more complex operations—would enhance the experience even further.

Download Huawei HiSuite software here

Panasonic SC-HTB100, Hisense HS205 and Philips TAB4000 Soundbar

0

Choosing the right budget soundbar can be tricky, especially when popular options look similar on paper. This review compares the Panasonic SC-HTB100, Hisense HS205, and Philips TAB4000 in detail—covering sound quality, features, design, and value—to help you decide which compact 2.0 soundbar best suits your home entertainment needs.

If you’re choosing between the Panasonic SC-HTB100, Hisense HS205, and Philips TAB4000, you’re basically picking from three budget-friendly 2.0 soundbars that all promise “better than TV speakers” without the complexity of a subwoofer or surround system. On paper they look similar… but they’re not the same in practice.

Below is a detailed comparison review that breaks down how they differ in design, specs, sound, features, and which one is best for different types of users.

Key Specs at a Glance

Let’s start with the essentials:

Panasonic SC-HTB100

  • Channels / Power: 2.0ch, 45 W RMS total (22.5 W per channel).

  • Drivers: Two full-range drivers (44 × 72 mm) with bass reflex port.

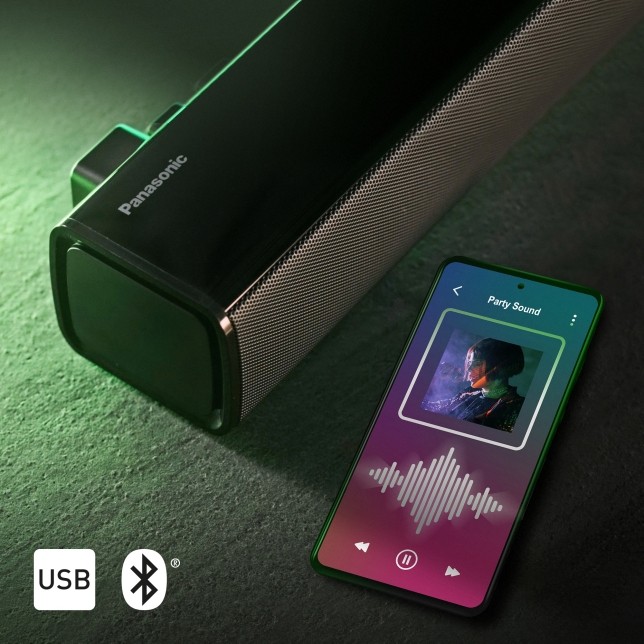
  • Connectivity: HDMI ARC (1×), optical, 3.5 mm line-in, USB, Bluetooth 5.0.

  • EQ Modes: Music, Voice, News.

  • Decoding: PCM only – no Dolby or DTS decoding.

  • Size / Weight: 762 × 58 × 68 mm, about 1.5 kg; wall-mountable.

Hisense HS205

  • Channels / Power: 2.0ch, 60 W (30 W × 2).

  • Drivers: Two full-range speakers.

  • Connectivity: HDMI ARC, optical, line-in, USB, coaxial, Bluetooth.

  • EQ Modes: Movie, Music, News (quick-select modes).

  • Special: Roku TV Ready – integrates with Roku TV and uses the Roku remote.

  • Size: 950 × 66 × 62 mm – widest of the three.

Philips TAB4000 (TAB4000/98 etc.)

  • Channels / Power: 2.0ch, 60 W max / 30 W RMS.

  • Drivers: 2 full-range drivers; frequency range roughly 80 Hz–20 kHz.

  • Connectivity: HDMI ARC, USB playback, Bluetooth 5.4, likely optical/audio-in depending on region.

  • EQ / Sound Enhancements: Treble and bass adjustment plus presets (Music, Movie, Voice, Stadium).

  • Size / Weight: 760 × 65 × 105 mm, ~1.45 kg; wall-mountable.

All three are simple 2.0 bars: no separate subwoofer, no Dolby Atmos, no surround virtualization tricks. The differences are in tuning, connectivity polish, and how “modern” each one feels.

Design & Build Quality

Panasonic SC-HTB100 – Slim and tidy

Panasonic SC-HTB100
Panasonic SC-HTB100

The Panasonic is the most compact and low-profile of the three in depth and height: only 58 mm tall and 68 mm deep, so it tucks under a TV easily and plays nicely with lower stands.

  • The design language is very “neutral black bar”: subtle branding, mesh grille, and no flashy accents.

  • At ~762 mm wide, it visually pairs best with TVs from about 43″ upwards, which Panasonic actually calls out.

  • Build quality feels solid for the price—rigid casing, clean lines, and a simple LED indicator.

If you’re tight on TV stand depth, the HTB100’s short depth and low height are a real plus.

Hisense HS205 – Long and living-room filling

The Hisense HS205 is the widest bar here at 950 mm, which visually matches 43–55″ TVs really nicely.

  • It is still slim in height (66 mm), so it won’t block most screens.

  • The aesthetic is again understated: matte black, simple grille, tiny logo.

  • For a budget bar, the casing feels reasonably sturdy—nothing premium, but nothing flimsy either.

The longer chassis gives more driver separation, which can subtly help stereo imaging (voices centred, effects more spread out).

Philips TAB4000 – Compact body, deeper footprint

The Philips TAB4000 is similar in width to the Panasonic (760 mm), but noticeably deeper at around 105 mm.

  • That extra depth gives more internal volume for the drivers and acoustic tuning, which can help mid-bass.

  • The design is very Philips-y: soft edges, minimal logo, and an overall clean look that doesn’t draw attention.

  • It’s also wall-mountable and comes with a bracket in the box.

If you’re wall-mounting below a TV, the TAB4000 looks neat and balanced. On a shallow stand, double-check the depth.

Design verdict:

  • Tight stand space → Panasonic HTB100 wins.

  • Wider TV (50–55″) and you want the bar to “span” the screen → Hisense HS205.

  • Wall-mount and slightly fuller look → Philips TAB4000.

Connectivity & Setup

All three aim to be “plug and play”, but there are meaningful differences.

HDMI ARC & TV integration

  • All three have HDMI ARC output, so you can connect via a single HDMI cable and control volume with most TV remotes via HDMI-CEC.

Where the Hisense and Philips pull ahead is in modern integration niceties:

  • Hisense HS205 is Roku TV Ready, which means on Roku TVs it integrates deeply into the on-screen menus and is fully controllable from a single Roku remote, with simplified audio settings.

  • Philips TAB4000 leverages HDMI-CEC (EasyLink) features like one-touch play and system audio control, again keeping things simple.

The Panasonic also supports HDMI-CEC (CEC is listed in its HDMI functions) Panasonic, but doesn’t offer a Roku-style “smart TV” partnership.

Other wired inputs

  • Panasonic SC-HTB100: Optical in, 3.5mm line-in, and USB (which can play MP3/WAV directly).

  • Hisense HS205: Optical, line-in, coaxial, and USB; the variety makes it easy to use with older TVs or set-top boxes.

  • Philips TAB4000: HDMI ARC and USB playback are confirmed; regional versions often include at least one extra audio-in (optical or analog), though this can vary.

If you’re connecting lots of devices directly to the soundbar (older consoles, CD players, etc.), the Hisense HS205 clearly offers the richest port selection.

Bluetooth & wireless streaming

  • Panasonic: Bluetooth 5.0, SBC codec, multi-pairing up to 8 devices.

  • Hisense HS205: Bluetooth (version not always specified publicly), designed for simple music streaming from phones/laptops.

  • Philips TAB4000: Bluetooth 5.4 with SBC, and Philips explicitly highlights improved stability and reduced lag vs. older implementations.

For Bluetooth quality and future-proofing, the Philips TAB4000 is the most advanced on paper.

Connectivity verdict:

  • Need lots of physical inputs → Hisense HS205.

  • Best wireless/Bluetooth implementation → Philips TAB4000.

  • Simple ARC + optical + analog is enough → Panasonic HTB100 is perfectly fine.

Sound Quality Comparison – Panasonic SC-HTB100, Hisense HS205, and Philips TAB4000

Now the important part: how they actually sound.

Overall tonal balance

Panasonic SC-HTB100
Reviewers consistently describe the HTB100 as clean, clear, and a big step up from TV speakers, especially with dialogue.

  • The tuning is slightly mid-forward, which keeps voices intelligible even at low volume.

  • The bass is modest – its small drivers and 45 W power limit the low-end punch, but the bass reflex port does give a bit more warmth than flat TV speakers.

  • High frequencies are generally smooth; not harsh, as long as you don’t push volume to the absolute max.

If you care primarily about dialogue clarity and are not expecting room-shaking bass, this works very well.

Hisense HS205
With 60 W total power, the HS205 has a bit more headroom than the Panasonic and can sound slightly bigger and livelier.

Hisense HS205
Hisense HS205
  • The Movie mode tends to push both bass and treble more, giving a more “cinematic” (V-shaped) sound.

  • Music mode flattens things out somewhat and can sound fairly balanced for pop/rock listening. News mode emphasizes the midrange, especially the presence region of speech, making commentators and news anchors stand out clearly.

Bass is still limited by the lack of subwoofer, but the extra power and longer bar can make it feel more room-filling in medium-sized rooms compared with the Panasonic.

Philips TAB4000
The TAB4000 also quotes 60 W max / 30 W RMS, with a frequency range of ~80 Hz–20 kHz. Reviews highlight clear stereo sound and solid midrange, with some limits at the deepest bass notes.

Philips TAB4000
Philips TAB4000
  • Unlike the other two, Philips actually offers treble and bass adjustment plus larger set of EQ presets (Music, Movie, Voice, Stadium), letting you fine-tune the sound more.

  • At moderate volumes, the sound is clean and detailed, with decent stereo separation and enough weight for everyday TV and casual music.

  • As you crank the volume, bass has its limits (remember it’s still a 2.0 bar), but distortion is kept reasonably in check for the category.

If you like to tweak the sound to taste – a bit more bass for music, a bit less for dialogue – the TAB4000 is the most flexible tuner here.

Dialogue clarity

All three have dedicated Voice/News style modes; they just go about it differently:

  • Panasonic: A Voice mode within its simple Music/Voice/News trio. Combined with its mid-forward character, this makes dialogue very intelligible, especially in smaller rooms.

  • Hisense: News mode plus the longer chassis, which keeps voices centred while some ambience spreads out. User reviews often call out clear speech as a strength at this price.

  • Philips: Voice preset and treble/bass controls; you can tweak out a bit of rumble and boost the clarity region if you want even sharper speech.

For out-of-the-box clarity, Panasonic and Hisense are neck-and-neck; for tweakability and custom tuning for your hearing, Philips wins.

Music performance

  • Panasonic: Good for background music and streaming over Bluetooth. But with 45 W and smaller drivers, it’s more about clarity and balance than energetic bass. Fine for acoustic, podcasts, and lighter genres.

  • Hisense: A bit more punch thanks to 60 W and the longer bar. For pop and casual listening, it feels livelier; still, don’t expect club-level bass.

  • Philips: Gets a lot of praise as a compact stereo system with 60 W max and decent mid-bass presence. With EQ options, you can shape it closer to your preference – slightly warmer for music, flatter for TV.

If music matters to you almost as much as TV, the Hisense HS205 and Philips TAB4000 feel more satisfying than the Panasonic, with Philips edging ahead thanks to EQ flexibility.

Loudness & room size

Rough guideline:

  • Small rooms / bedrooms (up to ~15 m²): Any of the three will be plenty. Panasonic easily covers this use-case.

  • Medium living rooms (~15–25 m²): The Hisense HS205 and Philips TAB4000 have more output and breadth. Their 60 W power ratings give more comfortable headroom for movie nights.

  • Large / very open spaces: All three will start to show their budget, 2.0-only limitations. If you want real cinematic impact, you’d move up to a 2.1 bar with a sub.

Panasonic SC-HTB100, Hisense HS205, and Philips TAB4000 – Features & Everyday Usability

Sound modes & presets

  • Panasonic SC-HTB100:

    • Sound modes: Music, Voice, News.

    • Simple, but it does cover the basics: movies/TV, news, and general music.

  • Hisense HS205:

    • Modes: Movie, Music, News (switched via remote).

    • Designed as “Quick Touch EQ” presets for different content types.

  • Philips TAB4000:

    • Modes: Music, Movie, Voice, Stadium.

    • Extra controls for treble and bass adjustment.

Philips clearly offers the richest set of audio controls—handy if you’re picky.

Smart TV friendliness

  • Hisense HS205: Roku TV Ready is a big advantage for Roku TV owners—simpler setup, one remote, and integrated on-screen options.

  • Panasonic and Philips: Both work with HDMI-CEC and ARC, so many TVs can still control them via the TV remote, but no branded “smart TV” certification is emphasized.

Setup experience

Across user reviews and manufacturer guides:

  • All three are generally praised for easy setup: plug into HDMI ARC, select the audio output in the TV settings, and you’re done.

  • Wall-mounting is fully supported, and both Panasonic and Philips explicitly supply brackets in the box.

Day-to-day, you’ll rarely interact with the bar itself—just volume and power via the TV/Roku remote.

Value & Pricing – Panasonic SC-HTB100, Hisense HS205, and Philips TAB4000

Exact prices vary by region and sales, but current trends:

  • Panasonic SC-HTB100 has often been seen as one of the cheapest name-brand soundbars, sometimes dropping well below its original price in sales (for example, Black Friday deals under £50 have been reported).

  • Hisense HS205 tends to sit a little above the very cheapest bars, but still clearly in the budget segment, frequently around entry-level pricing in US retailers like Walmart and Best Buy.

  • Philips TAB4000 is often priced similarly or slightly higher than the Hisense, marketed as a value-for-money EU-designed bar with Bluetooth 5.4 and HDMI-ARC.

In other words:

  • Panasonic = cheapest / strongest bargain potential.

  • Hisense = still budget, with a feature bump (power + Roku).

  • Philips = slightly more refined audio feature set and Bluetooth, but still affordable.

Which One Should You Buy?

Here’s how I’d break it down by use-case.

1) For pure TV dialogue clarity in a small room

Choose Panasonic SC-HTB100 if:

  • Your main problem is “I can’t hear what people are saying,” not “I need cinematic bass.”

  • You have a smaller bedroom TV (32–43″) and just want a clean, low-profile bar that’s much better than TV speakers.

  • You like the idea of simple modes (Music / Voice / News) and don’t care about advanced surround features.

Its 45 W output and mid-forward tuning are more than enough for small spaces, and its narrow depth is perfect for shallow stands.

2) For Roku TV owners and bigger living rooms

Choose Hisense HS205 if:

  • You own a Roku TV and want one-remote control plus seamless TV integration.

  • Your room is medium-sized, and you’d appreciate the extra 60 W headroom and wider bar for more “cinema feel.”

  • You plan to use various wired sources (set-top box via coaxial, legacy devices via line-in, etc.).

It’s the most generally versatile of the three—lots of ports, decent power, simple sound modes, and good value. For many typical living rooms, this is the most practical pick.

3) For people who like to tweak sound & stream via Bluetooth a lot

Choose Philips TAB4000 if:

  • You want to adjust bass and treble yourself, beyond just switching presets.

  • You listen to a lot of Bluetooth music and care about stable wireless audio—Bluetooth 5.4 is a nice step up.

  • You appreciate compact, wall-mount-friendly design with a bit more body (slightly deeper cabinet can help mid-bass).

It’s a great all-rounder if you’re in that sweet spot where music and films share equal time and you care more about tuning than absolute rock-bottom price.

4) If you’re a bass-lover or home-cinema enthusiast…

Honestly, none of these three bars will fully satisfy you if you really want impactful, chest-thumping bass or immersive surround. They are all 2.0 bars without subwoofers or surround formats like Dolby Digital/Atmos.

In that case, you’d be better off stepping up to a 2.1 system with a wireless subwoofer, even if that means moving away from these specific models.

If I had to summarise in one line per bar:

  • Panasonic SC-HTB100The “super-cheap but not nasty” clarity upgrade. Great if you just want something slim, simple, and far better than TV speakers, especially for spoken-word content and small rooms.

  • Hisense HS205The practical family choice. More power, more inputs, and Roku TV Ready integration make it the most flexible choice for typical living-room use and mixed content.

  • Philips TAB4000The tweaker’s budget bar. Similar power to the Hisense but with better Bluetooth and more nuanced EQ options, ideal if you want to fine-tune the sound and stream a lot of music.

How to Play DAV Files in VLC Player?

0

Video files come in a myriad of formats, each designed for specific purposes. One such format is the DAV file, commonly associated with surveillance and security systems. If you’ve ever tried to open a DAV file on your computer, you might have encountered frustration, especially when using popular media players like VLC. VLC Media Player, developed by VideoLAN, is a free, open-source software renowned for its versatility in handling various audio and video formats. However, DAV files aren’t natively supported in VLC without some tweaks or conversions. This article delves into everything you need to know about playing DAV files in VLC, from understanding the format to step-by-step instructions, troubleshooting, and alternatives. By the end, you’ll be equipped to handle these files seamlessly, whether for personal review of CCTV footage or professional analysis.DAV files, short for Digital Audio Video, are proprietary video files generated by Digital Video Recorders (DVRs) such as those from DVR365 or Dahua Technology.

They are often used in closed-circuit television (CCTV) systems to store recorded footage. What makes DAV unique is its encryption and modified MPEG compression, which enhances security but limits compatibility.

This encryption prevents unauthorized access, making DAV ideal for surveillance but problematic for everyday playback. Unlike standard formats like MP4 or AVI, DAV files require specialized players or modifications to open in universal software like VLC.VLC stands out as a go-to solution because it’s cross-platform (available on Windows, Mac, Linux, Android, and iOS), supports a vast array of codecs, and is completely free. Millions rely on it for media playback, streaming, and even basic conversions. However, direct playback of DAV in VLC isn’t straightforward due to the format’s proprietary nature. In older versions of VLC (pre-3.0.17), support was nonexistent, leading to errors like “File reading failed” or “Your input can’t be opened.”

Play DAV Files
Play DAV Files – photo: pixabay

Newer versions have improved, but adjustments are still necessary. This guide will cover two primary methods: tweaking VLC settings for direct playback and converting DAV to a compatible format like MP4. We’ll also explore why conversion might be preferable and how to avoid common pitfalls.

Understanding DAV Files and Their Challenges

Before diving into the how-to, it’s essential to grasp why DAV files pose challenges. Created by hardware like CCTV cameras and NVRs (Network Video Recorders), DAV files encapsulate video data with audio, timestamps, and sometimes metadata for forensic purposes.

The format uses a modified version of MPEG-4 compression, but with added encryption layers to protect sensitive footage from tampering. This is why standard players struggle— they lack the decryption keys or compatible demuxers (components that separate audio and video streams).Common scenarios where you might encounter DAV files include backing up home security footage, reviewing business surveillance, or analyzing evidence in legal contexts. For instance, if your DVR exports recordings as .dav, you’ll need a way to view them on a computer without the original hardware. VLC enters the picture as a robust alternative to proprietary players like DVR365 Player or Smart Player, which are often limited to Windows and lack VLC’s features like subtitles, playlists, and hardware acceleration.The main hurdles with DAV in VLC are:

  • Compatibility Issues: Without proper settings, VLC treats DAV as an unrecognized format.
  • Encryption: Some DAV files are heavily encrypted, requiring conversion.
  • Quality Preservation: Direct playback might lead to glitches if not handled correctly.
  • Platform Differences: Methods vary slightly between Windows, Mac, and Linux.

Despite these, VLC’s flexibility makes it possible to overcome them. Let’s move to the practical steps.

Method 1: Playing DAV Files Directly in VLC player by Adjusting Settings

The simplest way to play DAV in VLC is by modifying the player’s demuxer settings to handle the H.264 codec embedded in DAV files. This method works best with VLC version 3.0.17 or later, where DAV support was enhanced alongside DTS LBR audio.

Note that this tweak temporarily alters VLC’s behavior, making it incompatible with standard formats like MP4 until reverted.

  • Download and install the latest VLC from the official VideoLAN website (videolan.org).
  • Ensure your DAV file is accessible on your computer (copied from the DVR or external drive).
  • Backup your VLC settings if you’re cautious, though changes are reversible.

Step-by-Step Guide

  1. Launch VLC Media Player: Open the application on your device. If it’s your first time, familiarize yourself with the interface— the menu bar is at the top.
  2. Access Preferences: Click on “Tools” in the menu bar, then select “Preferences” from the dropdown. On Windows/Linux, you can use the shortcut Ctrl + P; on Mac, it’s Command + ,.
  3. Switch to Advanced View: In the Preferences window, look at the bottom-left corner for “Show settings.” By default, it’s set to “Simple.” Click “All” to reveal advanced options. This expands the left panel with detailed categories.
  4. Navigate to Demuxers: In the left panel, expand “Input/Codecs” by clicking the arrow next to it. Then, select “Demuxers.”
  5. Change Demux Module: On the right side, you’ll see “Demux module” set to “Automatic.” Click the dropdown and choose “H264 video demuxer.” This forces VLC to interpret DAV streams as H.264, which is the underlying codec.
  6. Save Changes: Click “Save” at the bottom. VLC might prompt a restart— do so if needed.
  7. Open the DAV File: Go to “Media” > “Open File” (or Ctrl + O on Windows/Linux). Browse to your DAV file and select it. VLC should now play the video.

If successful, you’ll see the footage with audio (if present). Playback controls like pause, seek, and fullscreen work as usual.

Play DAV Files in VLC Player

Troubleshooting This Method

  • Error Messages: If you get “File reading failed,” ensure you’re using VLC 3.0.17+. Update if necessary.
  • No Video/Audio: The file might be corrupted or overly encrypted. Test with another DAV file.
  • Playback Glitches: Lower the video quality in VLC’s settings or check your system’s hardware (e.g., GPU acceleration under Tools > Preferences > Input/Codecs > Hardware-accelerated decoding).
  • Reverting Changes: To play regular files again, repeat steps 1-6 but select “Automatic” for the demux module. This is crucial, as the H264 setting breaks compatibility with MP4, MKV, etc.
  • Mac/Linux Specifics: On Mac, preferences are under “VLC” menu. Linux users might need admin rights for installations.

This method is quick but has drawbacks— it’s not permanent, and frequent switching can be annoying. For a more reliable approach, consider conversion.Method 2: Converting DAV to MP4 for Seamless Playback in VLCConversion is often the best long-term solution, transforming DAV into MP4—a format VLC handles effortlessly without tweaks. MP4 offers broad compatibility across devices, preserves quality, and reduces file size. You can use VLC itself for conversion or third-party tools.Using VLC for ConversionVLC doubles as a converter, making it convenient if you avoid extra software.

  1. Open VLC and Access Converter: Launch VLC, go to “Media” > “Convert/Save” (Ctrl + R on Windows/Linux).
  2. Add DAV File: Click “Add” and select your DAV file. Click “Convert/Save” again.
  3. Choose Output Format: In the Profile dropdown, select “Video – H.264 + MP3 (MP4)” for standard quality. For HEVC (better compression), choose “Video – H.265 + MP3 (MP4).”
  4. Set Destination: Click “Browse” to choose a save location and name the file (e.g., output.mp4).
  5. Start Conversion: Hit “Start.” VLC will process the file— time varies by length and hardware.
  6. Play in VLC: Once done, open the new MP4 in VLC via “Media” > “Open File.”

This method is free and straightforward, but VLC’s conversion isn’t the
Using Third-Party ConvertersFor faster, feature-rich options:

  • Wondershare UniConverter: A paid tool (with free trial) that plays and converts DAV to 1000+ formats. Add files, play in built-in player, select MP4, and convert. Supports batch processing and editing (trim, subtitles).

    Pros: Lossless quality, hardware acceleration. Cons: Cost after trial.

  • Winxvideo AI: Free download with AI enhancements. Drag DAV, choose MP4, run conversion. Up to 47x faster with GPU support.

    Ideal for large files.

  • HandBrake (Free): Open-source; import DAV, preset to “Fast 1080p30,” output as MP4. Great for compression without quality loss.
  • Online Tools: Sites like Online-Convert.com allow uploads and quick DAV to MP4 conversion, but beware of privacy for sensitive footage.

After conversion, MP4 files play natively in VLC, editable in software like Adobe Premiere, and shareable easily.Pros and Cons of Each Method

Method
Pros
Cons
Direct Playback in VLC
No extra software needed; quick setup
Temporary; breaks other formats; potential glitches
Conversion via VLC
Free; integrated
Slower; basic options
Third-Party Conversion
Fast; advanced features; batch support
May require payment; learning curve

Conversion edges out for most users due to permanence and compatibility.Alternatives to VLC for DAV PlaybackIf VLC doesn’t suit, try:

  • Proprietary Players: DVR365 Player or Amcrest Smart Player for Windows—direct DAV support without conversion.
  • Smart Player: Free, supports playback and basic conversion.
  • Axon Investigate: For forensic needs, preserves metadata but pricey.
  • 5KPlayer or PotPlayer: Free alternatives with broader codec support.

For mobile, convert to MP4 first, as Android/iOS apps like VLC Mobile struggle with native DAV.

Playing DAV files in VLC is achievable through settings adjustments or conversion, turning encrypted surveillance footage into accessible media. Whether you’re a homeowner reviewing security clips or a professional handling evidence, these methods ensure smooth playback. Start with the direct method for quick views, but opt for conversion for long-term use. Always back up originals, and if issues persist, check for file corruption or update your software. With VLC’s power and these tips, DAV files won’t remain a mystery. For more advanced needs, explore tools like UniConverter to enhance your workflow. This approach not only solves immediate problems but empowers you in managing digital video assets effectively.

PotPlayer Review: A Detailed & Balanced Evaluation

0

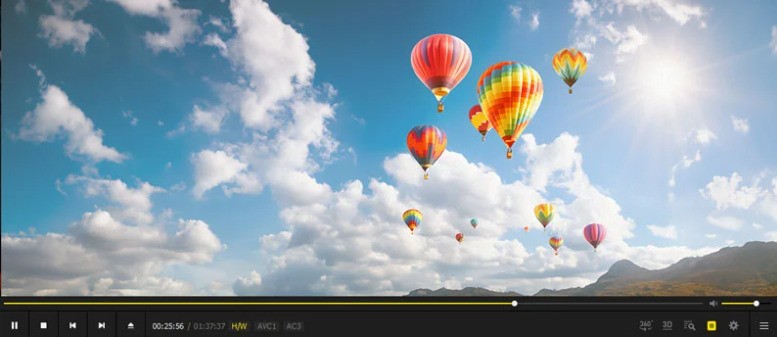
PotPlayer is a free multimedia player for Windows developed by the South Korean company Kakao. Designed as a successor to KMPlayer (developed by the same original author), PotPlayer aims to deliver a lightweight yet extremely powerful video playback experience. Its primary purpose is to offer smooth playback of virtually any media format while giving users deep control over audio, video, and rendering settings. Over the years, PotPlayer has built a reputation for being one of the most feature-packed media players available—but not without some controversies and limitations.

Key Features

Broad Media Format Support

PotPlayer supports an extensive list of formats, often without requiring additional codec installation. Commonly supported types include:

  • Video: MP4, MKV, AVI, MOV, WMV, FLV, HEVC/H.265, VP9

  • Audio: MP3, FLAC, AAC, OGG, WAV

  • Subtitles: SRT, ASS/SSA, VobSub, Blu-ray subtitles

  • Advanced containers: Blu-ray ISO, DVD folders, network streams

Built-in decoders ensure smooth playback even for high-bitrate 4K and 8K files.

PotPlayer is a free multimedia player
PotPlayer – free multimedia player

User Interface and Layout

PotPlayer has a clean, modern interface with dark-theme aesthetics. While the default UI is simple, it is highly customizable:

  • Skins and theme packs

  • Adjustable panels (playlist, bookmarks, equalizer, video controls)

  • Minimalistic mode for distraction-free viewing

The interface may feel slightly dense for casual users but is a dream for power users who love customization.

Extensive Customization Options

PotPlayer is known for its remarkable degree of configurability:

  • Video renderers (EVR, madVR compatibility, Direct3D9/11)

  • Audio filters, output modules, DSP, and equalization

  • Subtitle styling, sync adjustments, and automation rules

  • Keyboard/mouse gestures and customizable hotkeys

  • Playback speed and frame interpolation options

These advanced controls rival professional playback tools.

Performance and Resource Usage

PotPlayer is optimized for fast startup and smooth performance. Highlights include:

  • Very low CPU/RAM usage

  • Hardware acceleration (DXVA, CUDA, QuickSync)

  • Fluid playback of high-bitrate 4K and even 8K videos

  • Fast seeking and buffering for large files

Even on older systems, PotPlayer typically runs smoothly.

Advantages of PotPlayer

Exceptional Format Compatibility

PotPlayer’s ability to play virtually anything makes it a top choice for users who handle diverse media libraries, replacing the need for separate codecs or plugins.

Highly Customizable Viewing Experience

Few players offer PotPlayer’s level of control. Whether you want fine-tuned subtitle positioning or specific video color adjustments, PotPlayer excels.

Superior Playback Performance

Thanks to hardware acceleration and efficient internal decoders, users frequently report:

  • Smooth 4K playback

  • Fast loading and seeking

  • Stable performance even with large, high-quality files

This places PotPlayer on par with MPC-HC, VLC, and MPV for high-resolution content.

Useful Advanced Tools

PotPlayer includes several features that are not common in other media players:

  • Video capture and screen-recording tools

  • Bookmarking of scenes

  • Built-in subtitle search (depending on region)

  • 3D playback and VR support

  • A/B repeat loops

  • Frame-by-frame navigation

Such tools appeal especially to power users, editors, and enthusiasts.

Free and Lightweight

Despite offering “premium-player” features, PotPlayer remains free, lightweight, and efficient compared to some competitors that require paid versions (e.g., PowerDVD).

Drawbacks and Limitations

Update and Installer Concerns

Historically, some users reported that the PotPlayer installer attempted to bundle optional promotional software. While recent versions are cleaner, this reputation remains a concern. Users must still be cautious during installation.

Overwhelming for Casual Users

PotPlayer’s extensive menus, settings, and technical terminology may intimidate beginners. Compared to VLC’s simpler interface, PotPlayer can feel complex or cluttered.

Windows-Only Software

PotPlayer is not available on macOS or Linux. This limits its adoption and makes it less flexible than VLC or MPV, which work across multiple platforms.

Unclear Development Pace

PotPlayer once had very frequent updates, but in recent years, updates have become less predictable. Some users worry about:

  • Slower bug fixes

  • Less communication from developers

  • Occasional instability after updates

Though the player remains functional and stable for most users, the shift in update frequency can be seen as a drawback.

Limited Streaming Integration

While PotPlayer can handle network streams, it lacks the native streaming integrations found in players like Kodi or Plex. There is no library management system—PotPlayer is purely a playback tool.

PotPlayer is a powerful, free, and highly customizable multimedia player that stands out for its exceptional format support, deep configuration options, and excellent playback performance. It is ideal for enthusiasts and users who want complete control over video rendering, audio output, and subtitle behavior. However, its complexity, update concerns, and Windows-only availability may deter some users who prefer a simpler, cross-platform solution.

PotPlayer is an outstanding choice for power users, video collectors, and anyone who demands advanced playback tools. If you frequently watch high-resolution videos, need precise playback controls, or enjoy customizing your media experience, PotPlayer is one of the best free players available.

However, if you prefer a simple, no-configuration media player or need something cross-platform, alternatives like VLC, MPV, or MPC-HC may be more suitable.

Overall, PotPlayer earns a strong recommendation for its performance, customization, and depth—provided that users are comfortable navigating its extensive feature set.

Which browsers are more secure than Chrome and why?

0

In this short review about browsers that are more secure than Chrome involves an in-depth look at the key factors influencing browser security, how different browsers stack up in terms of privacy and protection against malware and other threats, and why certain browsers are considered more secure. Here’s an in-depth exploration that evaluates four browsers known for their emphasis on security, compared to Chrome.

Web browsers are the gateways to the internet, but they also serve as entry points for cybercriminals to exploit vulnerabilities in your system. Google Chrome, one of the most popular browsers in the world, has a robust security infrastructure, but it also comes with potential privacy concerns. For users who prioritize security over all other features, there are several browsers that may offer stronger protection, more frequent updates, and enhanced privacy features.

In this review, we will explore four browsers considered more secure than Chrome and examine why each stands out in terms of protecting user data and providing a safer browsing experience.

1. Brave Browser

Overview:

Brave is a relatively new web browser that aims to provide users with better privacy and security than traditional browsers like Chrome. It was developed by Brendan Eich, the creator of JavaScript and former Mozilla CEO. Brave focuses on blocking ads and trackers by default, ensuring that users have a smoother and more secure browsing experience.

Key Security Features:

  • Ad Blocking and Tracker Prevention: Brave blocks intrusive ads and trackers by default, which significantly reduces the risk of malware, spyware, and other types of tracking. By preventing ads from loading, Brave also improves page load times.

  • HTTPS Everywhere: Brave comes with HTTPS Everywhere pre-installed, an extension that automatically redirects users to secure HTTPS websites whenever available, preventing potential Man-in-the-Middle (MITM) attacks and eavesdropping on sensitive data.

  • Private Browsing with Tor: Brave offers a private browsing mode that integrates Tor, a privacy-focused network designed to conceal your identity by routing your internet traffic through multiple relays. This makes it harder for third parties to track your online activities and location.

  • Fingerprinting Protection: Brave uses technology to block browser fingerprinting techniques, which are methods of tracking users across websites even without cookies.

  • No Data Harvesting: Unlike Chrome, which gathers a vast amount of user data for advertising purposes, Brave does not track or sell your browsing data. Instead, Brave compensates users through its cryptocurrency-based Basic Attention Token (BAT) system, which allows users to opt into ads if they choose to earn rewards.

Why It’s More Secure:

Brave’s combination of ad blocking, tracker prevention, and integration with Tor makes it a compelling option for users who prioritize privacy and security. The absence of data harvesting and its use of HTTPS Everywhere further enhance its security posture. By blocking third-party scripts and trackers, it reduces the risk of malicious payloads being delivered to your device.

browsers considered more secure than Chrome
photo – pixabay

2. Mozilla Firefox

Overview:

Mozilla Firefox is a highly respected browser in the open-source community, known for its commitment to privacy and security. Firefox offers many features that help protect users from a variety of online threats while also prioritizing user control over data. While Chrome has become synonymous with Google’s extensive data collection practices, Firefox has taken a more conservative approach in terms of privacy.

Key Security Features:

  • Enhanced Tracking Protection (ETP): Firefox blocks known trackers by default. It uses a built-in database to block social media trackers, cross-site tracking cookies, and fingerprinting attempts, which are methods that websites and advertisers use to track user behavior across multiple sites.

  • Facebook Container: This is an add-on available for Firefox that isolates Facebook’s tracking scripts from the rest of your browsing. This prevents Facebook from collecting data about your activity outside its platform.

  • Container Tabs: Firefox’s Container Tabs feature lets you segregate your browsing activities into different containers (e.g., one for banking, one for shopping, and one for social media). This prevents websites from linking your sessions together and creating a detailed profile of you.

  • Security Updates and Patches: Firefox is known for being quick to release security updates and patches, making it one of the most proactive browsers in addressing vulnerabilities.

  • DNS-over-HTTPS (DoH): Firefox supports DNS-over-HTTPS, which encrypts DNS requests and prevents third parties, such as ISPs, from seeing which websites you visit. This helps reduce your exposure to surveillance and improves privacy.

  • Privacy-focused Search Engine: Firefox also integrates with privacy-focused search engines like DuckDuckGo by default, which prevents search engines from tracking user queries or storing personal data.

Why It’s More Secure:

Firefox’s approach to security and privacy is centered around providing users with control over their own data. With features like Enhanced Tracking Protection and Container Tabs, Firefox makes it difficult for websites to track users across different domains, reducing the risk of surveillance and unwanted data collection. The use of DoH and fast security updates also contribute to its reputation as one of the most secure browsers available.

3. Safari

Overview:

Apple’s Safari browser is often overlooked in the browser wars, but it’s one of the most secure options for macOS and iOS users. Safari has a strong focus on privacy and integrates many security features designed to keep users safe while browsing. Apple’s emphasis on privacy extends beyond just the browser and into the entire ecosystem, making it a good choice for users who value security.

Key Security Features:

  • Intelligent Tracking Prevention (ITP): Safari uses machine learning to identify and block cross-site tracking, preventing advertisers from collecting data on your browsing activities across websites. ITP also ensures that cookies are only stored for a limited amount of time, minimizing the risk of long-term tracking.

  • Privacy Report: Safari provides a Privacy Report feature that lets users see which websites are attempting to track them. It also displays how many trackers have been blocked, allowing users to evaluate their online privacy.

  • Sandboxing: Safari uses sandboxing technology to isolate processes from one another, preventing a compromised website or web application from affecting other parts of your system.

  • Password Monitoring: Safari alerts you if any of your stored passwords have been involved in a data breach, encouraging you to update them to prevent any potential security risks.

  • Built-in Anti-Phishing Features: Safari automatically warns users if they are about to visit a known phishing site. The browser also uses a secure connection to check for malicious websites in real time, which helps protect users from entering harmful sites.

  • Secure WebRTC: Safari includes security features that prevent WebRTC (a technology for real-time communication) from leaking users’ IP addresses, even when using VPN services. This ensures anonymity when browsing.

Why It’s More Secure:

Safari’s focus on privacy and its use of intelligent tracking prevention make it a great choice for users who are concerned about being tracked by advertisers and third parties. Its strong sandboxing features and phishing protection make it harder for malicious websites to harm users, while its password monitoring system helps ensure that personal information stays secure.

4. QuteBrowser

Overview:

QuteBrowser is a lesser-known, minimalist web browser that places a heavy emphasis on security, privacy, and user control. Unlike the other browsers mentioned, QuteBrowser is more of a niche choice, particularly for advanced users who want a lightweight and highly customizable browsing experience. It is based on QtWebEngine, a web rendering engine, and is designed to be keyboard-centric.

Key Security Features:

  • Minimalism for Better Security: QuteBrowser’s minimalist design ensures that there are fewer features and extensions that could potentially be exploited by attackers. It removes unnecessary elements that could create vulnerabilities, making it a more secure option for users who want to reduce their attack surface.

  • Customizable Privacy Settings: QuteBrowser allows users to fine-tune their privacy and security settings, including blocking scripts, disabling JavaScript, and preventing unwanted cookies. It gives users granular control over which websites can access sensitive data.

  • No Data Collection: QuteBrowser is an open-source project with a focus on privacy. Unlike Chrome, QuteBrowser does not collect any user data, making it a highly secure option for those who value complete privacy.

  • HTTPS and TLS Support: QuteBrowser supports HTTPS by default and ensures that TLS (Transport Layer Security) is used for secure communications. This prevents Man-in-the-Middle (MITM) attacks by ensuring all communications are encrypted.

  • Security Through Isolation: Since QuteBrowser uses a separate process for each tab, a vulnerability in one tab is less likely to affect others. This sandboxing effect reduces the risk of cross-site scripting (XSS) attacks and other web-based exploits.

Why It’s more secure than Chrome:

QuteBrowser’s minimalistic design reduces the potential attack surface by removing unnecessary features, making it a more secure alternative for advanced users. Its open-source nature ensures transparency, and its customizable privacy settings give users complete control over their browsing experience.

In the ongoing battle for privacy and security in the digital age, Google Chrome remains a dominant player. However, for users who prioritize security, there are several browsers that offer enhanced privacy and more robust protection against online threats.

  • Brave stands out for its default ad-blocking, tracker prevention, and integration with Tor, offering superior protection against surveillance.

  • Mozilla Firefox offers a range of privacy-focused features like Enhanced Tracking Protection and Container Tabs, along with fast security updates.

  • Safari integrates strong privacy tools, including Intelligent Tracking Prevention, while maintaining a seamless user experience across Apple devices.

  • QuteBrowser provides a minimalist, open-source experience for advanced users who want granular control over their security and privacy settings.

Each of these browsers offers distinct advantages in terms of security, and the best choice will depend on your individual needs.

HDMI Cables: Types, Differences, and What to Look Out For

0

High-Definition Multimedia Interface (HDMI) cables have become an integral part of modern technology, facilitating the transmission of both audio and video signals between devices. Whether you’re connecting a TV to a gaming console, a computer to a monitor, or a projector to a laptop, HDMI cables play a crucial role in ensuring high-quality image and sound output. But with so many different types of HDMI cables available in the market, it can be challenging to understand which one is right for your needs. In this article, we will explore the different types of HDMI cables, their key differences, and what you should look out for when choosing the right cable for your setup.

1. What is HDMI?

HDMI is a digital interface standard used for transmitting high-definition audio and video signals from a source device to a display device. First introduced in 2003, HDMI has largely replaced analog connections like VGA, DVI, and composite cables because of its ability to transmit high-quality digital signals over a single cable, simplifying the setup of home entertainment systems, computers, and professional equipment.

HDMI cables come in various versions, each supporting different video resolutions, audio formats, and features. Understanding the distinctions between these versions is essential for getting the most out of your HDMI-enabled devices.

2. Types of HDMI Cables

Not all HDMI cables are created equal, and they can be categorized based on the HDMI specification they support. The most common types are as follows:

1.1 Standard HDMI Cable

This is the most basic HDMI cable, designed to carry HD video signals at resolutions up to 1080p. However, it is no longer widely used in newer devices, as it lacks support for features like 4K video or high refresh rates. While it may still work with older equipment, it is generally recommended to opt for more modern HDMI cable versions for current technology.

Bravo 8K Performance
Bravo 8K Performance – Kordz

1.2 High-Speed HDMI Cable

The High-Speed HDMI cable supports 1080p and 4K video resolutions, making it suitable for most home theater setups, Blu-ray players, gaming consoles, and streaming devices. This cable is capable of supporting up to 4K resolution at 30Hz, which is ideal for watching movies, playing games, and streaming video content.

1.3 Premium High-Speed HDMI Cable

With the increasing demand for 4K and even 8K content, HDMI cables that can handle high resolutions and refresh rates have become more important. Premium High-Speed HDMI cables are designed to support resolutions up to 4K at 60Hz and support features like High Dynamic Range (HDR), wider color gamuts, and faster refresh rates. They ensure a smooth and crisp viewing experience, especially for gaming or high-definition video streaming.

1.4 Ultra High-Speed HDMI Cable

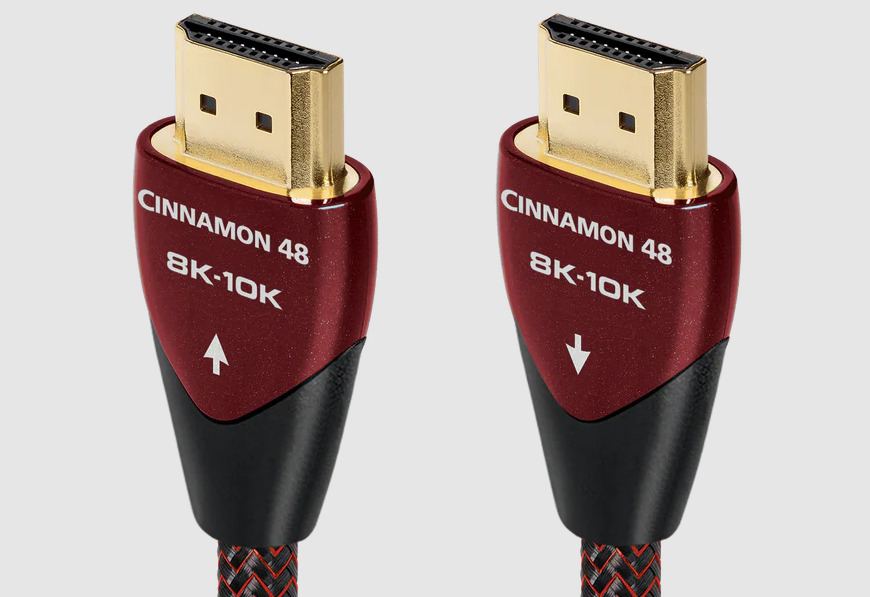
The Ultra High-Speed HDMI cable is the latest and most advanced option, supporting 4K, 8K, and even 10K video resolutions at refresh rates of up to 120Hz. These cables are designed for high-end devices, such as next-gen gaming consoles (like the PlayStation 5 and Xbox Series X), 8K TVs, and advanced home theater systems. Ultra High-Speed HDMI cables support a variety of cutting-edge technologies, including enhanced audio return channel (eARC), variable refresh rate (VRR), and automatic low latency mode (ALLM) for gaming.

1.5 HDMI with Ethernet

Some HDMI cables include an Ethernet channel, which allows devices to share an internet connection without the need for a separate Ethernet cable. This feature is particularly useful for smart TVs, game consoles, and streaming devices that require a stable internet connection to stream content. HDMI with Ethernet is typically found in newer HDMI 2.0 and 2.1 cables, though it is not as commonly used as standard HDMI cables.

1.6 HDMI Mini and Micro Cables

In addition to full-sized HDMI cables, there are also mini and micro HDMI versions. These cables are used primarily for connecting portable devices, such as tablets, cameras, and laptops, to external displays or projectors. The mini HDMI (Type C) and micro HDMI (Type D) cables are smaller in size but still provide the same functionality as their full-sized counterparts. Be sure to check your device’s HDMI port to determine which cable type is compatible.

AudioQuest Cinnamon 48 8K-10K 48Gbps HDMI cable

1.7 Active HDMI Cables

Active HDMI cables contain built-in signal boosters or chips that amplify the HDMI signal, allowing it to travel longer distances without degradation. These cables are typically used when you need to connect devices over long distances, such as when wiring a projector to a receiver in a large room or home theater setup. Active HDMI cables are available in both standard and high-speed versions.

3. Key Differences Between HDMI Cable Types

The primary differences between HDMI cables stem from the version of HDMI they support, as well as their maximum resolution, refresh rate, and supported features. Let’s break down the most important differences to consider when selecting the right HDMI cable for your needs.

3.1 Video Resolution and Refresh Rate

One of the most important factors in choosing an HDMI cable is understanding the video resolution and refresh rate that your devices support. Here’s a quick overview of how different cable versions handle resolution and refresh rate:

  • Standard HDMI Cable (1.1): Supports up to 1080p resolution at 60Hz. No support for 4K, 3D video, or HDR.

  • High-Speed HDMI Cable (1.2): Supports 1080p resolution and 4K at 30Hz. Lacks support for higher refresh rates, HDR, or wider color gamuts.

  • Premium High-Speed HDMI Cable (1.3): Supports 4K at 60Hz, HDR, and improved color accuracy (Rec. 2020 color space). Ideal for most current 4K TVs and gaming systems.

  • Ultra High-Speed HDMI Cable (1.4): Supports 4K at 120Hz, 8K at 60Hz, and 10K at 120Hz. This cable is necessary for cutting-edge technologies, such as 8K content, and provides smoother visuals for gaming and other high-refresh rate applications.

3.2 HDR (High Dynamic Range)

HDR is a technology that enhances the contrast and color range in videos, offering a more vibrant and lifelike image. If you are watching content in HDR, such as 4K HDR movies or gaming in HDR, you will need a cable that supports this feature. Only Premium High-Speed HDMI cables (or higher versions) support HDR, and these are essential for enjoying the full range of colors and contrast that HDR content offers.

3.3 Audio Support

Another factor to consider is the audio capabilities of your HDMI cable. While all HDMI cables support standard stereo or surround sound, more advanced cables like Ultra High-Speed HDMI support additional audio features such as eARC (Enhanced Audio Return Channel). eARC allows the transmission of high-quality audio formats, including Dolby Atmos and DTS:X, from the TV to a soundbar or AV receiver.

3.4 Gaming Features

If you’re a gamer, choosing the right HDMI cable can make a big difference in your gaming experience. For next-gen gaming consoles like the PlayStation 5 and Xbox Series X, a High-Speed HDMI or Ultra High-Speed HDMI cable is necessary to achieve the best visual performance. Ultra High-Speed cables, in particular, support higher refresh rates (up to 120Hz), which are crucial for smooth gameplay and reduce motion blur during fast-paced games. Furthermore, the Variable Refresh Rate (VRR) and Auto Low Latency Mode (ALLM) features, found in HDMI 2.1 cables, provide an even better experience by ensuring smoother gameplay with minimal input lag.

4. What to Look Out For When Choosing HDMI Cables

When shopping for an HDMI cable, there are several important factors to consider to ensure you’re getting the right cable for your needs.

4.1 Cable Length

The length of the HDMI cable is an important factor to consider, as longer cables can experience signal degradation. In general, try to keep your HDMI cable length under 10 feet (3 meters) for the best performance. If you need to go beyond that, consider using an active HDMI cable with signal boosting technology.

4.2 Version Compatibility

Make sure the HDMI cable version matches the capabilities of your devices. For example, if you have a 4K TV but are using an older Standard HDMI cable, you won’t be able to enjoy the full 4K experience. Always match the cable version to the resolution and refresh rate you intend to use.

4.3 Build Quality

While most HDMI cables are relatively affordable, the build quality can vary. Premium cables often feature better shielding to protect against interference, as well as more durable connectors. Look for cables with reinforced connectors, braided exteriors, and gold-plated contacts, which are less prone to corrosion.

4.4 Certification and Standards

When shopping for HDMI cables, especially for 4K or higher resolutions, make sure you choose certified cables. Certified cables, such as those with the “Premium Certified” or “Ultra Certified” logos, have been tested to meet industry standards and ensure reliable performance.

4.5 Price vs. Quality

Finally, consider the price-to-performance ratio when purchasing an HDMI cable. While premium cables often come with higher price tags, there are many affordable options that still deliver excellent quality. Avoid overpaying for cables that are unnecessarily expensive without offering significant performance benefits over standard cables.

5. Conclusion

HDMI cables are essential for connecting modern devices and transmitting high-definition audio and video signals. With multiple types and versions available, it’s important to choose the right one for your needs based on factors such as resolution, refresh rate, audio support, and gaming features. Always ensure that the HDMI cable you select is compatible with your devices and meets the required specifications for your setup. By understanding the differences between HDMI cable types and knowing what to look for, you can enjoy a superior viewing and gaming experience without the confusion of selecting the wrong cable.

Decide Between QNED, QLED, ULED, and NanoCell: Which TV is Right for You?

0

When it comes to purchasing a new TV, the choice of panel technology plays a pivotal role in determining the quality of your viewing experience. With so many options available in the market, it can be overwhelming to decide between QNED, QLED, ULED, and NanoCell. Each of these technologies boasts its unique set of advantages, and understanding how they differ can help you make an informed decision based on your viewing preferences, budget, and desired features.

In this article, we’ll break down the key characteristics of each technology and help you navigate the pros and cons, ultimately answering the question: which TV should you choose? Whether you’re a movie buff, a casual viewer, or a gamer, this guide will help you decide which panel suits your needs.

Understanding TV Panel Technologies

Before diving into the specifics of QNED, QLED, ULED, and NanoCell, let’s first understand the basic function of a TV panel. The panel is the core component responsible for displaying images and videos on the screen. Different technologies are used in the panel to enhance the quality of the image, including color accuracy, contrast, brightness, and viewing angles.

The four panel technologies in question — QNED, QLED, ULED, and NanoCell — are all part of the latest generation of LED-backlit LCD technology. While they all use LCD panels, the difference lies in how the individual technologies modify the backlighting and the panel structure itself.

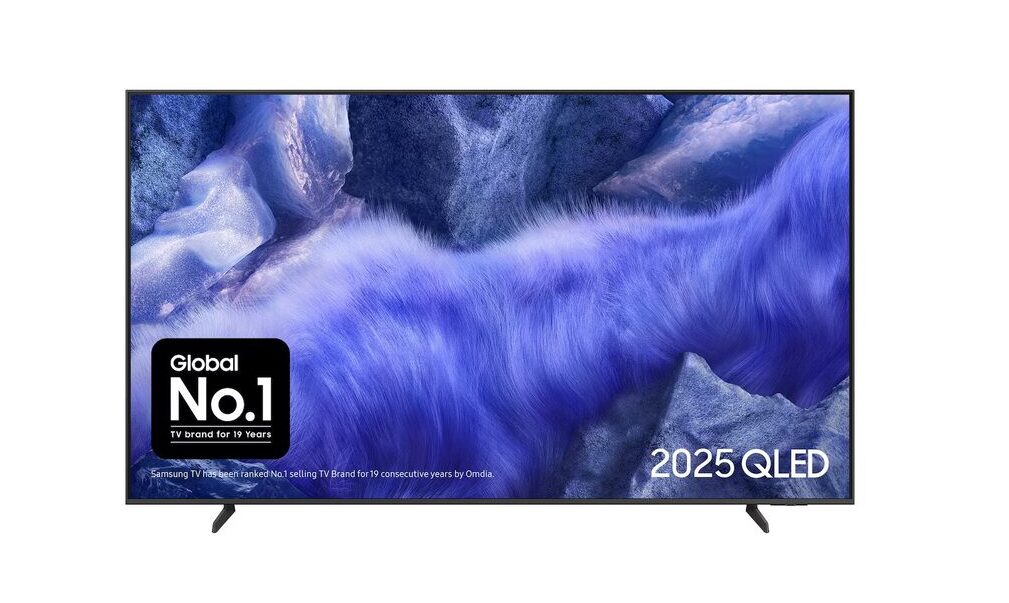
What Is QLED?

QLED stands for Quantum Dot Light Emitting Diode. It is a technology developed by Samsung that uses quantum dots — tiny nanocrystals — to enhance the backlight. These quantum dots emit light when illuminated by an LED backlight, creating more vibrant and accurate colors.

Advantages of QLED:

  1. Vivid Colors: Quantum dots help QLED TVs deliver more vibrant and saturated colors compared to traditional LED panels.

  2. High Brightness: QLED TVs can achieve high peak brightness, which makes them suitable for viewing in bright rooms.

  3. Long Lifespan: QLED panels are known for their longevity, offering years of reliable performance without significant degradation in color or brightness.

  4. Affordability: While not as affordable as traditional LED TVs, QLED is generally less expensive than OLED and QNED technologies.

    QLED
    QLED – technology developed by Samsung

Disadvantages of QLED:

  1. Black Levels: While QLED delivers great brightness and color accuracy, it can’t achieve the deep black levels of OLED or QNED due to its reliance on LED backlighting.

  2. Viewing Angles: The viewing angles of QLED TVs can be narrower than OLED and QNED, meaning the image may degrade when viewed from the side.

What Is QNED?

QNED (Quantum Nanocell Emitting Diode) is a hybrid technology developed by LG. It combines the benefits of quantum dots and NanoCell technology to create a more advanced backlighting system. QNED utilizes a mini-LED backlight, where tiny LEDs are used for more precise control over dimming zones. This results in improved contrast, better black levels, and enhanced brightness.

Advantages of QNED:

  1. Improved Black Levels: The mini-LED backlight allows for more precise local dimming, leading to better contrast and deeper black levels compared to standard QLED panels.

  2. Enhanced Brightness: Thanks to the mini-LED backlight, QNED TVs are capable of reaching higher brightness levels without sacrificing color accuracy.

  3. Wide Color Gamut: Combining quantum dots and NanoCell technology, QNED TVs offer a broader color spectrum for a more lifelike image.

  4. Thin and Sleek Design: The mini-LED system allows for a thinner TV design compared to traditional LED or LCD TVs.

Disadvantages of QNED:

  1. Price: QNED TVs tend to be more expensive than standard QLED models, mainly due to the advanced technology and mini-LED backlighting.

  2. Not True OLED: While QNED offers impressive black levels, it still doesn’t match the pure blacks and infinite contrast of OLED displays.

What Is ULED?

ULED (Ultra LED) is a proprietary technology developed by Hisense, a Chinese electronics brand. ULED enhances traditional LED-backlit LCD TVs by incorporating a series of advanced features to improve brightness, color, and contrast. The key elements of ULED technology include local dimming, quantum dot technology, and high refresh rates.

Advantages of ULED:

  1. Cost-Effective: ULED TVs are typically more affordable than QLED and QNED, making them a solid choice for those on a budget who still want good picture quality.

  2. Improved Contrast: ULED panels utilize local dimming and other enhancements to deliver better contrast, especially in dark scenes.

  3. Bright and Vivid Colors: ULED TVs can achieve high peak brightness and wide color gamuts due to quantum dot technology.

  4. Great for Sports and Gaming: With high refresh rates, ULED TVs are ideal for fast-moving content like sports and video games.

Disadvantages of ULED:

  1. Black Levels: While the local dimming system improves black levels, ULED still can’t match the depth of blacks seen on QNED or OLED TVs.

  2. Viewing Angles: Like QLED, ULED TVs have narrower viewing angles compared to OLED or QNED.

What Is NanoCell?

NanoCell is LG’s proprietary technology designed to enhance the color and clarity of LED-backlit LCD TVs. It uses nanoparticles integrated into the screen’s panel to absorb unwanted light wavelengths and improve the accuracy of colors displayed on the screen.

Advantages of NanoCell:

  1. Accurate Color Representation: The nanoparticles in NanoCell technology filter out impure colors, resulting in more accurate and vibrant color reproduction.

  2. Wide Viewing Angles: NanoCell technology enhances the viewing angles of LCD panels, so the image quality remains consistent even when viewed from the side.

  3. Affordable Option: NanoCell TVs are generally more affordable than QLED or QNED, making them a good middle-ground option between budget LED and premium models.

  4. Great for Bright Rooms: NanoCell TVs offer good brightness levels and color accuracy, making them ideal for well-lit environments.

Disadvantages of NanoCell:

  1. Black Levels: Like other LCD-based technologies, NanoCell TVs struggle to deliver true black levels, especially in dark scenes.

  2. Limited Contrast: The contrast performance of NanoCell technology is not as strong as QLED, QNED, or OLED panels.

Comparison: QNED vs. QLED vs. ULED vs. NanoCell

Let’s break down how these technologies compare across key metrics:

MetricQNEDQLEDULEDNanoCell
Color AccuracyExcellent (quantum dots + NanoCell)Excellent (quantum dots)Good (quantum dots)Very good (nano particles)
BrightnessExcellent (mini-LED + quantum dots)Very good (quantum dots)Good (local dimming + quantum dots)Good (high brightness)
Black LevelsExcellent (mini-LED dimming)Good (limited local dimming)Fair (local dimming)Fair (no local dimming)
ContrastExcellent (local dimming + quantum)Very good (local dimming)Good (local dimming)Fair (no true local dimming)
Viewing AnglesExcellent (better than QLED)Fair (narrower viewing angles)Fair (narrower viewing angles)Good (improved angles)
Price RangeHighMedium-HighMediumMedium-Low
Best ForCinematic experience, detailBright rooms, vivid colorsBudget-conscious with good performanceColor accuracy and wide angles

Which TV Should You Choose?

Choose QNED if:

  • You want top-tier contrast and black levels.

  • You prefer a high-end TV with excellent color accuracy and brightness.

  • You are willing to invest in a premium TV for the best possible picture quality, especially in dark rooms.

  • You are looking for a sleek, modern design with advanced features.

Choose QLED if:

  • You want vibrant colors and high brightness at a more affordable price than QNED.

  • You typically watch TV in a bright room where peak brightness matters.

  • You don’t mind sacrificing perfect black levels for better affordability and brightness.

Choose ULED if:

  • You are on a budget but still want a TV with good contrast, colors, and high refresh rates.

  • You are interested in sports, gaming, or fast-moving content.

  • You prefer a good value for money without diving into the premium price range of QNED or QLED.

Choose NanoCell if:

  • You want accurate colors and wide viewing angles at a more affordable price than QNED or QLED.

  • You typically watch TV in a bright room and value color clarity over deep blacks.

  • You don’t mind a bit of compromise on contrast and black levels for a more budget-friendly option.

Deciding between QNED, QLED, ULED, and NanoCell technology depends largely on your budget and specific viewing needs. If you’re looking for the ultimate picture quality with the best black levels and contrast, QNED is the way to go. On the other hand, if you need something more affordable without sacrificing too much in terms of brightness and color, QLED or ULED offers excellent value. NanoCell is perfect for those who value color accuracy and wide viewing angles at a lower price point.

Ultimately, the right choice depends on your preferences and viewing environment, but any of these technologies will elevate your TV viewing experience to a whole new level.

How to Record Your Computer Screen on Windows and Mac?

0

Recording your computer screen on Windows 10 and 11 or Mac is a straightforward process that can be beneficial for various purposes, such as capturing lectures, meetings, or gaming sessions. If you need to share your screen during video conferences on platforms like Zoom, Google Meet, or Skype, it can significantly enhance your overall experience. Here are the steps to record your computer screen using the built-in Xbox Game Bar feature:

Enabling Xbox Game Bar:

  • Click on the Windows icon located in the lower-left corner of your screen.
  • Select “Settings” (represented by a gear icon).
  • In the Settings search section, type “Enable Xbox Game Bar” and select it when it appears.
  • Slide the toggle under Xbox Game Bar to the right to enable the feature.

    Record Your Computer Screen
    photo: Pixabay

Steps to record your computer screen:

  1. After opening the application you want to record, simultaneously press the Windows Key and “G” to open the Game Bar dialog.
  2. You may see a prompt asking if you want to open the Game Bar for a game; even if it’s not a game, check the box that says, “Yes, this is a game.”
  3. The recording program window will now be visible, and you can start recording by clicking the “Start recording” button (or pressing Win + Alt + R).
  4. To stop the recording, click the red stop button, or you can press Win + G for the same result.
  5. If you wish to include your commentary in the recording, you can use the Xbox Game Bar’s microphone feature by pressing the microphone button in the top right corner of the screen under capture status.
  6. Once you’re done recording and want to view your recordings, you can find them in a folder called “Captures,” which is located in your computer’s video folder. If you’re having trouble locating it, open the Xbox Game Bar and press “Show All Captures” to access your videos.

For Mac computers, the process is different:

To record your screen on a Mac computer, you can use the Screenshot player, and the process is quick and easy:

  1. To record the entire screen, press Shift + Command + 5.
  2. If you only want to record a specific portion of the screen, you can select that area for recording while leaving the rest out.
  3. Onscreen controls will appear after pressing the three keys together, which provide options like stop and play. You can also use the toolbar to capture a still image.

By following these steps, you can easily record your computer screen on both Windows and Mac computers, making it convenient to share and preserve important content for various purposes.

Third-Party Screen Recording Software

While Windows, macOS, and mobile devices include basic screen-recording features, these integrated tools tend to be limited in functionality, quality, and customization. Third-party solutions fill the gap by offering higher performance, powerful features, and professional-grade outputs. This essay explores the leading screen-recording programs, their capabilities, ideal use cases, and key considerations for choosing the right tool.

1. OBS Studio

OBS Studio (Open Broadcaster Software) is one of the most widely used screen recorders and streamers in the world. This free, open-source program is favored by gamers, content creators, educators, and live streamers because of its extensive flexibility and professional capabilities.

OBS allows users to capture multiple sources—screens, webcams, windows, images, text overlays, browser windows, and audio devices—and combine them into “scenes.” These scenes can be switched dynamically during recordings or livestreams, enabling smooth transitions and professional video layouts. Because OBS supports hardware-accelerated encoding (with GPUs such as NVIDIA, AMD, and Intel), it can record or stream high-resolution, high-framerate content with lower CPU usage than many commercial tools. This is especially beneficial for gaming, where performance drops can ruin both gameplay and recordings.

However, OBS has a learning curve. Beginners may find the interface overwhelming due to its advanced settings for bitrate, codec selection, hotkeys, scenes, and audio routing. It is not the simplest tool for users who desire quick, one-click recording. Still, for those willing to invest time, OBS provides unmatched power at no cost.

2. Camtasia

Camtasia by TechSmith is a premium, professional-grade screen recorder and video editor. While expensive compared to other options, it remains the go-to tool for educators, corporate trainers, and content creators who need polished instructional or tutorial content.

Camtasia’s biggest advantage is its built-in video editing suite. Instead of recording footage in one application and editing it in another, users get a unified environment capable of trimming, splitting, adding transitions, enhancing audio, and inserting callouts, annotations, quizzes, narration, and effects. Instructors often rely on Camtasia to produce software tutorials, training videos, and e-learning modules.

It also supports multitrack recording: users can capture their screen, microphone, system audio, and webcam simultaneously and edit each on separate tracks. The software prioritizes ease of use, offering templates and guided workflows. The main drawback is its cost—making it less suitable for casual users or those who simply need basic screen captures.

3. Bandicam

Bandicam is a lightweight but powerful screen recorder often used for high-performance gaming captures. It is well-optimized for capturing game graphics using DirectX, Vulkan, or OpenGL technologies. Bandicam’s strength lies in its hardware-accelerated encoding, enabling 4K and high-framerate recordings with minimal system strain.

It includes features such as scheduled recording, device recording (for external devices like webcams or HDMI capture cards), and real-time drawing tools. The free version includes a watermark and time limits, but the paid version removes these restrictions.

Bandicam is incredibly efficient, making it a favorite among gamers and users with lower-end PCs. However, unlike Camtasia, it lacks a robust built-in editor (though it pairs with Bandicut, a simple video cutter), so users who need detailed editing may need additional software.

4. CamStudio

CamStudio is an older, open-source screen recorder for Windows. While not as advanced as modern tools, it remains popular among users who want a simple, free, lightweight recorder without unnecessary features.

Its best feature is its simplicity—launch it, pick a recording area, and start capturing. It offers AVI and SWF formats, and users can install custom codecs for different quality levels. The drawbacks are visible: outdated interface, occasional stability issues, and limited support for modern encoding standards like H.264 or H.265. Still, it works well for quick recordings on older hardware or for users who prefer minimalistic tools.

5. FlashBack Express

FlashBack Express provides a balance between simplicity and advanced functionality. Users appreciate that the free version allows recording without watermarks or time limits, making it suitable for tutorials, presentations, and demonstrations.

It supports webcam and screen recording simultaneously and offers scheduled recording—useful for capturing webinars or meetings automatically. While editing tools are limited in the free version, the paid FlashBack Pro adds advanced video editing, effects, and export options. This makes FlashBack a user-friendly tool for non-gamers looking for clean, dependable output.

6. Icecream Screen Recorder

Icecream Screen Recorder aims for simplicity across multiple platforms (Windows, macOS, and Android). It includes drawing tools, customizable recording areas, and features for capturing online meetings, video calls, webinars, or streaming content.

The free version is limited (time caps and fewer formats), while the paid version removes restrictions. Although not as advanced as OBS or Camtasia, it is ideal for users who need clean, quick captures with basic annotation features.

7. Zight (CloudApp)

Zight is a cloud-based screen-capture and screen-recording solution designed for business teams, remote workers, and creative professionals. Instead of focusing heavily on local video editing, its strength lies in instant sharing: once recorded, videos upload automatically to the cloud, generating shareable links.

Zight is excellent for collaboration—recording demos, bug reports, customer support videos, or quick walkthroughs—but less suited for long-form recording or performance-heavy tasks like gaming due to file-size limits and network dependency.

8. Screenify

Screenify is a newer, free screen recorder with no watermark, supporting 4K, 60 fps, and picture-in-picture webcam recording. It includes annotation tools, basic trimming, and templates for social content. For users who want modern, high-quality recordings without paying for Camtasia or dealing with OBS complexity, Screenify is a strong emerging option.

Key Considerations When Choosing a Screen Recorder

When selecting third-party screen recording software, users should evaluate:

  1. Purpose – Gaming? Tutorials? Business demos? Each has different needs.

  2. Performance – Hardware acceleration and optimization matter for high-framerate content.

  3. Editing Requirements – Integrated editors (like Camtasia) save time but cost more.

  4. Output Quality – Look for tools supporting HD/4K, proper codecs, and audio control.

  5. Ease of Use – Beginners may prefer simple interfaces; advanced users may prefer customizable tools.

  6. Budget – Many free tools exist, but professional features often require paid software.

Third-party screen recording software plays a vital role in content creation, education, business communication, and entertainment. Whether users need professional editing features, lightweight capture tools, gaming-optimized recorders, or cloud-based sharing solutions, the landscape offers diverse options. OBS Studio and Camtasia lead the industry for power and professionalism; Bandicam excels in gaming performance; FlashBack and Icecream provide user-friendly recording; Zight focuses on collaborative sharing; and Screenify offers modern, high-quality recording at no cost. By considering one’s purpose, performance needs, editing goals, and budget, users can choose the screen recorder that best enhances their workflow.