Home Blog Page 20

What if you don’t have NFC function on your phone?

0

Many people want to add NFC (Near Field Communication) to their phones but aren’t sure how to do it. This guide will explain how to install NFC on phones that don’t have built-in NFC capabilities. Even if your phone lacks NFC, you can still use NFC tags for various functions by first installing an NFC-enabling app.

If your phone doesn’t support NFC, there are still ways to add this functionality. Here are some methods you can try:

  • Install an NFC-enabling app: Various apps on the Google Play Store can enable NFC on phones without built-in NFC. One popular app is Trigger. After installing the app, open it and tap “Enable” to allow the app to use your phone’s existing RFID/NFC hardware (if available).
  • Use NFC tags: Without built-in NFC hardware, you can still use NFC tags for different actions on your phone. Once you’ve enabled NFC through an app, you can hold your phone up to an NFC tag, and the app will trigger the associated action. For example, you can program a tag to open your favorite music app or turn on Bluetooth when tapped.
  • Purchase an NFC sticker: NFC stickers are small, thin stickers containing an NFC chip. You can stick these to the back of your phone, enabling it to communicate with other NFC-enabled devices. This is particularly useful for making payments or sharing information with other devices.

While these methods can enable NFC functionality on your phone, they may not offer the same performance and reliability as phones with built-in NFC hardware. Compatibility may vary based on your phone’s specifications and the specific app or sticker you use.

There are numerous apps available to enable NFC on phones that lack built-in NFC capabilities. Two of the most popular are NFC Tools and Smart NFC, both of which are free on the Google Play Store.

NFC Tools:

  • Allows you to read, write, and program tasks on NFC tags and compatible chips.
  • Simple and intuitive, it can record standard information on NFC tags, making them compatible with any NFC device. You can store contact details, URLs, phone numbers, social profiles, or locations.
  • You can program tasks on NFC tags to automate repetitive actions, such as turning on Bluetooth, setting alarms, controlling volume, or sharing WiFi configurations.
  • Advanced users can create complex actions using preset variables, conditions, and tasks.
  • Offers over 200 tasks and infinite combinations to simplify your life.
  • Allows you to see data like the tag manufacturer, type, serial number, technologies available, tag size and memory, writability, and the data contained in the tag.

    Smart Nfc
    photo: Smart NFC

Smart NFC:

  • A comprehensive app for all NFC-related tasks with a user-friendly interface.
  • Detects, reads, writes, and programs NFC tags, automating daily tasks and promoting products.
  • Eliminates the need for multiple apps by catering to all NFC needs.
  • Enables automation of everyday tasks, such as opening URLs, changing phone settings, or launching apps.
  • Features like detecting if a phone has NFC, checking if NFC is enabled, and saving actionable information on tapping the NFC tag.
  • Facilitates sending information, linking to websites or apps, sending emails, and saving contacts or phone numbers.

Once NFC is enabled through either app, you can use NFC tags to trigger actions on your phone. For example, you can program a tag to launch your favorite music app or turn on Bluetooth with a simple tap.

@alliekmiller

Answering all your NFC FAQ. Can any phone use them, when to use them instead of Siri, my favorite NFC tags to use, password protecting, and more home automation insights. More NFC and tech tutorial videos coming! #tech #techtok #technology #nfc #nfctag #nfctags #automation #productivity #homeautomation #iphone

♬ original sound – Allie K. Miller

What is a NFC sticker?

An NFC sticker, also known as an NFC tag, is a small, adhesive-backed label that contains an embedded NFC (Near Field Communication) chip. These stickers can be affixed to various surfaces, including the back of your phone, to enable NFC functionality for devices that may not have built-in NFC hardware. Here’s a more detailed look at NFC stickers:

Components of an NFC Sticker:

  1. NFC Chip: This is the heart of the sticker, storing information and handling communication with NFC-enabled devices.
  2. Antenna: A tiny coil of wire or printed circuit that allows the chip to communicate wirelessly.
  3. Adhesive Backing: Allows the sticker to be easily attached to surfaces.

Features and Uses:

  1. Communication: Enables data exchange between the sticker and NFC-enabled devices when they are brought close together (usually within a few centimeters).
  2. Programming: Can be programmed using NFC-enabled apps to perform various tasks, such as opening websites, launching apps, changing phone settings, or sharing contact information.
  3. Automation: Useful for automating routine tasks like setting alarms, toggling WiFi or Bluetooth, or controlling smart home devices.

Practical Applications:

  1. Contactless Payments: Can be used to facilitate payments by linking to payment apps.
  2. Marketing and Information Sharing: Businesses can use them on products to provide additional information or promotional material when scanned.
  3. Smart Home Integration: Can control smart home devices, like lights or thermostats, with a tap.
  4. Personal Convenience: Easily program them to perform tasks such as setting your phone to silent mode when you go to bed or turning on navigation when you get in your car.

Example:

Imagine sticking an NFC sticker to your desk. You can program it so that when you place your phone on it, the phone automatically connects to the office WiFi, sets itself to vibrate mode, and opens your favorite productivity app.

How to Use an NFC Sticker:

  1. Acquire an NFC Sticker: Purchase from online retailers or electronics stores.
  2. Install an NFC App: Use an app like NFC Tools or Smart NFC from the Google Play Store to read and write to the sticker.
  3. Program the Sticker: Use the app to configure the sticker with the desired actions or information.
  4. Apply the Sticker: Stick it to a convenient surface.
  5. Use: Tap your NFC-enabled phone to the sticker to trigger the programmed actions.

In summary, NFC stickers are versatile tools that can extend NFC functionality to non-NFC phones and provide a convenient way to automate tasks and share information.
Google Pixel 8a: Great Camera & Software Support

0

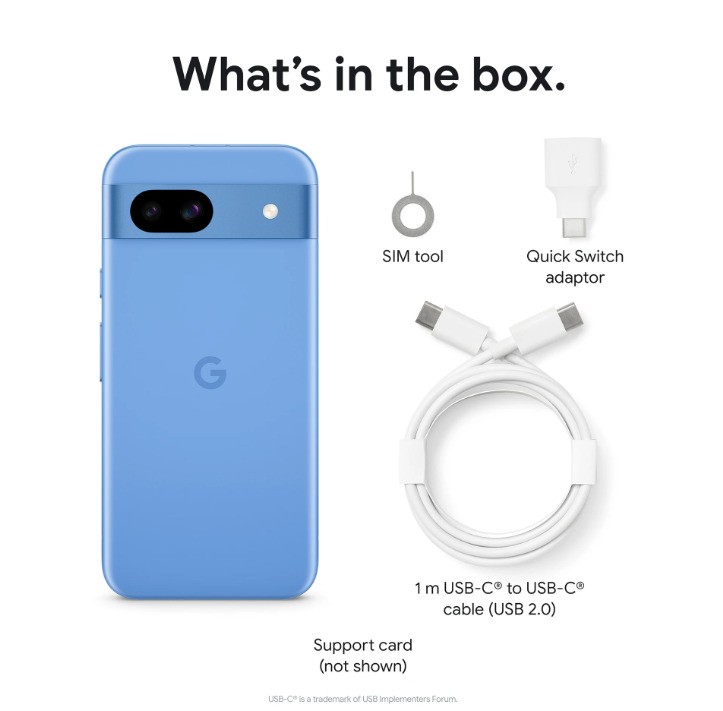
The Google Pixel 8a delivers impressive performance for its price range, offering an outstanding camera experience enhanced by Google’s AI-driven Magic Editor. It also boasts an exceptional 7 years of software updates. Despite being a more affordable option, the Pixel 8a provides an experience that closely rivals flagship phones.

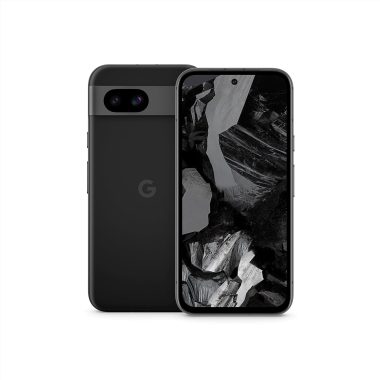
The Pixel 8a carries forward the distinctive design of the Pixel series, starting with the Pixel 6, featuring a signature camera bar across the rear. It comes in four colors—Aloe, Bay, Obsidian, and Porcelain—with a color-matched aluminum frame uniting the glass front and plastic back. The device has softly curved corners and edges, making it comfortable to hold. The rear has a matte finish, and the screen is protected by Google’s Actua display, which uses Gorilla Glass 3.

The bezels on the Pixel 8a are wider than desired, which Google seems to use as a differentiating factor from the Pixel 8. Interestingly, the Pixel 8a is slightly larger than the Pixel 8, despite having a 0.1mm smaller display, primarily due to the bezel.

Pixel 8a
Pixel 8a – images

The Pixel 8A closely mirrors the design of the Pixel 8 and Pixel 8 Pro. Google has rounded the edges, giving it a softer feel compared to the Pixel 7A. The back features a premium matte finish, which is less prone to fingerprint smudges than the glossy finishes of the Pixel 7A and Pixel 8.

The Pixel 8A comes in four colors: Aloe (green), Bay (light blue), Obsidian (black), and Porcelain (white). I’ve been using the Aloe green variant and really enjoy its bright, bold mint shade.

However, if you need more storage, you’ll have to choose the Obsidian color, as it’s the only option available with 256GB. Otherwise, you’ll be limited to 128GB, as the Pixel 8A doesn’t support expandable storage. This is a feature that sets the $400 Samsung Galaxy A35 5G apart, as it supports expandable storage up to 1TB.

The Pixel 8A has noticeably larger bezels than the Pixel 8, but this is only apparent when comparing the two side by side. In everyday use, the bezels are not distracting and are smaller than the forehead and chin on Apple’s $429 iPhone SE.

Google has increased the Pixel 8A’s display brightness compared to last year’s Pixel 7A, which is a welcome improvement. While I still find myself increasing the brightness outdoors, it’s not as problematic as with previous Pixel devices.

At a glance, distinguishing the Pixel 8a from its Pixel 8 siblings can be challenging, mainly due to the similar camera array. The camera bar, although prone to dust collection, prevents the phone from wobbling when placed on a flat surface.

Google Pixel 8a Display

Google has enhanced the brightness of its displays, with the Pixel 8a peaking at 2,000 nits, slightly lower than the Pixel 8 Pro’s 2,400 nits. This brightness is sufficient to enhance HDR visuals and improve the viewing experience for photos and movies. The Pixel 8a features a 6.1-inch AMOLED panel with a 2,400 x 1,080 pixel resolution, offering a sharp 430ppi. The display performance is comparable to the Pixel 8, and it includes a 120Hz adaptive refresh rate for smooth scrolling and improved battery life.

Camera

The camera setup is a highlight of the Pixel 8a, making it one of the best smartphone cameras in its price range. It retains the hardware from the Pixel 7a, with a 64-megapixel main camera and a 13-megapixel ultrawide camera. While it lacks a dedicated telephoto lens, Google’s software-driven Super Res Zoom provides decent 2x zoom, though the 8x zoom is less effective. The main camera performs exceptionally well, even in low light, often rivaling some flagship phones.

Google Pixel 8a
Google Pixel 8a

Performance

Powered by the Google Tensor G3, the same chip found in the Pixel 8 and Pixel 8 Pro, the Pixel 8a offers solid performance. Although it doesn’t match the raw power of devices with Snapdragon 8 Gen 3, it handles everyday tasks smoothly. Over a month of use, the Pixel 8a consistently delivered reliable performance.

Battery Life and Charging

The Pixel 8a features a 4,492mAh battery, promising over 24 hours of usage. During testing, the battery life proved sufficient for a full day of intensive use. However, the 18W charging speed is modest by modern standards, and while it supports wireless charging, it lacks the reverse charging feature of the Pixel 8 Pro.

Pros

  • Exceptional camera performance
  • 7 years of bloat-free Android updates
  • Great performance for the price

Cons

  • Discounted Pixel 8 presents strong competition
  • Bezels are somewhat wide
  • Charging speeds are modest

    Google Pixel 8a
    Google Pixel 8a

The Google Pixel 8a is a compelling mid-range smartphone that excels in several areas. Its 7-year software support adds long-term value, and its camera performance is on par with flagship models. Although it has some drawbacks like wider bezels and slower charging speeds, these are minor compared to the overall value it offers. The biggest challenge for the Pixel 8a is the competition from the discounted Pixel 8, which offers slightly more premium features. However, the Pixel 8a remains an excellent choice for those seeking a high-quality smartphone at a more affordable price. (Retail price: $499)

Discover the Unique Sound of Vinyl: Best Turntables for Audiophiles

0

Vinyl records have made a remarkable comeback in recent years, captivating audiophiles and music lovers alike with their warm, rich sound and nostalgic appeal. The unique sound of vinyl offers an immersive listening experience that digital formats often struggle to replicate. This article explores the distinctive qualities of vinyl sound and provides a comprehensive guide to the best high-quality turntables available on the market today.

The Unique Sound of Vinyl

Warmth and Richness

One of the most celebrated characteristics of vinyl records is the warmth and richness of their sound. Vinyl playback can capture nuances and subtleties in music that digital formats sometimes miss. This warmth is often attributed to the analog nature of vinyl records, which reproduce sound waves more faithfully than digital recordings.

Analog recordings capture the continuous waveforms of sound, whereas digital recordings sample these waveforms at intervals. This process can lead to a loss of information and a sound that some listeners find less engaging. Vinyl records, with their grooves etched directly from the original soundwaves, provide a more holistic and authentic representation of the music.

Depth and Texture

Vinyl records are known for their ability to reproduce depth and texture in music. The analog format captures the full range of frequencies, including the subtle details and overtones that add to the music’s complexity. This results in a listening experience that feels more three-dimensional and lifelike.

The texture of vinyl sound is often described as “full-bodied,” with a sense of presence that makes it feel as though the musicians are performing in the room with the listener. This quality is particularly noticeable in genres like jazz and classical, where the nuances of the instruments and the acoustics of the recording environment play a significant role in the overall sound.

Dynamics and Range

Another notable aspect of vinyl sound is its dynamic range. Vinyl records can handle wide variations in volume, from the quietest passages to the loudest crescendos, without the compression often applied to digital recordings. This allows for a more expressive and emotionally engaging listening experience.

The dynamic range of vinyl also contributes to the perception of space and ambiance in the music. Recordings made in live settings or natural acoustic environments can sound more open and airy on vinyl, enhancing the listener’s sense of immersion.

Analog Imperfections

Part of the charm of vinyl records lies in their imperfections. The occasional crackle, pop, or hiss adds a layer of character to the listening experience, reminding listeners of the physical nature of the medium. These analog artifacts can evoke a sense of nostalgia and authenticity that many find appealing.

While some may see these imperfections as flaws, others appreciate them as part of the vinyl experience. They contribute to the uniqueness of each listening session, as no two playbacks are exactly the same. This variability can make vinyl listening a more personal and engaging activity.

Best Turntables on the Market Today

Investing in a high-quality turntable is essential for those looking to fully enjoy the unique sound of vinyl. A good turntable can make a significant difference in the audio quality and overall listening experience. Here are some of the best high-quality turntables available on the market today.

1. Pro-Ject Debut Carbon Evo

The Pro-Ject Debut Carbon Evo is a favorite among audiophiles for its exceptional build quality and performance. It features a carbon fiber tonearm, which reduces resonance and improves tracking accuracy. The turntable also comes with a heavy steel platter, providing excellent speed stability and reduced vibrations. Besides being able to effortlessly change replay speeds with the push of a button, the playback speed is electronically controlled with the utmost precision, which results in the most accurate and stable speeds.

The Debut Carbon EVO is not only timeless by offering traditional high-gloss black, white and red finishes or our fabled real-wood walnut veneer. Completely new, unique and trend-setting are the beautifully realized satin signature finishes in 5 different variations.

Pro Ject Debut Carbon Evo
Pro-Ject Debut Carbon Evo – High Gloss Red
  • Key Features:
    • Carbon fiber tonearm
    • Heavy steel platter
    • Adjustable feet for leveling
    • Integrated speed control
  • Pros:
    • Superior build quality
    • Excellent sound clarity and detail
    • Easy to set up and use
  • Cons:
    • Slightly higher price point

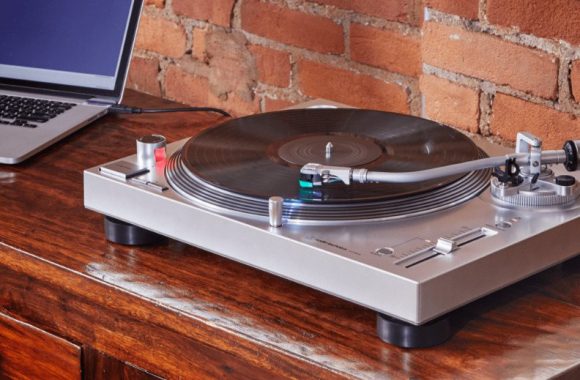
2. Audio-Technica AT-LP120XUSB

The Audio-Technica AT-LP120XUSB is a versatile turntable that offers great value for its price. It is a direct-drive turntable, which means it has a motor directly connected to the platter, providing consistent speed and torque. It also features a built-in phono preamp and USB output, allowing users to digitize their vinyl collection.

The fully manual turntable plays 33-1/3, 45, and 78 RPM records and is equipped with a USB output that allows direct connection to your computer. Just download the free Mac- and PC-compatible Audacity recording software and start converting your vinyl singles and LPs to digital audio files.

Audio Technica At Lp120xusb
Audio-Technica AT-LP120XUSB
  • Key Features:
    • Direct-drive motor
    • Built-in phono preamp
    • USB output for digitization
    • Adjustable anti-skate control
  • Pros:
    • Affordable
    • Versatile features
    • Reliable performance
  • Cons:
    • Slightly bulkier design

3. Rega Planar 3

The Rega Planar 3 is renowned for its minimalist design and outstanding sound quality. It features a lightweight, rigid plinth that reduces unwanted vibrations and resonance. The turntable is equipped with the RB330 tonearm, known for its precision engineering and smooth tracking.

  • Key Features:
    • RB330 tonearm
    • Lightweight, rigid plinth
    • High-quality cartridge
    • Manual speed change
  • Pros:
    • Exceptional sound quality
    • Elegant design
    • Durable construction
  • Cons:
    • Manual speed change can be inconvenient

4. Technics SL-1500C

The Technics SL-1500C is a modern turntable with a classic design, combining advanced technology with timeless aesthetics. It features a coreless direct-drive motor, ensuring accurate and stable rotation. The turntable also comes with a built-in phono preamp and auto-lift function, making it user-friendly. The SL-1500C is a complete turntable solution. It features built-in phono equaliser and bundled cartridge. There is no need to separately prepare either one, making it easy to link with a wide range of audio equipment, so you can enjoy listening to your analogue records immediately.
Technics Sl 1500c
Technics SL-1500C
  • Key Features:
    • Coreless direct-drive motor
    • Built-in phono preamp
    • Auto-lift function
    • High-precision tonearm
  • Pros:
    • High accuracy and stability
    • User-friendly features
    • Sleek design
  • Cons:
    • Higher price range

5. Fluance RT85

The Fluance RT85 is a high-performance turntable that offers excellent value for money. It features an acrylic platter, which reduces vibrations and provides consistent speed. The turntable is equipped with the Ortofon 2M Blue cartridge, known for its detailed and dynamic sound reproduction.

  • Key Features:
    • Acrylic platter
    • Ortofon 2M Blue cartridge
    • Solid wood plinth
    • Adjustable feet
  • Pros:
    • Outstanding sound quality
    • Attractive design
    • Great value for money
  • Cons:
    • Lacks some advanced features

6. U-Turn Audio Orbit Plus

The U-Turn Audio Orbit Plus is a budget-friendly turntable that doesn’t compromise on sound quality. It features a precision gimbal tonearm and an acrylic platter for improved performance. The turntable is fully manual, offering a pure analog experience.

  • Key Features:
    • Precision gimbal tonearm
    • Acrylic platter
    • Manual operation
    • Customizable options
  • Pros:
    • Affordable
    • High-quality sound
    • Customizable design
  • Cons:
    • Manual operation may not suit everyone

Factors to Consider When Choosing a Turntable

Selecting the right turntable involves considering various factors to ensure it meets your specific needs and preferences. Here are some key aspects to keep in mind:

1. Drive System

Turntables come with different drive systems, each with its advantages and disadvantages:

  • Belt-Drive: Belt-driven turntables use an elastic belt to connect the motor to the platter. This design helps isolate the platter from motor vibrations, resulting in cleaner sound. However, belt-driven models may require more maintenance over time.
  • Direct-Drive: Direct-drive turntables have a motor directly connected to the platter, offering consistent speed and torque. They are popular among DJs for their quick start-up times and durability. However, they can be more susceptible to motor vibrations.
  • Idler-Wheel Drive: This older design uses a wheel to transfer motor power to the platter. While not as common today, some vintage turntables still use this system. They are known for their high torque but can be noisier.

2. Tonearm

The tonearm plays a crucial role in tracking the grooves of a record accurately. There are two main types of tonearms:

  • Straight Tonearm: These are generally considered better for high-fidelity listening as they provide precise tracking and less distortion.
  • S-Shaped Tonearm: These are more common in DJ turntables and are known for their ruggedness and ability to handle scratching and back-cueing.

3. Cartridge

The cartridge contains the stylus (needle) that reads the grooves on the record. There are two main types of cartridges:

  • Moving Magnet (MM): These are the most common and affordable cartridges. They are easy to replace and provide good sound quality.
  • Moving Coil (MC): These are generally higher-end cartridges that offer superior sound quality but are more expensive and harder to replace.

4. Platter

The platter is the part of the turntable that holds the record. Its material and weight can affect sound quality:

  • Acrylic: Reduces vibrations and provides consistent speed.
  • Glass: Offers good speed stability and adds a unique aesthetic.
  • Metal: Provides excellent speed stability but can be more susceptible to vibrations if not well-damped.

5. Preamp

Some turntables come with a built-in phono preamp, which amplifies the signal from the cartridge to a level that standard audio equipment can handle. If your turntable doesn’t have a built-in preamp, you’ll need an external one.

6. Speed Control

Turntables typically offer two speeds: 33 1/3 RPM for LPs and 45 RPM for singles. Some also support 78 RPM for older records. Having easy speed control is essential for versatility.

7. Build Quality

A turntable’s build quality impacts its durability and performance. Look for models with sturdy plinths (bases), well-designed tonearms, and high-quality materials.

The unique sound of vinyl records, characterized by their warmth, richness, depth, and dynamic range, offers a listening experience that digital formats often struggle to replicate. For those who appreciate the analog charm and immersive qualities of vinyl, investing in a high-quality turntable is essential.

Turntables like the Pro-Ject Debut Carbon Evo, Audio-Technica AT-LP120XUSB, Rega Planar 3, Technics SL-1500C, Fluance RT85, and U-Turn Audio Orbit Plus represent some of the best options available on the market today. Each of these turntables offers a combination of exceptional sound quality, build integrity, and user-friendly features, catering to different preferences and budgets.

When choosing a turntable, consider factors such as the drive system, tonearm design, cartridge type, platter material, preamp options, speed control, and overall build quality. By carefully evaluating these aspects, you can find a turntable that not only enhances your vinyl listening experience but also stands the test of time.

Vinyl records and high-quality turntables offer a timeless and unparalleled musical experience, allowing listeners to connect with their favorite music on a deeper, more intimate level. Whether you’re a seasoned audiophile or a newcomer to the world of vinyl, the journey of discovering and enjoying the unique sound of vinyl is a rewarding one.

TCL 115X955K Max TV – Stunning 115-Inch 4K Ultra HD Performance

0

The TCL 115X955K Max TV is an impressive addition to the world of large-screen televisions, boasting a massive 115-inch display with 4K Ultra HD resolution. This television sets itself apart with advanced technology, superior performance, and a plethora of features designed to enhance the viewing experience. In this article, we’ll delve into the quality and performance of the TCL 115X955K Max TV, explore its main characteristics, weigh its pros and cons, and help you decide whether it’s the right purchase for you.

TCL 115X955K Max TV Main Characteristics

Display and Screen Type

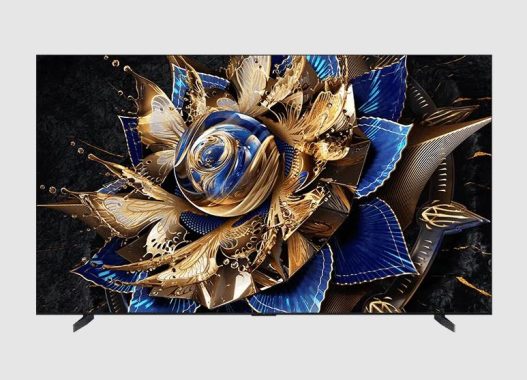
The TCL 115X955K Max TV features a flat LCD screen with QD-Mini LED technology, a combination of Quantum Dot (QLED) and Mini LED backlighting. This setup promises enhanced brightness, color accuracy, and contrast. The VA (Vertical Alignment) panel used in this TV is known for delivering deep blacks and excellent contrast ratios, making it ideal for a variety of viewing conditions.

Tcl 115x955k Max Tv
TCL 115X955K Max TV

Key Specifications:

  • Screen Type: LCD
  • Technology Type: QD-Mini LED (QLED with Mini LED)
  • Panel Type: VA
  • Resolution: 4K UHD (3840×2160)
  • Aspect Ratio: 16:9
  • Color Gamut: 98% DCI-P3
  • Peak Brightness: 5000 nits
  • Contrast Ratio: 7000:1

Picture Quality

The picture quality of the TCL 115X955K Max TV is enhanced by the AiPQ PRO Processor, an AI-driven picture quality processor that analyzes and optimizes each frame to deliver stunning clarity and detail. The processor uses a rich database to simulate and optimize images based on human recognition, ensuring that every scene looks as realistic as possible.

The TV also boasts 65,000-level precise lighting control and a sphenoidal microstructure formed by adding polyimide to the liquid crystal molecules. This structure accurately controls the optics passing through the liquid crystal layer, significantly improving contrast and picture quality.

TCL 115
TCL 115″X955 Premium QD-Mini LED TV

Key Picture Enhancements:

  • AiPQ PRO Processor: AI-driven picture quality optimization
  • Precise Lighting Control: 65,000-level control
  • Polyimide Microstructure: Enhances contrast and optical control
  • HDR Support: Dolby Vision IQ, HDR 10+, HLG

Audio Performance

Audio is another area where the TCL 115X955K Max TV excels. It features a powerful ONKYO 6.2.2 Hi-Fi sound system with a total audio power of 120W, capable of delivering 240W peak power. The audio setup includes multiple speakers positioned to create an immersive sound experience, with support for Dolby Atmos and DTS-HD for premium sound quality.

Tcl 115x955k Max Tv
115″ TV TCL115X955K Max TV – images: TCL

Key Audio Specifications:

  • Audio Power: 120W (10W2 L/R + 10W4 L/R surround + 10W2 up to sky + 20W2 bass)
  • Peak Power: 240W
  • Sound Channel: ONKYO 6.2.2 Hi-Fi System
  • Audio Technologies: Dolby Atmos, DTS-HD

Connectivity and Smart Features

The TCL 115X955K Max TV is equipped with a range of connectivity options and smart features to enhance user convenience and versatility. It supports hands-free voice control, video chat, and wireless display (Miracast). It also includes quick settings, Bluetooth 5.2, and Wi-Fi 6 for fast and reliable wireless connections.

Key Connectivity Features:

  • HDMI Inputs: 2 x HDMI2.1 + 2 x HDMI2.0
  • HDMI CEC: Yes, with certification
  • HDMI2.1 (eARC & ARC): Yes, with certification
  • HDMI2.1 (VRR): Yes, 4K@144Hz
  • HDMI2.1 (ALLM): Yes
  • AMD FreeSync: FreeSync Premium
  • Wi-Fi: WiFi 6
  • Bluetooth: BT5.2

Gaming and Additional Features

For gamers, the TCL 115X955K Max TV offers impressive features such as a 144Hz Variable Refresh Rate (VRR) and 240Hz Dynamic Light Control (DLG), ensuring smooth and responsive gameplay. The inclusion of Game Master, hands-free voice control, and video chat further adds to its appeal.

Key Gaming Features:

  • Refresh Rate: 144Hz VRR + 240Hz DLG
  • Game Master: Yes
  • FreeSync Premium: Yes

Performance

Picture Quality Performance

The TCL 115X955K Max TV’s combination of QD-Mini LED technology, high contrast ratio, and advanced AI processing ensures that it delivers exceptional picture quality. The 4K UHD resolution provides sharp and detailed images, while the wide color gamut (98% DCI-P3) ensures vibrant and accurate colors. The high peak brightness of 5000 nits allows for excellent HDR performance, making bright scenes look stunningly realistic.

Smart Features and Connectivity Performance

With support for the latest connectivity standards like HDMI 2.1, Wi-Fi 6, and Bluetooth 5.2, the TCL 115X955K Max TV ensures seamless integration with other devices and fast internet connectivity. Hands-free voice control and video chat add to the convenience, making it easy to control the TV and communicate without needing a remote.

 Tcl 115x955k Max Tv
TCL 115X955K Max TV

Pros and Cons

Pros

  • Exceptional Picture Quality: Thanks to QD-Mini LED technology, high contrast ratio, and AI processing.
  • Powerful Audio System: ONKYO 6.2.2 Hi-Fi system with Dolby Atmos and DTS-HD support.
  • Advanced Gaming Features: 144Hz VRR, 240Hz DLG, and FreeSync Premium.
  • Extensive Connectivity Options: Multiple HDMI 2.1 ports, Wi-Fi 6, and Bluetooth 5.2.
  • Convenient Smart Features: Hands-free voice control, video chat, and quick settings.
  • High Peak Brightness: 5000 nits for stunning HDR performance.

Cons

  • Price: The high-end features come with a premium price tag. – / price: £24,999 /
  • Size: The 115-inch screen size may be too large for smaller rooms or spaces.
  • Complex Setup: The advanced features and large size might require professional installation and setup.

To Buy or Not to Buy

Deciding whether to purchase the TCL 115X955K Max TV depends on your needs, preferences, and budget. Here are some factors to consider:

Reasons to Buy

  • High-End Home Theater Experience: If you’re looking for a top-of-the-line TV with stunning picture and sound quality for a home theater setup, this TV is an excellent choice.
  • Gaming Enthusiasts: The advanced gaming features make this TV a great option for serious gamers.
  • Smart Home Integration: If you value smart features like hands-free voice control and seamless connectivity, this TV offers plenty of advanced options.

Reasons Not to Buy

  • Budget Constraints: If the high price is a concern, there are more affordable options with good performance.
  • Space Limitations: Ensure you have enough space to accommodate the 115-inch screen.
  • Simpler Needs: If you don’t require the high-end features and are looking for a basic TV, this might be overkill.

The TCL 115X955K Max TV is a remarkable piece of technology, offering exceptional picture and sound quality, advanced gaming features, and a host of smart capabilities. The audio performance of the TCL 115X955K Max TV is equally impressive. The ONKYO 6.2.2 Hi-Fi system provides rich, immersive sound with clear dialogue and deep bass. Dolby Atmos support creates a three-dimensional audio experience, making you feel like you’re in the middle of the action. Its high-end specifications make it a top contender for anyone looking to create an immersive home theater experience. However, its premium price and large size may not be suitable for everyone. By weighing the pros and cons and considering your specific needs and budget, you can determine if the TCL 115X955K Max TV is the right choice for you.

Silent Wings 4 White Series: Superior Airflow and Static Pressure

0

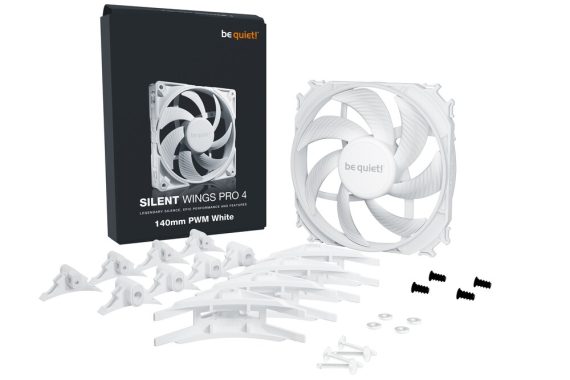
be quiet!, the German premium PC components manufacturer, proudly presents the Silent Wings Pro 4 White and Silent Wings 4 White fan series. These sleek white high-end fans are engineered for peak performance in cases, on heat sinks, and on radiators, offering exceptional airflow and remarkable static pressure. The fans are equipped with unique exchangeable mounting corners, allowing easy adaptation for various setups. The Silent Wings Pro 4 White has been enhanced to reach extremely high rotational speeds, providing options for users to configure these fans for low noise, a noise/performance balance, or maximum performance.

Silent Wings Pro 4 White

Enhanced Static Pressure and Simple Mounting

The be quiet! Silent Wings 4 White series emphasizes improved static pressure, crucial for mounting on heat sinks or liquid-cooled radiators. These fans feature a low tip clearance of 1.0mm and a funnel-shaped air outlet, which disperses air over a larger area, significantly boosting static pressure. This makes the Silent Wings 4 White series an ideal choice for heat sinks or radiators, while maintaining impressively low noise levels. The fans come with two easy-to-swap mounting corners: vibration-free rubber push-pin corners and traditional hard-plastic screw-type corners. Available in two sizes (120mm and 140mm) and two models (PWM and PWM high-speed), the PWM models are best suited as case fans with maximum speeds of 1600 rpm (120mm) and 1100 rpm (140mm), while the PWM high-speed versions are designed for heat sinks and radiators with higher speeds of 2500 rpm and 1900 rpm respectively. All be quiet! Silent Wings 4 White fans feature a durable 6-pole fan motor with three phases and fluid-dynamic bearings, ensuring a lifespan of 300,000 hours.

Going Pro for Ultimate Performance

For those seeking unparalleled performance, be quiet! introduces the Silent Wings Pro 4 White. These fans retain all the features of the Silent Wings 4 White but are turbo-charged to achieve rotational speeds of 3000 rpm for the 120mm version and 2400 rpm for the 140mm version. A speed switch on the back allows users to set the maximum speed based on their needs: Medium for silence-optimized operation, High Speed for a noise/performance balance, and Ultra High Speed for maximum performance. The Silent Wings Pro 4 White also includes an additional corner type specifically designed for radiators, forming a tight fit to prevent air leakage and ensure maximum static pressure. These fans also come with a high-grade white mesh sleeve cable and an easy-to-use motherboard connector.

 Silent Wings Pro 4 White
Silent Wings Pro 4 White – images: be quiet!

Pricing and Availability

  • Silent Wings 4 White 120mm PWM: 1600 rpm – $23.90 / €24.90 / £21.99
  • Silent Wings 4 White 120mm PWM high-speed: 2500 rpm – $23.90 / €24.90 / £21.99
  • Silent Wings 4 White 140mm PWM: 1100 rpm – $24.90 / €25.90 / £23.99
  • Silent Wings 4 White 140mm PWM high-speed: 1900 rpm – $24.90 / €25.90 / £23.99
  • Silent Wings Pro 4 White 120mm PWM: 3000 rpm – $31.90 / €32.90 / £29.99
  • Silent Wings Pro 4 White 140mm PWM: 2400 rpm – $32.90 / €33.90 / £30.99

All models will be available in retail starting April 9.

Why You Need a Wi-Fi Camera? How Wi-Fi Cameras Work?

0

In an increasingly connected world, the need for effective and reliable home security solutions has never been greater. Wi-Fi cameras have emerged as a popular choice for individuals seeking to enhance the security of their homes and businesses. These devices offer a range of features that make monitoring and protecting your property easier than ever before. In this article, we will explore how Wi-Fi cameras work, their benefits, why you might need one, and recommend a few of the best models available on the market.

How Wi-Fi Cameras Work

Wi-Fi cameras, also known as wireless cameras, operate by connecting to a Wi-Fi network, allowing them to transmit video and audio data to a remote storage device or cloud service. Here’s a closer look at their functioning:

Basic Functioning of Wi-Fi Cameras

Wi-Fi cameras capture video footage using a digital image sensor. This footage is then compressed and transmitted over a Wi-Fi network to a storage device or cloud service. Users can access this footage in real-time or later through a smartphone app or web interface.

Key Components

Image Sensor: Captures the visual data.

Lens: Focuses light onto the image sensor.

Processor: Compresses and encodes the video data.

Wi-Fi Module: Enables wireless communication with the network.

Power Source: Can be battery-powered or connected to an electrical outlet.

Connectivity and Data Transmission

Wi-Fi cameras connect to a local Wi-Fi network, allowing them to transmit data wirelessly. This eliminates the need for extensive cabling, making installation easier and more flexible. The data is typically sent to a cloud storage service or a Network Attached Storage (NAS) device, where it can be accessed remotely.

Software and Mobile App Integration

Most Wi-Fi cameras come with companion mobile apps that allow users to view live footage, receive alerts, and manage settings. These apps provide a user-friendly interface for monitoring and controlling the cameras from anywhere with an internet connection.

Benefits of Wi-Fi Cameras

Wi-Fi cameras offer several advantages that make them a valuable addition to any home or business security setup:

Security and Surveillance

Wi-Fi cameras provide real-time monitoring and recording, helping to deter crime and capture evidence in case of incidents. They can be placed strategically around a property to cover vulnerable areas and keep an eye on potential intruders.

Convenience and Remote Monitoring

With Wi-Fi cameras, users can monitor their property from anywhere in the world. Mobile apps and web interfaces provide instant access to live footage and recorded videos, offering peace of mind when you’re away from home.

Integration with Smart Home Systems

Many Wi-Fi cameras are compatible with smart home ecosystems such as Amazon Alexa, Google Assistant, and Apple HomeKit. This allows users to integrate their cameras with other smart devices, creating a seamless and automated home security system.

Cost-Effectiveness Compared to Traditional Security Systems

Wi-Fi cameras are generally more affordable and easier to install than traditional wired security systems. They eliminate the need for professional installation and can be set up by the user, reducing overall costs.

Why You Need a Wi-Fi Camera

There are several compelling reasons to invest in a Wi-Fi camera:

Personal Security

Wi-Fi cameras enhance personal security by providing real-time surveillance and recording capabilities. They help deter potential intruders and provide valuable evidence in case of a break-in or other security incidents.

Monitoring Children and Pets

Wi-Fi cameras are an excellent tool for keeping an eye on children and pets. They allow parents and pet owners to monitor activities and ensure the safety of their loved ones, even when they are not physically present.

Home Automation

Wi-Fi cameras can be integrated into a broader home automation system. They can trigger other smart devices, such as lights and alarms, to respond to detected motion, enhancing the overall security and functionality of the home.

Evidence Collection in Case of Incidents

In the unfortunate event of a security breach or accident, Wi-Fi cameras provide crucial evidence that can be used by law enforcement or insurance companies. High-resolution video recordings can help identify perpetrators and clarify the sequence of events.

Types of Wi-Fi Cameras

There are various types of Wi-Fi cameras to suit different needs and environments:

Indoor vs. Outdoor Cameras

  • Indoor Cameras: Designed for use inside the home, these cameras typically offer features like two-way audio and night vision.
  • Outdoor Cameras: Built to withstand the elements, outdoor cameras are weatherproof and often come with features like motion detection and infrared night vision.

Battery-Powered vs. Wired Cameras

  • Battery-Powered Cameras: These cameras offer flexibility in placement since they don’t require a power outlet. However, they need regular battery replacement or recharging.
  • Wired Cameras: Require a constant power source but offer uninterrupted operation and often better performance.

PTZ (Pan-Tilt-Zoom) Cameras

PTZ cameras can pan, tilt, and zoom to cover a larger area and focus on specific details. They are ideal for monitoring large spaces and can be controlled remotely via an app.

Doorbell Cameras

Doorbell cameras combine the functionality of a doorbell with a security camera. They allow users to see and communicate with visitors remotely, providing an added layer of security at the front door.

Top Wi-Fi Cameras on the Market

When choosing a Wi-Fi camera, it’s essential to consider factors such as resolution, field of view, night vision, and smart home compatibility. Here are some top models to consider:

Arlo Pro 4

Overview: The Arlo Pro 4 offers excellent performance with 2K resolution, a 160-degree field of view, and color night vision. It is compatible with major smart home systems and offers customizable activity zones and advanced AI detection features.

Key Features:

  • 2K video resolution
  • Integrated spotlight for color night vision
  • Weather-resistant design
  • Two-way audio
  • Smart home integration with Alexa, Google Assistant, and Apple HomeKit

    Arlo Pro 4
    Arlo Pro 4

Pros:

  • High video quality
  • Versatile smart home compatibility
  • Easy installation

Cons:

  • Requires a subscription for advanced features
  • Higher price point

Nest Cam IQ Outdoor

Overview: The Nest Cam IQ Outdoor is known for its intelligent alerts and high-quality video. It features a 4K sensor for crisp images and offers facial recognition technology to distinguish between familiar and unfamiliar faces.

Key Features:

  • 4K image sensor
  • 12x digital zoom
  • Facial recognition
  • Weatherproof design
  • Integration with Google Assistant

Pros:

  • Superior image quality
  • Advanced AI features
  • Robust build quality

Cons:

  • Expensive
  • Subscription required for full functionality

Ring Stick Up Cam Battery

Overview: The Ring Stick Up Cam Battery is a versatile and affordable option that works both indoors and outdoors. It offers 1080p video, motion detection, and two-way audio, making it a well-rounded choice for most users.

Key Features:

  • 1080p HD video
  • Battery-powered for flexible placement
  • Motion-activated notifications
  • Two-way talk
  • Integration with Alexa

    Stick Up Cam Battery
    Stick Up Cam Battery – Ring

Pros:

  • Affordable
  • Easy to install
  • Flexible mounting options

Cons:

  • Basic features without subscription
  • Average video quality compared to higher-end models

Wyze Cam v3

Overview: The Wyze Cam v3 is a budget-friendly option that offers excellent performance for its price. It features 1080p video, color night vision, and works both indoors and outdoors. It’s an ideal choice for those seeking a cost-effective security solution.

Key Features:

  • 1080p HD video
  • Color night vision
  • IP65 weatherproof rating
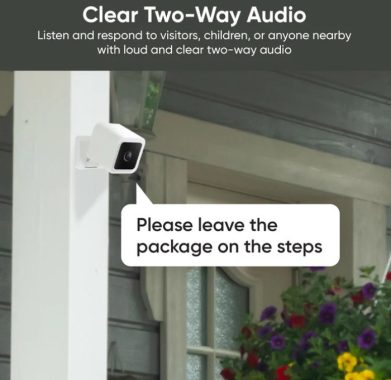
  • Two-way audio
  • Integration with Alexa and Google Assistant

    Wyze Cam V3
    Wyze Cam v3

Pros:

  • Extremely affordable
  • Good video quality for the price
  • Flexible indoor/outdoor use

Cons:

  • Limited advanced features
  • Requires a microSD card for continuous recording

Blink Outdoor

Overview: The Blink Outdoor camera is known for its impressive battery life, lasting up to two years on two AA lithium batteries. It offers 1080p video, motion detection, and cloud storage options, making it a reliable choice for outdoor surveillance.

Key Features:

  • 1080p HD video
  • Two-year battery life
  • Weather-resistant design
  • Motion detection
  • Integration with Alexa

Pros:

  • Long battery life
  • Easy installation
  • Affordable cloud storage options

Cons:

  • Limited features without subscription
  • No continuous recording option

Setting Up Your Wi-Fi Camera

Installing a Wi-Fi camera is generally straightforward, but following a systematic approach ensures optimal performance and coverage. Here’s a step-by-step guide:

Step-by-Step Installation Guide

  1. Choose the Right Location: Select a location that offers a clear view of the area you want to monitor. Ensure the camera is within range of your Wi-Fi network.
  2. Mount the Camera: Use the provided mounting hardware to secure the camera. For outdoor cameras, ensure they are positioned to avoid direct exposure to extreme weather.
  3. Power the Camera: Connect the camera to a power source if it’s wired, or insert the batteries for battery-powered models.
  4. Connect to Wi-Fi: Follow the manufacturer’s instructions to connect the camera to your Wi-Fi network. This usually involves using the companion mobile app.
  5. Set Up the App: Download the camera’s mobile app and create an account. Follow the app’s prompts to add the camera and configure settings.
  6. Test the Camera: Check the camera’s live feed to ensure it is capturing the desired area. Adjust the angle if necessary.

Common Issues and Troubleshooting

  • Weak Wi-Fi Signal: Ensure the camera is within range of your router or consider using a Wi-Fi extender.
  • App Connectivity Issues: Restart the app and camera, and ensure your phone is connected to the same Wi-Fi network.
  • Power Issues: Check the power source or replace batteries if the camera is not turning on.

Maintaining Your Wi-Fi Camera

Regular maintenance ensures your Wi-Fi camera operates efficiently and continues to provide reliable security.

Regular Maintenance Tips

  • Clean the Lens: Periodically clean the camera lens with a soft cloth to ensure clear video footage.
  • Check the Mounting: Ensure the camera is securely mounted and has not shifted.
  • Inspect Wiring: For wired cameras, check the cables for any signs of wear or damage.

Software Updates

Manufacturers often release firmware updates to improve performance and security. Ensure your camera and app are always updated to the latest version.

Security Considerations

  • Use Strong Passwords: Set a strong, unique password for your camera and associated accounts.
  • Enable Two-Factor Authentication: If available, enable two-factor authentication for an added layer of security.
  • Regularly Monitor Your Camera Feed: Check the camera feed and logs regularly to ensure there are no unauthorized access attempts.

Wi-Fi cameras offer a powerful and convenient solution for enhancing home and business security. Their ability to provide real-time monitoring, integration with smart home systems, and cost-effectiveness makes them an attractive option for many users. By understanding how these cameras work, their benefits, and the various types available, you can make an informed decision about which model best suits your needs. Whether for personal security, monitoring loved ones, or integrating into a smart home setup, Wi-Fi cameras are a valuable addition to any property.

Lorex 4K Spotlight IndoorOutdoor Wi-Fi 6 Security Camera with Smart Security Lighting

CORSAIR Enhances SSD Performance with MP700 PRO SE PCIe 5.0 x4 M.2 SSDs

0

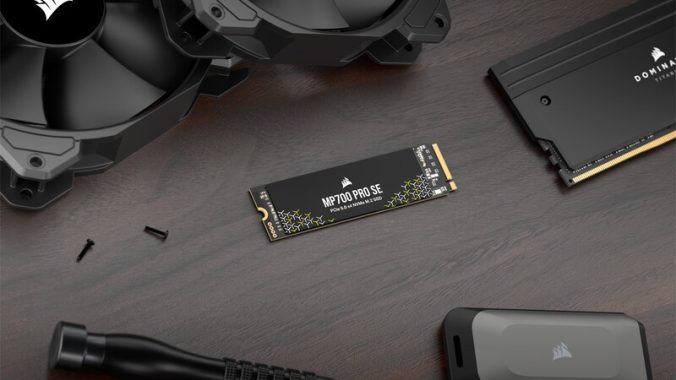
CORSAIR has unveiled the MP700 PRO SE PCIe 5.0 SSD, boasting remarkable sequential read speeds of up to 14,000MB/sec and write speeds up to 12,000MB/sec. These speeds are nearly double those of top PCIe 4.0 SSDs and up to 25 times faster than standard SATA SSDs. The MP700 PRO SE is offered in 2TB and 4TB capacities.

Beyond its exceptional sequential performance, the MP700 PRO SE leverages advanced interface, controller, and NAND flash technologies to deliver superior random read and write speeds, essential for quick file transfers and as an OS drive. Users will experience faster load times for Windows, applications, and games, while large file transfers become effortless. With native support for Microsoft® DirectStorage, this SSD is poised to enhance gaming experiences now and in the future.

Mp700 Pro Se
MP700 PRO SE

The CORSAIR MP700 PRO SE is optimized for the latest platforms, including Intel® 14th Gen and AMD Ryzen™ 7000 series CPUs and PCIe 5.0 motherboards. It also maintains compatibility with PCIe 4.0 motherboards, ensuring a smooth upgrade path and long-term viability.

Designed in the industry-standard M.2 2280 form factor, the MP700 PRO SE ensures broad compatibility and easy installation across various systems and platforms. While cooling is necessary for optimal performance, most motherboards’ integrated M.2 cooling solutions are sufficient. Additionally, the MP700 PRO SE comes with an optional stylish active cooler to prevent throttling and ensure smooth operation.

Aimed at demanding gamers, content creators, and professionals, the MP700 PRO SE offers a Hydro X Series water block variant, perfect for integration into custom cooling loops. Featuring industry-standard 1/4″ fittings, this option is ideal for maximizing performance under extreme workloads. CORSAIR provides cooling solutions to meet diverse needs.

The MP700 PRO SE is supported by the free CORSAIR SSD Toolbox software, which includes features like secure erase and firmware updates directly from the desktop. It also comes with a five-year warranty, offering peace of mind regarding its performance and reliability.

 Mp700 Pro Se
MP700 PRO SE – images: CORSAIR

The 2TB and 4TB versions of the CORSAIR MP700 PRO SE PCIe 5.0 x4 NVMe 2.0 M.2 SSDs are now available through the CORSAIR webstore and authorized retailers and distributors worldwide. The MP700 PRO SE with Air Cooler will be available in June.

For current pricing, visit the CORSAIR website or contact your local CORSAIR sales or PR representative.

Android Emulators, Best Software, and Rooting Android Smartphones

0

Android emulators and rooting are two powerful tools in the Android ecosystem, allowing users to extend their device’s capabilities beyond typical usage. Emulators provide a platform for running Android apps on non-Android devices, enhancing productivity and expanding possibilities for developers and gamers. Rooting, on the other hand, grants superuser access to your device, enabling deeper customization and control. This article will explore the best Android emulators available, alternative methods to run Android apps on PCs, and a comprehensive guide on how to root your Android smartphone.

  • What are Android Emulators?

Android emulators are software applications that simulate an Android environment on a computer or other device. They allow users to run Android apps and games on a PC or Mac, providing a versatile solution for testing, development, and enhanced gaming experiences.

Common Use Cases:

  • Gaming: Emulators provide a larger screen and better controls for a superior gaming experience.
  • App Development: Developers can test their apps in various Android environments without needing multiple devices.
  • Productivity: Use Android-specific apps and tools on a desktop for enhanced productivity.

Advantages:

  • Access to Android apps on a larger screen
  • Easier app testing and debugging
  • Enhanced performance and control options for gaming

Disadvantages:

  • Potential performance issues depending on system specs
  • Not all apps and games run smoothly on emulators
  • Possible security risks if not used properly
  • Top Android Emulators

Bluestacks

Features and Benefits:

  • User-friendly interface
  • High performance and compatibility
  • Multi-instance capability
  • Integrated Google Play Store

System Requirements:

  • OS: Windows 7 or higher, macOS Sierra or higher
  • Processor: Intel or AMD processor
  • RAM: At least 4GB
  • Storage: 5GB free disk space

    Bluestack
    Bluestack

Installation and Setup Guide:

  1. Download the Bluestacks installer from the official website.
  2. Run the installer and follow the on-screen instructions.
  3. Once installed, open Bluestacks and log in with your Google account.
  4. Access the Google Play Store and start downloading apps.

NoxPlayer

Features and Benefits:

  • Customizable controls
  • Multi-instance support
  • Integrated Google Play Store
  • Lightweight and fast

System Requirements:

  • OS: min. Windows XP SP3 or higher, macOS Sierra or higher
  • Processor: Dual-core processor
  • RAM: At least 2GB
  • Storage: 1.5GB free disk space

    NoxPlayer
    NoxPlayer

Installation and Setup Guide:

  1. Download the NoxPlayer installer from the official website.
  2. Run the installer and complete the installation process.
  3. Open NoxPlayer and log in with your Google account.
  4. Start downloading and running your favorite apps.

LDPlayer

Features and Benefits:

  • Optimized for gaming
  • High compatibility with various apps
  • Multi-instance and multi-task support
  • Regular updates and improvements

System Requirements:

  • OS: Windows 7 or higher
  • Processor: Intel or AMD processor
  • RAM: At least 2GB
  • Storage: 36GB free disk space

Installation and Setup Guide:

  1. Download LDPlayer from the official website.
  2. Run the installer and follow the setup instructions.
  3. Open LDPlayer and log in with your Google account.
  4. Download and enjoy your favorite apps and games.

MEmu Play

Features and Benefits:

  • High performance and compatibility
  • Multiple Android versions supported
  • Keyboard mapping for enhanced controls
  • Multi-instance manager

System Requirements:

  • OS: Windows XP SP3 or higher
  • Processor: Intel or AMD processor
  • RAM: At least 2GB
  • Storage: 5GB free disk space

    Memu Pl
    MEmu Play

Installation and Setup Guide:

  1. Download MEmu Play from the official website.
  2. Run the installer and complete the installation process.
  3. Open MEmu Play and log in with your Google account.
  4. Access the Google Play Store to download apps.

Andy

Features and Benefits:

  • Full Android experience on PC
  • Synchronization between desktop and mobile
  • Supports Xbox/PS controllers
  • Integrated Google Play Store

    Andy Emul
    Andy

System Requirements:

  • OS: Windows 7 SP1 or higher, macOS X 10.8 or higher
  • Processor: Dual-core AMD or Intel CPU
  • RAM: At least 3GB
  • Storage: 10GB free disk space

Installation and Setup Guide:

  1. Download Andy from the official website.
  2. Run the installer and follow the instructions.
  3. Open Andy and log in with your Google account.
  4. Start downloading apps from the Google Play Store.

Comparison Table of Top Emulators:

FeatureBluestacksNoxPlayerLDPlayerMEmu PlayAndy
PerformanceHighHighHighHighMedium
User InterfaceUser-friendlyCustomizableOptimized for gamingUser-friendlyFull Android experience
System RequirementsModerateLowModerateLowModerate
Multi-instanceYesYesYesYesNo
Google Play StoreYesYesYesYesYes
Controller SupportYesYesYesYesYes

 – Alternative Methods to Run Android Apps on PC

Android-x86

Overview: Android-x86 is a project that ports the Android operating system to run on x86-based computers. It offers a complete Android experience on your PC.

Installation Guide:

  1. Download the Android-x86 ISO file from the official website.
  2. Create a bootable USB drive using tools like Rufus.
  3. Boot your PC from the USB drive and follow the installation instructions.
  4. Once installed, configure your Google account and start using Android apps.

VirtualBox with Android OS

Overview: Running Android OS in a VirtualBox allows you to create a virtual Android machine on your PC. This method provides flexibility and isolation from your main system.

Installation Guide:

  1. Download and install VirtualBox from the official website.
  2. Download an Android OS ISO file (e.g., from Android-x86 project).
  3. Create a new virtual machine in VirtualBox and select the downloaded ISO file as the boot disk.
  4. Start the virtual machine and follow the installation process.
  5. Configure your Google account to start using Android apps.

Chrome OS with Google Play Store

Overview: Chrome OS now supports running Android apps via the Google Play Store. This method is particularly useful for users who have a Chromebook or are comfortable installing Chrome OS on their PC.

Usage Guide:

  1. If you have a Chromebook, ensure it’s updated to the latest version.
  2. Open the Google Play Store and log in with your Google account.
  3. Download and install Android apps directly from the Play Store.

– Rooting Your Android Smartphone

Definition and Purpose: Rooting an Android device means gaining superuser access, allowing you to modify the system files and settings that are usually restricted. This process unlocks a wide range of customization and optimization options.

Benefits of Rooting:

  • Complete control over your device
  • Ability to install custom ROMs and kernels
  • Enhanced performance and battery life
  • Removal of pre-installed bloatware
  • Advanced backup and restore capabilities

Risks and Disadvantages:

  • Voiding the device warranty
  • Potential for bricking the device if done incorrectly
  • Security vulnerabilities from unrestricted access
  • Compatibility issues with certain apps

– Step-by-Step Guide to Rooting an Android Smartphone

Pre-Rooting Checklist
  1. Backup Your Data:
    • Use tools like Google Backup or third-party apps to ensure all your data is safe.
  2. Ensure Battery is Fully Charged:
    • A fully charged battery prevents the device from dying mid-process, which could cause issues.
  3. Enable Developer Options and USB Debugging:
    • Go to Settings > About Phone and tap on the Build Number seven times to enable Developer Options.
    • In Developer Options, enable USB Debugging.

Rooting Methods

Using One Click Root Apps

KingRoot:

  1. Download and install the KingRoot app on your device.
  2. Open KingRoot and follow the on-screen instructions to start the rooting process.
  3. Wait for the process to complete and reboot your device.

Dr.Fone:

  1. Download and install Dr.Fone on your PC.
  2. Connect your device to the PC using a USB cable.
  3. Open Dr.Fone and select the “Root” option.
  4. Follow the on-screen instructions to root your device.
Using Custom Recovery (TWRP) and SuperSU/Magisk

Installing TWRP:

  1. Download the TWRP recovery image for your device.
  2. Use ADB and Fastboot tools on your PC to flash the TWRP image:
    • Open Command Prompt in the directory where ADB and Fastboot are installed.
    • Enter the following commands:
      adb reboot bootloader
      fastboot flash recovery twrp.img
      fastboot reboot
  3. Reboot your device into recovery mode.

Flashing SuperSU/Magisk:

  1. Download the latest SuperSU or Magisk ZIP file.
  2. Transfer the ZIP file to your device.
  3. Boot into TWRP recovery mode.
  4. Select “Install” and choose the SuperSU or Magisk ZIP file.
  5. Swipe to confirm the installation.
  6. Reboot your device.
Post-Rooting Steps
  1. Verify Root Status:
    • Use apps like Root Checker to confirm that your device is rooted.
  2. Install Root Management Apps:
    • Use Magisk Manager or SuperSU to manage root permissions and other root-related tasks.
  3. Restore Data and System Optimization:
    • Restore your backed-up data and optimize your device settings to enhance performance and security.

–  Conclusion –

Android emulators and rooting provide significant benefits for users looking to expand their device’s capabilities. Choosing the right emulator can enhance your productivity and gaming experience, while rooting your device opens up a world of customization and control. However, both actions come with potential risks and should be approached with caution. By following the detailed guides provided, you can make informed decisions and safely explore the full potential of your Android devices. Always remember to backup your data and proceed carefully to avoid any adverse effects.

Sharp AQUOS XLED FV1: A Fusion of Style and Performance

0

Step into the world of cutting-edge television technology with the Sharp AQUOS XLED FV1. This sophisticated piece of innovation not only redefines the viewing experience but also elevates the aesthetics of your living space.

At first glance, the Sharp AQUOS XLED FV1 captivates with its sleek and contemporary design. With thin bezels on three sides and a slightly thicker one at the bottom, the TV exudes a premium feel. Complemented by a metal center-mounted stand, this television doesn’t just sit; it commands attention. Elevating the TV about 3.4 inches above the table, the stand ensures compatibility with most soundbars without obstructing the screen. Even for wall-mounted setups, accessibility is not compromised, thanks to strategically positioned inputs and thoughtful cable management provisions.

Sharp Aquos Xled Fv1 Tv
Sharp AQUOS XLED FV1 TV

Crafted with attention to detail, the build quality of the Sharp AQUOS XLED FV1 is impeccable. While some flex is noticeable towards the back, it doesn’t impede performance. The stand provides sturdy support, minimizing wobbling both front to back and side to side.

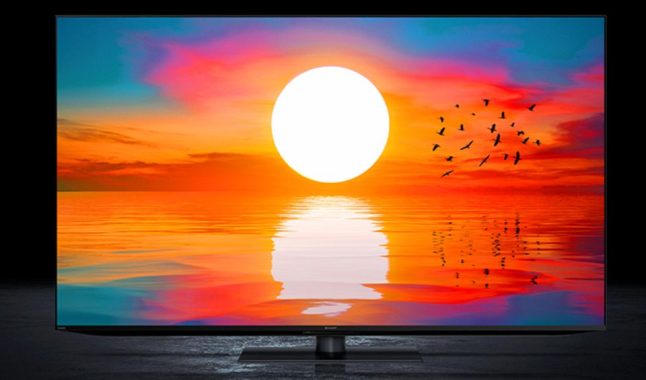
Where the Sharp AQUOS XLED FV1 truly shines is in its display capabilities. Enabled with local dimming, the TV delivers breathtaking contrast, rendering deep blacks and vibrant highlights, especially in HDR content. Speaking of HDR, its brightness capabilities are exceptional, ensuring every detail shines through, even in the darkest and brightest of scenes. With PQ EOTF tracking, the TV faithfully reproduces HDR content, staying true to the creator’s vision. And to preserve details in bright highlights, a subtle roll-off near peak brightness is ingeniously implemented.

The color reproduction of the Sharp AQUOS XLED FV1 is equally impressive. With wide coverage of color spaces like DCI-P3 and Rec. 2020, it brings your content to life with accuracy, albeit with slight deviations in certain hues.

However, not without its flaws, the television struggles with sharpness processing when handling low-resolution and low-bitrate content. While response time is excellent overall, transitions from dark states may exhibit some black smearing, albeit minimally.

The Sharp AQUOS XLED boasts impressive gaming performance, particularly when in Game Mode, offering commendable input lag that, while not the lowest in the market, ensures a responsive gaming experience. Supporting resolutions up to 4K @ 120Hz on two of its four HDMI ports, along with 1080p and 4K @ 60Hz @ 4:4:4, it caters to diverse gaming setups. However, it falls short in properly displaying 4:4:4 in both 1080p and 4K @ 120Hz.

In terms of HDR support, the AQUOS XLED covers HDR10, HLG, and Dolby Vision, yet lacks compatibility with HDR10+. HDMI 2.1 bandwidth is limited to ports 3 and 4, with port 3 doubling as the eARC port, restricting bandwidth options.

 Sharp Aquos Xled Fv1 Tv
AQUOS XLED FV1 TV : images: Sharp

Comparatively, the Hisense U8/U8K offers similar features at a lower price point, with superior contrast ratio and black uniformity, making it preferable for dark room viewing. Additionally, its enhanced pre-calibration accuracy and support for 4K @ 144Hz make it a compelling choice for PC gamers.

Likewise, the LG G3 OLED surpasses the AQUOS XLED with its infinite contrast ratio, wider viewing angle, and faster response time, catering to both cinematic viewing and gaming needs.

However, the AQUOS XLED shines in gaming scenarios with its clear motion, minimal blur, and excellent input lag, making it ideal for immersive gaming experiences. Its stellar contrast and brightness ensure vibrant visuals, whether in a dimly lit or well-lit environment. Moreover, with HDMI 2.1 support and VRR compatibility, it seamlessly integrates with modern gaming consoles.

For movie enthusiasts, the AQUOS XLED delivers deep blacks, vibrant highlights, and lifelike colors, enhanced by effective local dimming and wide color gamut. Despite some drawbacks in pre-calibration accuracy, it excels in providing a judder-free and artifact-smoothing movie-watching experience.

As a PC monitor, the AQUOS XLED offers impressive SDR brightness and input lag, though its narrow viewing angle and limitations in chroma display at higher refresh rates may hinder its appeal for certain users. Nevertheless, its commendable response time ensures minimal blur in fast-paced scenes.

Sharp Aquos Xled Fv1
AQUOS XLED FV1 TV

Part of Sharp’s premium AQUOS lineup, the AQUOS XLED FV1 integrates innovative Deep Chroma QD technology, Dolby Vision IQ, and ARSS+ speaker system, offering a blend of brightness, contrast, and immersive audio experience. Available in 65-inch and 75-inch sizes, it epitomizes excellence in modern television technology. Price: 75″ AQUOS XLED TV Sale $2299.99 – 65″ AQUOS XLED TV Sale $1599.99.

Specifications of the Sharp AQUOS XLED TV (75-inch)

Display: 75-inch 4K Ultra HD (3,840 x 2,160) Mini-LED display, 120Hz refresh rate, HDR10, HLG, and Dolby Vision IQ

Operating System: Android 11 TV

Speakers: 85W total, ARSS+ (11 speakers – 4 main down-firing speakers, 2 forward-firing tweeters, 2 up-firing main drivers, 2 up-firing tweeters, 1 15W subwoofer) with Dolby Atmos, 2.1.2 speaker system

Connectivity: WiFi, Bluetooth 5.1

Inputs: 2 x USB Type A, 4 x HDMI 2.1, 1 x AV-IN (mini plug), 1 x headphone, 1 x Digital audio output, 1 Ethernet

The Sharp 65/75-inch AQUOS XLED TV stands out with its impressive features, boasting a massive 65/75-inch 4K Mini-LED panel that delivers stunning color accuracy, exceptional brightness, and contrast, offering an immersive viewing experience for movies. With a fast 120Hz refresh rate, it ensures smooth and tear-free gaming. If you prioritize both image quality and size, this smart TV is among the finest available on the market.

Pros:

  • Mini-LED display panel provides superb color accuracy
  • Over 2,000 micro dimming zones on the panel enhance contrast and brightness
  • Wide range of ports for connectivity
  • Robust 85W surround speaker system enhances audio experience
  • Android TV interface facilitates easy navigation and content casting from various devices

Cons:

  • Considerable investment required due to high price
  • Rear ports are challenging to access
  • Heavy build may pose handling challenges

In essence, the Sharp AQUOS XLED FV1 is a testament to the convergence of style and performance in modern television technology. With its sleek design, stellar display capabilities, and meticulous attention to detail, it’s poised to redefine your viewing experience.

Unveiling Philips TITAN OS: A Gateway to Superior TV Quality

0

Smart TV’s from Philips TITAN OS : 

As technology advances, so do the expectations of consumers seeking not just visual clarity but also seamless performance. Philips, a renowned name in the electronics industry, has been at the forefront of innovation, continuously refining its products to meet evolving demands. Central to their commitment to excellence is the Philips TITAN OS, an operating system designed to elevate the quality and performance of their TVs. Coupled with Philips’ Pixel Precise Ultra HD Engine, this combination promises a viewing experience that transcends ordinary expectations.

Philips TITAN OS: A Paradigm Shift in Television Interface:
At the heart of every smart TV lies its operating system, dictating not only its user interface but also its capabilities and functionalities. Philips TITAN OS represents a paradigm shift in television interface design, focusing on intuitive navigation, seamless integration, and a plethora of smart features. Unlike conventional operating systems, TITAN OS is purpose-built for Philips TVs, ensuring optimal performance and compatibility.

75pml9009
Philips 75PML9009 with Titan OS – photo

One of the standout features of Philips TITAN OS is its user-friendly interface, which prioritizes simplicity without compromising on functionality. Navigating through menus, accessing apps, and adjusting settings are streamlined processes, making the TV experience more enjoyable and accessible to users of all ages. Additionally, TITAN OS boasts robust connectivity options, allowing users to seamlessly integrate their TV with other smart devices in their homes. Whether it’s streaming content from a smartphone or controlling smart home appliances, TITAN OS serves as the central hub, offering unparalleled convenience and versatility.

Furthermore, Philips has placed a strong emphasis on content discovery and personalization within TITAN OS. Advanced algorithms analyze user preferences and viewing habits, curating recommendations tailored to individual tastes. This not only simplifies the process of finding new content but also enhances the overall viewing experience by presenting relevant suggestions.

Quality and Performance: A Testament to Philips’ Legacy:
Beyond its operating system, the quality and performance of a TV are paramount considerations for consumers. In this regard, Philips has established itself as a leader, consistently delivering products that exceed expectations. From stunning visuals to immersive audio, Philips TVs epitomize the marriage of cutting-edge technology and superior craftsmanship.

One of the hallmarks of Philips TVs is their exceptional picture quality, made possible by a combination of advanced display technologies and precise calibration. Whether it’s the deep blacks of OLED panels or the vibrant colors of Quantum Dot displays, Philips TVs offer a visual feast that captivates the senses. Moreover, with support for High Dynamic Range (HDR) formats such as HDR10+ and Dolby Vision, these TVs ensure that every frame is rendered with breathtaking detail and clarity.

In addition to stunning visuals, Philips TVs also excel in the realm of audio performance, thanks to innovative sound technologies. Whether it’s immersive surround sound or crystal-clear dialogue, Philips TVs leverage cutting-edge audio processing algorithms to deliver an audio experience that complements the visual spectacle.

Pixel Precise Ultra HD Engine: Enhancing Visual Fidelity and Clarity:
At the core of Philips TVs’ visual prowess lies the Pixel Precise Ultra HD Engine, a proprietary technology designed to enhance image quality and clarity. Leveraging sophisticated algorithms and advanced image processing techniques, this engine optimizes every pixel, resulting in sharper details, smoother motion, and more lifelike colors.

One of the key features of the Pixel Precise Ultra HD Engine is its ability to upscale lower-resolution content to near-4K quality. Whether it’s streaming videos, Blu-ray discs, or even standard-definition broadcasts, this engine intelligently interpolates additional pixels, enhancing the overall sharpness and clarity of the image. As a result, even non-4K content looks stunningly crisp and detailed on Philips TVs, ensuring a consistently immersive viewing experience.

Furthermore, the Pixel Precise Ultra HD Engine incorporates motion enhancement technologies to minimize motion blur and judder, particularly during fast-paced scenes. By analyzing motion vectors and interpolating intermediate frames, this engine ensures that motion remains smooth and fluid, preserving the integrity of the original content.

The latest interface of Philips Smart TVs doesn’t aim for revolution but rather refines the best features of competitors’ full-screen versions. This ensures that users transitioning from other TV brands will find familiar and intuitive navigation on their Philips sets.

The Philips Titan OS presents a menu granting access to various features like search, home screen, channels (IPTV), applications, signal inputs, and settings. A notable addition is the “sponsored content” section, occupying roughly a third of the screen, followed by a customizable array of popular applications.

Certain core apps are always visible on the launcher, ensuring easy access even when not actively in use. Users can explore curated recommendations and previews of movies and TV series from registered streaming apps, with the search functionality touted as a standout feature, enabling cross-platform content exploration.

Furthermore, sorting content by genre streamlines the search process, catering to individual preferences and moods. The casting feature, compatible with Chromecast, facilitates seamless content streaming from smartphones, tablets, or other TVs to the Titan OS TV, providing a convenient method for accessing unsupported app content on the TV.

Notably, streaming applications are accessed via a cloud server, indicating a departure from local storage and management on the TV itself. While this ensures up-to-date applications, questions linger regarding download times and the impact of cloud updates on viewing experiences.

The deployment of Titan OS initially targets specific models like PML9009, PUS8909, and PUS8309, with OLED759 following suit. However, flagship 2024 series like OLED+959, OLED+909, and OLED809 will retain Google TV integration, emphasizing a premium experience for discerning consumers. Despite this, Titan OS demonstrates Philips’ commitment to innovation and user-centric design, promising a seamless and feature-rich smart TV experience for users across various models.

The 4 best models in Philips’ 2026 TV lineup represent the pinnacle of their shift to Titan OS, introducing breakthroughs like Dolby Vision 2 Max, four full-bandwidth HDMI 2.1 ports, and 165Hz refresh rates for gaming.

Philips OLED951: The ultimate picture-quality flagship built with a META 4.0 Primary RGB Tandem WOLED panel. It delivers an astonishing 4500 nits peak brightness and features an ultra-low reflection coating (reducing glare to just 0.3%). Driven by the 10th Gen P5 AI Dual Engine processor, it includes 4-sided Ambilight and the room-expanding AmbiScape smart light integration.

Philips OLED911: The best option for built-in cinematic sound, carrying identical screen technology to the flagship model but integrating a premier 81W 3.1-channel Bowers & Wilkins soundbar. It utilizes the single-chip 10th Gen P5 AI processor, features 4-sided Ambilight, and introduces a compact 48-inch size to the premium lineup for smaller rooms.

Philips MLED981: The brand’s first high-performance RGB Mini-LED TV, tailored for ultra-bright rooms and massive screen preferences. Available in a commanding 85-inch size, it utilizes the 10th Gen P5 AI processor to manage halo artifacts, boasts a punchy 70W 4.1-channel audio array with a built-in rear subwoofer, and includes 3-sided Ambilight.

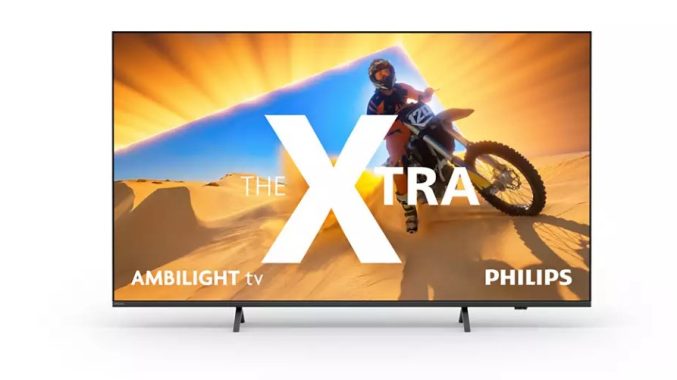
In an era defined by technological innovation and heightened consumer expectations, Philips stands out as a beacon of excellence in the world of television. With its TITAN OS, Philips has redefined the television interface, offering a seamless and intuitive user experience that enhances the enjoyment of content. Coupled with the Pixel Precise Ultra HD Engine, Philips TVs deliver unparalleled quality and performance, captivating audiences with stunning visuals and immersive audio. As the boundaries of home entertainment continue to expand, Philips remains steadfast in its commitment to pushing the envelope and setting new standards for excellence in television technology.