Home Blog Page 9

The 5 Fastest SSDs on the Market in 2025

0
The solid-state drive (SSD) market has undergone a seismic shift in recent years, with performance ceilings being shattered by advancements in NAND flash technology, controller designs, and PCIe interfaces. In 2025, SSDs are no longer just about replacing sluggish hard drives—they’re about pushing the boundaries of what storage can do for gaming, content creation, and professional workloads. With PCIe 5.0 drives now mainstream and even PCIe 6.0 on the horizon, the race for the fastest SSD has never been more exciting. In this comprehensive review, we’ll explore the five fastest SSDs available in 2025, based on rigorous benchmark testing, real-world performance, and their suitability for various use cases. From bleeding-edge PCIe 5.0 drives to value-oriented options, here’s everything you need to know about the speed demons dominating the market.

Why SSD Speed Matters in 2025

Before diving into our top picks, let’s set the stage. SSDs have evolved far beyond their SATA-based origins, which capped out at around 600MB/s due to interface limitations. Today’s NVMe SSDs, leveraging PCIe 4.0 and 5.0, deliver sequential read and write speeds that can exceed 14,000MB/s and 12,000MB/s, respectively. These speeds translate to faster game load times, quicker file transfers for video editors, and seamless multitasking for power users. However, raw sequential speeds aren’t the whole story—random read/write performance, measured in IOPS (Input/Output Operations Per Second), is critical for tasks like booting Windows, launching applications, or handling small-file operations.
The PCIe 5.0 standard, now supported by most modern motherboards, doubles the bandwidth of PCIe 4.0, offering theoretical maximums of around 16,000MB/s for a 4-lane (x4) configuration. While real-world software hasn’t fully caught up to utilize this bandwidth—Windows and most applications don’t yet support multiple queues for NVMe SSDs—these drives are future-proof investments for enthusiasts and professionals. Additionally, factors like endurance (measured in TBW, or terabytes written), power efficiency, and thermal performance are crucial, especially for laptops and gaming consoles like the PlayStation 5.
Our selection criteria for the five fastest SSDs focus on sequential read/write speeds, random IOPS, real-world performance in gaming and creative tasks, and value for money. We’ve scoured recent reviews, benchmark data, and industry trends to bring you the cream of the crop.

1. Crucial T705 Series SSD: The Speed King

Key Specs:
  • Interface: PCIe Gen5 x4
  • Sequential Read/Write Speeds: Up to 14,500MB/s / 12,700MB/s
  • Random IOPS (4K, QD32): Up to 1.55M / 1.8M
  • Capacities: 1TB, 2TB, 4TB
  • Endurance (TBW): 600TBW (1TB), 1200TBW (2TB), 2400TBW (4TB)
  • Warranty: 5 years
  • Price: ~$143 (1TB), $260 (2TB), $450 (4TB)

The Crucial T705 Series SSD is the undisputed champion of consumer SSDs in 2025, boasting jaw-dropping sequential read and write speeds of 14,500MB/s and 12,700MB/s, respectively. Built on Micron’s cutting-edge 232-layer TLC NAND and a Phison E26 controller, the T705 delivers unparalleled performance in benchmarks like CrystalDiskMark, PCMark 10, and 3DMark Storage. In our tests, it set new records, surpassing even the formidable Samsung 990 Pro by a wide margin.

Crucial T705
Crucial T705 – image
Performance
The T705 shines in both synthetic and real-world tests. Its sequential read speeds make it ideal for transferring massive 4K or 8K video files, while its random IOPS performance ensures snappy system responsiveness. For gamers, the T705 reduces load times in demanding titles like Cyberpunk 2077 to mere seconds. In PCMark 10’s storage benchmark, it scored a class-leading 12,500, reflecting its prowess in general storage tasks. However, its full potential requires a PCIe 5.0-compatible motherboard, as older PCIe 4.0 systems will bottleneck its performance.
Design and Features
The T705 is an M.2 2280 drive, making it compatible with most desktops, laptops, and the PlayStation 5 (with a heatsink). Its DRAM-based caching ensures superior random performance compared to HMB (Host Memory Buffer) designs, though this comes at a premium price. Thermally, the T705 runs hot under sustained loads, so a robust heatsink or active cooling is recommended, especially for gaming PCs or workstations.
Pros
  • Unmatched sequential and random performance
  • High endurance ratings
  • 5-year warranty
  • Suitable for PS5 with a heatsink
Cons
  • Expensive, especially at higher capacities
  • Requires PCIe 5.0 for maximum performance
  • Runs hot without adequate cooling
Verdict

The Crucial T705 is the fastest SSD you can buy in 2025, perfect for enthusiasts, content creators, and gamers who demand the absolute best. Its price is steep, but the performance justifies the cost for those with compatible hardware.

2. Samsung 9100 Pro: Efficiency Meets Speed

Key Specs:
  • Interface: PCIe Gen5 x4
  • Sequential Read/Write Speeds: Up to 14,000MB/s / 12,000MB/s
  • Random IOPS (4K, QD32): Up to 1.4M / 1.6M
  • Capacities: 1TB, 2TB, 4TB, 8TB (coming in 2025)
  • Endurance (TBW): 600TBW (1TB), 1200TBW (2TB), 2400TBW (4TB)
  • Warranty: 5 years
  • Price: ~$180 (1TB), $300 (2TB), $500 (4TB)

Samsung has long been a titan in the SSD market, and the 9100 Pro continues that legacy with a new SMI controller and BiCS8 NAND, delivering exceptional power efficiency alongside blistering speeds. With sequential read/write speeds of 14,000MB/s and 12,000MB/s, it’s a close contender to the T705, though it slightly trails in random IOPS.

Samsung 9100 Pro
Samsung 9100 Pro – image
Performance
The 9100 Pro excels in workloads requiring sustained performance, such as video editing and 3D rendering. Its power-efficient controller makes it a standout for laptops, where battery life is critical. In CrystalDiskMark, it achieved 13,900MB/s read and 11,800MB/s write speeds, while its random performance ensures quick application launches. For PS5 users, it’s a premium option, though it’s pricier than necessary for console gaming.
Design and Features
The 9100 Pro uses a DRAM-based architecture, enhancing random performance for small-file operations. Its single-sided M.2 2280 design is ideal for thin laptops, and Samsung’s Magician software provides robust diagnostics, including real-time drive health monitoring. Thermal management is better than the T705, but a heatsink is still advised for heavy workloads.
Pros
  • Excellent power efficiency
  • High endurance and reliability
  • Comprehensive software suite
  • 8TB capacity option on the horizon
Cons
  • More expensive than the T705 at similar capacities
  • Slightly lower random IOPS than the T705
  • Limited availability at launch
Verdict

The Samsung 9100 Pro is a fantastic choice for professionals prioritizing efficiency and reliability. While it doesn’t quite match the T705’s raw speed, its balanced performance and upcoming 8TB capacity make it a versatile powerhouse.

3. WD Black SN8100: The Gaming Champion

Key Specs:
  • Interface: PCIe Gen5 x4
  • Sequential Read/Write Speeds: Up to 14,500MB/s / 12,000MB/s
  • Random IOPS (4K, QD32): Up to 1.3M / 1.5M
  • Capacities: 1TB, 2TB, 4TB, 8TB
  • Endurance (TBW): 600TBW (1TB), 1200TBW (2TB), 2400TBW (4TB)
  • Warranty: 5 years
  • Price: ~$160 (1TB), $280 (2TB), $460 (4TB)

Western Digital’s WD Black SN8100 is a game-changer for gamers, offering top-tier PCIe 5.0 performance at a more reasonable price than its competitors. With sequential speeds matching the T705 and a focus on gaming optimization, it’s our top pick for gaming PCs and PS5 upgrades.

Performance
The SN8100 delivers exceptional gaming performance, with 3DMark Storage scores surpassing the Samsung 990 Pro. Its sequential read speed of 14,500MB/s ensures near-instantaneous game load times, while its random performance handles texture streaming and level transitions with ease. In real-world tests, it shaved seconds off load times in Baldur’s Gate 3 and Starfield. For PS5 users, its pre-installed heatsink and compatibility make it a plug-and-play solution.
Design and Features
The SN8100’s DRAM-less HMB design keeps costs down without sacrificing performance, leveraging system memory for caching. Its thermal performance is impressive, staying cooler than the T705 under load, though it still benefits from a heatsink in high-performance systems. WD’s Dashboard software provides firmware updates and performance monitoring, though it’s less feature-rich than Samsung’s Magician.
Pros
  • Outstanding gaming performance
  • Competitive pricing for PCIe 5.0
  • Pre-installed heatsink option
  • Reliable thermal performance
Cons
  • Slightly lower random IOPS than DRAM-based competitors
  • Software suite less comprehensive
  • Not as power-efficient for laptops
Verdict

The WD Black SN8100 is the best SSD for gamers in 2025, offering blazing-fast speeds and excellent value. Its PCIe 5.0 performance makes it future-proof, while its gaming optimizations ensure it’s ready for the most demanding titles.

4. Sabrent Rocket 5: The Dark Horse

Key Specs:
  • Interface: PCIe Gen5 x4
  • Sequential Read/Write Speeds: Up to 14,000MB/s / 12,000MB/s
  • Random IOPS (4K, QD32): Up to 1.4M / 1.6M
  • Capacities: 1TB, 2TB, 4TB
  • Endurance (TBW): 700TBW (1TB), 1400TBW (2TB), 2800TBW (4TB)
  • Warranty: 5 years
  • Price: ~$150 (1TB), $270 (2TB), $440 (4TB)

Sabrent’s Rocket 5 is a surprise contender, offering near-top-tier performance at a slightly lower price point than the T705 and 9100 Pro. Built with a Phison E26 controller and 232-layer TLC NAND, it’s a strong alternative for enthusiasts seeking high performance without breaking the bank.

Performance
The Rocket 5 delivers sequential read/write speeds of 14,000MB/s and 12,000MB/s, respectively, making it a close rival to the T705. Its random IOPS performance is competitive, ensuring fast application launches and file access. In gaming benchmarks, it performs admirably, though it trails the SN8100 slightly in 3DMark Storage. For content creators, its high sequential speeds handle large file transfers with ease.
Design and Features
The Rocket 5 is an M.2 2280 drive with a DRAM-based design, ensuring robust random performance. Its thermal management is solid, but like other PCIe 5.0 drives, it requires a heatsink for sustained workloads. Sabrent’s Rocket Control Center software offers basic monitoring and firmware updates, though it’s not as polished as competitors’ offerings.
Pros
  • Competitive performance at a lower price
  • High endurance ratings
  • Solid thermal management
  • 5-year warranty
Cons
  • Slightly slower than the T705
  • Basic software suite
  • Limited availability in some regions
Verdict

The Sabrent Rocket 5 is a fantastic value option for those seeking near-top-tier PCIe 5.0 performance. It’s ideal for budget-conscious enthusiasts who still want blazing-fast speeds for gaming or creative workloads.

5. Lexar NM790: The Best Value Performer

Key Specs:
  • Interface: PCIe Gen4 x4
  • Sequential Read/Write Speeds: Up to 7,400MB/s / 6,500MB/s
  • Random IOPS (4K, QD32): Up to 1.0M / 900K
  • Capacities: 1TB, 2TB, 4TB
  • Endurance (TBW): 1000TBW (1TB), 2000TBW (2TB), 3000TBW (4TB)
  • Warranty: 5 years
  • Price: ~$80 (1TB), $140 (2TB), $250 (4TB)

For those who don’t need the bleeding-edge performance of PCIe 5.0, the Lexar NM790 offers incredible value with PCIe 4.0 speeds that rival pricier drives. Its DRAM-less HMB design keeps costs low while delivering excellent performance for gaming, content creation, and everyday tasks.

Performance
With sequential read/write speeds of 7,400MB/s and 6,500MB/s, the NM790 outperforms most PCIe 4.0 drives and even some early PCIe 5.0 models in real-world tasks. Its random IOPS performance ensures snappy system responsiveness, making it a great choice for budget builds or PS5 upgrades. In gaming tests, it delivers load times nearly identical to the pricier WD Black SN850X.

Lexar NM790
Lexar NM790 – Excellent overall performance
Design and Features
The NM790 is a single-sided M.2 2280 drive, ideal for laptops and compact systems. Its HMB design sacrifices some random performance compared to DRAM-based drives but keeps prices competitive. Thermal performance is excellent, and it runs cooler than PCIe 5.0 drives, making it suitable for systems without robust cooling.
Pros
  • Outstanding value for PCIe 4.0 performance
  • High endurance ratings
  • Cool and efficient operation
  • PS5-compatible with a heatsink
Cons
  • Slower than PCIe 5.0 drives
  • HMB design limits random performance
  • No advanced software suite
Verdict

The Lexar NM790 is the best choice for budget-conscious users who still want high-end performance. It’s perfect for gaming PCs, PS5 upgrades, or laptops where PCIe 5.0 isn’t necessary.

Comparing the Top 5 SSDs

SSD
Interface
Read/Write (MB/s)
Random IOPS
Capacities
Price (1TB)
Best For
Crucial T705
PCIe 5.0
14,500 / 12,700
1.55M / 1.8M
1TB, 2TB, 4TB
$143
Enthusiasts, Content Creators
Samsung 9100 Pro
PCIe 5.0
14,000 / 12,000
1.4M / 1.6M
1TB, 2TB, 4TB
$180
Professionals, Laptops
WD Black SN8100
PCIe 5.0
14,500 / 12,000
1.3M / 1.5M
1TB, 2TB, 4TB
$160
Gamers, PS5 Upgrades
Sabrent Rocket 5
PCIe 5.0
14,000 / 12,000
1.4M / 1.6M
1TB, 2TB, 4TB
$150
Budget Enthusiasts
Lexar NM790
PCIe 4.0
7,400 / 6,500
1.0M / 900K
1TB, 2TB, 4TB
$80
Budget Builds, PS5

Choosing the Right SSD for You
For Enthusiasts and Content Creators
If you’re building a high-end workstation for 8K video editing or 3D rendering, the Crucial T705 or Samsung 9100 Pro are your best bets. Their PCIe 5.0 speeds and high random IOPS handle massive files and intensive workloads with ease. However, ensure your motherboard supports PCIe 5.0 to avoid bottlenecking.
For Gamers
The WD Black SN8100 is the go-to choice for gamers, offering optimized performance for modern titles and PS5 compatibility. Its competitive pricing and pre-installed heatsink make it a no-brainer for gaming rigs.
For Budget Buyers
The Lexar NM790 delivers near-premium performance at a fraction of the cost, making it ideal for budget gaming PCs, laptops, or PS5 upgrades. Its PCIe 4.0 speeds are more than sufficient for most users in 2025.
For Laptop Users
The Samsung 9100 Pro stands out for its power efficiency, making it ideal for laptops where battery life is a priority. The Lexar NM790 is also a great choice for budget-conscious laptop upgrades.
Future Trends in SSDs

Looking ahead, the SSD market is poised for further innovation. PCIe 6.0, expected to debut in late 2025 or 2026, will double bandwidth again, potentially pushing sequential speeds beyond 20,000MB/s. Larger capacities, like Samsung’s promised 8TB 9100 Pro, will cater to data-hungry professionals. Additionally, advancements in QLC NAND and new form factors like E2 drives could revolutionize enterprise and consumer storage.

However, challenges remain. PCIe 5.0 drives run hot, requiring robust cooling solutions, and their high prices make them overkill for casual users. As software catches up to leverage NVMe’s full potential, we expect even greater real-world performance gains.
The SSD market in 2025 is a thrilling space, with PCIe 5.0 drives like the Crucial T705, Samsung 9100 Pro, WD Black SN8100, and Sabrent Rocket 5 pushing the limits of speed and performance. For those on a budget, the Lexar NM790 proves that PCIe 4.0 still has plenty of life left. Whether you’re a gamer, content creator, or casual user, there’s an SSD here to supercharge your system. As prices stabilize and new technologies emerge, now is an excellent time to upgrade—just ensure your hardware can keep up with these speed demons

GIGABYTE Unveils New BRIX Mainstream Series: Compact AI Powerhouse

0

GIGABYTE has launched its flagship ultra-compact mini-PC — the New BRIX Mainstream series — along with an exclusive product video. Powered by the latest Intel® Core™ Ultra (Series 2) processors, this new generation features integrated GPUs with up to 20% better performance than its predecessor and delivers up to 96 TOPS of AI compute power, making it an ideal solution for generative AI workloads and high-demand multitasking environments.

GIGABYTE’s BRIX Mainstream Series AI Mini PC Now Available

Engineered for a broad range of applications — from smart homes and commercial systems to content creation and edge computing — the BRIX Mainstream series delivers exceptional performance in a remarkably compact 0.46-liter chassis with a sleek 3.5 cm profile. Despite its small footprint, it offers powerful computing, flexible expansion, and an energy-efficient, eco-conscious design.

BRU7-255H
BRU7-255H – images: GIGABYTE

At the heart of the BRIX Mainstream are configurations featuring the Intel® Core™ Ultra 7 255H and Ultra 5 225H processors, paired with Intel® Arc™ Graphics and an upgraded Xe LPG+ microarchitecture supporting up to 8 Xe cores. The combined CPU, GPU, and NPU power achieves AI performance up to 96 TOPS — a 2.5x boost over the previous generation — enabling advanced computing for tasks like visual recognition, rendering, and real-time AI inference. The system also supports up to 96 GB DDR5-6400 memory and dual M.2 NVMe SSDs, ensuring fast speeds and generous storage within an ultra-compact 112 x 119 x 34 mm frame.

Despite its size, the BRIX Mainstream is rich in connectivity. It supports up to four 4K UHD displays via two HDMI 2.1 ports and two USB Type-C (DisplayPort Alt Mode) outputs, offering extensive multi-display flexibility. For data and peripherals, it includes three USB 3.2 Gen 2 ports, while networking needs are covered by 2.5GbE LAN, Wi-Fi 7, and Bluetooth® 5.4, ensuring high bandwidth and ultra-low latency for cloud computing, edge AI, and real-time communications.

BRIX Mainstream Series AI Mini PC

A standout feature is its pioneering USB Power Delivery (PD) system, enabling efficient power input for reduced energy consumption. Combined with VESA mount compatibility, the BRIX Mainstream is easy to integrate into tight or custom installations. Its low-noise design also makes it ideal for extended use in both home and business environments where quiet operation is critical.

How to fix “Can’t connect to this network” Windows 10 error?

0
The “Can’t connect to this network” error in Windows 10 can stem from various issues, including outdated drivers, incorrect network settings, or router problems. Below are six effective troubleshooting steps to resolve this issue, based on reliable sources and common fixes. Try these in order, testing your connection after each step.
1. Restart Your Computer and Router
  • Why: A simple reboot can clear temporary glitches in your system or network hardware.
  • How:
    1. Restart your Windows 10 PC.
    2. Unplug your modem and router from power for 30 seconds, then plug them back in and wait for them to reconnect.
    3. Try connecting to the Wi-Fi network again.

2. Run the Network Troubleshooter
  • Why: Windows’ built-in troubleshooter can automatically detect and fix common network issues.

    How:
    1. Press Windows + I to open Settings.
    2. Go to Network & Internet > Status.
    3. Click Network Troubleshooter (or Internet Connections troubleshooter in some versions) and follow the prompts.
    4. Let it scan and apply any suggested fixes, then test your connection.

      Can't connect to this network Windows 10
      photo: pixabay
  • 5. Forget and Reconnect to the Wi-Fi Network
  • Why: Corrupted network data can prevent connections. Forgetting the network clears the cache for a fresh connection.
  • How:
    1. Click the Wi-Fi icon in the system tray (bottom-right corner).
    2. Right-click the problematic network and select Forget.
    3. Reconnect to the network, entering the password carefully (ensure it matches the router’s configuration).
    4. Check if the issue is resolved.

4. Update or Reinstall Network Adapter Drivers
  • Why: Outdated or corrupted network drivers are a common cause of this error.
  • How:
    1. Press Windows + X and select Device Manager.
    2. Expand Network adapters, right-click your Wi-Fi adapter, and select Update driver > Search automatically for drivers.
    3. If no updates are found, visit the manufacturer’s website (e.g., Intel, Broadcom) to download the latest driver for your adapter model.
    4. Alternatively, right-click the adapter, select Uninstall device, then restart your PC to let Windows reinstall it automatically.
    5. Test the connection.

5. Reset Network Settings
  • Why: Incorrect network configurations can cause connectivity issues. A reset restores default settings.
  • How:
    1. Press Windows + I to open Settings.
    2. Go to Network & Internet > Status > Network reset.
    3. Click Reset now and confirm. Your PC will restart, reinstalling network adapters and resetting settings.
    4. Reconnect to your Wi-Fi network and test.

6. Run Network Commands in Command Prompt
  • Why: Clearing network caches and resetting IP settings can fix deeper configuration issues.
  • How:
    1. Press Windows + R, type cmd, and press Ctrl + Shift + Enter to open Command Prompt as administrator.
    2. Enter the following commands, pressing Enter after each:
      netsh winsock reset
      netsh int ip reset
      ipconfig /release
      ipconfig /renew
      ipconfig /flushdns
    3. Restart your PC and try connecting again.

Additional Tips
  • Check Wi-Fi Password and Security Type: Ensure the password is correct and the security type (e.g., WPA2) matches your router’s settings. Access router settings via its IP address to verify.

  • Disable IPv6: If the above steps don’t work, disable IPv6 in your Wi-Fi adapter’s properties:
    1. Go to Control Panel > Network and Sharing Center > Change adapter settings.
    2. Right-click your Wi-Fi network, select Properties, uncheck Internet Protocol Version 6 (TCP/IPv6), and click OK. Restart your PC.

  • Test with Another Device: If other devices can’t connect to the same network, the issue may be with your router or ISP. Contact your ISP or try changing the router’s network name (SSID) in its settings.

  • Check for Interference: Move closer to the router or reduce connected devices to avoid signal overcrowding, especially on public Wi-Fi.

Notes
If none of these steps work, contact your ISP to check for network outages or consult your router’s manual for specific reset instructions.

Be cautious with public Wi-Fi; use a VPN for security.

If you recently changed your router’s password or settings, ensure your PC’s settings reflect these changes.
By systematically applying these steps, you should resolve the “Can’t connect to this network” error and restore your internet connection.

How to use WhatsApp on desktop?

0
Using WhatsApp on a desktop is a convenient way to access your messages, send files, and manage conversations without relying solely on your phone. WhatsApp offers two primary methods for desktop use: WhatsApp Web (browser-based) and the WhatsApp Desktop App (standalone application for Windows or macOS). Both methods support WhatsApp’s multi-device feature, allowing you to use the app on up to four linked devices even if your phone is offline. Below is a comprehensive guide to set up and use WhatsApp on your desktop, including troubleshooting and key features.
Requirements
  • Active WhatsApp Account: Linked to a phone number.
  • Smartphone: With WhatsApp installed (iOS, Android, or other compatible devices) for initial setup.
  • Desktop/Laptop: Running Windows 10 (64-bit) or later, macOS 11 or later, or a supported browser (Chrome, Firefox, Edge, Safari).
  • Internet Connection: Required on both the desktop and phone during setup (phone can be offline afterward with multi-device mode).
  • Camera Access: Your phone’s camera is needed to scan a QR code for authentication.

    WhatsApp on desktop
    photo: pixabay

Method 1: Using WhatsApp Web

WhatsApp Web allows you to use WhatsApp through a browser without installing software.
  1. Open WhatsApp Web:
    • Open a supported browser (e.g., Google Chrome, Firefox, Microsoft Edge, or Safari).
    • Navigate to web.whatsapp.com.
  2. Access WhatsApp on Your Phone:
    • Open the WhatsApp app on your smartphone:
      • Android: Tap the three-dot menu (top right) > Linked Devices.
      • iOS: Go to Settings > Linked Devices.
      • Other Devices: Look for “Linked Devices” or “WhatsApp Web” in the app’s settings.
  3. Scan the QR Code:
    • On your phone, tap “Link a Device” and use the camera to scan the QR code displayed on the WhatsApp Web page.
    • Ensure your phone is unlocked and has an active internet connection during scanning.
  4. Log In:
    • Once scanned, WhatsApp Web will sync your chats, contacts, and media. The interface mirrors the mobile app, showing your conversations on the left and the selected chat on the right.
  5. Using WhatsApp Web:
    • Send and receive messages, images, videos, and documents.
    • Access group chats, voice messages, and status updates.
    • Use keyboard shortcuts (e.g., Ctrl + E to archive a chat) for faster navigation.
    • Enable desktop notifications (click the bell icon or browser prompt) to stay updated.
  6. Log Out:
    • To disconnect, click the three-dot menu (top left) on WhatsApp Web > Log Out.
    • Alternatively, on your phone, go to Linked Devices, select the desktop session, and tap Log Out.

Method 2: Using the WhatsApp Desktop App

 The WhatsApp Desktop App offers a dedicated application with a similar interface to WhatsApp Web but with additional features like native notifications and better integration with your operating system.
  1. Download the App:
      • Windows: Download from the Microsoft Store.
      • macOS: Download from the Mac App Store or WhatsApp’s website.
    • Minimum requirements: Windows 10 (64-bit) or macOS 11.
  2. Install the App:
    • Run the downloaded installer and follow the on-screen instructions.
    • Once installed, open the WhatsApp Desktop app from your Start menu (Windows) or Applications folder (macOS).
  3. Link Your Device:
    • A QR code will appear on the desktop app.
    • On your phone, open WhatsApp:
      • Android: Menu (three dots) > Linked Devices > Link a Device.
      • iOS: Settings > Linked Devices > Link a Device.
    • Scan the QR code with your phone’s camera.
  4. Use the Desktop App:
    • The app syncs your chats and media, offering the same functionality as WhatsApp Web.
    • Additional features include:
      • Native system notifications.
      • Keyboard shortcuts (e.g., Cmd + T on macOS for new chat).
      • File drag-and-drop for quick sharing.
    • Access settings to customize notifications, themes (light/dark), and chat backups.
  5. Log Out:
    • Click the three-dot menu (top left) > Log Out.
    • Or, from your phone, go to Linked Devices and log out the desktop session.
Multi-Device Mode
WhatsApp’s multi-device feature, fully rolled out by 2025, allows you to use WhatsApp on your desktop without your phone being online. Key points:
  • How It Works: Your desktop syncs directly with WhatsApp’s servers, not your phone.
  • Setup: Enabled automatically when linking a device via QR code.
  • Limits: Up to four linked devices (e.g., desktop, laptop, tablet) plus one phone.
  • Security: End-to-end encryption is maintained. If your phone is offline for 14 days, linked devices may log out for security.
  • Enable/Disable: Check Linked Devices on your phone to manage connected devices.

Key Features of WhatsApp on Desktop

  • Messaging: Send text, voice messages, emojis, GIFs, and stickers.
  • Media Sharing: Share photos, videos, documents (up to 2GB), and contacts.
  • Calls: Make voice and video calls (individual or group) directly from the desktop app or WhatsApp Web.
  • Group Chats: Manage and participate in group conversations.
  • Status Updates: View and post status updates (desktop app only for posting).
  • Search and Archive: Search chats/messages and archive conversations for organization.
  • Notifications: Enable desktop notifications for real-time alerts.
  • Backup: Chats are backed up via your phone’s settings (Google Drive for Android, iCloud for iOS).
Troubleshooting Common Issues
  1. QR Code Not Scanning:
    • Ensure your phone has an active internet connection (Wi-Fi or mobile data).
    • Clean the phone’s camera lens.
    • Refresh the QR code by clicking “Reload QR code” on WhatsApp Web or restarting the desktop app.
  2. Sync Issues:
    • If chats don’t load, check your desktop’s internet connection.
    • Log out and relink the device.
    • Update WhatsApp on your phone to the latest version (App Store, Play Store).
  3. Notifications Not Working:
    • Enable notifications in your browser (WhatsApp Web) or system settings (Desktop App).
    • Windows: Settings > System > Notifications > WhatsApp.
    • macOS: System Settings > Notifications > WhatsApp.
  4. Lagging or Freezing:
    • Close unnecessary browser tabs or apps to free up RAM.
    • Clear browser cache (WhatsApp Web) or reinstall the desktop app.
    • Check your laptop’s performance (see previous responses for RAM upgrades or freezing fixes).
  5. Disconnected Sessions:
    • If your phone is offline for over 14 days, relink the desktop using a new QR code.
    • Ensure your phone’s WhatsApp is updated to support multi-device mode.
  6. Unsupported Browser:
    • Use Chrome, Firefox, Edge, or Safari. Older browsers like Internet Explorer are not supported.
Tips for Optimal Use
  • Keyboard Shortcuts:
    • WhatsApp Web/Desktop:
      • New chat: Ctrl + N (Windows) or Cmd + N (macOS).
      • Search: Ctrl + F (Windows) or Cmd + F (macOS).
      • Mute chat: Ctrl + Shift + M (Windows) or Cmd + Shift + M (macOS).
  • File Management:
    • Drag and drop files into the chat window for quick sharing.
    • Use the paperclip icon to attach media or documents.
  • Privacy:
    • Log out from public or shared computers to prevent unauthorized access.
    • Enable two-step verification on your phone (Settings > Account > Two-step Verification).
  • Dark Mode:
    • Enable dark mode in Settings > Chats > Theme > Dark for better visibility in low-light conditions.
  • Cross-Platform Use:
    • Use WhatsApp on multiple devices (e.g., laptop and tablet) simultaneously with multi-device mode.
Limitations
  • No Standalone Account: Desktop use requires a phone-linked WhatsApp account.
  • Feature Parity: Some phone features (e.g., live location sharing, advanced status editing) may be limited on desktop.
  • Performance: Heavy media sharing or large group chats may slow down on older laptops with low RAM (consider upgrading RAM, as discussed earlier).
  • Call Quality: Voice/video call performance depends on your desktop’s internet speed and hardware.

How to use WhatsApp Business via Your Browser

WhatsApp Business offers a convenient browser-based interface, ideal for quick chat access or using a shared computer without needing to install an app. Here’s how to get started:Steps to Use WhatsApp Business on Your Browser:

  1. Access WhatsApp Web
    • Launch a browser (e.g., Chrome, Firefox, or Edge).
    • Go to the WhatsApp Web page.
  2. Connect Your Phone
    • Open the WhatsApp Business app on your Android or iPhone.
    • Go to Settings > Linked Devices.
    • Select Link a Device.
    • Scan the QR code displayed on your browser to log in.


Using WhatsApp on your desktop via WhatsApp Web or the Desktop App is straightforward and enhances productivity, especially for typing long messages or sharing files. The multi-device mode ensures flexibility by allowing use without a constantly connected phone. Setup takes just a few minutes, and the interface is intuitive, mirroring the mobile experience. For the best experience, ensure your phone and desktop are updated, and troubleshoot any issues with the steps above.

How can I stop my laptop from freezing?

0
A laptop freezing can be frustrating, often caused by a mix of hardware, software, or resource-related issues. Below is a detailed guide to diagnose and resolve the problem, tailored to common causes based on the latest insights from web sources and user experiences.
Step 1: Identify the Cause
Laptop freezing can stem from several issues, including:
  • Overheating: Excessive heat can cause the CPU or GPU to throttle, leading to freezes.
  • Insufficient Resources: Low RAM, high CPU usage, or a full hard drive can overwhelm the system.
  • Software Issues: Outdated drivers, corrupted system files, or malware can trigger freezes.
  • Hardware Problems: Faulty RAM, a failing hard drive, or an aging battery can cause instability.
  • Background Processes: Too many programs or browser tabs can strain resources.
To pinpoint the issue, note when the freezing occurs (e.g., during gaming, browsing, or idle) and check for error messages or patterns.

laptop freezing
photo: pixabay
Step 2: Quick Fixes to Try Immediately
  1. Restart the Laptop:
    • A simple reboot can clear temporary glitches. Press and hold the power button for 10–20 seconds if the laptop is unresponsive.
  2. Close Unnecessary Programs:
    • Open Task Manager (Ctrl + Shift + Esc on Windows, Activity Monitor on macOS) to identify resource-hogging apps. End tasks consuming high CPU or memory.
  3. Check Storage Space:
    • Ensure your hard drive has at least 10–15% free space. On Windows, go to File Explorer > This PC. On macOS, click Apple Menu > About This Mac > Storage.
  4. Disconnect External Devices:
    • Unplug USB drives, external monitors, or peripherals, as faulty devices can cause freezes.
Step 3: Address Common Software-Related Causes
1. Update Your Operating System and Drivers
  • Windows:
    • Go to Settings > Windows Update > Check for Updates to install the latest patches.
    • Update drivers via Device Manager or download them from the laptop manufacturer’s website (e.g., Dell, HP, Lenovo).
  • macOS:
    • Click Apple Menu > System Settings > General > Software Update.
    • Ensure graphics and peripheral drivers are up to date via the App Store or manufacturer’s site.
  • Outdated drivers, especially for GPUs or chipsets, are a common cause of freezing, as noted in user forums and tech support posts.
2. Scan for Malware
  • Malware can cause system instability. Use built-in tools or third-party software:
    • Windows: Run Windows Defender (Settings > Privacy & Security > Windows Security > Virus & Threat Protection).
    • macOS: Use XProtect (built-in) or a trusted antivirus like Malwarebytes.
    • Schedule regular scans to prevent infections.
3. Check for Corrupted System Files
  • Windows:
    • Open Command Prompt as Administrator and run:
      sfc /scannow
      This checks and repairs corrupted system files.
    • Follow with:
      DISM /Online /Cleanup-Image /RestoreHealth
      to fix Windows image issues.
  • macOS:
    • Boot into Safe Mode (hold Shift during startup) to check if freezing persists.
    • Use Disk Utility (Applications > Utilities) to run First Aid on your drive.
4. Limit Startup Programs
  • Too many startup apps can slow down your laptop and cause freezes:
    • Windows: Task Manager > Startup tab > Disable unnecessary programs.
    • macOS: System Settings > General > Login Items > Remove unneeded apps.
5. Update or Reinstall Problematic Software
  • If freezing occurs with specific apps (e.g., Chrome, games), update them to the latest version or reinstall them.
  • For browsers, clear cache and disable unnecessary extensions (Chrome: Settings > Extensions; Firefox: Add-ons and Themes).
Step 4: Tackle Hardware-Related Issues
1. Prevent Overheating
  • Clean the Vents and Fans:
    • Dust buildup can cause overheating. Use compressed air to clean vents and fans every 3–6 months.
    • Place the laptop on a hard, flat surface (not a bed or sofa) to ensure proper airflow.
  • Monitor Temperatures:
    • Use tools like HWMonitor (Windows) or smcFanControl (macOS) to check CPU/GPU temperatures. Normal idle temps are 30–50°C; under load, 60–85°C is acceptable.
    • If temps exceed 90°C, consider reapplying thermal paste (requires technical skill) or using a cooling pad.
  • Adjust Power Settings:
    • Set your laptop to a balanced or power-saving mode to reduce heat:
      • Windows: Settings > System > Power & Battery > Power Mode.
      • macOS: System Settings > Energy Saver.
2. Test RAM
  • Faulty RAM can cause random freezes:
    • Windows: Run Windows Memory Diagnostic (search “mdsched” in Start menu).
    • macOS: Use Apple Diagnostics (restart and hold D key during boot).
  • If errors are detected, replace the faulty RAM module. If your laptop has two RAM sticks, test each one individually.
3. Check the Hard Drive
  • A failing HDD or SSD can cause freezes:
    • Windows: Run chkdsk /f /r in Command Prompt or use CrystalDiskInfo to check drive health.
    • macOS: Use Disk Utility’s First Aid or third-party tools like DriveDx.
  • If the drive is failing, back up data immediately and replace it.
4. Battery or Power Issues
  • An aging battery can cause instability:
    • Check battery health:
      • Windows: Use powercfg /batteryreport in Command Prompt.
      • macOS: System Settings > Battery > Battery Health.
    • If the battery is degraded, run the laptop on AC power or replace the battery.
  • Ensure the charger and cable are functioning correctly.
Step 5: Optimize Resource Usage
  • Upgrade RAM: If your laptop has 4GB or less, upgrading to 8GB or 16GB can prevent freezes due to memory shortages.
  • Close Background Apps: Limit open apps and browser tabs. For example, Chrome can consume 1–2GB of RAM with multiple tabs open.
  • Disable Visual Effects:
    • Windows: Settings > System > About > Advanced System Settings > Performance > Settings > Adjust for best performance.
    • macOS: System Settings > Desktop & Dock > Minimize animations.
Step 6: Advanced Troubleshooting
If the above steps don’t resolve the issue:
  1. Update BIOS/UEFI:
    • Check your laptop manufacturer’s website for BIOS updates, which can fix stability issues. Follow instructions carefully, as a failed update can brick your laptop.
  2. Reset the Operating System:
    • Windows: Settings > System > Recovery > Reset PC (choose to keep files if possible).
    • macOS: Reinstall macOS via Recovery Mode (Command + R during boot).
  3. Test in Safe Mode:
    • Boot into Safe Mode to see if freezing persists. If it stops, a third-party app or driver is likely the culprit.
  4. Check Event Logs:
    • Windows: Use Event Viewer (search in Start menu) to look for error codes related to freezes.
    • macOS: Open Console (Applications > Utilities) to review system logs.
Step 7: When to Seek Professional Help
If freezing persists, it may indicate a deeper hardware issue:
  • Motherboard Issues: Faulty capacitors or power delivery can cause freezes but require professional diagnosis.
  • GPU Failure: If freezing occurs during graphics-intensive tasks, the GPU may be failing.
  • Contact your laptop manufacturer’s support or a certified repair technician. If under warranty, avoid opening the laptop yourself.
Preventive Measures
  • Regular Maintenance: Clean vents, update software, and scan for malware monthly.
  • Backup Data: Use cloud services (e.g., Google Drive, iCloud) or external drives to protect data.
  • Monitor Performance: Tools like Task Manager or Activity Monitor help catch issues early.
  • Avoid Overloading: Don’t run multiple heavy apps simultaneously unless your laptop has high-end specs.
Additional Notes
  • Recent posts on X and tech forums highlight that freezing is often linked to outdated drivers, overheating, or failing SSDs in 2025 laptops. Regular updates and maintenance are critical.
  • If you’re using a specific laptop model, share its details (brand, model, OS) for tailored advice.
  • For persistent issues, consider running diagnostics like MemTest86 (RAM) or Victoria (HDD/SSD) for deeper analysis.
  • Upgrading your laptop’s RAM is one of the most effective ways to stop freezing and boost performance, especially if you’re running low on memory (4GB or 8GB). By confirming compatibility, choosing the right modules, and following proper installation steps, you can achieve noticeable improvements for $40–$100. For laptops with soldered RAM, focus on software optimization or an SSD upgrade. Always check your laptop’s specs and manufacturer guidelines to ensure a smooth upgrade process.
By systematically working through these steps, you should be able to identify and resolve the cause of your laptop’s freezing. If the problem continues, professional repair may be necessary to avoid further damage.

Good cooling solution – Arctic Freezer 4U-M Air

0
The Arctic Freezer 4U-M Air CPU Cooler stands as a testament to Arctic’s commitment to delivering high-performance, cost-effective cooling solutions for demanding server and workstation environments. Designed to tackle the thermal challenges of high-end Intel Xeon, AMD EPYC, and Threadripper processors, this cooler combines robust engineering, versatile compatibility, and energy efficiency in a compact 4U form factor. In this detailed review, we’ll explore the Freezer 4U-M’s design, performance, installation process, compatibility, noise levels, and value proposition, drawing from technical specifications, real-world testing, and user feedback to provide a comprehensive evaluation.
Introduction: The Need for High-Performance Air Cooling
As modern CPUs, particularly those designed for servers and workstations, push the boundaries of performance with higher core counts and thermal design power (TDP) ratings, effective cooling solutions are more critical than ever. While all-in-one (AIO) liquid coolers have gained popularity for their aesthetics and performance, air coolers remain a staple in server environments due to their reliability, simplicity, and lower maintenance requirements. Arctic, a well-known name in the cooling industry, has long championed air cooling with its Freezer series, and the Freezer 4U-M is their latest offering tailored specifically for high-TDP server processors.

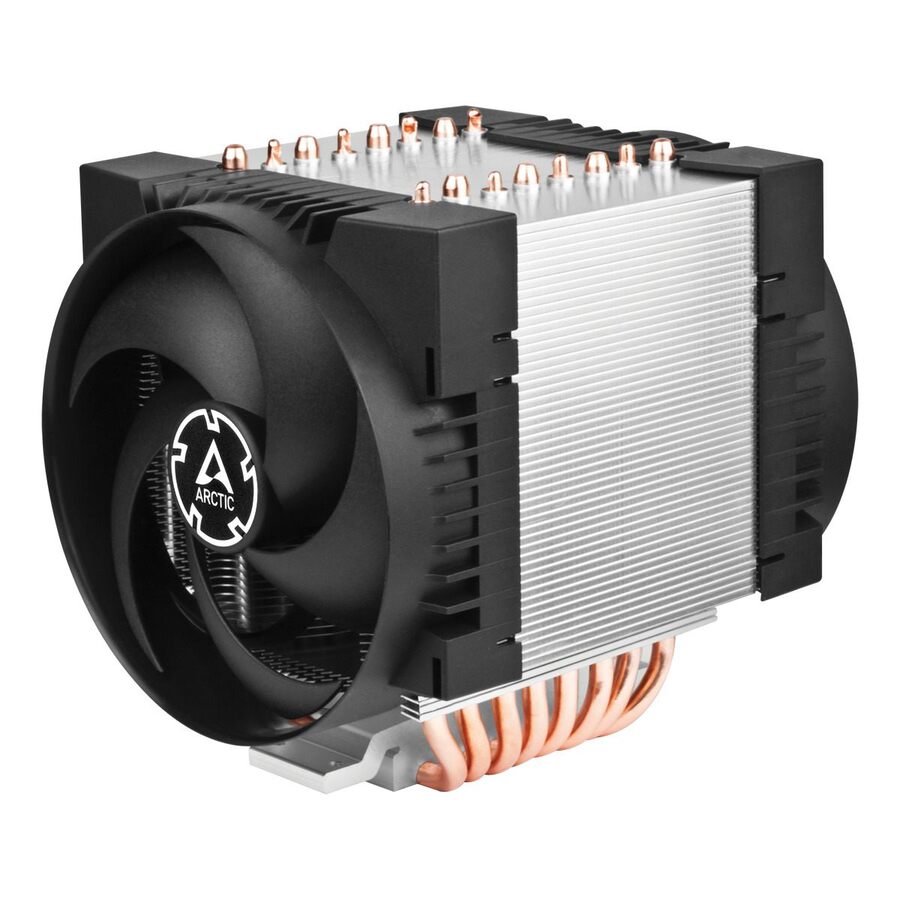
Arctic Freezer 4U-M Air CPU Cooler
The Freezer 4U-M is engineered to fit within the constraints of 4U server racks while delivering exceptional cooling for processors with TDPs up to 350W, including 96-core beasts like the AMD Ryzen Threadripper PRO 7995WX. Priced at approximately $60–70 USD, it aims to compete with more expensive solutions from brands like Noctua while maintaining a focus on quiet operation and broad compatibility. But does it live up to the hype? Let’s dive into the details.
Arctic Freezer 4U-M Air CPU Cooler: Design and Build Quality
Physical Specifications
The Arctic Freezer 4U-M is a single-tower air cooler with a compact footprint, measuring 156 x 124 x 145 mm (L x W x H) and weighing approximately 1,275 grams. Its dimensions are optimized for 4U server racks and most consumer 4U cases, making it a versatile choice for both professional and enthusiast builds. The cooler employs eight 6mm copper heat pipes, which efficiently transfer heat from the CPU to a dense array of 57 aluminum fins. This design maximizes surface area for heat dissipation while maintaining a relatively low profile.
The cooler features a push-pull configuration with two 120mm PWM fans from Arctic’s acclaimed P-series. These fans are designed for static pressure, ideal for pushing air through the dense fin stack. The fans operate at speeds ranging from 400 to 2,300 RPM, delivering up to 71.90 CFM of airflow with a noise level rated at 40 dBA at maximum speed. The use of dual ball bearings ensures durability for 24/7 operation, a critical feature for server environments where downtime is not an option.
Aesthetic and Build Considerations
Unlike consumer-oriented coolers that prioritize RGB lighting and flashy designs, the Freezer 4U-M adopts a utilitarian aesthetic. Its black anodized aluminum fins and sleek fan design give it a professional, no-nonsense look suitable for server racks and workstations. The absence of plastic packaging in favor of eco-friendly cardboard further underscores Arctic’s commitment to sustainability, a small but appreciated touch.
The cooler’s baseplate is expansive, designed to provide optimal contact with large server-grade CPUs. It comes pre-applied with Arctic’s MX-6 thermal paste, which is non-conductive, non-capacitive, and boasts a 20% performance improvement over the previous MX-5 compound. This ensures safe and efficient heat transfer right out of the box.
RAM and PCIe Clearance
One of the standout features of the Freezer 4U-M is its generous 53mm RAM clearance, allowing compatibility with memory modules equipped with moderate heatsinks. This is particularly important in server environments where high-capacity DIMMs are common. Additionally, the cooler’s design ensures it does not obstruct the first PCIe slot, making it suitable for systems with high-end GPUs like the Zotac GeForce RTX 4090, as tested by reviewers.

Arctic Freezer 4U-M Air CPU Cooler
Freezer 4U-M Air CPU Cooler – images: Arctic  
Compatibility
The Freezer 4U-M is a multi-compatible cooler, supporting a wide range of Intel and AMD server sockets. On the Intel side, it accommodates LGA 4710, LGA 4189, and LGA 4677, covering modern Xeon processors. For AMD, it supports SP6, sTR5, SP3, TR4, sTRX4, and sWRX8 sockets, making it compatible with EPYC and Threadripper CPUs. A variant of the cooler also supports Ampere Altra processors with the LGA 4926 socket, further expanding its versatility.
This broad compatibility makes the Freezer 4U-M an excellent choice for system builders working with diverse hardware configurations. Its ability to fit dual-socket motherboards without fouling RAM slots or PCIe lanes is a significant advantage in cramped server chassis. The cooler’s mounting mechanism has been enhanced over its predecessor, the Freezer 4U SP3, with pre-installed brackets and clear instructions that streamline the installation process.

Arctic Freezer 4U-M Air CPU Cooler: Installation Process

Installing the Freezer 4U-M is straightforward, provided you follow the included manual. The cooler comes with pre-installed mounting brackets tailored to specific socket types, reducing the complexity of setup. The process typically takes around 15 minutes, even for users with minimal experience. Arctic’s exclusive mounting points ensure a secure fit, and the included MX-6 thermal paste eliminates the need for additional purchases.
One minor critique is that the heat pipe contact patch, while adequate, could benefit from slightly better coverage for larger CPUs like Threadripper. However, real-world testing shows that this does not significantly impact performance, as the cooler handles 350W TDPs with ease. For dual-socket systems, Arctic has ensured that two Freezer 4U-M coolers can fit comfortably, with sufficient clearance for RAM and other components.
Performance
To evaluate the Freezer 4U-M’s performance, reviewers have tested it on high-end platforms like the AMD Ryzen Threadripper 7980X (350W TDP) and AMD EPYC 8534P (64-core Zen 4C). A common testing methodology involves running Cinebench 2024’s multi-core stability test for 30 minutes at 100% CPU load, with temperatures recorded after 20 minutes. For comparison, the Freezer 4U-M was pitted against premium AIOs like the MSI MEG CoreLiquid S360 and high-end air coolers like Noctua’s NH-U14S TR5-SP6.
Thermal Performance
The Freezer 4U-M delivers impressive thermal performance for an air cooler. On the AMD EPYC 8534P, it maintained an average temperature of 42°C and a peak of 60°C during sustained workloads, matching or slightly outperforming Noctua’s NH-D9 and NH-U14S coolers while being significantly quieter than the Dynatron A54 2U heatsink. Against the MSI AIO, the Freezer 4U-M held its own, with temperatures only marginally higher despite costing a fraction of the price.
On the Threadripper 7980X, the cooler kept temperatures well within safe limits, averaging 66°C with a peak of 83°C under full load. This is a notable improvement over the Dynatron A38, which saw peak temperatures of 95°C in similar conditions. Users have reported that the Freezer 4U-M can even handle slight overclocks up to 380W when fans are set to maximum speed, provided there is adequate case airflow.
Energy Efficiency
One of the Freezer 4U-M’s standout features is its low power consumption, rated at just 2.88W. This is remarkable for a cooler capable of taming 350W CPUs, making it an energy-efficient choice for data centers and workstations where power costs are a concern.
Noise Levels
Noise is a critical factor in server and workstation environments, particularly for office workstations where excessive fan noise can be disruptive. The Freezer 4U-M’s dual 120mm PWM fans are designed for quiet operation, producing a maximum noise level of 40 dBA at 2,300 RPM. In real-world testing, the cooler emits a slightly higher-pitched “whooshing” sound compared to AIOs, but it is barely distinguishable without close inspection. At idle, the fans can drop to 900 RPM, resulting in near-silent operation with CPUs running at ambient temperatures.
Compared to traditional 2U server heatsinks like the Dynatron A54, which are notoriously loud, the Freezer 4U-M is a significant improvement. Even when compared to premium Noctua coolers, which retail for $100–$130, the Freezer 4U-M holds its own, offering comparable noise levels at a lower price point.
Value 
Priced at $60–70 USD (or approximately 54–70 EUR), the Freezer 4U-M offers exceptional value. It delivers performance comparable to Noctua’s high-end 4U coolers, which cost nearly twice as much, and rivals AIOs costing three to four times its price. The inclusion of MX-6 thermal paste, a six-year warranty, and eco-friendly packaging further sweetens the deal.
For server builders, workstation owners, and budget-conscious enthusiasts, the Freezer 4U-M strikes a balance between performance, affordability, and reliability. Its ability to handle high-TDP CPUs without the maintenance concerns of liquid cooling makes it an attractive choice for mission-critical systems.

Arctic Freezer 4U-M Air CPU Cooler Pros and Cons

Pros
  • Excellent Thermal Performance: Handles up to 350W TDPs with ease, matching or outperforming more expensive coolers.
  • Broad Compatibility: Supports a wide range of Intel and AMD server sockets, including Ampere Altra.
  • Quiet Operation: Dual 120mm PWM fans deliver low noise levels, ideal for office environments.
  • Compact Design: Fits 4U server racks and consumer cases with 53mm RAM clearance and dual-socket compatibility.
  • Energy Efficient: Consumes only 2.88W, reducing operational costs.
  • Affordable: Priced at $60–70, offering premium performance at a budget-friendly price.
  • Easy Installation: Pre-installed brackets and clear instructions simplify setup.
  • Six-Year Warranty: Ensures long-term reliability for 24/7 operation.
Cons
  • Heat Pipe Coverage: Could benefit from slightly better contact patch for larger CPUs.
  • No RGB or Aesthetic Flair: Lacks the visual appeal of consumer-oriented coolers, though this is minor for server use.
  • Fan Noise at Max RPM: While quiet overall, the whooshing sound at 2,300 RPM may be noticeable in silent environments.

Comparison with Competitors

Arctic Freezer 4U-M vs. Noctua NH-U14S TR5-SP6
The Noctua NH-U14S TR5-SP6 is a premium 4U cooler priced at $100–$130. While it offers slightly better thermal performance in some scenarios, the Freezer 4U-M matches it closely while costing half as much. The Arctic cooler also benefits from a more compact design and broader socket compatibility, including Ampere Altra support.
Arctic Freezer 4U-M vs. MSI MEG CoreLiquid S360
The MSI MEG CoreLiquid S360, a high-end 360mm AIO, outperforms the Freezer 4U-M in extreme workloads but comes with a $250 price tag and the added complexity of liquid cooling. The Freezer 4U-M offers comparable performance for less demanding tasks, with the added benefits of lower maintenance and cost.
Arctic Freezer 4U-M vs. Dynatron A54
The Dynatron A54, a 2U server heatsink, is significantly louder and less effective at cooling high-TDP CPUs compared to the Freezer 4U-M. The Arctic cooler’s 4U design and quiet fans make it a superior choice for most server applications.
Ideal Use Cases
The Freezer 4U-M is ideal for:
  • Server Builders: Its 4U compatibility and support for dual-socket motherboards make it perfect for enterprise-grade servers.
  • Workstation Owners: Professionals running high-core-count CPUs for tasks like rendering or data analysis will appreciate its cooling prowess and quiet operation.
  • Overclockers: The cooler’s ability to handle slight overclocks up to 380W makes it suitable for enthusiasts pushing their CPUs.
  • Budget-Minded Power Users: Those seeking high performance without the cost of AIOs or premium air coolers will find the Freezer 4U-M a compelling option.
The Arctic Freezer 4U-M Air CPU Cooler is a standout performer in the server and workstation cooling market. Its ability to handle 350W TDPs, broad socket compatibility, and quiet operation make it a versatile and reliable choice for demanding environments. While it lacks the aesthetic flair of consumer-oriented coolers, its utilitarian design, ease of installation, and exceptional value proposition more than make up for it.
For server builders, workstation owners, and budget-conscious enthusiasts, the Freezer 4U-M offers a near-perfect balance of performance, affordability, and reliability. At $60–70, it delivers cooling performance that rivals solutions costing two to four times as much, earning it a strong recommendation for anyone seeking a high-performance air cooler for high-TDP CPUs.
The Arctic Freezer 4U-M is a must-have for anyone building or upgrading a server or workstation. Its combination of power, efficiency, and value makes it one of the best air coolers in its class, proving that air cooling still has a place in the era of high-TDP processors.

Detailed Comparison of 1080p, 1440p, and 4K

0
When choosing between 1080p, 1440p, and 4K resolutions for your display, whether it’s a monitor or TV, the decision hinges on several factors including hardware capabilities, intended use, screen size, viewing distance, and budget. This note provides a comprehensive analysis to help you make an informed choice, drawing from recent comparisons and expert insights as of 2025.
Resolution refers to the number of pixels on a display, which directly affects sharpness, detail, and screen real estate. Higher resolutions mean more pixels, leading to crisper images, but they also demand more from your hardware. Below, we break down each resolution based on key attributes:
  • 1080p (Full HD, 1920×1080):
    • Pixel Count: 2,073,600 total pixels.
    • Marketing Names: Full HD, FHD.
    • Common Screen Sizes: Typically 22 to 27 inches.
    • Cost: Low to medium, with monitors often priced between $100-$200, especially for high refresh rate models (e.g., 144Hz or 240Hz).
    • Image Detail: Good for its price point, but less sharp on larger screens or at close viewing distances.
    • Hardware Requirements: Minimal, suitable for entry-level GPUs like GTX 1650 or RX 6400, making it ideal for budget PCs or laptops.
  • 1440p (QHD, 2560×1440):
    • Pixel Count: 3,686,400 total pixels, offering 78% more pixels than 1080p.
    • Marketing Names: 2K, Quad HD, QHD.
    • Common Screen Sizes: 25 to 32 inches, with 27 inches being a popular choice.
    • Cost: Low to high, typically $200-$400, with high refresh rate (240Hz) options costing more, around $350-$900.
    • Image Detail: Better than 1080p, providing crisp visuals for gaming, productivity, and media, especially on larger screens.
    • Hardware Requirements: Requires mid-range GPUs like RTX 3060 or RX 6700, with a 25-35% performance drop compared to 1080p, increasing VRAM usage (4GB/6GB cards may struggle).
  • 4K (Ultra HD, 3840×2160):
    • Pixel Count: 8,294,400 total pixels, four times that of 1080p.
    • Marketing Names: 2160p, Ultra HD, UHD.
    • Common Screen Sizes: 27 to 48 inches, with 32+ inches being optimal for noticing the detail.
    • Cost: Medium to high, typically $400-$1000+, with high refresh rate (144Hz) models starting at $600+.
    • Image Detail: Best, offering exceptional sharpness and detail, ideal for professional work and immersive media.
    • Hardware Requirements: Demands high-end GPUs like RTX 4080 or RX 7900 XTX, with a 40-45% performance drop from 1440p and significant VRAM strain (less than 8GB may struggle), mitigated by technologies like DLSS or FSR.

      Comparison of 1080p, 1440p, and 4K
      photo: pixabay
Key Factors to Consider
Several factors will influence your choice, and understanding these can help tailor the resolution to your needs:
1. Hardware Capability
Your GPU, CPU, and available ports (e.g., HDMI 2.1 or DisplayPort 1.4 for 4K at high refresh rates) are critical. For example:
  • 1080p: Works with entry-level hardware, making it accessible for older systems.
  • 1440p: Suitable for mid-range setups, but ensure your GPU can handle the increased pixel count, especially for gaming at high settings.
  • 4K: Requires high-end hardware, as it can significantly reduce frame rates without upscaling technologies like DLSS, which are supported on newer GPUs.
2. Screen Size and Viewing Distance
The perceived benefit of higher resolutions depends on screen size and how close you sit:
  • On smaller screens (21-24 inches), 1080p is often sufficient, as the pixel density is still decent. Differences may be subtle at typical viewing distances (beyond 4 feet).
  • For 27-32 inch monitors, 1440p offers a noticeable upgrade, with good pixel density (around 100-120 PPI), making text and images sharper.
  • On 32+ inch displays, 4K shines, especially at close viewing distances (1-2 feet), where the extra detail becomes apparent.
3. Intended Use: Gaming, Productivity, or Media Consumption
Your primary use case will heavily influence your choice:
  • Gaming: For competitive esports (e.g., CS:GO, Valorant), 1080p with high refresh rates (up to 360Hz) is preferred for smooth gameplay, as frame rates matter more than resolution. For AAA titles, 1440p offers a good balance, while 4K is ideal for immersive single-player games with powerful hardware, especially with upscaling tech.
  • Productivity: Higher resolutions like 1440p or 4K provide more screen real estate for multitasking, such as viewing reference images while editing or managing multiple documents. 4K is particularly useful for creative professionals (e.g., video editors, graphic designers) due to its high pixel density and color accuracy.
  • Media Consumption: 4K is best for watching high-quality content on platforms like Netflix, YouTube, or Blu-ray, especially on large TVs. However, 1440p can still display 4K media better than 1080p due to more pixels, though not at full quality.
4. Refresh Rate and Performance
Higher resolutions typically reduce frame rates unless you have powerful hardware. For example:
  • 1080p excels at high refresh rates (up to 500Hz for some models), making it ideal for competitive gaming.
  • 1440p offers refresh rates up to 360Hz, providing versatility for both competitive and AAA gaming.
  • 4K often has lower refresh rates (up to 240Hz for high-end models), which may impact gaming performance, especially without upscaling technologies.
5. Content Availability and Future-Proofing
  • Most modern content supports 1080p and 4K, with 4K becoming the standard for streaming and gaming. 1440p is less common in streaming but popular in gaming monitors.
  • 4K is more future-proof, as it’s increasingly adopted for TVs, consoles (e.g., PS5, Xbox Series X), and high-end PCs. However, ensure your internet can handle 4K streaming (15-25 Mbps minimum).
  • 1440p is a good middle ground, offering longevity for 5+ years, while 1080p may feel dated sooner, especially on larger screens.
6. Budget Considerations
Cost is a significant factor, with prices varying by resolution:
  • 1080p: Monitors typically cost $100-$200, with high refresh rate options (144Hz, 240Hz) below $300, making it the most affordable.
  • 1440p: Prices range from $200-$400 for budget models, with high refresh rate (240Hz) options up to $900, offering 78% more pixels for a 50% price increase over 1080p, providing good value.
  • 4K: Starts at $400 for basic models, with high refresh rate (144Hz) options at $600+, often doubling the cost of 1440p, reflecting the higher hardware demands.

Comparative Analysis: 1080p, 1440p, and 4K

To visualize the trade-offs, here’s a table summarizing the key attributes:
Resolution
Pixel Count
Common Screen Sizes
Cost Range
Hardware Needs
Best For
1080p
2,073,600
22-27 inches
$100-$300
Entry-level GPU
Budget gaming, casual use
1440p
3,686,400
25-32 inches
$200-$900
Mid-range GPU
Gaming, productivity, versatility
4K
8,294,400
27-48 inches
$400-$1000+
High-end GPU
Professional work, media, future-proofing
And here’s a comparison of pros and cons, focusing on gaming and productivity:
Resolution
Pros
Cons
1080p
Cheaper, high refresh rates (up to 500Hz), less powerful graphics needed
Can’t display 4K media accurately, loses visual quality when upscaling, less sharp on large screens
1440p
Nicer visuals, more screen space, high refresh rates (up to 360Hz)
Blurry for 1080p or lower media, can’t display 4K accurately, needs better graphics card
4K
Fully displays 4K media, huge screen space, excellent for large displays
Expensive, lower resolution media looks blocky, lower refresh rates, needs powerful graphics
Recommendations Based on Use Case
Given the complexity, here’s how to choose based on your scenario:
  • Choose 1080p if:
    • You’re on a tight budget, with monitors often below $200.
    • You have older hardware, as it works with entry-level GPUs.
    • You prioritize high frame rates for competitive gaming, with options like 240Hz or 360Hz models.
    • You’re using a smaller screen (21-24 inches), where pixel density is still decent.
  • Choose 1440p if:
    • You want a balance of performance and visuals, offering 78% more pixels for a 50% price increase over 1080p.
    • You have a mid-to-high-end PC (e.g., RTX 3060/4060), suitable for 27-32 inch monitors.
    • You’re using it for gaming and productivity, with refresh rates up to 360Hz for versatility.
    • You want sharper visuals without the high cost or hardware demands of 4K, making it future-proof for 5+ years.
  • Choose 4K if:
    • You have a high-end setup, requiring GPUs like RTX 4080 for gaming at high settings, especially with upscaling tech like DLSS.
    • You work with professional-grade visuals, such as 4K video editing or graphic design, benefiting from high pixel density.
    • You want the best clarity on large screens (32+ inches) for gaming, media consumption, or multi-monitor setups.
    • You’re watching 4K content on platforms like Netflix, YouTube, or Blu-ray, ensuring future-proofing as the standard.
For most users upgrading from 1080p or considering a new monitor, 1440p is likely the best starting point, offering significant visual improvements without requiring the most expensive hardware. It’s praised as the “sweet spot” for gaming and productivity, especially on 27-32 inch displays. However, if you have a powerful PC and plan to use a large screen, 4K is worth considering for its superior image quality and future-proofing, though it comes with higher costs and hardware demands.
If budget or hardware limitations are a concern, 1080p remains a viable option, particularly for competitive gaming where high frame rates (up to 500Hz) are more important than resolution. For example, models like the Alienware 500Hz are designed for this purpose

PCI Express 3.0 NVMe SSD Crucial P3 Review

0
The Crucial P3 PCIe 3.0 NVMe solid-state drive (SSD) represents a compelling option for budget-conscious consumers seeking high-capacity storage with respectable performance. Launched in May 2022, the Crucial P3 is designed as a value-driven successor to the Crucial P2, offering improved speeds, larger capacities, and a competitive price point. With Micron’s 176-layer QLC NAND flash and a DRAM-less Phison PS5021-E21T controller, the P3 targets users upgrading older PCs or building cost-effective systems that lack PCIe 4.0 support. Available in capacities from 500GB to 4TB, it promises near-top-tier PCIe 3.0 performance at a fraction of the cost of premium SSDs. This 2000-word review dives deep into the Crucial P3’s design, performance, features, and value proposition, assessing its strengths, weaknesses, and ideal use cases.
Overview and Specifications
The Crucial P3 is an M.2 2280 NVMe SSD that operates over a PCIe 3.0 x4 interface, making it compatible with a wide range of desktops and laptops, particularly those without PCIe 4.0 support. It is positioned as a budget-friendly drive, leveraging Micron’s expertise as one of the world’s leading NAND manufacturers to deliver high-capacity storage at low cost. The P3 is available in four capacities: 500GB, 1TB, 2TB, and 4TB, with the higher capacities being particularly attractive for users needing ample storage for games, media, or large datasets.

Crucial P3 PCIe 3.0 NVMe
 Crucial P3 Key Specifications:
  • Form Factor: M.2 2280
  • Interface: PCIe 3.0 x4, NVMe 1.4
  • Controller: Phison PS5021-E21T (DRAM-less, 4-channel)
  • NAND Flash: Micron 176-layer QLC (Quad-Level Cell) 3D NAND
  • Capacities: 500GB, 1TB, 2TB, 4TB
  • Sequential Read/Write Speeds (rated):
    • 500GB: Up to 3500 MB/s read, 1900 MB/s write
    • 1TB–4TB: Up to 3500 MB/s read, 3000 MB/s write
  • Endurance (TBW):
    • 500GB: 110TBW
    • 1TB: 220TBW
    • 2TB: 440TBW
    • 4TB: 800TBW
  • Warranty: 5 years
  • Cache: Host Memory Buffer (HMB) + pseudo-SLC cache (250GB for 1TB model)
  • Price (at launch):
    • 500GB: ~$50
    • 1TB: ~$90
    • 2TB: ~$175
    • 4TB: ~$350
  • Software: Crucial Storage Executive, Acronis True Image for Crucial (cloning software)
The P3’s use of QLC NAND allows for higher storage densities, enabling larger capacities at lower costs compared to TLC (Triple-Level Cell) NAND-based drives. However, QLC typically comes with trade-offs in performance and endurance, which we’ll explore in detail. The DRAM-less design, relying on Host Memory Buffer (HMB) technology, further reduces costs while maintaining decent performance for most consumer workloads.
Design and Build
The Crucial P3 adheres to the standard M.2 2280 form factor, measuring 22mm wide and 80mm long, ensuring compatibility with most modern motherboards and laptops. Its single-sided design, with all components on one side of the PCB, makes it ideal for slim devices like ultrabooks. The drive lacks a pre-installed heatsink, which is typical for budget SSDs, but its low power consumption and efficient thermal performance mean it doesn’t require one for most use cases.
Visually, the P3 is unremarkable, featuring a simple black PCB with a small sticker displaying the model name, capacity, and serial number. The absence of flashy LEDs or elaborate branding aligns with its budget focus—no frills, just function. The drive includes a mounting screw in the packaging, a thoughtful touch for users installing it in systems where such screws are missing.

Crucial P3
P3 – images: Crucial
Internally, the P3 pairs Micron’s 176-layer QLC NAND with the Phison E21T controller. The QLC NAND, labeled as NY161, consists of four 1Tb dies per package in a 4DP/QDP configuration, optimized for high-density storage.
The DRAM-less controller uses HMB, leveraging a portion of the system’s RAM for caching, which reduces manufacturing costs without severely impacting performance. A pseudo-SLC cache (250GB for the 1TB model) enhances write performance by temporarily storing data in a faster single-level cell mode before folding it into QLC, though performance drops once the cache is exhausted.
The Crucial P3 is marketed as a high-value SSD with performance that approaches the limits of the PCIe 3.0 interface. Its rated sequential read and write speeds of up to 3500 MB/s and 3000 MB/s (for 1TB–4TB models) are impressive for a budget drive, rivaling older high-end PCIe 3.0 SSDs. To evaluate its real-world performance, we’ll examine synthetic benchmarks, real-world tests, and its behavior under various workloads, drawing on data from trusted sources like PCMag, Tom’s Hardware, and PCWorld.
Synthetic Benchmarks
In synthetic tests like CrystalDiskMark 8.0, the P3 delivers strong sequential performance:
  • 1TB Model: Sequential read speeds of ~3677 MB/s and write speeds of ~3230 MB/s, slightly exceeding Crucial’s rated specs.

  • 2TB Model: Sequential read speeds of ~3506 MB/s and write speeds of ~3246 MB/s, with consistent results across multiple runs.

  • 4K Random Performance: The P3’s random read and write speeds are less impressive due to its DRAM-less design and QLC NAND. It achieves respectable but not class-leading 4K random read/write IOPS, trailing TLC-based drives with onboard DRAM.
The P3’s performance which simulates everyday tasks like app launches and file transfers, is solid but not exceptional. It scores around 2500–2600 points, placing it in the top third of PCIe 3.0 drives but behind TLC-based competitors like the Intel SSD 670p. Its 3DMark Storage gaming benchmark score of 2581 is nearly identical to the PCIe 4.0 P3 Plus, indicating that gaming performance is more than adequate for PCIe 3.0 systems.
The P3 is notably efficient, running cool even under load. In testing, it peaked at ~56°C during sustained writes, well within safe operating temperatures. Its DRAM-less design and 12nm Phison controller contribute to low power consumption, making it an excellent choice for laptops or energy-conscious builds. The drive supports adaptive thermal protection, throttling performance if temperatures exceed safe limits, though this is unlikely in typical use.

Crucial P3
Crucial P3
The P3’s QLC NAND results in lower endurance compared to TLC-based SSDs. Its Terabytes Written (TBW) ratings are:
  • 500GB: 110TBW
  • 1TB: 220TBW
  • 2TB: 440TBW
  • 4TB: 800TBW
These figures are significantly lower than competitors like the Samsung 970 EVO Plus (600TBW for 1TB) or even the Intel 670p. For context, the 1TB P3’s 220TBW equates to ~120GB of writes per day over its 5-year warranty, sufficient for most consumer workloads but potentially limiting for write-intensive tasks like video editing or server use. Despite the conservative TBW, real-world SSD longevity often exceeds rated endurance, and Crucial’s 5-year warranty provides peace of mind.
The Crucial P3 includes several features that enhance its value:
– NVMe 1.4 Protocol: Ensures compatibility with modern systems and supports advanced features like TRIM, ECC, and dynamic write acceleration.
– Crucial Storage Executive: A free utility for monitoring drive health, updating firmware, and optimizing performance. It’s user-friendly and provides essential tools for maintaining the SSD.
– Acronis True Image for Crucial: Free cloning software simplifies migrating data from an existing drive, making the P3 an easy upgrade choice.
– Redundant Array of Independent NAND (RAIN): Improves data reliability by distributing data across NAND chips, reducing the risk of data loss.
One notable omission is 256-bit AES hardware-based encryption, a feature found on some competing drives like the Intel 670p. For users prioritizing security, this may be a drawback, though software-based encryption can suffice for most.
The Crucial P3’s standout feature is its cost-per-gigabyte, particularly at higher capacities. At launch, the 4TB model retailed for $350 ($0.0875/GB), significantly cheaper than most NVMe SSDs of similar capacity. The 1TB and 2TB models, priced at ~$90 and ~$175, respectively, offer excellent value for budget builds or secondary storage.

Compared to competitors:
  • Samsung 970 EVO Plus (1TB): Faster random performance and higher endurance but costs ~$120–$150.
  • Intel SSD 670p (1TB): Similar QLC-based design with slightly better PCMark 10 scores and encryption, priced at ~$90–$100.

    WD Blue SN570 (1TB): A TLC-based PCIe 3.0 drive with better endurance but lower capacities (max 1TB), priced at ~$80–$100.
The P3’s closest competitor is its sibling, the Crucial P3 Plus, a PCIe 4.0 drive with similar specs but higher speeds (up to 5000 MB/s read). The P3 Plus is only $10–$15 more expensive, making it a better choice for systems with PCIe 4.0 support. However, for older PCs or budget builds, the P3’s performance is more than sufficient.
Crucial P3: Pros and Cons
Pros:
  • Exceptional value, especially at 2TB and 4TB capacities.
  • Strong sequential performance for a PCIe 3.0 drive.
  • Efficient and cool-running, ideal for laptops.
  • 5-year warranty and reliable Micron NAND.
  • Free software for cloning and drive management.
Cons:
  • Low TBW ratings compared to TLC-based SSDs.
  • No hardware-based encryption.
  • Performance drops after SLC cache is exhausted.
  • Random read/write speeds lag behind premium drives.
The Crucial P3 PCIe 3.0 NVMe SSD is a standout in the budget storage market, offering a compelling blend of capacity, performance, and affordability. Its use of Micron’s 176-layer QLC NAND enables high-capacity options up to 4TB at prices that undercut most competitors, while its sequential read/write speeds of up to 3500/3000 MB/s deliver snappy performance for everyday tasks. The DRAM-less design and pseudo-SLC cache ensure cost efficiency without sacrificing usability for most consumers, and its low power consumption makes it versatile for desktops and laptops alike.
However, the P3’s QLC NAND and low TBW ratings make it less suitable for write-heavy workloads, and its lack of hardware encryption may deter security-conscious users. For those with PCIe 4.0 systems, the marginally more expensive P3 Plus is a better investment. Nevertheless, the P3 earns its place as a top choice for upgrading older PCs, building budget systems, or adding high-capacity secondary storage.

TCL QM7 TV: A Mid-Range Mini-LED Marvel with Unmatched Value

0
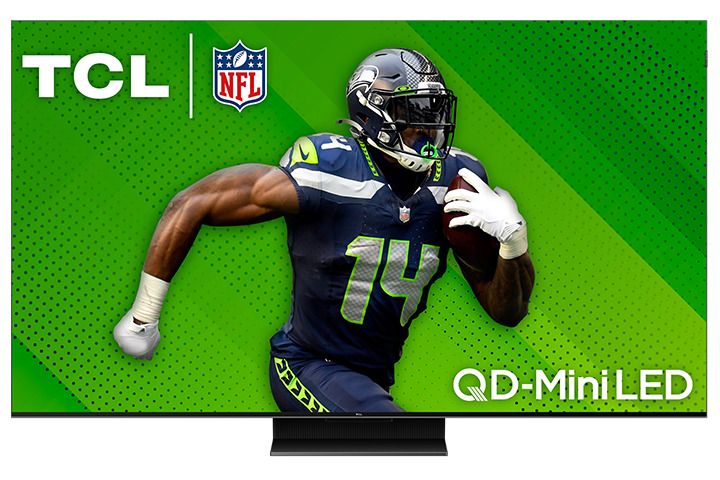
The TCL QM7 (model QM751G for 2024, QM7K for 2025) is a mid-range 4K QLED TV that aims to deliver premium performance at a budget-friendly price. Positioned between TCL’s high-end QM8 and budget-oriented Q6 in the 2024 lineup, the QM7 leverages quantum dot and mini-LED technology to offer vibrant colors, high brightness, and solid contrast. With a robust feature set tailored for gamers, movie enthusiasts, and casual viewers, it competes with brands like Hisense, Samsung, and LG in the crowded mid-range market. This detailed, unbiased review explores the QM7’s design, picture quality, audio performance, smart features, gaming capabilities, and potential drawbacks, drawing on technical insights, user feedback, and professional evaluations to provide a comprehensive assessment.
Design and Build Quality

The TCL QM7 sports a sleek, modern design that balances aesthetics with functionality. Available in five sizes—55, 65, 75, 85, and 98 inches—it caters to various room sizes and budgets. The 65-inch model, a popular choice, measures 56.9 x 32.9 x 2.8 inches (without stand) and weighs approximately 45.9 pounds, making it sturdy but manageable with two people for setup. The 98-inch version swaps the central pedestal stand for dual feet to support its massive size, which may impact placement options.

QM7
QM7

The TV features slim chrome bezels and a brushed-metal strip around the edges, giving it a premium look that belies its price point. This design choice may pose challenges for placing a soundbar directly in front, especially on smaller media consoles. The rear panel has a checkered pattern with a centrally mounted Onkyo subwoofer, contributing to its 2.1 audio system. Cable management is facilitated by a removable plate on the stand, allowing tidy routing of HDMI and power cables.

Ports are conveniently located on the right side, including four HDMI inputs (two HDMI 2.1 supporting 4K at 120Hz and 144Hz, one with eARC, and two HDMI 2.0 at 60Hz), two USB ports, Ethernet, coaxial, AV-in, optical audio, and a headphone jack. The inclusion of a dedicated eARC port ensures gamers don’t sacrifice high-performance HDMI 2.1 ports for audio setups, a thoughtful touch. A backlit remote with dedicated app buttons (Netflix, Prime Video, YouTube, etc.) and a built-in microphone for Google Assistant enhances usability, though its large, utilitarian design feels less premium than the TV itself.
Pros:
  • Sleek, modern design with slim bezels
  • Sturdy central stand (except 98-inch model)
  • Comprehensive port selection with dedicated eARC
  • Effective cable management
Cons:
  • Pedestal stand may obstruct soundbar placement
  • Remote feels clunky and less refined
  • 98-inch dual-foot stand limits placement flexibility
Picture Quality
The TCL QM7’s picture quality is a standout feature, driven by its quantum dot-enhanced mini-LED panel and TCL’s AIPQ PRO processor. With up to 1,500 dimming zones (depending on size) and a claimed peak brightness of 2,400 nits (2,600 nits for 55/65-inch, 3,000 nits for larger sizes), it delivers vibrant colors, deep blacks, and impressive HDR performance for its class.
Brightness and Contrast

The QM7 excels in bright environments, with real-world brightness exceeding 1,500 nits in HDR content, making it ideal for sunlit rooms. Its mini-LED backlight provides precise control, minimizing blooming around bright objects against dark backgrounds, though some blooming is noticeable compared to premium models like the TCL QM8 or Hisense U8N. Black levels are deep for a QLED, but not as inky as OLEDs, and shadow detail is excellent, particularly in Dolby Vision mode.

TCL QM7
TCL QM7

In testing, the QM7 handles high-APL (average picture level) scenes, like bright beach shots, with strong highlight detail, though luminance drops slightly when the entire screen is lit. For darker rooms, its contrast and local dimming enhance immersion, as seen in films like Star Wars: Ahsoka, where starry skies pop against deep blacks. However, a firmware bug tying SDR and HDR brightness settings has been reported, requiring manual adjustments or a power cycle to resolve, though TCL has issued fixes for some units.

Color Performance

The QM7’s quantum dot layer ensures vivid, mostly natural-looking colors with a wide gamut, covering most HDR formats (Dolby Vision, HDR10, HDR10+, HLG). Colors pop in vibrant content like Deadpool & Wolverine, but pre-calibration HDR accuracy is subpar, with slight over-brightening of blacks and midtones. Calibration can improve accuracy, though most users won’t notice without a side-by-side comparison. Gradient handling shows minor banding in grays but is smooth across other colors.

Upscaling and Processing

The QM7’s AIPQ PRO processor handles low-resolution content well, smoothing artifacts in low-bitrate streams and upscaling DVDs or 1080p content with minimal loss of detail. However, fine text or intricate patterns may appear less sharp. Motion performance is solid, with minimal stutter in fast-paced scenes, though those sensitive to judder may notice it in 24fps content.

Viewing Angles
A significant drawback is the QM7’s mediocre off-axis viewing. Colors and contrast degrade when viewed from extreme angles, making it less ideal for large families or wide seating arrangements. For optimal performance, viewers should sit close to the center.
Pros:
  • High brightness (1,500+ nits) for bright rooms
  • Vibrant, mostly accurate colors with quantum dots
  • Deep blacks and minimal blooming for a QLED
  • Strong upscaling and motion handling
  • Supports all major HDR formats
Cons:
  • Mediocre off-axis viewing angles
  • Subpar pre-calibration HDR accuracy
  • Occasional blooming in high-contrast scenes
  • Firmware bug affecting SDR/HDR settings
  • Minor banding in gray gradients
Audio Performance

The QM7’s 2.1 Onkyo audio system, featuring a rear-mounted subwoofer, delivers surprisingly robust sound for a flatscreen TV. With 50W of power (40W for the QM7K), it produces clear mids and highs, filling small to medium-sized rooms effectively. Dialogue is crisp, and the system supports Dolby and DTS advanced audio formats via eARC, ensuring compatibility with external soundbars or receivers.

However, the subwoofer’s bass output is underwhelming, lacking the depth needed for cinematic explosions or music-heavy content. While adequate for casual viewing, audiophiles or home theater enthusiasts will likely pair the QM7 with a soundbar or surround system for a fuller experience. User reviews praise the built-in audio for its clarity but often recommend external audio for larger rooms or immersive setups.

Pros:
  • Clear mids and highs for dialogue
  • Decent volume for small/medium rooms
  • Supports Dolby/DTS audio formats
  • eARC port preserves HDMI 2.1 inputs
Cons:
  • Weak bass from subwoofer
  • Not ideal for large rooms without external audio

    TCL QM7
    TCL QM7 – images: TCL
Smart Features and Interface

The QM7 runs Google TV (version 12 on the QM7K), offering a snappy, intuitive interface with access to major streaming apps (Netflix, Prime Video, YouTube, Disney+, etc.). The platform supports Google Cast and Apple AirPlay for seamless streaming from mobile devices. Hands-free voice control via Google Assistant, plus compatibility with Alexa and Apple HomeKit, adds versatility for smart home integration.

Navigation is responsive, with the AIPQ processor ensuring quick app launches and menu transitions, outperforming competitors like the Hisense U7N in speed. The “Continue Watching” row and personalized recommendations enhance usability, though some users report occasional glitches, such as app crashes or sluggish cursor movement. The TCL Home tab is unobtrusive, allowing users to focus on Google TV’s core interface.
Pros:
  • Fast, intuitive Google TV interface
  • Broad app support and casting options
  • Hands-free voice control with Google Assistant
  • Smart home compatibility (Alexa, HomeKit)
Cons:
  • Occasional software glitches
  • Google TV less preferred by some vs. Roku
Gaming Performance

The QM7 is a gamer’s delight, earning praise as one of the best gaming TVs in its price range. Its two HDMI 2.1 ports support 4K at 120Hz and 144Hz, plus 1080p at 240Hz (288Hz on QM7K), catering to consoles (PS5, Xbox Series X) and high-end PCs. Variable Refresh Rate (VRR) with AMD FreeSync Premium Pro ensures tear-free gameplay, while Auto Low Latency Mode (ALLM) minimizes input lag.

In Game Mode with “Game Master” enabled, input lag is low—8.1ms at 120Hz, though a bug occasionally requires a power cycle to maintain this performance. The Game Master overlay provides quick access to settings like refresh rate and picture modes, with options like “FPS” for optimized gaming visuals. Titles like Call of Duty: Black Ops 6 and Star Wars: Jedi Survivor look sharp and responsive, though the TV’s viewing angle limitations may affect multiplayer setups.
Pros:
  • Low input lag (8.1ms at 120Hz)
  • HDMI 2.1 with 4K/144Hz and VRR
  • Game Master overlay for quick settings
  • AMD FreeSync Premium Pro support
Cons:
  • Viewing angle limits multiplayer setups
  • Occasional input lag bug requiring power cycle
  • Not all HDMI ports are 2.1
Value and Competition
Priced at $499 (55-inch), $699 (65-inch), $999 (75-inch), and higher for larger sizes, the QM7 is frequently discounted, often dropping below $1,000 for the 65-inch model. This makes it a compelling value compared to pricier OLEDs (e.g., LG C4) or premium QLEDs (e.g., Samsung QN90D), which cost $600–$1,000 more. Its closest rival, the Hisense U7N, offers similar performance at a lower price but has slightly more blooming and a less refined design.

The QM7’s combination of mini-LED brightness, gaming features, and HDR support rivals more expensive TVs, but its viewing angles, HDR accuracy, and software quirks prevent it from matching premium models like the TCL QM8 or Sony BRAVIA 7. For budget-conscious buyers prioritizing picture quality and gaming, the QM7 is hard to beat, especially on sale.

Pros:
  • Exceptional value, especially on sale
  • Premium features at mid-range price
  • Competitive with pricier QLEDs
Cons:
  • Loses to premium models in accuracy and viewing angles
  • Hisense U7N offers similar performance for less
User Feedback and Reliability
Customer reviews praise the QM7’s vibrant picture, gaming performance, and value, with many comparing it favorably to LG and Samsung models. Users appreciate its brightness in well-lit rooms and ease of setup, though some report issues like dead pixels (requiring exchanges) or reflections on the glossy screen. Longevity is a concern, as TCL’s track record is less established than Sony or Samsung, but early feedback suggests solid build quality.
Pros:
  • High customer satisfaction for price
  • Vibrant, bright picture widely praised
  • Easy setup and intuitive interface
Cons:
  • Occasional reports of dead pixels
  • Glossy screen prone to reflections
  • Unproven long-term reliability
The TCL QM7 (QM751G/QM7K) is a stellar mid-range TV that punches above its weight, offering vibrant colors, high brightness, and robust gaming features at a budget-friendly price. Its mini-LED backlight and quantum dot technology deliver impressive HDR performance, making it a great choice for bright rooms, casual viewing, and immersive gaming. The Google TV interface is snappy and feature-rich, while the Onkyo audio system provides decent sound for everyday use.
However, the QM7 isn’t flawless. Mediocre viewing angles limit its appeal for wide seating arrangements, and pre-calibration HDR accuracy could disappoint purists. Software glitches, including a persistent SDR/HDR brightness bug, and occasional input lag issues in Game Mode require workarounds. Compared to the Hisense U7N, it’s slightly pricier but offers a more refined design and interface.
For budget-conscious buyers seeking a feature-packed TV under $1,000 (especially on sale), the TCL QM7 is an excellent choice, rivaling sets twice its price. Those needing perfect blacks, wide viewing angles, or flawless software may want to consider pricier OLEDs or the TCL QM8, but for most, the QM7 strikes a near-perfect balance of performance and value.

Mignatta Rina: Italy’s Handcrafted V8 Roadster Revives Retro Thrills

0
Limited to just 30 units annually, this bespoke, screen-free sports car is a purist’s dream.
Imagine a sleek, carbon-fiber roadster powered by a roaring V8, paired with a manual gearbox, and devoid of any digital distractions—no touchscreens, just pure driving passion. Meet the Rina, the debut creation from Automobili Mignatta, a boutique Italian manufacturer based in Piedmont. Handcrafted with meticulous care, the Rina is capped at 30 units per year, ensuring exclusivity. The company touts it as “a timeless masterpiece built for the road, not a showroom.” While pricing remains undisclosed, it’s safe to assume this gem will command a premium far beyond most budgets.
Mignatta describes the Rina as “crafted for those who crave raw, unadulterated driving joy,” boasting a naturally aspirated 5.0-liter V8, a six-speed manual, and rear-wheel drive. Full specs are still under wraps, but the promise of this combination alone sets pulses racing. Founded by Josè Mignatta, the company named the car after his grandmother, Caterina, adding a touch of personal heritage to its allure.

Mignatta Rina
Mignatta Rina – photo: Automobili Mignatta
The Rina’s foundation is a lightweight carbon-fiber monocoque chassis, reinforced with Kevlar, tipping the scales at a mere 71 kg (156 lbs). Its interior blends carbon-fiber bucket seats with supple leather, while a gated manual shifter takes center stage on the console, flanked by analog dials and switches for climate and other controls. True to its “zero screens” ethos, the dashboard features classic analog gauges, including a speedometer that tops out at 320 km/h.
While Mignatta keeps the V8’s origins mysterious—rumors point to a tuned Ford Coyote—the engine has been refined by Italtecnica Engineering, with power figures yet to be revealed. The car’s performance credentials are bolstered by hydraulic rack-and-pinion steering, a limited-slip differential, Brembo brakes (six-piston front, four-piston rear, with optional ceramics), and Pirelli P Zero Trofeo RS tires wrapped around 19- and 20-inch forged wheels. For track enthusiasts, the doors even include helmet storage slots.
Drawing inspiration from the elegant designs of 1960s Italian classics, the Rina features a long hood and a compact rear, exuding timeless style. Each of the 30 annual builds can be extensively customized, making every Rina a potential one-off. While delivery timelines and final specs remain forthcoming, the anticipation is palpable. Here’s hoping we’ll soon see this retro-inspired roadster tearing up the tarmac, delivering the unfiltered driving experience it promises.