Home Blog Page 44

Why is it better to buy a TV with wide color gamut and HDR?

0

When choosing a new TV, considering the inclusion of Wide Color Gamut/WCG/ and HDR technology can greatly enhance your viewing experience, especially if you enjoy vibrant and lifelike visuals. WCG ensures that the TV can reproduce a broader range of colors, providing more accuracy and richness to the content you watch. With HDR, you’ll witness images that come alive with increased brightness, deeper contrast, and more details in both bright highlights and dark shadows.

When comparing different TVs, pay attention to the specific HDR format supported by each model. HDR10 is the most widely used and commonly available format, offering an improvement over standard dynamic range content. HDR10+ and Dolby Vision are also popular formats, each with their own dynamic metadata that adjusts the image on a scene-by-scene basis for even more precision and visual impact.

As technology evolves, new TV models might even come equipped with advanced features like mini-LED or OLED panels, offering better local dimming and superior contrast ratios. Additionally, keep an eye out for features such as variable refresh rates, higher refresh rates (e.g., 120Hz), and HDMI 2.1 ports that can support higher bandwidths and features like eARC and ALLM.

wide color gamut
photo: Pixabay

Before making a final decision, consider factors like your budget, the TV’s size and resolution, and your specific needs. If you’re a fan of gaming, a TV with low input lag and gaming-oriented features could be beneficial. If you’re an avid movie enthusiast, a larger screen with superior picture quality may be more appealing.

Finally, keep in mind that content availability matters when it comes to fully enjoying the benefits of WCG and HDR. While streaming services like Netflix, Amazon Prime Video, and Disney+ offer an increasing amount of HDR content, not all TV shows and movies are available in these formats. Nonetheless, as the industry moves forward, more content will likely be produced and released in HDR, making it a worthwhile investment for the future.

Wide Color Gamut (WCG) in TVs refers to the range of colors that a television can accurately display. TVs with WCG can show more colors than older color spaces, resulting in more vibrant and saturated colors, as well as a wider range of color choices when viewing content. Various color spaces, including Rec. 2020, DCI-P3, Adobe RGB, and Rec. 709, incorporate WCG. TVs with WCG often come with High Dynamic Range (HDR) capabilities, enhancing image quality by representing a more natural illumination of content. HDR TVs have higher brightness, contrast, and color capabilities, enabling brighter highlights, darker shadows, and vivid colors. They also offer increased depth perception and a more immersive viewing experience. Some HDR formats, such as HDR10, HDR10+, HLG10, and PQ10, preserve image quality when the dynamic range is less than what was originally created. HDR technology is usually found in widescreen TVs and enhances the overall viewing experience. When considering a new TV, choosing one with WCG and HDR can significantly improve the image quality and color representation.

D65 is the agreed standard for the color of white, serving as a reference point for content creators and display manufacturers. Technically, it is a widely used standard for illumination defined by the CIE (International Commission on Illumination) and belongs to the D series of illuminants, which aim to represent open-air lighting conditions in different regions worldwide. D65 is approximately equivalent to the average midday light in Europe, earning it the name “daylight illuminant.” It is the standard used for defining the color of white in both Europe and North America. Conceptually, D65 can be visualized as the color of a piece of white paper viewed under daylight conditions at midday.

D65 is associated with a correlated color temperature of 6500K, often referred to as the color temperature of white. As white light is composed of red, green, and blue components, D65 can also be represented as a specific point within the triangle forming any particular color gamut. In calibration processes, when setting up a TV, selecting the color temperature closest to D65 (sometimes labeled as D65 or using terms like Warm or Warm2 by manufacturers) is recommended. Professional calibrators, when calibrating the grayscale using white balance or color temperature controls, aim to align the color of white as closely as possible to D65. This ensures accurate and consistent color representation on the display.

Color gamut refers to the range of colors a TV or projector can display, and a larger gamut allows for a better and more vibrant picture. It is also known as a color space. The combination of hue and saturation axes in a color gamut creates a two-dimensional graph representing available colors. However, color is not only about hue and saturation but also includes luminance or brightness, which adds a third dimension to the graph, forming what is called color volume. HDR (High Dynamic Range) increases overall brightness, making the color volume larger.

Wider color gamuts and higher dynamic ranges are achieved when content is created using new standards. It’s essential to have the color and dynamic range present in the original content, as post-processing cannot recover information that wasn’t there to begin with. If brightness and colors are excessively enhanced, the result can be washed-out or over-saturated images, especially if the creative process was limited to the Rec. 709 standard. HDR, with its wider color gamut and higher dynamic range, enables more realistic images with intricate details that standard TVs cannot achieve through post-processing.

Analogously, think of a photo file: starting with a large image and reducing its size maintains the detail and quality, but enlarging a small image leads to distortion and pixelation. Similarly, by increasing the dynamic range and color gamut during content creation and preserving these qualities throughout distribution, the content can be mapped down to the TV without stretching it from an older standard, thereby preserving the artist’s original creative intent. Therefore, it is essential to match your TV settings to the content you are watching.

The term “color gamut” refers to the entire range of colors that a display can reproduce. In a WCG display, this range is significantly larger, enabling it to show more vibrant and lifelike colors.

Conventional displays typically use the sRGB color gamut, which is a standard color space used for most content on the internet and in digital media. While sRGB is sufficient for many applications, it has limitations in reproducing certain colors that exist in the real world, particularly intense and saturated colors.

To address this limitation, WCG displays use wider color spaces like DCI-P3 or Rec. 2020, which encompass a larger range of colors. These color spaces cover more of the visible spectrum of colors, allowing for more accurate and richer representations of colors found in nature and in high-quality images and videos.

WCG technology is particularly beneficial when viewing content that is specifically mastered for wide color gamut displays. It enhances the viewing experience by providing more realistic and captivating colors. However, to fully take advantage of WCG, the content being viewed must also be encoded with the wider color gamut in mind.

WCG displays are becoming increasingly common in high-end TVs, monitors, and mobile devices. As technology advances and content production adapts to wider color gamuts, WCG is expected to become more prevalent across various devices and media platforms.

Investing in a TV with wide color gamut (WCG) and HDR capabilities can significantly elevate your entertainment experience by delivering striking colors, improved contrast, and a more immersive visual feast. Taking the time to research and choose the right TV that meets your preferences and requirements will undoubtedly result in a more enjoyable and satisfying viewing journey.
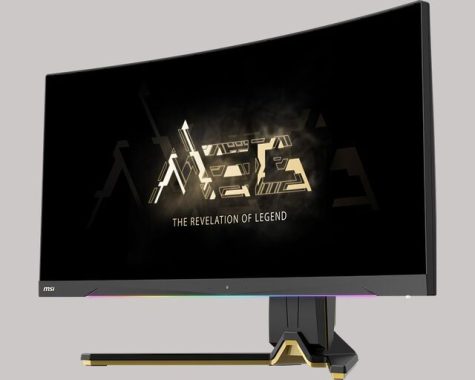
3440×1440 MSI MEG 342C QD-OLED monitor – Review

0

Presenting the 34-inch ultrawide MSI MEG 342C QD-OLED monitor, a display made with gamers in mind. Its sleek black plastic body, accented with gold details, exudes a gamer-oriented aesthetic. The build quality is top-notch, offering a solid feel without any flex in the plastic body. Rubber feet on the stand prevent easy sliding, but the screen does wobble slightly, necessitating a stable desk for optimal positioning. The only minor drawback is the 59″ (1.5 m) power cable, which may prove too short if your power source is far from the monitor.

MSI MEG 342C QD-OLED monitor

Ergonomically, the monitor performs well for an ultrawide display, though it lacks swivel range, making it challenging to adjust the screen for others to view comfortably. The back features a matte plastic finish with vents on top, and cable management is facilitated through the stand. Speaking of which, the V-shaped stand takes up considerable space, and the thickness from the sides to the back measures 8.9″ (22.5 cm).

In terms of controls, the monitor offers a power button, a Gaming Intelligence button (if installed), and a joystick for navigating the on-screen menu.

The MSI 342C boasts an outstanding near-infinite contrast ratio thanks to its OLED panel, delivering perfect black levels and vibrant highlights in dark rooms. However, in brighter environments, the black levels may appear closer to purple due to ambient light.

Notably, the MSI MEG 342C doesn’t require a backlight, eliminating the need for local dimming. The OLED panel’s near-infinite contrast ratio effectively achieves the same effect without any blooming around bright objects.

The monitor exhibits excellent gray uniformity, with solid colors across the screen appearing uniform and no noticeable dirty screen effect in the center. However, like most OLED displays, it does exhibit thin vertical lines in dark scenes, although they are hardly noticeable unless actively sought.

MSI MEG 342C QD-OLED

In terms of HDR color volume, the MSI 342C impresses with its QD-OLED panel, capable of displaying both bright and dark colors vividly.

When it comes to text clarity, the monitor is good but not as stellar as traditional RGB monitors due to its triangular RGB subpixel layout. This results in slightly worse text rendering and color fringing around text and windows, especially with ClearType enabled.

Gaming performance is exceptional, with a maximum refresh rate of 175Hz, VRR support, and near-instantaneous response times. However, like other OLED displays, it still exhibits some persistence blur due to the sample-and-hold method. It lacks an option to adjust pixel overdrive.

For macOS users, the MSI 342C works seamlessly with VRR and HDR support, and the Automatic Brightness Limiter (ABL) in HDR is not overly aggressive. It also has features like KVM switch, Picture-in-Picture, and Picture-by-Picture modes, enhancing the overall user experience.

To address the risk of burn-in associated with OLED panels, the monitor includes settings like Pixel Shift, Static Screen Detection, and Panel Protect, effectively mitigating the potential for permanent image retention.

The MSI MEG 342C QD-OLED monitor truly shines when it comes to gaming. With its 175Hz refresh rate and support for variable refresh rate (VRR), gamers can enjoy a buttery-smooth experience with minimal motion blur. The low input lag further ensures that your inputs are translated instantly, providing a highly responsive gaming environment.

Not only does the MSI 342C excel in PC gaming, but it also offers support for 4K @ 120Hz gaming on consoles. However, due to its ultrawide format, you may encounter black bars on the sides when using it with consoles. Nevertheless, its near-infinite contrast ratio allows for deep, rich blacks, making it especially advantageous for gaming in dark rooms where every detail can be accentuated.

MSI MEG 342C QD-OLED
MSI MEG 342C – images: MSI

For office use, the ultrawide screen of the MSI MEG 342C provides ample space for multitasking, while its impressive reflection handling ensures visibility in well-lit environments. However, the subpixel layout does introduce some challenges with text clarity and color fringing around windows, which might be a concern for extended office work.

The Pros:

  • Instantaneous response time, low input lag, and VRR support up to 175Hz.
  • Infinite contrast ratio, wide color gamut, and high peak brightness for exceptional visual quality.
  • Abundance of useful features.
  • Height adjustable stand and versatile connectivity options, including a USB hub, USB-C with 65W PD, and KVM functionality.

The Cons:

  • Slightly bulky design.
  • Text clarity issues stemming from the uncommon subpixel layout.
  • Potential risk of burn-in

The inclusion of extra features tailored for everyday use further enhances its versatility. The USB-C port with DisplayPort Alt Mode and 65W power delivery simplifies connectivity to compatible devices, and the KVM switch allows seamless switching between sources using the same keyboard and mouse connected to the monitor. The Picture-in-Picture and Picture-by-Picture modes offer additional convenience, enabling users to view two images simultaneously with various display settings.

MSI MEG 342C QD-OLED

MSI has implemented settings like Pixel Shift, Static Screen Detection, and Panel Protect to mitigate this risk, but users must remain mindful of static elements that may be displayed for extended periods. The MSI MEG 342C QD-OLED monitor is a superb choice for gamers with its high refresh rate, smooth motion, and incredible contrast ratio. For office use, it offers plenty of screen space for multitasking and excellent reflection handling but faces challenges with text clarity and potential burn-in risk. Its QD-OLED panel and gaming-centric features make it a compelling choice for those seeking an immersive gaming experience with the added convenience of everyday use features. MSI MEG 342C QD-OLED monitor price: $1,099.99  *currently out of stock


 MSI MEG 342C  SPECS
PANEL SIZE34.18″ (86.82 cm)
ACTIVE DISPLAY AREA (MM)800.1(H) x 337.1(V)
CURVATURECurve 1800R
PANEL TYPEQD-OLED
PANEL RESOLUTION3440×1440 (UWQHD)
PIXEL PITCH (H X V)0.2315(H)x0.2315(V)
ASPECT RATIO21:9
BRIGHTNESS (NITS)250 (Typ.)
CONTRAST RATIO1000 (HDR Peak)
SIGNAL FREQUENCY31~274 KHz(H) / 48~175 Hz(V)
ACTIVATED RANGE48~175Hz
REFRESH RATE175Hz
RESPONSE TIME0.03ms (GtG)
DYNAMIC REFRESH RATE TECH.Adaptive sync
HDR SUPPORTVESA DisplayHDR True Black 400
VIDEO PORTS2x HDMIâ„¢(Supports 3440×1440@175Hz)
1x DisplayPort (Supports 3440×1440@175Hz)
1x USB Type-C (DP alt. w/ PD Charging 65W)
USB PORTS4 x USB 3.2 Gen 1 Type A
1 x USB 3.2 Gen 1 Type B
VIEWING ANGLE178° (H) / 178° (V)
ADOBE RGB / DCI-P3 / SRGB97.8% / 99.3% / 139.1%
SURFACE TREATMENTAnti-Reflection
DISPLAY COLORS1.07B (10 bits)
POWER TYPEPower Cable
POWER INPUT100~240V, 50~60Hz
ADJUSTMENT (TILT)-5° ~ 20°
ADJUSTMENT (HEIGHT)0 ~ 100mm
KENSINGTON LOCKYes
DIMENSION (W X D X H)814 x 293 x 375 mm / 814 x 143 x 375 (w/o Stand)
CONSOLE MODE2K Resolution PS5â„¢ Optimization with VRR function
FRAMELESS DESIGNFHD @ 120Hz
PIP / PBP FUNCTIONYes
VESA MOUNTING100 x 100 mm
WEIGHT (NW / GW)9.3 Kg / 13.9 Kg
6.5 Kg (Without Stand)
NOTEDisplayPort: Up to 3440×1440@175Hz (YCbCr 10-bit).
Type-C: Up to 3440×1440@175Hz (YCbCr 10-bit) w/ PD 65W
HDMI: Up to 3440×1440@175Hz (RGB 12-bit)

Unveiling the Power of Ultrasonic Sensors

0

Ultrasonic sensing is the preferred choice for industries seeking high-precision level detection and proximity sensing. If you’re curious about how this technology works, this guide aims to introduce you to ultrasonic sensors and the underlying principles. Additionally, you’ll discover practical applications of ultrasonic sensing in various industries.

What Are Ultrasonic Sensors?

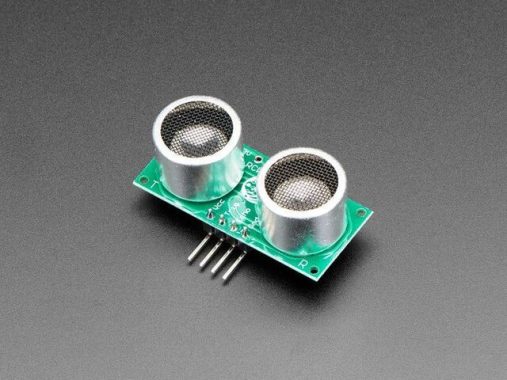
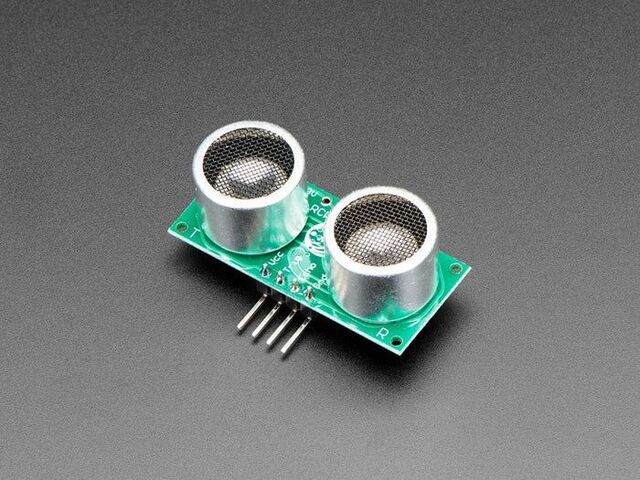
Ultrasonic sensors are electronic devices that determine the distance to target objects by emitting ultrasonic sound waves and converting the returning sound into electrical signals. These ultrasonic waves travel faster than audible sound. The sensors consist of two main components:

  1. Transmitter: This emits sound waves using piezoelectric crystals.
  2. Receiver: It collects the sound waves that reach the target and return to the sensor.

The Working Principle of Ultrasonic Sensors:

Ultrasonic sensors operate on a simple principle. They emit sound waves at frequencies beyond the range of human hearing. The sensor’s transducer functions like a microphone, receiving and sending sound waves. By measuring the time it takes for the sound to be sent and received, the sensor can determine the distance to the target.

Applications of Ultrasonic Sensors:

Ultrasonic sensors find extensive use in detecting objects, especially when other sensors may struggle due to material properties. Here are five standard applications of ultrasonic sensing:

  • Object Detection: In tech companies and autonomous vehicles, ultrasonic sensors assist in monitoring surrounding conditions, detecting vehicles in blind spots, and providing driving assistance.

    Ultrasonic Distance Sensor
    Ultrasonic Distance Sensor – images: The pi hut
  • Distance Detection: Ultrasonic sensors help drivers avoid collisions by monitoring proximity to other vehicles or objects, making them valuable for parking and traffic situations.
  • Diameter Detection: Industries like printing facilities use ultrasonic sensors to detect diminishing roll diameters, ensuring smooth production and preventing interruptions.
  • Sag Detection: Ultrasonic sensors ensure proper positioning of cables and conveyor belts in industrial settings, helping to maintain efficiency and prevent faults.
  • Level Detection: In food industries, ultrasonic sensors monitor ingredient levels in production machines, facilitating continuous production processes.

Advantages and Limitations of Ultrasonic Sensors:

Ultrasonic sensing offers numerous advantages, but it also has limitations worth considering:

Advantages:

  • Insensitive to object color or transparency, making it suitable for a wide range of materials.
  • Operates effectively in dark environments, unlike proximity sensors.
  • Relatively cost-effective and adaptable to specific needs.
  • Some sensors are self-cleaning, remaining unaffected by dirt and moisture.
  • User-friendly and safe for close proximity to equipment and people.
  • Provides highly accurate distance measurements and thickness readings.

    Ultrasonic Distance Sensor
    Ultrasonic Sensor

Limitations:

  • Inoperable in a vacuum since sound waves require air to travel.
  • Not suitable for underwater applications.
  • Soft fabrics can absorb sound waves, making detection challenging.
  • Sensing accuracy may be affected by temperature changes, though compensated devices are available.
  • Limited detection range, usually up to ten meters, although sufficient for many applications.

Ultrasonic sensors are a reliable and precise technology for various applications. They excel at detecting objects and are resilient to environmental conditions such as light, moisture, dirt, and dust. Although they have some limitations, the benefits of ultrasonic sensing outweigh the drawbacks, making it a valuable choice for a wide range of industries.

27″ QHD Fast IPS Dell G2724D Monitor – Review

0

The Dell G2724D monitor is an impressive display that offers a range of features to elevate your gaming experience. With its 27″ Fast IPS panel and 2560 x 1440 QHD resolution, the graphics are sharp and lifelike, making it easy to immerse yourself in games for hours on end. The 3-sided ultra-thin bezels further enhance the visual appeal, creating a seamless and expansive view.

One of the biggest virtues of this monitor lies in its gaming capabilities. The 165Hz refresh rate and 1ms response time ensure seamless gameplay, minimizing motion blur and input lag. Additionally, the support for up to 120Hz at QHD resolution with HDR on consoles via HDMI connectivity is a great bonus for console gamers. The inclusion of VESA Adaptive-Sync, NVIDIA G-SYNC Compatible, and AMD FreeSync Premium makes it adaptable to different graphics cards, reducing screen tearing and stuttering during gameplay.

The monitor also comes with seven pre-set gaming profiles tailored to different genres like Sports, FPS, MOBA/RTS, RPG, Warm, Cool, and sRGB mode. This customization feature allows users to optimize their visuals for specific gaming scenarios. Moreover, the Dark Stabilizer, Console Mode, Frame Rate Counter, and Timer provide additional tools to enhance the gaming experience.

Dell G2724D monitor
Dell G2724D monitor – images: Dell

Another highlight is the inclusion of four unique overlays: Night Vision, Clear Vision, Chroma Vision, and Crosshair. These overlays improve visibility and assist gamers during different game scenarios, making it easier to spot enemies and navigate challenging environments.

The Dell G2724D monitor boasts a bright display with a peak brightness of 400 cd/m², ensuring vibrant and detailed visuals. The 99% sRGB color gamut support further contributes to accurate color reproduction.

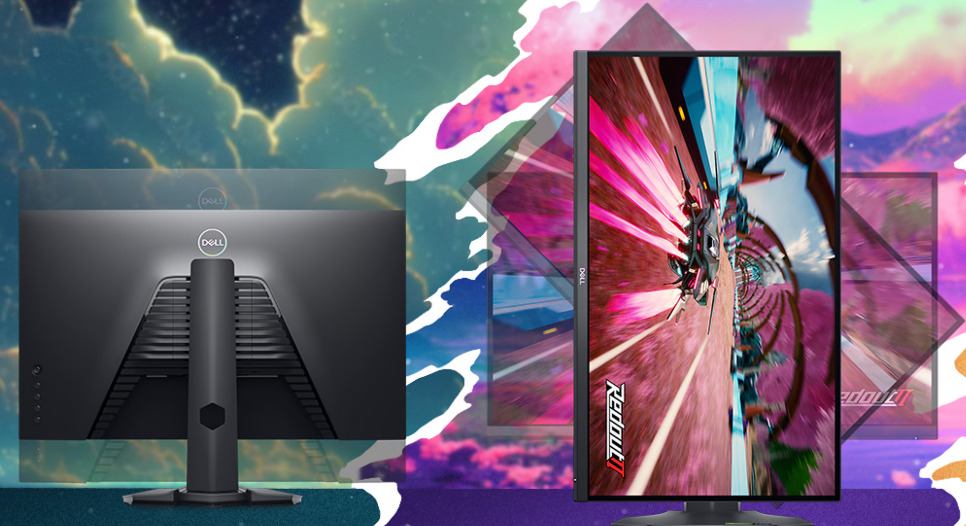
The monitor’s ergonomics are commendable as well, with various adjustments available, including height, pivot (rotation), swivel, and tilt. This versatility allows users to find the most comfortable viewing position for extended gaming sessions.

However, there are a couple of flaws worth noting. Firstly, the monitor’s HDR certification is only Display HDR 400, which means it may not deliver the full HDR experience compared to higher certifications. Users seeking the best HDR visuals may find this limiting.

Secondly, while the monitor’s response time is specified as 1ms (gray-to-gray extreme), real-world performance might not always match this claim, leading to some motion artifacts in fast-paced games.

Moreover, the Dell G2724D offers excellent connectivity options, ensuring seamless integration with various devices. The two HDMI ports with HDCP 2.2 support, as well as the two DisplayPort 1.4 ports with HDCP 2.2 support, provide plenty of input options for gaming consoles, PCs, and other compatible devices. The inclusion of a DisplayPort cable and a USB-C to DisplayPort cable further enhances the monitor’s versatility and ease of setup.

The build quality of the monitor is solid, and the inclusion of a VESA mounting interface allows users to easily mount it on a compatible stand or wall bracket, providing flexibility in setting up their gaming station.

One of the most notable advantages of the Dell G2724D is the “Low Blue Light technology” and flicker-free panel, which reduces eye strain during extended gaming sessions. This feature is beneficial for users who spend long hours in front of the screen, contributing to a more comfortable and enjoyable gaming experience.

Dell G2724D monitor
Dell G2724D monitor

The Dell ComfortView Plus technology further enhances eye comfort by reducing harmful blue light emissions without compromising color accuracy, making it suitable for both gaming and general computing tasks.

While the monitor performs admirably for gaming, it also holds up well for other multimedia tasks like watching movies, editing photos, or general productivity work. The 27″ screen and high resolution make multitasking a breeze, enabling users to work efficiently without feeling cramped.

In terms of design, the Dell G2724D boasts a sleek and modern look that blends well with most gaming setups or office environments. The slim bezels not only enhance the visual appeal but also facilitate a seamless multi-monitor setup for users who require extended screen space.

It’s worth mentioning that Dell is known for its excellent customer service and warranty support, which adds peace of mind for buyers in case of any unexpected issues.

The Dell G2724D monitor stands out as an exceptional gaming display with its Fast IPS panel, QHD resolution, and gaming-focused features like pre-set profiles, overlays, and low latency. Its versatility, eye-care technologies, and ergonomic adjustments make it a well-rounded choice for both gaming and general computing needs. Despite some limitations in HDR certification and potential real-world response time performance, the monitor’s overall performance, reliability, and value for money ($269.99) make it a top contender in the market.

Dell 27 Gaming Monitor - G2724D
Dell 27 Gaming Monitor – G2724D

In conclusion, the Dell G2724D monitor is a fantastic choice for gamers looking to elevate their gaming experience. The 27″ Fast IPS panel, QHD resolution, and low latency make it perfect for immersive gameplay. The range of gaming features, overlays, and customizable profiles provide a competitive edge for different gaming scenarios. However, the limitations of its HDR certification and potential real-world response time performance are the main drawbacks. Nonetheless, for its price point and overall performance, the Dell G2724D remains a highly appealing option for gamers seeking a top-notch gaming monitor.

Specs Dell G2724DDetails
Display TypeLED-backlit LCD monitor / TFT active matrix
Diagonal Size27″
Adaptive-Sync TechnologyVESA Adaptive-Sync, NVIDIA G-SYNC Compatible, AMD FreeSync Premium
Panel TypeFast IPS
Aspect Ratio16:9
Native ResolutionQHD 2560 x 1440 (DisplayPort: 165 Hz, HDMI: 144 Hz)
Pixel Pitch0.2331 mm
Pixel Per Inch109
Brightness400 cd/m²
Contrast Ratio1000:1 / 1000:1 (dynamic)
HDR CertificationDisplayHDR 400
Color Support16.8 million colors
Color Gamut99% sRGB
Response Time1 ms (gray-to-gray extreme)
GamingYes
Horizontal Viewing Angle178°
Vertical Viewing Angle178°
Screen CoatingHaze 25%, anti-glare 3H hardness
Backlight TechnologyLED backlight
FeaturesLED edgelight system, Low Blue Light technology, 3-sided bezel-less, Dell ComfortView Plus, flicker-free panel
Dimensions (WxDxH)24.1 in x 7.9 in x 15.5 in – with stand (lowest position)
ConnectivityHDMI (HDCP 2.2)
2 x DisplayPort 1.4 (HDCP 2.2)
MechanicalDisplay Position Adjustments: Height, pivot (rotation), swivel, tilt
Tilt Angle-5°/+21°
Swivel Angle-90°/+90°
Rotation Angle-90°/+90°
Height Adjustment5.1 in
VESA Mounting Interface100 mm
MiscellaneousFeatures: VESA interface support
Cables Included1 x DisplayPort cable
1 x USB-C to DisplayPort cable
PowerInput Voltage: AC 100-240 V (50/60 Hz)
Power Consumption (On mode)26 W
Power Consumption (Typical)56 Watt
Power Consumption Stand by0.3 Watt
Power Consumption (Off Mode)0.3 Watt
On / Off SwitchYes
Software / System RequirementsIncluded Software: Dell Display Manager

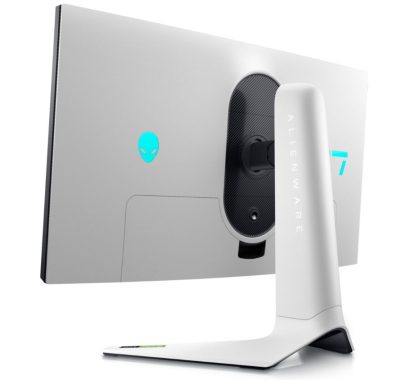
Dell Alienware AW2723DF – awesome performance!

0

Introducing the Dell Alienware AW2723DF, a remarkable 27″ gaming monitor that boasts a 1440p resolution, offering a high pixel density of 108.79 PPI on its 27″ screen, ensuring sharp details and text without the need for scaling.

The 1440p resolution strikes a balance between sharpness and performance, making it less taxing on your CPU/GPU while still providing an immersive gaming experience. Though it may not match the razor-sharpness of 4K displays, the difference is hardly noticeable in games and videos.

Dell Alienware AW2723DF

This monitor utilizes an IPS panel with a wide 95% DCI-P3 color gamut, delivering vibrant colors for an enhanced visual experience. The Creator mode allows you to adjust the gamut, providing flexibility when watching SDR content. Additionally, gamma adjustments and Uniformity Compensation further refine the display’s performance.

Its IPS panel with wide viewing angles makes it suitable for color-critical work, although calibration with a colorimeter is recommended for optimal results. The monitor’s contrast ratio is decent at 1,000:1, although not as deep as VA panel monitors.

The Dell AW2723DF supports both AMD FreeSync Premium Pro and NVIDIA G-SYNC Compatible, delivering excellent variable refresh rate (VRR) performance and tear-free gameplay at up to 280FPS. The monitor’s input lag is impressively low, around 2ms, ensuring a seamless and responsive gaming experience.

In terms of HDR capabilities, the display achieves VESA’s DisplayHDR 600 certification, with 16 dimming zones. While HDR content appears better than SDR in some scenes, the overall HDR experience falls short compared to OLED or FALD displays.

Navigating the OSD menu is made easy with the 5-way directional joystick beneath the bottom bezel. Notable features include Dark Stabilizer, on-screen timers, refresh rate tracking, Picture in Picture, Picture by Picture, and AlienVision, which adds visual enhancements for gaming.

The stand offers great adjustability, including height adjustment, swivel, tilt, pivot, and VESA mount compatibility. The monitor’s robust build includes customizable AlienFX RGB lighting elements and a headset hanger.

Connectivity options are extensive, with DisplayPort 1.4 with DSC for 1440p 280Hz 10-bit color, two HDMI 2.0 ports, a headphone jack, audio line-out port, and a quad-USB 3.0 hub.

Dell Alienware AW2723DF
Dell Alienware AW2723DF – images Dell

The Dell Alienware AW2723DF is available in the price range of $600 to $650. Overall, it stands as an outstanding gaming monitor, boasting vibrant image quality and smooth performance, though some might find better alternatives within this price range.

SpecificationDetails
Diagonal Viewing Size27 inches (68.47 cm)
Active Display Area (HxV)596.74 mm x 335.66 mm (23.49″ x 13.21″)
Panel TypeFast IPS Nano Color
Display Screen CoatingAnti Glare
Maximum Preset Resolution2560 X 1440 at 144Hz (HDMI 2.0) / 2560 X 1440 at 280Hz (overclock) (DP 1.4) / 2560 X 1440 at 240Hz (native) (DP 1.4)
Viewing Angle178° vertical / 178° horizontal
Pixel Pitch / PPI0.23 mm x 0.23 mm / 109 PPI
Contrast Ratio1000:1 (typical)
HDR SupportabilityVESA DisplayHDRâ„¢600
Aspect Ratio16:9
Backlight TechnologyLED edgelight system
Brightness450 cd/m2 (typical); 600 cd/m2 (peak)
Response Time (typical)1ms (gray to gray) in Extreme Mode
Connectivity2 x HDMI (ver 2.0), 1 x DP (ver 1.4), 2 x USB 3.2 Gen1 downstream ports (front bottom), 2 x USB 3.2 Gen1 downstream ports (rear), 1 x USB 3.2 Gen1 upstream port (rear), 1 x Headphone-out port (bottom), 1 x Audio line-out port (rear), Security Lock Slot based on Kensington Security Slot
NVIDIA® G-SYNC® CompatibleYes, supports NVIDIA® G-SYNC® Compatible with up to 280Hz refresh rate
AMD Free-Syncâ„¢ Premium ProYes, supports AMD Free-Syncâ„¢ Premium Pro with up to 280Hz refresh rate
VESA AdaptiveSync DisplayYes, supports VESA AdaptiveSync Display with up to 280Hz refresh rate
AlienFX LightingYes, 3 zones (Alien Head, Screen size phazor graphic, Power button)
Preset OSD ModesCreator, FPS, MOBA/RTS, RPG, SPORTS, and 3 customizable game modes
Additional OSD ModesPIP/PBP, Console Mode, AlienVision
Stand AdjustabilityHeight adjustable stand (110 mm), Tilt (-5° to 21°), Swivel (-20° to 20°), Pivot (-90° to 90°), Built-in cable-management
Low Blue LightYes, ComfortView Plus (TÜV Rheinland certified – Low Blue Light Hardware Solution)
Flicker-freeYes
ID Color VariantLunar Light
Color Gamut95% DCI-P3 (typical), 100% sRGB
Color Depth1.07 billion colors
Color AccuracyDelta E < 2 (sRGB min.), Delta E < 3 (DCI-P3 typical)
Dimensions (with stand)406.25 mm ~ 516.25 mm (H) x 606.60 mm (W) x 268.02 mm (D)
Dimensions (Panel Only)354.29 mm (H) x 606.60 mm (W) x 67.00 mm (D)
Weight (Panel Only)5.71 kg (12.58 lb)
Weight (with packaging)12.64 kg (27.86 lb)
Compliance StandardsRoHS-compliant, arsenic-free glass, and mercury-free for the panel only, BFR/PVC Reduce monitor (excluding external cables)
Flat Panel Mount InterfaceVESA (100 mm x 100 mm)
Temperature RangeOperating: 0°C to 40°C (32°F to 104°F), Non-operating: -20°C to 60°C (-4°F to 140°F)
Humidity RangeOperating: 10% to 80% (non-condensing), Non-Operating: 5% to 90% (non-condensing)
Altitude RangeOperating: 5,000 m (16,404 ft) max, Non-Operating: 12,192 m (40,000 ft) max
Voltage Required100 VAC to 240 VAC / 50 Hz or 60 Hz +/- 3 Hz/1.5 A (typical)
Power Consumption (Operational)0.3 W (Off Mode), 0.4 W (Standby Mode), 22.1 W (On Mode), 105 W (Max)
Audio OutputNo
What’s IncludedMonitor, Stand riser, Stand base, Power cable (varies by country), 1 x DisplayPort (DP to DP) cable, 1 x Mini-DisplayPort to Display Port (mDP to DP) cable, 1 x HDMI Cable, 1 x USB 3.2 Gen1 (5 Gbps) upstream cable, Factory calibration report, Quick Start Guide, Safety Information, Alienware sticker

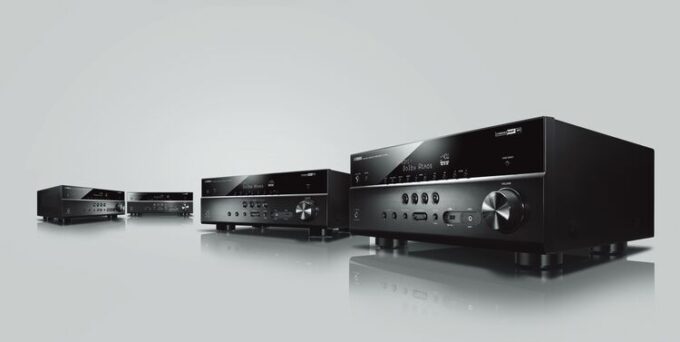
Excellent, budget-friendly AV Receiver Yamaha RX-V385

0

The Yamaha RX-V385 is a feature-packed and budget-friendly 5.1-channel home theater receiver that promises to deliver solid surround sound performance without breaking the bank. Whether you’re setting up a home theater in a small apartment or a spacious living room, this receiver has the power and processing capabilities to suit your needs.

Power and Processing: With a 5-channel amplifier capable of delivering 70 watts per channel into 8 ohms, the RX-V385 provides ample power to drive your speakers with clarity and precision. The low total harmonic distortion (THD) at 0.09% ensures that the audio reproduction remains faithful to the original source, even at higher volumes. Dolby and DTS surround sound decoding further enhances the audio experience, making movies and music come to life.

The receiver also features the YPAO (Yamaha Parametric Room Acoustic Optimizer) function, which is a valuable addition for those seeking optimized surround sound. The YPAO microphone included with the receiver automatically calibrates the speaker settings, ensuring a more precise and immersive audio performance in your specific room environment.

Yamaha RX-V385
Yamaha RX-V385

Upscaling HD video signals to 4K Ultra HD is a convenient feature that ensures your entertainment looks stunning on compatible 4K TVs. The inclusion of Cinema DSP modes adds richness and depth to both music and movie soundtracks, further enhancing your listening experience.

Digital Music Options: The built-in Bluetooth functionality allows for wireless music streaming, enabling you to play your favorite tunes from your mobile device directly to the receiver. This is a convenient feature that enhances the versatility of the RX-V385, making it suitable for various entertainment needs.

Audio Performance: Three 32-bit/384kHz Burr-Brown digital-to-analog converters guarantee high-quality audio reproduction, ensuring that your digital music files sound their best. The Extra Bass feature enhances the low-frequency response, even with small speakers, for a more impactful and immersive audio experience.

Virtual Cinema Front is a notable feature that simulates surround sound effects when all five connected speakers are placed in the front of the room. This is a great option for setups where placing speakers around the room might not be practical or desired.

Ultra Low Jitter PLL circuitry is another commendable inclusion, reducing timing jitter from digital sources and thereby improving overall sound quality and imaging. Compressed Music Enhancer further ensures that even digital music files like MP3s sound clearer and more enjoyable.

Connections: The RX-V385 offers a variety of connection options to suit different setups. With 4 HDMI inputs and 1 HDMI output supporting HDCP 2.3 technology, the receiver is compatible with 4K Ultra HD sources and TVs. Additionally, it supports HDR 10, Dolby Vision, and HLG, ensuring you can enjoy extended picture contrast and brightness with compatible 4K content.

Other connection options include 3 composite video inputs, 1 optical and 2 coaxial digital audio inputs, 2 pairs of stereo RCA inputs, a front-panel USB port for audio playback from USB flash drives, and a front-panel minijack for connecting mobile devices or music players. It also has a preamp output for a powered subwoofer and a 1/4″ headphone jack.

Yamaha RX-V385
Yamaha RX-V385

The RX-V385 comes with four SCENE presets, enabling one-touch power-up, source selection, and DSP recall, simplifying the receiver’s operation for different entertainment scenarios.

The inclusion of Audio Return Channel (ARC) functionality allows the receiver to receive digital audio signals from a compatible HDTV’s tuner or “smart” content via HDMI, streamlining the audio setup.

The AM/FM tuner, along with the included remote control, adds convenience and versatility to the overall user experience.

The Yamaha RX-V385 is an excellent choice for those seeking an affordable ($349.95) and versatile home theater setup. Its powerful 5-channel amplifier, support for 4K Ultra HD video, and a wide array of connection options make it future-proof for various entertainment needs. The inclusion of Bluetooth streaming adds a modern touch, making it easier to enjoy music from compatible devices wirelessly.

The YPAO function is a standout feature, ensuring that your surround sound setup is optimized for your specific room, regardless of its size or shape. Whether you’re a movie enthusiast or a music lover, the specialized DSP modes allow you to tailor the sound to your liking, regardless of your speaker setup.

While the Yamaha RX-V385 is a feature-packed and budget-friendly home theater receiver, it is essential to acknowledge some of its drawbacks:

Limited Power Output: While the 70 watts per channel output is suitable for small to medium-sized rooms, it may not be sufficient for larger spaces or for powering demanding speakers. Audiophiles or those seeking a more powerful and dynamic sound may find the power output to be limiting.

No Network Connectivity: The RX-V385 lacks built-in Wi-Fi or Ethernet connectivity, which means it cannot directly access streaming services or firmware updates. While it offers Bluetooth for music streaming from mobile devices, the absence of network connectivity may be a drawback for those who prefer to access online music platforms or firmware updates easily.

Limited HDMI Inputs: With only four HDMI inputs, the receiver might fall short for users with multiple HDMI devices like gaming consoles, streaming boxes, Blu-ray players, etc. This limitation could necessitate additional switching devices or force users to frequently switch HDMI cables.

Yamaha RX-V385
Yamaha RX-V385 – images: Yamaha

No Phono Input: The absence of a phono input means that users looking to connect a turntable directly to the receiver will need to purchase an external phono preamp. This could be an inconvenience for vinyl enthusiasts who want a more straightforward setup.

Basic Display: The Yamaha RX-V385 features a basic front panel display, which might not provide detailed information about the input source, audio format, or other settings. A more informative and user-friendly display could enhance the overall user experience.

Lack of Advanced Audio Decoding: While the receiver supports popular surround sound formats like Dolby and DTS, it may lack support for some advanced audio formats like Dolby Atmos or DTS:X. Audiophiles seeking a more immersive and cutting-edge audio experience might find this limitation disappointing.

No Multi-Zone Capability: The RX-V385 is designed as a 5.1-channel receiver, meaning it does not have built-in multi-zone support for powering additional speakers in different rooms. Users interested in a multi-room audio setup would need to look for more advanced models.

Limited DSP Customization: While the receiver offers specialized DSP modes for different setups, some users might find the customization options limited or may prefer more manual control over audio settings.

Older Technology: As newer models are released, the RX-V385 might lack some of the latest cutting-edge features and technologies, which could make it less future-proof for users who desire the latest advancements in home theater technology.

Despite these drawbacks, the Yamaha RX-V385 still provides excellent value for those seeking an affordable and functional home theater receiver with reliable surround sound performance. Users should consider their specific needs and preferences before making a purchasing decision.

For those looking to create a comprehensive home theater system, the Yamaha RX-V385 provides a solid foundation that allows you to expand and customize your setup over time. All in all, the RX-V385 is a commendable option for those seeking a budget-friendly home theater receiver without compromising on performance and features.


RX-V385
Amplifier SectionChannels5.1
Rated Output Power (1kHz, 1ch driven)100 W (8 ohms, 0.9% THD)
Rated Output Power (20Hz-20kHz, 2ch driven)70 W (8 ohms, 0.09% THD)
Maximum Effective Output Power (1kHz, 1ch driven) (JEITA)145 W (6 ohms, 10% THD)
Dynamic Power / Ch (Front L/R, 8/6/4/2 ohms)110 / 130 / 160 / 180 W
Surround Sound ProcessingCinema DSPYes
DSP Programs17
Dialog Level AdjustmentYes
SILENT Cinema / Virtual Cinema DSPYes (Virtual CINEMA FRONT)
Dolby TrueHDYes
Dolby Digital PlusYes
DTS-HD Master AudioYes
Audio FeaturesFile FormatMP3 / WMA / MPEG-4 AAC / WAV: up to 48 kHz / 16-bit
Compressed Music EnhancerYes (incl. enhancer for Bluetooth®)
YPAO Sound OptimizationYes
Adaptive DRC (Dynamic Range Control)Yes
Initial Volume and Maximum Volume SettingYes
Audio DelayYes (0-500 ms)
DA ConverterBurr-Brown 384 kHz / 32-bit DAC x 3
Video Features4K Ultra HD Pass-through and UpscalingYes (4K / 60p, 4:4:4)
HDMI 3D Pass-throughYes
HDMI eARCYes (via firmware update)
HDMI Audio Return ChannelYes
HDMI UpscalingYes (HDMI® to HDMI)
Deep Color / x.v.Color / 24Hz Refresh Rate / Auto Lip-SyncYes
Extensive ConnectionHDMI Input/Output4 / 1 (HDCP 2.3, HDR10 / Dolby Vision / HLG and BT.2020 compatible)
HDMI CECYes
USB InputUSB memory
Front AV InputUSB / mini jack
Digital Audio Input / Output: Optical1 / 0
Digital Audio Input / Output: Coaxial2 / 0
Analog Audio Input / Output3 (front 1) / 0
Composite Video Input / Output3 / 1
PreoutSubwoofer
Headphone Output1
ConnectivityBluetoothYes (SBC, in and out)
Tuner SectionFM / AM TunerYes
User InterfaceOn-Screen DisplayYes (color OSD)
SCENESCENE (4 sets)
Remote Control UnitYes
GeneralStandby Power Consumption (IR only)≤ 0.2 W
Auto Power StandbyYes
ECO ModeYes
Dimensions (W x H x D)17-1/8″ x 6-3/8″ x 12-3/8″
Weight17.0 lbs.

A Guide to Setting Your Primary Location on Netflix

0

In response to addressing password sharing, Netflix has announced policy changes in certain regions like Canada, New Zealand, Portugal, and Spain. These changes are expected to be implemented in other countries as well. One of the new requirements is for users to set their primary location. Your primary location is the place where you primarily intend to use the Netflix service. By doing this, Netflix can assume that any new device logging into your account from the same location belongs to your household.netflix loading streaming issues

    photo: Pixabay

If you want to set up your primary location on Netflix, follow these steps:

  1. Using your internet-connected TV, launch the Netflix app and sign in to your account.
  2. Navigate to the app’s menu by pressing the left button on your TV remote.
  3. Go to “Get Help” > “Manage Primary Location.”
  4. Choose either “Set by Email” or “Set by Text,” and you’ll receive a verification link through your email or a text message on your phone.
  5. If you selected email, open the email and tap “Review Request.” If you chose the text message, click the link and then select “Review Request.”
  6. Now, click on “Set Primary Location.”
  7. A confirmation message should appear on your TV screen. Select “Continue to Netflix” to start watching.

Please note that currently, setting your primary location is only possible through the Netflix app on your smart TV. It won’t work on PCs, mobile devices, or set-top boxes like Roku or Apple TV. While the reason for this limitation is unclear, it is hoped that Netflix will extend this feature to other devices in the future to accommodate users who primarily watch Netflix on their phones or computers or don’t own a smart TV.

  • What is the purpose of setting a primary location on Netflix? Setting a primary location on Netflix is necessary to ensure that users have access to content that is specifically licensed for their region. This measure helps prevent unauthorized access to content that may not be available in their area.
  • How can I set my primary location on Netflix? To set your primary location, log in to the Netflix app on your TV, then go to Get Help > Manage Primary Location. Choose to receive a verification link via email or text message and follow the provided instructions to set your primary location.
  • What happens if I don’t set a primary location on Netflix? If you fail to set a primary location by February 21st, 2022, Netflix will automatically assign one for you based on device IDs, account activity, and IP address.
  • Do I need to set a primary location if I don’t watch Netflix on a TV? No, if you exclusively watch Netflix on devices other than a TV, there is no need to set a primary location for your account.
  • Can I circumvent the new password-sharing rule on Netflix by not setting a primary location? While the specific implications for non-TV users are not entirely clear, it is unlikely that avoiding the primary location setting will enable users to bypass the password-sharing rule.
  • Is it possible to change my primary location on Netflix? Yes, you can change your primary location on Netflix. Simply follow the same steps on the TV and Wi-Fi network of the new location to update your primary setting accordingly.

Your PC Can’t Recognize the Printer – Here’s What to Do!

0

You’ve got your PC and printer both connected to the Wi-Fi network, but for some reason, they just can’t seem to communicate with each other. Don’t worry; we’ve got you covered on how to deal with this printer mystery.

First things first, ensure that your printer and PC are indeed connected to the same network and are powered on. Sometimes, dual-band Wi-Fi routers provide two networks – one on the 2.4GHz band and the other on the 5GHz band. While most devices can still detect each other on different bands, it’s better to connect them to the same band just to be sure.

If you’ve confirmed that both devices are on the same network, it’s time to delve into your Windows settings. Simply type ‘printer’ into the Windows search bar and open the “Printers & Scanners” menu that pops up. If your printer isn’t listed on that screen, click on ‘Add a printer or scanner’ and try to find it that way.

PC Can't Recognize the Printer
photo: Pixabay

Should your printer be listed but shows a gray ‘offline’ label beneath it, we need to investigate further. Click on the printer and select “Manage.” If it’s your primary printer, click the “Set As Default” button – this simple action might trigger Windows to rediscover the printer, making them the best of friends from then on.

If the issue persists, click on the “Run The Troubleshooter” link on that page. Windows will conduct a series of network tests to attempt to connect to your elusive paper-spewing companion.

If there’s still no success, go back one screen, click on the printer again, and choose “Remove Device.” This will uninstall the printer entirely. Afterward, reboot your computer and try adding the printer anew.

For Mac users, accessing printer settings is slightly different. Click on the Apple icon in the top-left corner of the screen, select “System Preferences,” and then choose “Printers & Scanners.” If your printer isn’t already listed on the left, click the “+” button under the list to add it. You can also change the default printer from this screen if you have multiple printers installed on your Mac.

To sum it up, here’s what you can do to resolve the issue:

  • Ensure the printer and computer are on the same wireless band.
  • Set the printer as the default printer in Windows/Mac.
  • Run the printer troubleshooter.

More Tips for Computer-Printer Connectivity

  1. Outdated Printer Drivers: Check if your printer drivers are up to date as outdated drivers can cause recognition issues.
  2. Firewall or Security Software: Sometimes, firewall or security software settings can block the communication between the computer and printer.
  3. IP Address Conflict: Ensure that there are no IP address conflicts between the computer and the printer on the network.
  4. Network Connectivity Problems: Verify that both the computer and printer are connected to the same network and that the Wi-Fi signal is stable.
  5. Printer Hardware Issues: The printer itself might have hardware problems that prevent proper recognition by the computer.
  6. USB Connection Problems: If using a USB connection, check for loose or faulty cables that could disrupt communication.
  7. Printer Queue Errors: Clear any stuck print jobs in the printer queue, as they can interfere with new print commands.
  8. Power Cycling: Try power cycling both the computer and printer to refresh their connections.
  9. Printer Compatibility: Ensure that the printer is compatible with your computer’s operating system.
  10. Network Router Settings: Some router settings can impact printer visibility on the network. Double-check router configurations.

Remember, diagnosing and fixing printer recognition issues can be a step-by-step process, so try these solutions one by one to identify the cause and resolve the problem effectively.

What’s the reason for my laptop screen becoming very dim?

0

If your laptop screen has suddenly become dimmer than usual, there are several possible reasons and solutions to consider. It can be a straightforward issue to fix, or it may require more technical expertise. Let’s explore some of the possible causes and solutions:

  • Screen Brightness Controls: First, check if your laptop has dedicated screen brightness controls on the keyboard. Look for icons resembling sun symbols, typically found on the row of function keys (F1 to F12). You may need to press the “Fn” button along with the relevant icon to adjust the screen brightness.
  • Battery Power Settings: If your screen dims when running on battery power, this is typically a power-saving feature. Windows’ power management settings may automatically reduce screen brightness to conserve battery life. To adjust this, type “battery saver” into the Windows 10 search bar and open the “Battery Saver Settings.” Look for the option that says “Lower screen brightness while in battery saver” and uncheck it. However, keep in mind that disabling this feature may reduce battery life.

     laptop screen becoming very dim
    photo: Pixabay
  • Dynamic Brightness: Some advanced laptops have dynamic brightness that adjusts based on ambient light levels. While this is usually beneficial, it can behave erratically on certain models. To disable it, unplug the laptop from the power adapter, open the Windows Control Panel, and search for “Power Options.” Click on “Change Plan Settings,” select “Advanced settings,” and then expand the “Display” section. Look for an option called “Adaptive Brightness” and switch it off.
  • Night Mode: If your screen appears to have a yellowish hue, you may have accidentally activated the night mode feature. Night mode reduces blue light emission, which is associated with sleep disturbances. In Windows, you can deactivate night mode by clicking the speech bubble-like icon in the bottom-right corner of the screen and selecting the Night Light icon. On a Mac, click the Apple menu, go to System Preferences, select Display, and then choose “Off” from the schedule dropdown menu under the Night Shift tab.
  • Backlight Failure: If your laptop screen is extremely dark, making it almost impossible to see in a well-lit room, there’s a possibility that the backlight has malfunctioned. This issue typically requires professional repair and should be handled by an experienced technician.

To summarize the steps you can take:

  • Adjust the power management settings to prevent aggressive screen dimming on battery power.
  • Turn off adaptive brightness if it’s causing issues.
  • Make sure you haven’t accidentally enabled night mode, which can give your screen a yellowish tint.

If none of these solutions work, and the screen remains dim or has backlight issues, it’s best to seek assistance from a qualified technician.

Car Polishing – A Comprehensive Guide

0

Maintaining the appearance of your vehicle is crucial, and car polishing offers numerous benefits in achieving this goal. By preparing the surface for waxing and sealing, polishing eliminates scratches on the windshield, and it effectively removes contaminants from chrome-plated surfaces. Additionally, it can be used to repair minor damages to your vehicle’s windshield, resulting in an overall enhancement of its appearance. Furthermore, a well-polished car is likely to fetch a higher resale value should you decide to sell it.

It’s important to distinguish car polishing from car waxing, as these two processes are often confused and used interchangeably. Car polishing involves using products with abrasives to remove imperfections from the car’s surface, and it should be done before waxing. This ensures that no contaminants are sealed in once the wax is applied.

The process of car polishing is not a one-size-fits-all approach. Different materials in your car require specific polishing techniques to enhance their beauty and shine. Surfaces like chrome should be thoroughly cleaned and examined to determine their composition—whether they are real chrome, plated, painted, or coated. Aluminum surfaces also require regular polishing to prevent dullness, though extra care should be taken due to the material’s softer nature.

Car Polishing
Car Polishing

Plastic surfaces are easier to clean and maintain, but neglect can cause them to become dull and lifeless over time. Regular car washing and cleaning are essential, and toothpaste or plastic-specific products can be used for polishing.

When selecting a car polishing product, consider investing in a quality carnauba wax, known for its durability and long-lasting effects in polishing and protecting cars. Opt for eco-friendly and organic products whenever possible to protect both your vehicle and the environment from harsh chemicals and toxic residues.

Whether you choose liquid polish or solid polish depends on your preferences and needs. Spray polish is easier to apply and spreads more evenly, while paste polish is believed to provide better results, especially for specific conditions.

If you plan to do the car polishing yourself, make sure to have the appropriate tools and protective clothing, including protective eyewear and goggles, as there will be paint and dust particles flying around during the process.

To polish your car safely and efficiently, there are two methods – manual and mechanical. The choice depends on the condition of your car’s paint. If there are visible swirls, scratches, oxidation, chemical etching, or dullness, a proper assessment will help determine the suitable polishing method.

To polish car paint manually, follow these steps:

  1. Thoroughly wash and dry your vehicle.
  2. Use a clay bar to ensure the surface is free of contaminants that could cause scratches during polishing.
  3. Apply a polishing compound to a pad and divide it into sections, then apply it evenly on the surface.
  4. Use a microfiber buff cloth to remove any residue.

If you decide to use an electric buffer, the process is similar, but ensure you use the car polisher correctly to avoid any potential damage to the car’s paint.

Using an electric buffer for car polishing requires proper technique and caution to achieve the best results without damaging the car’s paint. Here’s a step-by-step guide on how to use an electric buffer for car polishing:

  1. Prepare the Surface: Before you start, ensure that your vehicle is clean and free from dirt and debris. Wash your car thoroughly and dry it completely. Also, inspect the surface for any large debris or contaminants that may cause scratches during polishing.
  2. Select the Correct Polishing Pad: There are different types of polishing pads available, such as foam, microfiber, and wool pads. The choice of pad depends on the severity of imperfections on the car’s paint. For mild imperfections, a foam pad is suitable, while a microfiber or wool pad may be needed for more severe defects.
  3. Choose the Right Polishing Compound: Select a high-quality polishing compound that matches the type of imperfections you’re dealing with. Some compounds are designed to remove light swirl marks and scratches, while others are more abrasive and can tackle deeper scratches. Always follow the manufacturer’s instructions for the specific polishing compound you’re using.

    Car Polishing
    Images: Pixabay
  4. Safety Precautions: Wear protective gear, including safety glasses and a dust mask, to shield yourself from flying particles and dust during the polishing process. Safety should always be a priority.
  5. Test on a Small Area: Before you start polishing the entire car, it’s a good idea to test the chosen polishing pad and compound on a small, inconspicuous area. This will allow you to assess the results and determine if you need to adjust your technique or switch to a different combination of pad and compound.
  6. Apply the Polishing Compound: Place a small amount of the polishing compound on the pad. Remember, a little goes a long way, so start with a conservative amount. Spread the compound evenly on the pad’s surface.
  7. Work in Sections: Divide the car’s surface into manageable sections and work on one section at a time. Apply moderate pressure to the buffer, but avoid excessive pressure, as it may lead to swirl marks or burn through the clear coat.
  8. Control the Buffer: Keep a firm grip on the buffer and move it in straight lines or overlapping patterns. Avoid staying in one spot for too long, as this can generate excessive heat and damage the paint.
  9. Regularly Check the Progress: As you polish, periodically stop and inspect the section you’re working on. Look for improvements and make adjustments if needed.
  10. Wipe Off Residue: Once you’ve finished polishing a section, use a clean microfiber towel to wipe off the residue left behind by the polishing compound. Inspect the area for any remaining imperfections.
  11. Repeat as Needed: Continue the process on the rest of the car’s surface, working on one section at a time, until you’ve achieved the desired level of gloss and removed most of the imperfections.
  12. Follow Up with Waxing: After polishing, it’s essential to protect the newly polished surface with wax or sealant. Waxing will provide a protective layer and enhance the shine, making your car’s paint look even more vibrant.

Remember, practice makes perfect. If you’re new to using an electric buffer for car polishing, start with a gentle approach and gain confidence as you refine your technique. When done correctly, car polishing with an electric buffer can bring out the best in your vehicle’s appearance, leaving it with a stunning shine and a renewed luster.