Home Blog Page 22

Mobile payment: Apple Pay, Samsung Pay, or Android Pay?

0

Android Pay, now known as Google Pay, is a mobile payment and digital wallet service developed by Google. It allows users to make payments using their Android devices (smartphones, tablets, or watches) by leveraging Near Field Communication (NFC) technology. Here are some key features and functionalities of Android Pay/Google Pay:

  1. Contactless Payments: Users can make secure, contactless payments at participating retailers by simply tapping their device on a point-of-sale terminal equipped with NFC technology.
  2. Online Payments: Google Pay can be used for making purchases within apps and on websites that support the service, providing a seamless checkout experience.
  3. Card Storage: Users can store their credit, debit, and loyalty cards in the Google Pay app. This allows for easy access and use without the need to carry physical cards.
  4. Security: Google Pay employs multiple layers of security, including tokenization, where actual card details are replaced with a unique virtual account number. This ensures that the user’s card information is not exposed during transactions.
  5. Integration with Google Services: Google Pay integrates with other Google services, like Google Play and Google Store, allowing for a unified payment experience across various Google platforms.
  6. Rewards and Offers: Users can store loyalty cards and redeem offers and discounts directly from the app, enhancing the shopping experience.

    Online and In-App Payments
    photo: pixabay

Google Pay is widely accepted by many merchants, making it a convenient option for users who prefer using their mobile devices for transactions. It has also expanded its functionality to include peer-to-peer payments, similar to services like Venmo or PayPal.

How does Android Pay or Google Pay work?

Android Pay, now known as Google Pay, works by utilizing Near Field Communication (NFC) technology to facilitate secure, contactless payments at retail stores and online. Here’s a detailed breakdown of how it works:

Setup Process:

  1. Download the App: Users need to download the Google Pay app from the Google Play Store.
  2. Add Payment Methods: Users add their credit or debit card information to the app. This can be done manually or by taking a picture of the card. The app may require additional verification from the card issuer.

Making Payments:

In-Store Payments:

  1. Unlock Device: The user unlocks their Android device.
  2. Hold Near Terminal: The user holds their device near the contactless payment terminal.
  3. Authentication: For security, the user may need to authenticate the transaction using biometrics (fingerprint or facial recognition) or a PIN.
  4. Transaction Completion: The device communicates with the terminal via NFC, transmitting a virtual account number (token) instead of the actual card number. The terminal processes the transaction, and the user receives a confirmation on their device.

Online and In-App Payments:

  1. Select Google Pay: At checkout, the user selects Google Pay as the payment method.
  2. Authenticate: The user authenticates the transaction if required.
  3. Transaction Completion: Google Pay processes the payment using the stored virtual account number, ensuring the actual card details are not shared with the merchant.

Security Features:

  1. Tokenization: Google Pay replaces actual card details with a unique virtual account number (token) for each transaction, adding a layer of security.
  2. Device Security: Transactions require device authentication (PIN, pattern, password, fingerprint, or facial recognition).
  3. Monitoring and Alerts: Google monitors transactions for suspicious activity and provides real-time alerts for each purchase.

Additional Features:

  • Rewards and Loyalty Programs: Users can add loyalty cards and access special offers directly from the app.
  • Peer-to-Peer Payments: Users can send and receive money from friends and family.
  • Transit Payments: In some regions, Google Pay can be used for public transportation payments.

Benefits:

  • Convenience: Users can make payments quickly and easily without carrying physical cards.
  • Security: Enhanced security features protect user information.
  • Integration: Seamless integration with other Google services and apps for a unified experience.

Google Pay is widely accepted at numerous retailers and online platforms, making it a versatile and secure payment solution for Android users.

Apple Pay, Samsung Pay, or Android Pay?

As of the latest data and trends, Apple Pay is generally considered the most successful among the mobile payment systems when compared to Samsung Pay and Android Pay (now known as Google Pay). Here’s an analysis of the relative success of these platforms:

  1. Apple Pay:
    • Market Penetration: Apple Pay has a strong presence, particularly in markets where iPhone usage is high, such as the United States and parts of Europe.
    • User Base: Apple Pay benefits from the loyalty and spending power of the iPhone user base. It is pre-installed on all compatible iPhones, contributing to a large number of potential users.
    • Adoption: Apple Pay is widely accepted by retailers and supported by a significant number of banks and financial institutions worldwide.
  2. Google Pay (formerly Android Pay):
    • Market Penetration: Google Pay has broad reach due to the large number of Android devices globally. It is popular in many regions but faces competition from other Android-based payment solutions.
    • User Base: Google Pay taps into the extensive Android ecosystem, which includes a diverse range of devices and users.
    • Adoption: While widely accepted, Google Pay’s adoption varies by region, with strong competition in markets where local mobile payment solutions are prevalent.
  3. Samsung Pay:
    • Market Penetration: Samsung Pay has a smaller reach compared to Apple Pay and Google Pay, limited to users of Samsung devices.
    • User Base: Samsung Pay is limited to Samsung Galaxy smartphones and certain smartwatches, which restricts its potential user base compared to the broader Android ecosystem.
    • Adoption: Despite its limited device compatibility, Samsung Pay is notable for its technology that allows it to work with both NFC and traditional magnetic stripe terminals, offering broader acceptance in places where NFC is not yet prevalent.

Key Factors Influencing Success:

  • Technology and Compatibility:
    • Apple Pay: Utilizes NFC technology for contactless payments. Its integration with Apple’s ecosystem and user-friendly interface contributes to its success.
    • Google Pay: Also relies on NFC technology and is integrated with Google’s services, making it convenient for Android users.
    • Samsung Pay: Stands out with its Magnetic Secure Transmission (MST) technology, enabling payments at older terminals that do not support NFC, giving it an edge in some regions.
  • Retailer and Bank Partnerships:
    • Apple Pay: Strong partnerships with major retailers, banks, and financial institutions globally.
    • Google Pay: Extensive partnerships, though regional competition can affect its dominance.
    • Samsung Pay: Good partnerships, particularly in markets where Samsung devices are popular, but overall fewer than Apple Pay.
  • User Experience and Loyalty:
    • Apple Pay: High user satisfaction due to seamless integration with the Apple ecosystem, including other services like Apple Watch and Apple Wallet.
    • Google Pay: Integration with Google services enhances the user experience, especially for users deeply embedded in the Google ecosystem.
    • Samsung Pay: Positive user experience, particularly valued for its MST technology, but limited by device compatibility.

Apple Pay is generally considered the most successful mobile payment system due to its extensive market penetration, strong user base, and high adoption rates among retailers and banks. Google Pay follows, benefiting from the broad Android ecosystem but facing strong regional competition. Samsung Pay, while innovative, is limited by its device-specific nature and thus has a smaller overall reach.

How secure is Mobile Payment?

Mobile payments are generally considered secure due to several advanced security measures implemented by the major mobile payment systems, such as Apple Pay, Google Pay, and Samsung Pay. Here are the key security features and considerations:

Security Features

  1. Tokenization:
    • How It Works: Tokenization replaces your actual card number with a unique digital identifier (token) for each transaction.
    • Benefit: This ensures that your real card details are never shared with merchants or stored on your device, reducing the risk of card information theft.
  2. Encryption:
    • How It Works: Mobile payment transactions are encrypted from end to end.
    • Benefit: Encryption protects the data as it travels from your device to the payment processor, preventing interception by unauthorized parties.
  3. Biometric Authentication:
    • How It Works: Mobile payment apps often require fingerprint, facial recognition, or iris scan for authentication.
    • Benefit: Biometric authentication provides a strong layer of security, making it difficult for unauthorized users to access the payment app.
  4. Secure Element (SE) or Trusted Execution Environment (TEE):
    • How It Works: Sensitive payment information is stored in a secure chip (SE) or a protected area of the device’s processor (TEE).
    • Benefit: This isolates payment information from the rest of the device, protecting it from malware and other security threats.
  5. Two-Factor Authentication (2FA):
    • How It Works: Some mobile payment systems require a second form of verification, such as a one-time password (OTP) sent via SMS or email.
    • Benefit: 2FA adds an extra layer of security, ensuring that even if your device is compromised, transactions cannot proceed without the additional verification step.
  6. Real-Time Monitoring and Alerts:
    • How It Works: Mobile payment systems often include monitoring tools that detect unusual or suspicious activity.
    • Benefit: Users receive immediate alerts for any suspicious transactions, allowing them to take action quickly to prevent fraud.

Potential Security Concerns

  1. Lost or Stolen Devices:
    • Risk: If a device with an active mobile payment app is lost or stolen, there is a potential risk of unauthorized transactions.
    • Mitigation: Most mobile payment apps can be remotely disabled, and strong device-level security (PIN, biometrics) helps prevent unauthorized access.
  2. Phishing Attacks:
    • Risk: Users may be tricked into providing their login credentials or personal information through fake emails or websites.
    • Mitigation: Educating users about phishing and implementing multi-factor authentication reduces the risk of such attacks.
  3. Malware and Viruses:
    • Risk: Malware targeting mobile devices can potentially compromise sensitive information.
    • Mitigation: Keeping devices updated with the latest security patches, using antivirus software, and downloading apps only from trusted sources helps mitigate this risk.

Overall Security Assessment

Mobile payments are generally secure due to the robust security measures implemented by major providers. The use of tokenization, encryption, biometric authentication, secure elements, and real-time monitoring significantly reduces the risk of fraud and unauthorized transactions. However, users must also follow best practices, such as keeping their devices secure, being vigilant about phishing attempts, and using strong, unique passwords. By combining advanced technology with user awareness, mobile payments can offer a secure and convenient way to handle transactions.
Motherboard Buying Guide: Form Factors, Sockets, Ports, and More

0

How to Choose a Motherboard: Key Factors to Consider

When selecting a motherboard, it’s essential to consider its compatibility with your computer case and central processing unit (CPU), among other factors. Here are the top seven elements to keep in mind:

  1. Cost
  2. CPU
  3. CPU Socket
  4. Form Factor and Case
  5. Expansion Ports
  6. Built-in Ports
  7. RAM (Memory)

Cost

Motherboards range in price from as low as $50 to over $1,500. Generally, spending more gets you more features. Here’s a breakdown:

  • Basic (>$150): H510 and H610 (Intel), A520 (AMD); LGA1200 and LGA1700 (Intel), AM4 (AMD); mATX or Mini ITX.
  • Mid-Range (>$250): B560 and B660 (Intel), B550 (AMD); LGA1200 and LGA1700 (Intel), AM4 (AMD); mATX, ATX, Mini ITX.
  • High-End ($250 and up): Z590 and Z660 (Intel), X570 (AMD); LGA1200 and LGA1700 (Intel); ATX, Mini-ITX, E-ATX.

    Motherboard Buying Guide
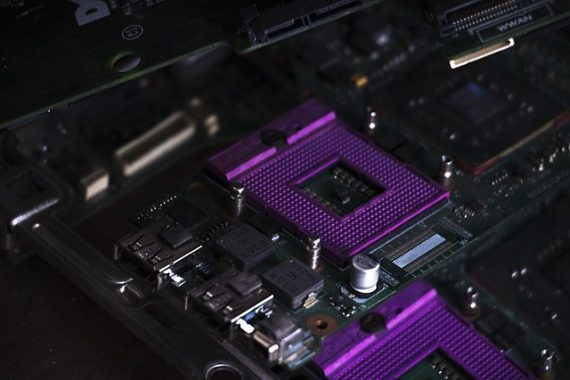
    Motherboard Buying Guide – photo: pixabay

Motherboard Chipset

The chipset determines the motherboard’s capabilities and compatibility with other components.

CPU

The CPU is the brain of your PC. Choose a motherboard that supports your current CPU or the new one you plan to buy. Mid-tier CPUs are adequate for multitasking and business use, while gamers and content creators may need CPUs with higher clock speeds and more RAM support.

CPU Socket

The CPU socket type on a motherboard dictates which CPUs are compatible. Ensure the motherboard socket matches your CPU. For example, an Intel Core i7-9700F needs an LGA 1151 socket, while an AMD Ryzen 9 5900X requires an AM4 socket. Check your CPU’s documentation or manufacturer’s website for socket information.

What Form Factor and Case Should a Motherboard Have?

The form factor of a motherboard is crucial, alongside the CPU socket, when selecting the right motherboard.

  • Upgrading or Replacing a Motherboard: If you’re replacing a motherboard in an existing computer, ensure it has a compatible socket for your current CPU and fits in your existing case, unless you plan to upgrade both the CPU and case.
  • Building a New PC: Choose a motherboard that fits your desired CPU and case. While aesthetics matter, the case size and supported motherboard type are more important.

Main Motherboard Form Factors:

  • ATX: Standard for most desktops, measuring 12 inches by 9.625 inches. It offers ample space for expansion cards and peripherals.
  • Micro-ATX: Same width as ATX but two inches shorter. It fits smaller cases but has fewer expansion slots.
  • Mini-ITX: Compact at 6.75 inches square, fitting small cases with limited expansion slots.

Select a case that matches your chosen form factor (ATX, Micro-ATX, Mini-ITX) and then find a compatible motherboard.

What Expansion Ports Should a Motherboard Have?

After the CPU socket and form factor, the number and type of expansion ports are vital considerations:

  • PCIe Slots: Key for adding components like graphics cards and additional USB ports.
    • PCIe x16 Slots: For graphics cards.
    • PCIe x1 Slots: For other expansion cards.
  • PCIe Generations: Most motherboards support PCIe 3.0, but newer ones support PCIe 4.0 and 5.0 for more bandwidth. Consider future-proofing by opting for PCIe 5.0 if possible.

What Built-In Ports Does a Motherboard Need?

Built-in ports determine the connectivity options for your peripherals:

  • Common Ports: USB-A, USB-C, audio ports, HDMI, DisplayPort.
  • Legacy Ports: VGA, PS/2, parallel, and serial ports (if needed).
  • Network and Wireless: Ethernet ports, built-in Wi-Fi, and Bluetooth.

Choose a motherboard with the necessary ports to avoid needing additional expansion cards or USB hubs.

How Much RAM Does a Motherboard Need?

Consider the number of RAM slots and the total RAM capacity:

  • Basic Use: Streaming, web browsing, and basic gaming require less RAM.
  • Intensive Use: Video/photo editing and resource-heavy gaming benefit from higher RAM capacity and additional slots.

What Should I Do After Buying a Motherboard?

After purchasing a motherboard, follow these steps for installation:

  1. Preparation: Gather the motherboard and PC manuals. Consult a tech expert or consider professional installation if unsure.
  2. Power Off and Unplug: Ensure the PC is off, unplugged, and all peripherals disconnected.
  3. Open the Case: Remove the desktop case cover.
  4. Disconnect Hardware: Safely remove internal hardware and power supply cables.
  5. Remove Old Motherboard: Unscrew and carefully remove the existing motherboard.

Install the new motherboard by following its specific instructions, particularly if reusing old components.

Additional Tips for Choosing a Motherboard

  • Peripheral Support: Ensure compatibility with required connections (USB 3.0, eSATA, Thunderbolt, HDMI, PCI Express).
  • Component Compatibility: Verify the motherboard supports your CPU and memory types.
  • Cooling: Ensure adequate cooling, especially if overclocking.
  • Device Drivers: Install necessary drivers for connected devices.
  • Additional Features: Consider onboard wireless, audio, RAID controller, etc.
  • Overclocking: Ensure the motherboard supports necessary CPU multipliers and voltages.

What Is a Motherboard?motherboard-

A motherboard connects key computer components, including the CPU, memory, hard drives, expansion cards, and ports. It’s the backbone of a Windows PC, ensuring all parts work together seamlessly. Macs also have motherboards, often referred to as “logic boards.” The CPU plugs into a specific socket on the motherboard, with expansion cards and other components also connecting directly to it.

Essential Car Care: Step-by-Step Guide to Checking Car Oil

0

Regularly checking your car’s oil is vital for maintaining its engine health and performance. By keeping an eye on oil levels and quality, you can avoid expensive repairs and keep your vehicle running smoothly for the long haul. Here’s a step-by-step tutorial to help you effectively check your car’s oil:

Park on a Level Surface: Make sure your car is parked on a flat surface. This ensures accurate oil level readings, as parking on an incline can cause the oil to pool to one side, giving false readings. Also, let the engine cool down to allow the oil to settle in the pan for a precise measurement.

Locate the Dipstick: Find the oil dipstick, usually a long, slender metal rod with a brightly colored handle, typically near the front of the engine. If you’re unsure, refer to your car’s owner’s manual for guidance.

Remove and Wipe the Dipstick: Carefully pull out the dipstick and wipe it clean with a paper towel or cloth. This ensures an uncontaminated oil reading when you reinsert it.

Insert and Remove the Dipstick Again: After wiping, reinsert the dipstick fully into its tube, then pull it out again to check the oil level. This step ensures an accurate reading by allowing oil to splash onto the dipstick for a consistent measurement throughout the engine.

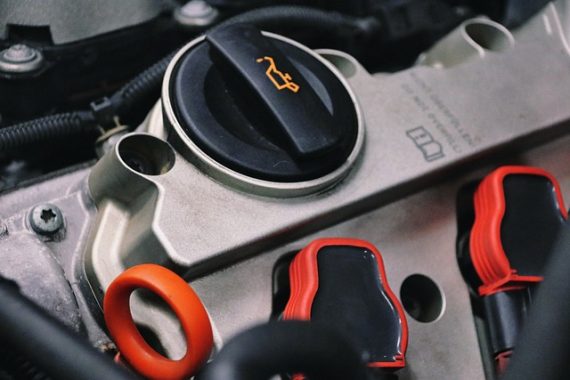
Checking Car Oil
photo: pixabay

Check the Oil Level: Observe the markings on the dipstick, usually indicating “Low” and “Full” levels. The oil should fall between these marks. If it’s below the “Low” mark, you’ll need to add oil to bring it up to the appropriate level.

Assess the Oil Quality: While checking the level, take note of the oil’s color and consistency. Fresh, clean oil typically appears translucent with an amber or light brown hue, indicating effective lubrication and engine protection.

Add Oil if Necessary: If the oil level is below the “Low” mark, add the correct type and viscosity of oil to the engine. Use a funnel to pour it into the filler cap on the valve cover, adding small amounts at a time to avoid overfilling.

Recheck the Oil Level: After adding oil, wait a few minutes for it to settle, then recheck the level using the dipstick. This ensures that you’ve added the right amount and avoids potential engine damage from overfilling.

Secure the Dipstick and Close the Hood: Once you’re satisfied with the oil level, securely reinsert the dipstick into its tube and close the hood of your car.

Maintain Regular Oil Checks: Make it a habit to check your car’s oil regularly to ensure optimal engine performance and longevity.

Securing the Dipstick and Closing the Hood:

After confirming the oil level and quality, carefully reinsert the dipstick into its tube until it’s fully seated. Ensure it’s securely in place to avoid dislodging while driving. Close your car’s hood tightly, latching it securely to shield the engine bay from debris and contaminants.

Once the dipstick is back in place, proceed to close the hood of your car. Lower it gently until nearly closed, then firmly press down to ensure a secure latch. Properly securing the hood is essential to prevent unexpected opening while driving, which could pose safety risks or obstruct your view.

Closing the hood also safeguards the engine bay from debris, contaminants, and weather elements. A tightly closed hood helps maintain the cleanliness and protection of vital engine components, reducing the chances of damage.

Maintaining Regular Oil Checks:

Incorporate regular oil checks into your routine, such as monthly inspections or before embarking on long journeys. Consistent checks enable proactive maintenance of your engine’s health and performance. They also facilitate early detection of potential issues, averting costly repairs in the future.

By adhering to these straightforward guidelines, you can confidently perform car checks like a seasoned pro, ensuring smooth and efficient engine operation. Remember, proactive maintenance is paramount for prolonging your vehicle’s lifespan and minimizing future repair expenses.

SP PX10 Portable SSD: Red Dot Award Winner 2024

0

Silicon Power’s PX10 Portable SSD Wins 2024 Red Dot Award

Silicon Power (SP) proudly announces that its revolutionary PX10 portable SSD has been honored with the prestigious Red Dot Award for 2024. The PX10 distinguishes itself with its lightweight design, distinctive yet practical shape, and military-grade toughness. This accolade underscores SP’s dedication to delivering cutting-edge products that seamlessly blend exceptional performance with innovative design.

Sleek Design with Exceptional Performance

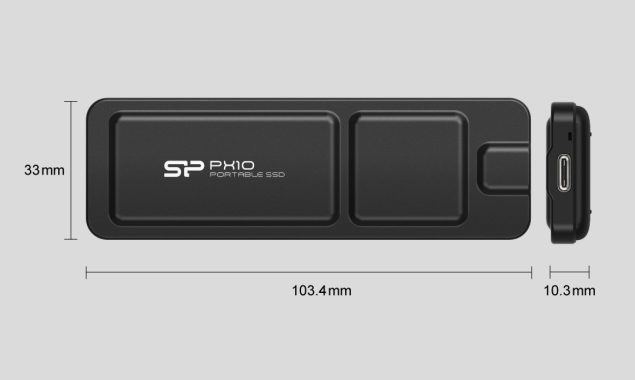
The PX10 seamlessly combines style and functionality. Available in timeless black and soft pink, it caters to both professionals and fashion-conscious users. With its ultra-slim profile, measuring just 10.3mm thick, and featherweight construction at only 33g, it surpasses most portable SSDs in terms of portability. Its unique shape, inspired by internal components, not only enhances its visual appeal but also aids in heat dissipation. By positioning the circuitry close to the aluminum casing, heat dispersal is improved, ensuring optimal performance even during prolonged use.

SP PX10 Portable SSD

Flexible, Efficient Performance on the Go

With read and write speeds reaching up to 1,050MB/s, the PX10 accelerates data transfer, streamlining workflows and boosting productivity. iPhone 15 Pro/Pro Max users can utilize the PX10 to record and store high-quality videos directly onto their devices using Apple ProRes, freeing up valuable phone memory and ensuring uninterrupted capture. Additionally, the PX10 is military-grade certified, offering reassurance by protecting data integrity against accidental drops of up to 1.2m.

Experience the convenience of pocket-sized portability paired with an expansive 4TB capacity, fulfilling all your storage requirements. Picture storing approximately 40 copies of “Titanic” in 4K UHD, a hundred hours of 4K 60fps gaming footage, or the entire 10 seasons of “Friends,” utilizing only a fraction of the total space. The possibilities with such extensive storage are limitless.

The cable serves as the ultimate all-in-one solution, acting as the universal cable you need for all your devices. Not only does it deliver rapid 60W Power Delivery (PD) to keep your devices charged, but it also boasts impressive data transfer rates. With speeds reaching up to 10Gbps, our USB-C to USB-C 3.2 Gen 2 cable stands among the select few offering both robust power and exceptional performance seamlessly.

SP PX10 Portable SSD
PX10 Portable SSD – images: SP

The PX10 represents our lightest and thinnest external SSD yet, measuring a mere 10.3 millimeters thick and weighing just 33 grams. Its exceptionally compact design facilitates one of the most effective heat dissipation systems in its class, all while maintaining MIL-STD certification² for secure data storage, even in challenging conditions.

PX10 specifications:

  • Capacity: 512 GB / 1 TB / 2 TB / 4 TB
  • Dimensions: 103.4 mm x 33mm x 10.3mm
  • Weight: 33g (maximum)
  • Material: Aluminum
  • Color Options: Black / Pink
  • Interface: USB 3.2 Gen 2
  • Performance Read (max.): Up to 1,050 MB/sec
  • Performance Write (max.): Up to 1,050 MB/sec
  • Supported Operating Systems:
    • Desktop: Windows 7 and higher, Mac OS X 10.3 and higher, Linux 2.6 and higher
    • Mobile: Android 6 and higher, iOS 13 and higher
    • Console: PlayStationâ„¢ 5 (Play and store PS4â„¢ games; archive PS5â„¢ games), PlayStationâ„¢ 4 Pro or PS4 with system software version 4.50 or higher, Xboxâ„¢ Series X|S (Play and store Xbox Oneâ„¢ games; archive Xbox Series X|S games)

THE ADVANTAGES OF ELECTRIC CARS

0

In the past decade, the UK has witnessed a significant rise in electric vehicle usage on its roads, with EV sales now constituting 14% of annual new registrations, a trend projected to escalate further. This surge is attributed to the myriad advantages electric cars offer over their petrol or diesel counterparts:

  1. Zero emissions while driving, translating to 0g CO2 per km.
  2. Lower maintenance costs throughout the vehicle’s lifespan.
  3. Remarkably quiet operation.
  4. Superior performance compared to traditional combustion engine vehicles.
  5. Convenient home charging facilities.
  6. Free parking privileges in select areas.
  7. Futureproofing with evolving technology.

    electric cars
    photo: pixabay

Electric cars stand out as environmentally superior due to their reliance on lithium-ion batteries charged by electricity rather than fossil fuels, thereby eliminating harmful emissions like carbon dioxide. Additionally, their efficiency in power utilization surpasses that of combustion engines, with around 70% of battery power directly propelling the wheels, compared to a mere 20% efficiency in traditional engines.

Financially, electric cars prove more economical to maintain, as they require no oil changes or engine component replacements typical of combustion engines. Moreover, the cost per mile for powering an electric vehicle tends to be cheaper than its petrol-driven counterpart.

In terms of noise pollution, electric cars reign supreme, operating silently in contrast to the loud combustion engines. Acceleration and torque capabilities have also advanced significantly in recent years, with many electric models outperforming their petrol equivalents.

Incentive schemes by the UK government further incentivize electric car adoption, offering exemptions from road tax and congestion charges, among other benefits. Moreover, the convenience of home charging eliminates the need for frequent trips to petrol stations, while advancements in battery technology extend the vehicle’s range.

Parking perks, including free or subsidized parking in designated spots with charging facilities, add to the allure of electric vehicles. As infrastructure continues to expand, with more charging stations than petrol stations already in place, electric cars are positioned as a future-proof transportation solution. Ongoing investments by manufacturers ensure continuous improvement, with regular software updates enhancing the driving experience and technological capabilities of electric vehicles long after purchase.

How Are Mobile Processors Made? A Guide to Materials & Processes

0

Mobile processors, like those used in smartphones and tablets, are made through a complex process involving multiple stages of design, fabrication, and testing. Here’s an overview of the key steps in manufacturing a mobile processor:

1. Design

The process begins with design, which involves creating the architecture and layout of the processor. This includes determining how many cores it will have, the cache structure, the graphics processing unit (GPU), and other components. Engineers use electronic design automation (EDA) software to create the designs and simulate their functionality.

Mobile Processor
Mobile Processor – photo: pixabay

2. Fabrication (Wafer Production)

Once the design is finalized, the fabrication process begins. The primary material used for making processors is silicon, due to its excellent semiconductor properties. Here’s what happens during fabrication:

  • Wafer Creation: Large cylindrical ingots of high-purity silicon are sliced into thin wafers. These wafers serve as the substrate for the processors.
  • Photolithography: This step involves creating intricate patterns on the silicon wafers using ultraviolet (UV) light and a photomask. A photomask is a template that defines the design of the circuits.
  • Etching and Doping: The exposed areas on the wafer are etched with chemicals to create channels and structures, and doping (the introduction of impurities) is used to modify the electrical properties of the silicon.
  • Layering: This process is repeated multiple times to build the complex structures needed for a processor. Additional layers might include metal interconnects to link different parts of the processor.
  • CMP (Chemical Mechanical Planarization): This step ensures the wafer surface is flat after each set of layers.

3. Packaging and Testing

After the wafers are completed, they are cut into individual chips (known as die or dies), which are then packaged into a form that can be integrated into a smartphone or other mobile device.

  • Packaging: The individual dies are mounted onto a substrate, and tiny wires (bond wires) connect them to the packaging. This step might also include adding heat sinks or other cooling mechanisms.
  • Testing: Each processor undergoes rigorous testing to ensure it meets the design specifications and performs reliably. Tests may include checking for defects, performance benchmarks, and stress tests to ensure longevity.

4. Integration into Mobile Devices

Once packaged and tested, the mobile processors are integrated into smartphone circuit boards and other components like memory, storage, radios, and power management systems. This is the final step before the device is assembled and sold to consumers.

Mobile processors are primarily made from silicon, with a complex process involving design, fabrication, and testing. The key steps include photolithography, etching, doping, packaging, and comprehensive testing to ensure that the processors are functional and meet the required performance standards.

Understanding Mobile Processor Testing

Testing mobile processors is a critical stage in the manufacturing process. It ensures that the processor meets quality, reliability, and performance standards. Here’s a detailed look at the different aspects of mobile processor testing:

1. Wafer Testing (Wafer-Level Testing)

Before the silicon wafer is cut into individual chips, it’s subjected to a series of tests to identify any defects or issues. This step helps reduce waste by identifying faulty chips early in the process.

  • Electrical Testing: Probes are used to contact the test pads on the wafer to measure electrical characteristics, such as voltage and current. This step checks for basic functionality and detects short circuits or open connections.
  • Parametric Testing: These tests measure specific parameters, like transistor threshold voltage and resistance, to ensure they meet design specifications.
  • Functional Testing: The individual circuits on the wafer are tested to ensure they perform their intended functions.

2. Die Testing (Die-Level Testing)

After the wafer is cut into individual dies, each die is tested for functionality and performance.

  • Logic Testing: This involves running specific test patterns through the processor to ensure it can perform logical operations correctly.
  • Memory Testing: Given the critical role of cache in processors, memory tests check for defects in cache lines and ensure proper data storage and retrieval.
  • Analog Testing: If the processor has analog components (like sensors), these are tested for proper functionality.

3. Packaging Testing (Package-Level Testing)

Once the dies are packaged, they are subjected to further tests to ensure the packaging process did not introduce defects.

  • Bond Wire Testing: Tests check for proper connections between the die and the package, ensuring no breaks or shorts in the bond wires.
  • Thermal Testing: This test checks how well the packaged processor dissipates heat and whether it operates within the expected temperature range.
  • Electrical Continuity Testing: This verifies that all electrical connections within the package are intact.

4. Functional Testing (System-Level Testing)

After packaging, the processors are tested in an environment that simulates their end use. This ensures they perform well in a system context.

  • Benchmarks: Performance benchmarks simulate real-world tasks and operations to ensure the processor performs as expected.
  • Stress Testing: These tests push the processor to its limits, checking for stability and reliability under high load and extreme conditions.
  • Temperature and Environmental Testing: This tests the processor’s behavior under various environmental conditions, such as extreme heat, cold, humidity, or vibration.

5. Quality Assurance and Reliability Testing

Beyond functional tests, processors undergo long-term reliability tests to ensure they will not fail prematurely.

  • Burn-In Testing: Processors are run continuously at high temperatures to simulate aging and ensure they remain stable.
  • Reliability Tests: These tests check for potential failure modes and weaknesses in the design or manufacturing process.
  • Yield Analysis: This analyzes the percentage of working processors from a given batch, aiming to identify trends or common causes of defects.

In summary, testing is a comprehensive and critical step in mobile processor manufacturing. It ensures each processor meets quality and reliability standards and is capable of performing in real-world conditions.

Google Maps: Game-Changer for Electric Vehicle Owners

0

If you drive an electric car, you know that finding a charging station can be a real challenge. A survey from April 2023 revealed that this difficulty is the third biggest reason why people hesitate to buy electric vehicles. Whether you’re on a long road trip or in a rural area, the lack of charging options can be a constant worry.

To tackle this problem, Google Maps is launching a new feature. In the coming months, the platform will offer detailed routing specifically designed to help EV drivers find charging stations nearby.

Maps
photo: pixabay

This AI-driven feature uses millions of user reviews to give real-time guidance and precise navigation. It’s starting in the United States, but there’s excitement about its potential expansion to Europe. Additionally, major carmakers like Ford, Volvo, and Honda are expected to collaborate with Google on this project. The timing is crucial, as electric car sales are slowing down. By addressing a major hurdle, Google could help rejuvenate the industry and contribute to environmental sustainability.

And that’s just part of the story—Google Maps is continually introducing new features to improve user experience and simplify travel.

Google Maps isn’t just making electric vehicle (EV) charging easier—it’s also tapping into AI to enhance its restaurant reviews. The platform now uses AI to analyze photos uploaded by users, allowing it to identify specific dishes. This gives diners detailed information about a restaurant’s menu, including the dishes’ popularity and pricing. Sounds like something from the future, doesn’t it?

In addition, travelers across North America can now access expert recommendations from well-known guides like Lonely Planet and The New York Times. These curated suggestions cover cultural landmarks, food hotspots, and hidden gems, making it easier for locals and visitors to find unique places worth exploring.

As these new features roll out, Google Maps invites users to share their opinions and feedback. Your input helps shape the future of navigation and travel, ensuring these tools stay relevant and helpful for everyone.

Monitor Review: Acer Predator X27U BMIIPRUZX

0

The Acer Predator X27U is a standout monitor for gaming, offering a rapid refresh rate ideal for competitive gaming. It supports FreeSync VRR and is G-SYNC compatible, minimizing screen tearing. With a near-instantaneous response time, motion remains smooth across refresh rates, and its low input lag contributes to a responsive feel during high refresh rates. However, input lag increases at lower refresh rates, which might be a drawback for some competitive gamers. Additionally, this monitor has limited console compatibility because it lacks HDMI 2.1 bandwidth and doesn’t support VRR with the PlayStation 5 or Xbox Series X|S.

Acer Predator X27U bmiipruzx

The Acer Predator X27U BMIIPRUZX is a strong choice for PC gaming, with a high refresh rate, outstanding motion handling, and a 27-inch OLED screen. However, its limitations in console gaming due to the absence of HDMI 2.1 bandwidth suggest that gamers seeking console compatibility might find better options elsewhere. Additionally, in terms of brightness and input lag, it falls behind other competing models, such as the ASUS ROG Swift OLED PG27AQDM, which has a brighter display, and the LG 27GR95QE-B, which offers lower input lag. Even though it’s the most budget-friendly of the 240Hz OLED monitors, these trade-offs might make other models more appealing. If HDMI 2.1 bandwidth is a key consideration, you might consider the Corsair XENEON 27QHD240, which is priced slightly higher but offers this feature.

Design-wise, the Acer Predator X27U has a sleek look, featuring an all-black plastic body and a silver tripod stand. Its thin panel has a thicker section at the back, where the internal components are housed, similar to other OLED monitors. The build quality is robust, with sturdy plastic materials and a stand that provides solid support with minimal wobble.

The monitor also boasts excellent ergonomics, allowing for multiple adjustments to achieve an ideal viewing angle. The stand’s minimum height places the top of the screen 16.9 inches (42.8 cm) from the desk. However, the downward-facing input ports, positioned on the back panel, can be somewhat difficult to access when the stand is attached. A small cable management clip on the back of the stand is a useful addition to keep cables organized.

The text clarity on the Acer Predator X27U is acceptable but not outstanding. Its RWBG subpixel layout can cause color fringing, especially noticeable when ClearType is enabled, leading to less-than-perfect text rendering. This problem persists even with ClearType off, as well as on Windows 11. Additionally, the matte screen coating contributes to a somewhat hazy appearance of text compared to monitors with less aggressive screen finishes.

Acer Predator X27U bmiipruzx
Acer Predator X27U

Since the Acer Predator X27U BMIIPRUZX is limited to HDMI 2.0 bandwidth, reaching its maximum refresh rate is possible only through a DisplayPort connection. To support 10-bit signals over DisplayPort, you’ll need a graphics card compatible with Display Stream Compression (DSC), such as any NVIDIA 16 Series or AMD RX 5000 Series or later.

Despite its low input lag at higher refresh rates, giving it a responsive feel for gaming, the input lag increases at lower refresh rates, which could be problematic for competitive gamers. While this lag isn’t noticeable in regular desktop use, it can be a drawback for competitive gaming.

The Acer Predator X27U has limitations when used with the Xbox Series X|S. It doesn’t support 1440p at 120Hz regardless of the settings used, and Variable Refresh Rate (VRR) doesn’t work properly at any resolution or refresh rate. Although the console may indicate VRR is on, the refresh rate remains fixed, impacting gameplay. As a result, the optimal configurations for Xbox Series X|S are 1080p at 120Hz or 1440p at 60Hz.

Acer Predator X27U bmiipruzx
Predator X27U bmiipruzx – images: Acer

The Acer Predator X27U is a strong performer for gaming, with a near-instantaneous response time, a 240Hz refresh rate, and low input lag at high refresh rates. It displays perfect blacks with no blooming, which is great for gaming and watching content in dark rooms. However, its lower brightness level might not be sufficient to combat intense glare in bright rooms, despite excellent reflection handling. It does a great job with HDR content due to its wide color gamut, but it’s not capable of displaying the most vivid colors.

For office use and content creation, the Acer Predator X27U provides wide viewing angles and excellent ergonomics, allowing for easy adjustment. However, its text clarity issues and risk of permanent burn-in due to OLED technology could be concerns. Overall, this monitor is best for gaming enthusiasts who value fast response times and high refresh rates, but might not be the best choice for those seeking clear text rendering or high versatility with gaming consoles.

The Acer Predator X27U BMIIPRUZX is a 27-inch OLED gaming monitor with a 1440p resolution and a 240Hz refresh rate. It uses the same OLED panel found in similar models like the ASUS ROG Swift OLED PG27AQDM, the LG 27GR95QE-B, and the Corsair XENEON 27QHD240, all of which share these high-performance specs.

The Predator X27U comes with features tailored for both gaming and productivity. It supports FreeSync variable refresh rate (VRR) and is compatible with G-SYNC, providing smooth, tear-free gameplay. Connectivity options include DisplayPort 1.4 and HDMI 2.0, allowing you to connect various gaming consoles and PCs.Acer Predator X27U bmiipruzx

In addition to gaming-focused features, the monitor has a USB-C port for quick connections to laptops and other devices. The integrated KVM switch allows you to effortlessly switch between multiple computers while using the same keyboard and mouse, adding to its versatility for productivity tasks.

Choosing the Right PSU: Efficiency and Wattage Explained

0

What is the difference between 80+ gold, silver, bronze, platinum rated PSU?

The “80 Plus” certification is a standard used to rate the efficiency of Power Supply Units (PSUs) for computers. The different levels of certification (Bronze, Silver, Gold, Platinum, and Titanium) indicate the efficiency of the PSU at various load levels. Here’s a detailed explanation of each rating and what it means:

  1. 80 Plus Bronze:
    • Efficiency: At least 82% efficiency at 20% and 100% load, and 85% efficiency at 50% load.
    • This is the entry-level certification for 80 Plus. It ensures that the PSU is reasonably efficient and wastes less power as heat.
  2. 80 Plus Silver:
    • Efficiency: At least 85% efficiency at 20% load, 88% at 50% load, and 85% at 100% load.
    • This is a step up from Bronze, providing better efficiency and often a slightly better build quality.
  3. 80 Plus Gold:
    • Efficiency: At least 87% efficiency at 20% load, 90% at 50% load, and 87% at 100% load.
    • Gold-rated PSUs are quite efficient, reducing energy waste and heat generation compared to lower-rated units. They’re often chosen by enthusiasts and gamers who want a balance of efficiency and cost.
  4. 80 Plus Platinum:
    • Efficiency: At least 90% efficiency at 20% load, 92% at 50% load, and 89% at 100% load.
    • Platinum-rated PSUs offer high efficiency, which can lead to lower electricity bills and less heat generation. These are typically used in high-end systems where efficiency and reliability are key.
  5. 80 Plus Titanium:
    • Efficiency: At least 90% efficiency at 10% load, 94% at 20% load, 96% at 50% load, and 94% at 100% load.
    • Titanium is the highest level of efficiency. These PSUs are designed for extreme performance and energy efficiency, often used in enterprise environments or ultra-high-end gaming and workstation builds.

The key difference between these ratings is the efficiency of the PSU at various load levels. Higher efficiency ratings generally mean less energy waste, lower electricity costs, less heat generation, and potentially a longer lifespan for the PSU. However, higher-rated PSUs tend to be more expensive, so it’s important to choose a PSU that fits your budget and meets your efficiency needs.

Corsair
Corsair

Is a Bronze-rated PSU sufficient?

An 80+ Bronze Power Supply Unit (PSU) can be reliable, but it generally has a higher chance of failing compared to Gold or Platinum-rated units. If a Bronze PSU does fail, there’s a greater risk of power surges, which could damage your expensive components, leading to much higher replacement costs than the $25-$50 you’d save by opting for a lower-rated PSU.

Higher-rated PSUs, like Gold or Platinum, offer greater efficiency, which means reduced power usage. This increased efficiency can result in noticeable savings on your electricity bill over time.

Never skimp on fundamental components like the motherboard, PSU, cooling, or fans, as these are critical to the stability and longevity of your system. If you’re looking to cut costs in your build, consider more budget-friendly memory: higher memory speeds rarely translate into noticeable performance improvements, and the premium price is often due to cosmetic enhancements like decorative heat sinks. You could also opt for a lower-tier CPU: an entry-level Ryzen 5 or Core i5 with 4-6 threads can handle most tasks efficiently. Additionally, ensure your GPU matches your monitor’s capabilities—buying a high-end graphics card like an RTX 2080 when your monitor only supports 1080p at 60Hz is just wasting money.

What is a good very high-end PSU for overclocking?

A good PSU for overclocking needs to provide stable power with a bit of headroom for overclocked components. Here are some points to consider when choosing a high-end PSU for overclocking:

  1. Quality and Reliability:
    • Stick with reputable brands like Corsair, EVGA, Seasonic, Cooler Master, MSI, or Thermaltake. These brands are known for producing high-quality PSUs that are reliable and built to last.
  2. Wattage:
    • To determine the appropriate wattage, consider your overall system components (including any overclocked CPUs and GPUs). While the exact wattage needed varies, a 750W to 1000W PSU generally suffices for high-end overclocked systems. Use online PSU wattage calculators to get an estimate based on your specific components and overclocking plans.
  3. Efficiency Rating:
    • While not strictly necessary, an 80 Plus Gold or higher-rated PSU is advisable. It indicates a higher efficiency level, which can lead to less heat generation and potentially longer PSU lifespan.
  4. Build Quality and Safety Features:
    • Look for PSUs with high-quality internal components, strong capacitors, and comprehensive safety features (like over-voltage protection, under-voltage protection, and short-circuit protection). This ensures stability and reduces the risk of damaging other components during overclocking.
  5. Modular Design:
    • Modular or semi-modular PSUs allow for easier cable management, which can improve airflow and make maintenance easier. This is helpful for overclocking, as better airflow can contribute to system stability.

Considering the above, some recommended high-end PSUs for overclocking are:

  • Corsair HX Series: Known for their reliability and high build quality. The HX850 and HX1000 are popular choices.
  • EVGA SuperNOVA G6 Series: Offers 80 Plus Gold efficiency, modular design, and robust safety features.
  • Seasonic Focus Plus Platinum Series: Highly efficient with an 80 Plus Platinum rating and modular design.
  • Cooler Master V Gold Series: A strong contender with 80 Plus Gold efficiency, modularity, and a 10-year warranty.

Ultimately, the best PSU for overclocking depends on your system’s specific power requirements. Once you have an estimate of the wattage you’ll need, choose a PSU from a reputable brand that meets or exceeds that requirement, with a preference for those with higher efficiency ratings and robust safety features.

What is Power Supply Efficiency, and Why Is It Important?

Power supply efficiency is a measure of how much of the electrical power drawn by a Power Supply Unit (PSU) is successfully converted into usable power for your computer, with the remainder lost as heat. PSUs with higher efficiency ratings—Bronze, Silver, Gold, Platinum, and Titanium—have lower energy loss, generate less heat, and often have better build quality.

While almost all PSUs from reputable brands meet certain efficiency standards, opting for a higher-efficiency PSU can offer benefits such as reduced heat output, lower electricity bills, and longer component lifespan. However, for PCs with lower power requirements, like those with an Intel Core i5 and integrated graphics, choosing a Gold or Platinum PSU may not be cost-effective.

For high-performance PCs, particularly those with powerful components like an Nvidia RTX 3080 and Intel Core i9, a higher efficiency rating makes more sense. These systems draw more power and produce more heat, so a Gold or Platinum PSU can help maintain stability and keep operating costs down.

AX860i
AX860i – images: Corsair

PSU: Efficiency Ratings

Efficiency LevelkWh/yearCost per Year
PSU that meets minimum ATX efficiency requirements1398.11kWh$164.98
Typical low cost PSU1199.82kWh$141.58
80 PLUS Bronze PSU988.09kWh$116.59
80 PLUS Silver PSU954.48kWh$112.63
80 PLUS Gold PSU934.31kWh$110.25
80 PLUS Platinum914.15kWh$107.87
PSU Efficiency Ratings

How Much Power Does Your PSU Need?

As a general rule, the wattage of your PSU should be approximately twice the total TDP (Thermal Design Power) of your CPU and GPU combined. This provides a safe margin for additional components and future upgrades. In many cases, a PSU between 600W and 700W is a good choice for standard setups. If you opt for a PSU with higher wattage, it may run cooler and quieter because the fan might not need to spin up at lower loads.

How Long Should You Use a PSU Before Replacing It?

PSUs are among the most durable computer components, with high-end units often carrying warranties of 10–12 years. Here are some factors to consider when deciding whether to replace your PSU:

  • Obsolescence: If new hardware requires different connectors or standards, it might be time to upgrade.
  • Warranty Expiry: Replacing a PSU once its warranty has expired can be a good precautionary measure.
  • Performance Issues: If you notice inconsistent power output, increased noise, or other performance drops, it could signal that your PSU is wearing out.
  • Power Requirements: If you upgrade your system with more power-hungry components, you may need a higher wattage PSU.

In my personal experience, I had a 750W Gold PSU in a secondary PC, running for about 8 hours a day for 10 years without any issues. The key is to choose a high-quality PSU from a reputable manufacturer (like Seasonic, EVGA, Corsair, or be quiet!), which can significantly impact its lifespan.

Unlocking Productivity: Lesser-Known iPhone Tricks

0

The iPhone has become a vital tool for professionals worldwide, offering a blend of communication, productivity, and entertainment. However, many users aren’t aware of some hidden features and tricks that can supercharge productivity. This guide explores some lesser-known iPhone tricks designed to help busy professionals stay organized, save time, and work more efficiently.

1. Automate Routine Tasks with Shortcuts

Apple’s Shortcuts app allows you to automate various tasks, streamlining your workflow. With Shortcuts, you can create custom workflows that perform a series of actions with a single command. Here are some examples for busy professionals:

  • Morning Routine: Create a shortcut that turns off “Do Not Disturb,” checks your calendar, and plays your favorite morning playlist.
  • Email Follow-ups: Set up a shortcut that sends a pre-written follow-up email to a selected contact.
  • Travel Planner: Build a shortcut that pulls up directions, checks traffic, and opens your boarding pass in Apple Wallet.

Shortcuts can be customized to fit your specific needs, allowing you to automate repetitive tasks and focus on what’s truly important.

Lesser-Known iPhone Tricks
photo: pixabay

2. Utilize Focus Modes for Improved Concentration

Focus modes in iOS let you control notifications based on your current activity. While many professionals are familiar with “Do Not Disturb,” the Focus feature goes beyond that, allowing you to create custom modes for different scenarios.

  • Work Mode: Create a work-focused mode that silences personal notifications but allows work-related ones. You can also set specific apps to be accessible during this time.
  • Meeting Mode: Configure a mode that mutes all notifications except for emergency contacts and important messages. You can also set it to automatically activate during scheduled meetings.
  • Exercise Mode: Build a mode that allows notifications from fitness apps and music players while silencing everything else.

By customizing your Focus modes, you can maintain concentration and avoid interruptions during critical periods.

3. Leverage Advanced Notes Features

Apple’s Notes app is a versatile tool that can do much more than basic note-taking. Here are some advanced features that can help busy professionals stay organized:

  • Collaborate on Notes: Share notes with colleagues for real-time collaboration. This feature is perfect for brainstorming sessions or meeting agendas.
  • Scan Documents: Use the Notes app to scan documents, business cards, or receipts. This feature is useful for quickly digitizing paperwork.
  • Lock Sensitive Notes: Protect sensitive information by locking specific notes with a password or Face ID.

By mastering these advanced features, you can use the Notes app as a powerful organizational tool.

4. Master Spotlight Search for Quick Access

Spotlight Search is an underutilized feature that can save you time by providing quick access to apps, contacts, emails, and more. Here’s how to maximize its potential:

  • Search Apps and Contacts: Start typing the name of an app or contact to quickly find and open it.
  • Search Emails and Messages: Use keywords to locate specific emails or messages. This feature is especially handy for finding important information without scrolling through your inbox.
  • Perform Quick Calculations: Type math equations directly into Spotlight to get instant results. This feature is great for quick calculations on the go.

By mastering Spotlight Search, you can reduce the time spent navigating through your iPhone and focus on what matters most.

5. Use Siri for Voice Commands and Automation

Siri, Apple’s virtual assistant, can do much more than answer questions. As a busy professional, you can use Siri to automate tasks and improve productivity.

  • Create Reminders and Appointments: Ask Siri to create reminders, schedule appointments, or add events to your calendar. This feature is helpful when you’re on the move and can’t type.
  • Send Messages and Make Calls: Use Siri to send messages or make calls without unlocking your iPhone. This can save time and keep you focused on your tasks.
  • Control Smart Devices: If you have smart devices at home or in the office, use Siri to control them. This feature is great for adjusting your environment without interrupting your workflow.

With Siri’s voice commands, you can accomplish tasks hands-free, allowing you to multitask and stay productive.

6. Maximize Efficiency with Multi-Tasking Features

Multi-tasking is crucial for busy professionals who need to manage multiple tasks simultaneously. The iPhone offers several features that enable efficient multi-tasking:

  • Picture-in-Picture (PiP) Mode: This feature lets you watch videos or participate in FaceTime calls while using other apps. It’s perfect for attending virtual meetings while taking notes.
  • App Switcher: Use the App Switcher to quickly switch between open apps. This feature is especially helpful when working with multiple apps simultaneously.
  • Drag and Drop: If you use an iPhone with a larger screen, you can drag and drop content between apps. This feature is great for transferring text or images between Notes and other apps.

By mastering these multi-tasking features, you can increase efficiency and juggle multiple tasks without losing focus.

Conclusion

The iPhone offers a wide range of features and tricks that can boost productivity for busy professionals. By automating routine tasks, customizing Focus modes, using advanced Notes features, mastering Spotlight Search, leveraging Siri, and maximizing multi-tasking capabilities, you can transform your iPhone into a powerful productivity tool.

Whether you’re a business executive, freelancer, or entrepreneur, these lesser-known iPhone tricks can help you stay organized, save time, and work more efficiently. Start exploring these features today and unlock the full potential of your iPhone.