Home Blog Page 24

Performance: Sony X77L entry-level 4K TV

0

The overall build quality of the Sony X77L is commendable, despite being constructed entirely from plastic. While the material choice may not be premium, it holds up well without any notable flaws. The back panel, predominantly a single large piece, exhibits some flex, though this is typical and unlikely to result in long-term issues.

The X77L 4K impresses with its solid color reproduction, offering a well-saturated and accurate palette right out of the box without the need for calibration. However, its limited color gamut hampers its ability to display the full range of colors essential for optimal HDR content viewing.

Sony X77L
Sony X77L

In terms of HDR performance, the Sony X77L falls short in brightness, resulting in subpar HDR picture quality. While it performs decently with SDR content, it may struggle in brightly lit rooms due to its slightly lower minimal brightness output.

The 75” model of the X77L utilizes an IPS panel, translating to mediocre contrast and shallow black levels, making it unsuitable for viewing dark content in dimly lit environments. However, in well-lit rooms, this issue is less noticeable, ensuring acceptable picture quality.

HD content shines on the Sony X77L, delivering crisp and detailed images with good clarity. Unfortunately, its black uniformity suffers due to the absence of local dimming, resulting in a grayish-black appearance.

On the bright side, wide-angle viewing remains impressive, thanks to the IPS panel, ensuring consistent contrast and color saturation even in rooms with expansive seating arrangements.

Motion handling during regular content playback is commendable, with minimal motion blur and smooth performance even during fast-paced scenes.

As for sound quality, the X77L delivers an okay performance, with adequate volume levels and clear dialogue. However, bass output is lacking, a common limitation in flat-panel TVs.

Externally, the TV’s rear appears plain and somewhat inexpensive. The inputs are recessed, making them difficult to reach when wall-mounted. To aid in cable management, the TV includes clips that can be attached to the feet.

Similar to its predecessor, the Sony X75K, the X77L stands out for being entirely flicker-free across all brightness levels. This feature is particularly beneficial for individuals sensitive to flickering, reducing eye strain during extended viewing sessions.

In ‘Game’ mode, the input lag is impressively low, delivering a smooth and responsive gaming experience. However, the ‘Graphics’ Picture Mode, essential for clear text display from a PC, suffers from unusually high input lag, rendering it impractical for regular use due to sluggish cursor movements.

Although equipped with an auto low latency mode that switches to the ‘Game’ Picture Mode, enabling it requires navigating through the HDMI signal format menu, a departure from previous Sony TVs. This feature is supported only on port 3, coinciding with the eARC port. Users employing a soundbar or home theater receiver will need to utilize alternative inputs and manually switch to the ‘Game’ Picture Mode to benefit from reduced input lag.

Regrettably, the TV’s 60Hz refresh rate limits its compatibility with the PS5 and Xbox Series S|X. Despite the auto low latency mode’s inclusion, it still necessitates configuration through the HDMI signal format menu, available exclusively on port 3. For those utilizing external audio devices, switching inputs and manually activating the ‘Game’ Picture Mode becomes necessary to achieve optimal performance.
The Sony X77L provides a decent gaming experience, boasting low input lag for responsive gameplay and an acceptable response time with minimal blur during fast movements. However, its gaming capabilities are hindered by its 60Hz refresh rate and lack of support for advanced gaming features like VRR. While equipped with an auto low latency mode (ALLM), its usability is limited by Sony’s decision to confine this feature to just one HDMI input, coincidentally the eARC port, rendering it less practical for gaming enthusiasts.

Pros:

Good accuracy prior to calibration.
Low input lag in the ‘Game’ Picture Mode.
Flicker-free performance at all brightness levels.

Cons:

Limited peak brightness.
Restricted to a 60Hz refresh rate with no VRR support.
ALLM functionality confined to one port.
As a desktop PC monitor, the Sony X77L falls short, but it suffices for PC gaming purposes. The ‘Game’ Picture Mode ensures minimal input lag for responsive gameplay, while the ‘Graphics’ Picture Mode correctly displays chroma 4:4:4. However, activating the latter significantly increases input lag, resulting in sluggish mouse movements. Consequently, users must choose between responsive inputs and clear text when using it as a desktop display.

For viewing sports in well-lit environments, the Sony X77L proves satisfactory. Its wide viewing angle accommodates diverse seating arrangements, maintaining image consistency from various angles. Although it handles reflections moderately and offers decent peak brightness, excessive glare may pose issues. With adequate motion handling and good gray uniformity, the central screen area remains clear during fast-paced action scenes.

Sony X77L
X77L – images; Sony

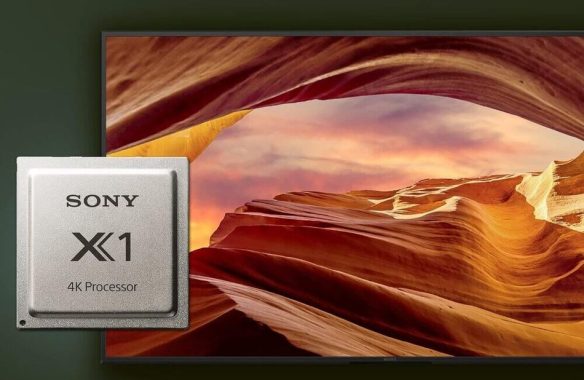
Positioned as an entry-level 4K model in Sony’s 2023 lineup, the X77L slots above the X75L and below the less widely available X80L. Offering minimal additional features, it relies on Sony’s 4K Processor X1 for quality picture processing. Utilizing an ADS panel and lacking local dimming, it targets users seeking a basic TV for secondary rooms or moderately lit living spaces.

Resolution and Upscaling

Our upscaling assessment begins with a range of videos spanning various resolutions, from ultra-low-quality sources to 480p DVDs, and progressing to 720p and 1080p resolutions. We evaluate broadcasting signals, streaming content, and discs to comprehensively gauge the TV’s performance.

The X77L yielded mixed outcomes in this assessment. Regarding low-resolution content, the TV pleasantly surprised us. Despite the limitations of the X77L’s processor, the images appeared adequately sharp, preserving substantial detail. Text exhibited commendable clarity, devoid of significant aberrations.

Conversely, the X77L 4K struggled with low-quality streaming content. Macro-blocking was conspicuous, indicating the TV’s incapacity to effectively mitigate these artifacts. However, this outcome was predictable, given that such capabilities are primarily associated with top-tier units.

As an entry-level option, Sony’s X77L proves to be a respectable choice for a 4K TV. Its color accuracy and sharp, detailed imagery, enhanced by Sony’s top-notch video processing, offer a satisfying viewing experience. However, its noticeable drawbacks lie in its limited contrast and shallow black levels, particularly impacting the display quality in dimly lit environments when viewing dark content.

In summary, if you prioritize a solid picture quality that aligns with entry-level expectations and don’t mind forgoing the advanced features found in higher-end models, the Sony X77L 4K could be an ideal fit for your needs.


Aegisub app – free & easy Edit and Create Subtitle

0

Aegisub presents a comprehensive subtitle editing solution, empowering you to craft and modify subtitles in ASS, SSA, and SRT file formats, ensuring an immersive movie experience in your preferred language.

In the realm of global entertainment, watching movies and series stands as a cherished pastime. Yet, the absence of subtitles in desired languages often poses a challenge. Consequently, translators seek to bridge this gap by crafting subtitles, particularly for trending and popular titles.

Enter Aegisub—an efficient tool for creating subtitles in ASS, SSA, or SRT formats. Boasting a user-friendly interface, it facilitates seamless subtitle editing, supported by features like spell checking, translation assistance, tag call tips, syntax highlighting, and versatile macros. With these aids, translating, editing, and quality assurance become more accessible tasks.

subtitle editing
subtitle editing tool

Aegisub ensures data integrity and user convenience with features like multi-level undo/redo, auto-saving, backups, and emergency recovery, assuaging concerns about errors or system crashes.

Flexibility is key, as Aegisub supports a myriad of formats and character sets, enabling seamless import and export operations across various formats. Legacy encodings and multi-language subtitles are effortlessly handled, thanks to full Unicode support.

In addition, Aegisub’s robust video mode supports a wide array of formats, complemented by features like automatic live preview of subtitles and full support for variable framerate video and Matroska timecodes, enhancing the overall editing experience.

Whether for professional or casual use, Aegisub equips users with the necessary tools to edit and create subtitles tailored to their preferences.

From adjusting subtitles to crafting new ones, Aegisub offers professional-grade tools within its intuitive interface. Tasks can even be automated, streamlining the editing process.

Moreover, Aegisub provides flexibility in customizing subtitle styles, ensuring both accuracy and aesthetic appeal.

With Aegisub, the task of subtitle creation and editing transcends mere functionality; it becomes an immersive and personalized experience. Users can effortlessly tailor subtitles to their preferences, ensuring seamless integration with their viewing habits.

The utility of Aegisub extends beyond conventional subtitle editing. It empowers users to rectify incorrect or faulty subtitles, thereby enhancing the overall viewing experience. Whether correcting errors or adjusting timings, Aegisub provides a comprehensive toolkit for addressing diverse subtitle challenges.

Furthermore, Aegisub’s versatility is exemplified by its ability to accommodate users of varying skill levels. Novices can easily navigate the intuitive interface and leverage basic editing features, while advanced users can delve into intricate customization options to fine-tune subtitles with precision.

In essence, Aegisub represents more than just a subtitle editor; it is a catalyst for enhancing the accessibility and enjoyment of multimedia content. By placing robust editing capabilities at users’ fingertips, Aegisub empowers individuals to engage with movies and series on their own terms, transcending language barriers and fostering a deeper connection with cinematic narratives.

In conclusion, Aegisub emerges as a go-to solution for creating and editing subtitles, empowering users to enjoy movies while ensuring subtitle accuracy and functionality. Download Aegisub Subtitle Editor here

How to fix when YouTube does not automatically transfer songs on phones

0

Are you frustrated because YouTube isn’t seamlessly transitioning between songs or videos on your phones and computers? As a widely beloved application for both smartphone and computer users, YouTube offers a diverse range of content, from movies to music to animations and comedy. One of its standout features is the automatic playback function, ensuring a continuous viewing or listening experience without the need for manual intervention. However, many users are currently experiencing issues where YouTube fails to automatically switch tracks on their devices, leaving them puzzled about how to resolve this issue.

Youtube
photo: pixabay

So, why exactly is YouTube not automatically transitioning between songs or videos on phones and computers?

  1. Age Restrictions: YouTube’s autoplay feature is disabled by default for users aged 13 to 17. Only those 18 and older have this feature activated by default. Hence, if you fall into the younger age group, it’s likely that autoplay hasn’t been enabled for you.
  2. Accidental Deactivation: It’s possible that during your usage, you inadvertently turned off the autoplay feature, preventing YouTube from seamlessly transitioning between tracks on your computer or phone.
  3. Connectivity Issues: Given that YouTube requires an internet connection to function, interruptions in connectivity can disrupt the autoplay feature. If your device loses internet connection suddenly, it may fail to continue playing videos automatically.
  4. Timeout Settings: For users on 4G networks, YouTube’s autoplay feature may deactivate after 30 minutes of inactivity, whereas on Wi-Fi, it may stop after 4 hours.
  5. Supervised Accounts: If you’re using a supervised account, such as one set up by parents, they might have disabled the autoplay feature. In such cases, the option to toggle autoplay on or off may not be visible to you on YouTube.

Steps to Resolve YouTube’s Autoplay Issue on Phones and Computers

If you find that YouTube isn’t automatically transitioning between songs or videos on your devices, here are some steps you can take to address the issue:

How to Enable Autoplay on Your Phone:

  1. Open the YouTube application on your phone.
  2. Select any video you wish to watch.
  3. Once the video finishes playing, you’ll notice the next video icon appearing on the screen.
  4. Simply click on this icon to enable autoplay.

Alternatively, you can enable continuous video playback in the Settings:

  1. Launch the YouTube app on your phone and tap on your avatar circle located in the top right corner of your account.
  2. Scroll down and tap on Settings.
  3. Select Autoplay.
  4. Activate the option for ‘Mobile phone/tablet.’

How to Enable Autoplay on Your Computer:

  1. Navigate to YouTube on your computer and open any video.
  2. On the toolbar of the video player, you’ll find an autoplay icon. Click on it to enable autoplay.

Additionally, Verify Your Internet Connection:

If YouTube still doesn’t automatically transition between songs or videos on your computer or phone, it’s essential to check your internet connection. Ensure that your device is connected to a stable network. Sometimes, a disconnected or weak network connection can disrupt YouTube’s functionality.

Moreover, be mindful of the autoplay feature’s timeout settings. After a certain period of inactivity, autoplay may stop. In such cases, simply return to YouTube and allow the video to continue playing to re-enable autoplay.

By following these steps and ensuring a stable internet connection, you can resolve the issue of YouTube not automatically transitioning between songs or videos on your devices.

In summary, if you’re experiencing issues with YouTube’s autoplay feature on your phone or computer, consider these factors and steps to troubleshoot and potentially resolve the problem.

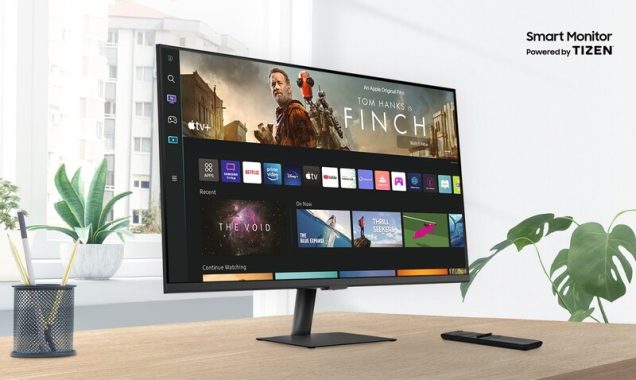
43″ Samsung M70B UHD Smart monitor review

0

Looking for a monitor that’s not just a screen, but a versatile hub for your entertainment and productivity needs? Say hello to the 43″ Samsung M70B monitor. Packed with features and boasting a stunning 4K UHD display, this monitor aims to be your one-stop solution, whether you’re gaming, working, or binge-watching your favorite shows.

Design and Build Quality

First impressions matter, and the M70B makes a bold statement with its sleek and modern design. The flat panel is framed by thin bezels, maximizing your screen real estate and providing an immersive viewing experience. The stand is simple yet sturdy, allowing for tilt adjustments to find that perfect viewing angle.

Samsung M70B
Samsung M70B

Panel Type and Display

Featuring a VA panel, the M70B delivers rich colors and deep blacks, ensuring vibrant and lifelike visuals. With a resolution of 3840 x 2160 pixels, 4K content comes to life with stunning clarity and detail. Whether you’re editing photos, watching movies, or browsing the web, every pixel is crystal clear.

Connectivity and Compatibility

One of the standout features of the M70B is its wide range of connectivity options. With two HDMI ports, three USB ports, and a USB-C port with 65W charging power, you can easily connect all your devices without any hassle. From gaming consoles to laptops, this monitor is compatible with them all. Additionally, its Wireless Display capability allows for seamless screen mirroring from your smartphone or tablet.

Unlike the majority of monitors, the Samsung M70B comes with an included remote control for easy navigation of settings and apps. Along the bottom bezel, a physical button solely serves to power the monitor on/off. Notably, this monitor features a built-in far-field microphone for convenient hands-free voice control. Concerned about privacy? There’s a physical switch adjacent to the power button to disable the microphone.

Performance and Gaming

With a response time of just 4ms and a maximum refresh rate of 60Hz, the M70B ensures smooth and fluid gameplay, whether you’re playing fast-paced shooters or exploring vast open worlds. The inclusion of Game Mode optimizes the display settings for gaming, reducing input lag and enhancing the overall gaming experience. Plus, features like Ultrawide Game View provide a wider field of view, giving you a competitive edge in-game.

Samsung M70B UHD Smart monitor
Samsung M70B UHD Smart monitor – images Samsung

The Samsung M7 43″ serves decently in office settings. Its expansive high-resolution display facilitates multitasking, yet the relatively low pixel density and suboptimal pixel structure yield just passable text clarity. However, its poor ergonomics make finding an ideal viewing position challenging, compounded by narrow viewing angles that result in washed-out images when seated closely to the screen. While its glossy screen coating enhances movie viewing, it fails to effectively reduce direct reflections, making it unsuitable for bright office environments.

For video consumption, the Samsung M7 proves commendable. Equipped with a built-in Tizen OS smart interface boasting a rich array of streaming apps, it offers seamless access to favorite content sans the need for a PC connection. Its impressive contrast and impeccable black uniformity ensure an immersive viewing experience, particularly in dimly lit rooms. Nonetheless, despite its good peak brightness, glare management is compromised by the glossy screen coating, advising against placement in well-lit spaces.

In terms of gaming performance, the Samsung M70B boasts objectively low input lag, ensuring a responsive gaming experience. However, compared to most comparable monitors, its input lag is slightly higher, aligning more closely with typical TVs. Activating Game Mode is crucial for achieving the lowest input lag. Without it, ‘PC Mode’ registers 12.7ms of input lag and ‘BluRay Mode’ clocks in at 68.5ms.

When it comes to compatibility with gaming consoles like the Xbox Series S|X, the Samsung M70B has limitations. Restricted to a 60Hz refresh rate and lacking support for variable refresh rates, it cannot fully exploit the capabilities of these consoles. While it can accept and display signals at 1440p or 1080p resolution, there’s no discernible advantage as higher refresh rates are not achievable.

Smart Features and OS

Running on Samsung’s Tizen™ operating system, the M70B offers a seamless and intuitive user experience. From accessing your favorite streaming apps to controlling your smart home devices, everything is just a few clicks away. With built-in support for voice assistants like Bixby, Alexa, and Google Assistant, you can control your monitor with simple voice commands, making multitasking a breeze.

Samsung M70B UHD Smart monitor

Pros:

  1. Stunning 4K UHD display with vibrant colors and deep blacks.
  2. Wide range of connectivity options including HDMI, USB, and USB-C.
  3. Smooth and responsive gaming performance with Game Mode.
  4. Intuitive smart features and voice assistant support for hands-free control.
  5. Sleek and modern design that complements any workspace or entertainment setup.

Cons:

  1. Limited to a maximum refresh rate of 60Hz, which may not be ideal for competitive gaming.
  2. Tilt adjustment range is somewhat limited compared to other monitors.
  3. Some users may find the stand design to be less adjustable than expected.M70B 4K UHD Smart Monitor

Price and Value

At a retail price of $399.99, the 43″ Samsung M70B monitor offers exceptional value for money considering its impressive features and performance. Whether you’re a gamer, content creator, or professional, this monitor delivers on all fronts, making it a worthwhile investment for anyone looking to upgrade their setup.

Conclusion

In conclusion, the 43″ Samsung M70B 4K UHD Smart Monitor is a powerhouse of a display that ticks all the boxes for both entertainment and productivity. With its stunning visuals, versatile connectivity options, and smart features, it’s more than just a monitor – it’s your all-in-one entertainment hub. Whether you’re working, gaming, or streaming your favorite content, the M70B delivers an unmatched viewing experience that will elevate your setup to new heights.

Exploring Android App Ideas for Beginners

0

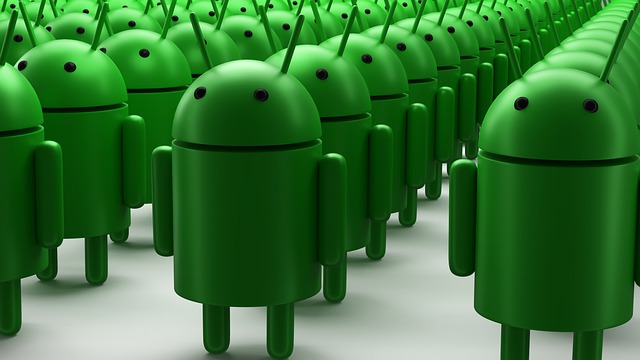
Excited to embark on your journey of building your first Android app? Congratulations! You’re about to dive into an exciting adventure of programming and creativity. However, starting out may feel overwhelming. Which app ideas should you pursue? What tools and technologies do you need to learn? To help you navigate this initial stage, we’ve compiled some beginner-friendly Android app ideas to kickstart your development journey.

Mapping Apps For novice Android developers, mapping apps offer an excellent starting point. With the right tools, they’re relatively straightforward to create and provide a practical way to enhance your programming skills. These apps typically involve retrieving location data, incorporating pins and markers on maps, and customizing user interfaces. Additionally, they serve as handy tools for everyday navigation and location-based services.

Before diving in, define the primary purpose of your app, whether it’s navigation assistance or location-based functionalities. Consider adding features like search bars or address books to improve user experience. With a clear plan in place, you’ll be well-equipped to develop an effective mapping app for Android users.

Android App Ideas
photo: Pixabay

Privacy Alert Application Another beginner-friendly app idea is a Privacy Alert application. This app notifies users when their personal data stored on their devices is at risk of compromise, offering protection against malicious apps and websites. Building such an app not only hones your development skills but also contributes to user safety and privacy awareness.

Bluetooth Chat For those eager to tackle a more complex project, a Bluetooth chat app is an excellent choice. This app allows users to connect and communicate with each other using Bluetooth technology, offering valuable experience in device connectivity. To simplify the project, break it down into tasks such as setting up Bluetooth connections, designing the messaging interface, and implementing file/photo-sharing features.

Creating a functional Bluetooth chat app boosts your coding confidence and showcases your abilities to friends and family.

Planning User Experience (UX) Crafting a seamless user experience (UX) is crucial for first-time app developers. A well-designed app enhances usability and user satisfaction. But how do you ensure a great UX?

Start with Wireframes Before writing any code, sketch out the app’s structure and design using wireframes. Wireframing tools help you visualize the app’s architecture and layout, providing a roadmap for development. Whether you opt for low-fidelity wireframes to outline basic views or high-fidelity wireframes for detailed design elements, careful planning sets the stage for a successful app development journey.

User Testing

Once you’ve developed a functional version of your app, it’s crucial to gather feedback. Launching your app without prior testing risks having your efforts go to waste if it fails to resonate with users. User testing can be conducted through various methods:

  1. Beta testing with friends and family.
  2. Seeking opinions from popular tech and Android blogs.
  3. Collecting feedback through user surveys.
  4. Utilizing analytics tools such as Firebase or Flurry to track usage and analyze heatmaps.

By soliciting ample user feedback before the official launch, you significantly increase the likelihood of your app’s success.

Checklist Apps

For novice developers aspiring to offer Android mobile application development services, creating an app with a checklist feature is a wise choice. These apps provide a convenient space for users to jot down quick notes and tick them off upon completion. Typically, they boast a simple user interface and customizable options like reminders and category sorting.

Popular checklist apps include:

  1. Wunderlist
  2. Any.do
  3. Todoist
  4. Google Keep

These platforms offer essential features such as recurring task notifications, dark mode, multiple list support, voice commands, and easy sharing options, setting a solid foundation for your development journey.

Calendar Application

Another practical Android app idea for beginners is a calendar application. Calendars are indispensable tools for organizing schedules, making a calendar app a valuable asset for users. Building one also provides an opportunity to delve into data manipulation and input techniques.

Core functionalities of a calendar app include:

  1. Creating and displaying events and tasks.
  2. Adding or removing information from the calendar.
  3. Sending reminders for upcoming tasks or events.
  4. Syncing with other calendars or accounts.

Enhancements to differentiate your app may include:

  1. Social media integration for sharing events or schedules.
  2. Location settings to sync with specific time zones.
  3. Automation features like weather forecasts for events or automatic reminders for recurring tasks.

Developing an Android calendar app is a manageable project for beginners, offering valuable insights into data manipulation and user interaction.

In this guide, we’ve explored beginner-friendly Android app ideas, covering fundamental concepts of app development, coding, and design. While the journey may seem daunting initially, leveraging resources and maintaining the right mindset can ease the transition.

Start with simple projects and gradually progress to more complex ones. Conduct thorough research, leverage top-notch tools, and don’t hesitate to seek assistance when needed.

With dedication and perseverance, you’ll soon craft an app to be proud of, and who knows, you might even become the next renowned Android developer.

Everything you need to know about TVs with OLED displays

0

In short, OLED technology utilizes microscopic LEDs similar to those found in indoor LED lights to generate both light and color, crafting images for viewing. LCDs, on the other hand, solely produce color, relying on a backlight behind the panel to illuminate pixels and form images.

Quantum Dot, or QLED TVs as branded by Samsung, represent a souped-up version of LCD technology, leveraging advancements to deliver richer, more lifelike colors compared to traditional LCD/LED displays. Though still reliant on a backlight, QLED displays offer enhanced vibrancy.

Notably, OLEDs boast an advantage in contrast ratio, as they can individually illuminate pixels, achieving an “infinite contrast ratio.” In contrast, traditional LCDs struggle to reproduce true black, resulting in a lower contrast ratio due to the backlight causing darker shades to appear as dark grey instead of true black.

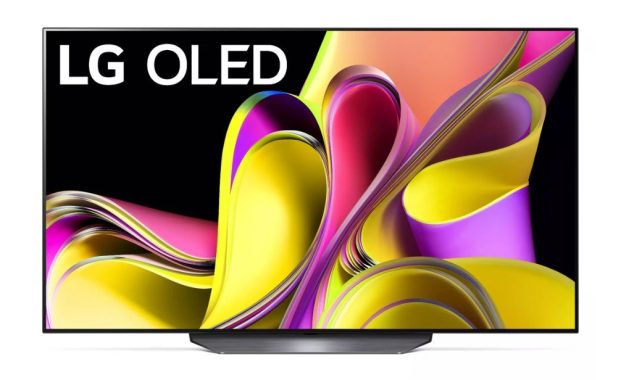
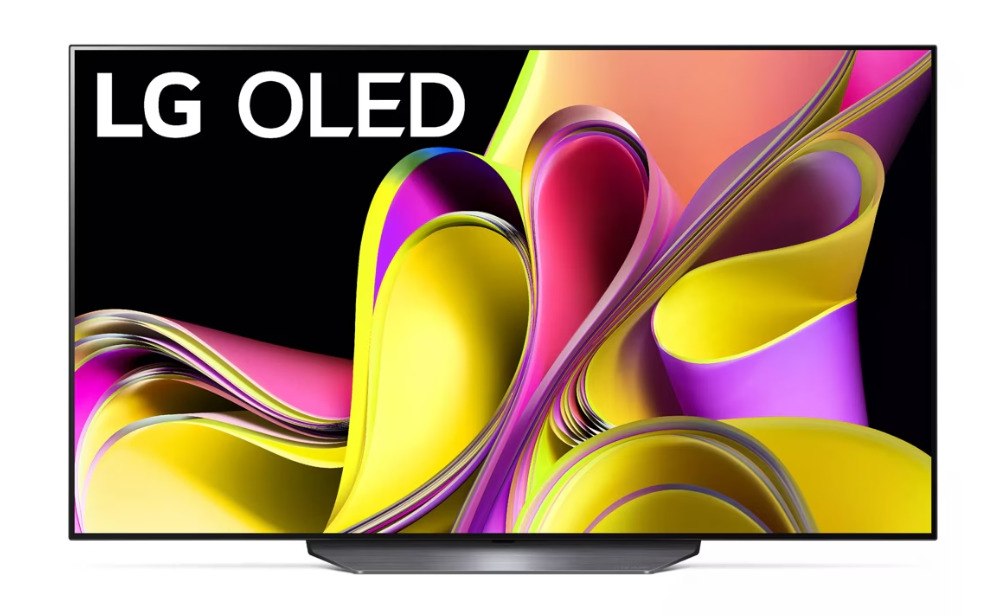
LGClass B3
LG Class B3 – LG

What sets LCD and OLED displays apart?

It ultimately hinges on individual preferences and priorities, but there’s a stark contrast between the two technologies. LCD displays are backlit, meaning they rely on a single light source behind the screen. Consequently, even when displaying black, light emanates from an LCD screen since all pixels are illuminated uniformly. This inherent uniformity prevents LCD screens from achieving deep blacks or striking highlights. Uneven lighting, although less common on smaller smartphone screens, is a persistent issue with larger displays like computer monitors and TVs, detracting from their ability to render rich, vibrant colors with precision.

On the other hand, OLED displays operate differently. Each pixel emits its own light, allowing for independent brightness control. When displaying black, OLED screens can achieve absolute darkness by turning off pixels entirely, a feat unattainable with LCD technology. This capability not only facilitates deeper blacks but also enables OLED displays to produce colors that more closely resemble real-life hues. Moreover, unlike LCD screens prone to uneven lighting, OLED displays typically maintain uniform brightness unless afflicted by defects.

OLED screens excel in power efficiency, particularly with features like dark mode. Unlike LCD screens, which consume constant power irrespective of screen content, OLED displays dim or deactivate individual pixels to render darker colors, thereby conserving energy. However, OLED screens are susceptible to burn-in, a phenomenon where prolonged display of static images, such as UI elements on smartphones, can cause pixel malfunction, most noticeable when displaying black.

In essence, while OLED displays offer superior color reproduction and energy efficiency, they come with the caveat of potential burn-in issues, especially in smartphone usage scenarios.

What are the drawbacks of OLED displays?

Pros:

  1. OLED displays boast sleeker, lighter designs compared to alternative display technologies.
  2. With wider viewing angles than LCDs, they excel in gaming and immersive viewing experiences.
  3. OLEDs deliver superior contrast ratios, enhancing visual depth and clarity over traditional LCD displays.
  4. They exhibit greater energy efficiency by shutting off pixels entirely when rendering black images, resulting in reduced power consumption.
  5. Offering faster response times, OLED displays present sharper motion images with minimal ghosting effects, outperforming LCD counterparts.

Cons:

  1. OLED displays typically command higher prices compared to LCDs of equivalent size and resolution due to intricate manufacturing processes and components.
  2. They are susceptible to image retention or burn-in, wherein static images left onscreen may become permanently embedded over time.
  3. The lifespan of OLED displays is shorter than that of LCDs, as they have limited operational lifetimes.

    S95C
    S95C – Samsung

How do OLEDs Function?

OLEDs represent a remarkable achievement in materials science, utilizing engineered organic materials to become what are known as direct band-gap semiconductors. Despite their organic composition, OLEDs operate much like conventional LEDs.

Understanding Diodes A Light Emitting Diode (LED) is essentially a diode where one of the materials possesses a direct band-gap. Diodes operate by forming a p-n junction, a region with excess ‘holes’ (areas where electrons can reside) and another with excess electrons.

Diodes exhibit a unique property: current flows only in one direction through them. This is due to the ability to inject additional electrons into the p-region, which lacks electrons, while electrons cannot be injected into the n-region.

Exploring Recombination When an electron migrates into the p-region of a diode, it seeks to pair up with a hole, a process known as recombination. Recombination occurs because an electron-hole pair possesses lower net energy than an individual electron, with entropy driving systems towards lower-energy states.

Understanding Light Emission The surplus energy from the previously ‘excited’ electron must dissipate, typically emitted as light in direct band-gap materials. The color of this light can be precisely engineered by aligning the band-gap height with the energy required for photon emission.

Is IPS LCD Better Than OLED?

Alright, let’s address some misconceptions here.

The primary advantages of OLEDs include:

  1. Generally higher power efficiency for most content. While LCDs with area-dimming backlights can narrow this gap.
  2. Typically better contrast, especially in dark rooms, as OLEDs emit no light in the black state. However, in normal conditions, contrast is often limited by ambient light reflecting off the screen.
  3. Excellent viewing angle performance with minimal color shift off-axis, though IPS LCDs also perform well in this regard.
  4. Thin form factor.

Now, let’s clear up some common misunderstandings:

  1. OLEDs don’t necessarily offer a greater range of colors than LCDs. The number of colors depends on the display’s internal drivers, not the technology. Most OLEDs still support 6-8 bits per color, similar to LCDs.
  2. OLEDs may not always deliver a larger color gamut. This depends on the method of color production and the specific materials used. LCDs can also achieve wide gamuts, for instance, through RGB LED backlights.
  3. Neither technology inherently excels in color accuracy, which is influenced by factors such as native primaries and tone response.
  4. OLEDs aren’t necessarily brighter than LCDs; in fact, the opposite can be true. While LCDs can accommodate brighter backlights, there are limits to how intensely OLEDs can be driven.
  5. Neither display has an inherent advantage in terms of being “better for the eyes.” Prolonged close-up viewing can strain the eyes regardless of the display technology. It’s essential to take breaks and rest your eyes periodically.

Is Mini LED Better Than OLED?

Both Mini LED and OLED represent significant advancements in display technology, each with its own set of strengths and weaknesses. Determining which technology is superior depends on specific use cases and individual preferences.

Here’s a breakdown of the features of Mini LED and OLED:

Mini LED:

Backlight technology: Mini LED utilizes LED-based backlighting, employing numerous regional backlights for enhanced local contrast and precise area control.

Brightness and contrast: Mini LEDs can deliver higher brightness and contrast levels, particularly noticeable in HDR (high dynamic range) content.

Longevity: Due to the use of inorganic materials, Mini LED boasts a longer service life compared to OLED’s organic materials.

Display size: Mini LED technology is well-suited for large displays and TVs, offering flexible backlight adjustment and control.

OLED:

Self-luminous technology: OLED’s self-luminous nature allows each pixel to emit light independently, resulting in superior contrast and deeper blacks with faster response times.

Viewing angle and color representation: OLED provides a wider viewing angle range and more vibrant, true-to-life color representation.

Thin and flexible: OLED displays are thin and flexible, making them suitable for specific applications such as curved or foldable displays.

Energy efficiency: OLED achieves higher energy efficiency compared to Mini LED’s backlight technology, as it emits light only at the pixels requiring display.

Ultimately, whether Mini LED or OLED is more suitable depends on your priorities. If you prioritize factors like local contrast, brightness, and longevity, especially for large displays or TVs, Mini LED might be the better choice. Conversely, if contrast, color accuracy, viewing angle, and thin, flexible design are more important to you, OLED could be the preferred option. Your decision should be guided by personal preferences, budget, and specific usage scenarios.

Android firmware update – all you wanted to know

0

How do you check your Android firmware version?

To check your Android firmware version, you can follow these steps:

  1. Open the Settings app on your Android device.
  2. Scroll down and tap on About Phone or About Device. Some versions of Android display the phone number on this screen. If so, tap on it.
  3. Scroll down to Software Information.
  4. Look for Android Version or Firmware Version.

The number listed here is the version of the Android operating system installed on your device. Please note that the steps may vary slightly depending on the make and model of your Android device. If you’re unable to find it, you may want to refer to the specific user manual or support site for your device.

Android Phone update
photo: Pixabay

How do I update my Android firmware?

To update your Android firmware, you can follow these steps:

  1. Connect your Android device to a Wi-Fi network to avoid using your mobile data for the update.
  2. Open the Settings app on your Android device.
  3. Scroll down and tap on System.
  4. Tap on Advanced to expand the menu.
  5. Tap on System Update.
  6. Your device will check for updates. If updates are available, tap on Download and Install.

After the software is downloaded, it’s a good idea to charge your device before starting the update. The update process can take some time and your device might restart several times.

Please note that the steps may vary slightly depending on the make and model of your Android device. If you’re unable to find it, you may want to refer to the specific user manual or support site for your device. Also, not all Android devices receive updates at the same time, it depends on your device manufacturer and carrier. If an update isn’t available, it may be coming in the future. So, it’s a good idea to check for updates periodically.

Can I stop an Android firmware update in progress?

Once an Android firmware update has started, it’s generally not recommended to stop it because it could potentially cause issues with your device. The device might become unresponsive, or the operating system could become unstable.

However, if you absolutely need to stop it, you could try the following steps:

  1. Press and hold the Power button on your device until you see the power menu.
  2. Tap on Restart or Reboot.

Please note that this method might not work on all devices, and it’s not a guaranteed way to stop the update. It’s always best to let the update complete. If you’re worried about the update, make sure to back up your data before starting the update process. If you’re experiencing issues with the update, it might be best to contact your device’s manufacturer or your service provider for assistance.

Remember, interrupting an update can lead to data loss or even bricking your device, making it unusable. So, proceed with caution.

Can I update Android firmware on my device without Wi-Fi connection?

Yes, you can update your Android device without a Wi-Fi connection, but it’s important to note that updates can be quite large and may use a significant amount of mobile data. Here’s how you can do it:

  1. Open the Settings app on your Android device.
  2. Scroll down and tap on System.
  3. Tap on Advanced to expand the menu.
  4. Tap on System Update.
  5. Your device will check for updates. If updates are available, tap on Download and Install.

Please be aware that downloading updates over a cellular network might incur additional charges depending on your data plan. It’s generally recommended to use a Wi-Fi connection to avoid potential data overages. Also, the speed of the update might be slower over a cellular network compared to a Wi-Fi connection.

Remember to keep your device charged during the update process as it can consume more battery power. If your battery level is low, the update might not start. It’s always a good idea to back up your data before starting an update. If you encounter any issues during the update, you may want to contact your device’s manufacturer or your service provider for assistance.

Can I use mobile hotspot for updating Android firmware?

Yes, you can use a mobile hotspot to update your Android firmware. A mobile hotspot essentially turns your smartphone into a portable Wi-Fi network, allowing other devices to connect to the internet through your mobile data connection.

However, there are a few things to keep in mind:

  1. Data Usage: Firmware updates can be large and may consume a significant amount of data. Make sure you have enough data in your plan to accommodate the update.
  2. Battery Usage: Using your phone as a hotspot can drain its battery faster, especially if it’s also downloading an update. Make sure your phone is charged or is charging during this process.
  3. Connection Stability: Ensure that the hotspot connection is stable. If the connection is lost during the update, it could cause problems.

Remember, it’s always a good idea to back up your data before starting an update. If you encounter any issues during the update, you may want to contact your device’s manufacturer or your service provider for assistance.

What is the difference between a Android firmware update and a software update?

Firmware and software are both types of code that run on your devices, but they serve different purposes and interact with the hardware in different ways:

  1. Software: Software is a set of instructions that instructs a computer to perform specific tasks. It allows the user to interact with the computer. Software updates are designed to improve the functionality, security, or performance of applications and operating systems. These updates are typically installed by users and are aimed at enhancing the user experience. Software is usually written in a high-level language, such as Java, with lots of libraries and pre-made functions to ease development. Software can be changed without having to adjust any hardware, making it simple to update.
  2. Firmware: Firmware is a type of software program on a hardware device that provides control for specific hardware and provides essential instructions on how the device communicates with various other computer hardware. Firmware updates, on the other hand, are focused on improving the functionality and stability of the hardware itself. Firmware is typically written in a low-level language, like C, with little external support as the code is highly tailored for individual devices. Firmware is stored on non-volatile memory and is rarely changed.

In summary, while software updates are generally user-facing and enhance the functionality of applications and operating systems, firmware updates are lower-level, hardware-specific updates meant to improve the functionality and stability of the hardware itself.

Can a firmware update fix hardware issues on Android devices?

Yes, a firmware update can potentially fix hardware issues on Android devices. Firmware is a type of software that provides control for specific hardware and provides essential instructions on how the device communicates with various other computer hardware. A firmware update can optimize the performance of firmware or device drivers, potentially enhancing the performance of the processor or other device hardware. These updates also fix any existing bugs.

However, it’s important to note that not all hardware issues can be resolved with a firmware update. Some hardware problems may be due to physical damage or wear and tear, which cannot be fixed with software or firmware updates. In such cases, the hardware component may need to be repaired or replaced.

Before updating firmware, it’s recommended to follow proper procedures and keep a few important things in mind:

  • If it isn’t broken, don’t fix it. You should only update the firmware if you have a specific reason to do so.
  • Ensure uninterrupted power supply during the update process. If your device powers off during the update, you can potentially brick it and render it unusable.
  • Make sure you install the correct firmware version for your device.

Remember, while firmware updates can help resolve some issues, they should be done with caution. If you’re unsure, it’s always a good idea to seek help from a professional or your device’s manufacturer.

Can I downgrade the firmware version on Android devices?

Yes, it is technically possible to downgrade the firmware version on Android devices, but it’s not a straightforward process and it comes with risks. Here are some important points to consider:

  1. Depends on the Manufacturer: The ease of downgrading your Android phone to a previous version depends on the company that made it and the contents of any updates you’ve already received.
  2. Data Loss: Downgrading your Android phone isn’t generally supported, it isn’t an easy process, and it will almost certainly result in you losing data on your device. Therefore, it’s crucial to back up your phone before you begin.
  3. Void Warranty: This process might void your device’s warranty or potentially brick it, making your phone nothing more than e-waste.
  4. Security Risks: There’s the security aspect of it all, for starters. If your phone is tracked to be on version 3 of the software, issues with version 2 aren’t likely to be addressed by the company that made it.
  5. Compatibility Issues: After that, you may find that some of the things you like just won’t work with an older version. Sometimes the changes you like outweigh the ones you don’t.

If you still want to proceed, you would typically need to unlock your bootloader first, which will wipe your device’s internal storage. Then, you can flash your device to an older version of Android. Be warned, as unlocking your bootloader will probably invalidate your warranty. The easiest devices to flash, by far, are phones in the Google Pixel series.

However, due to the risks involved, it’s recommended to seek help from a professional or your device’s manufacturer if you’re not experienced in modifying your device’s firmware. It’s also worth considering whether the issues you’re experiencing with the current version can be resolved in other ways, such as through settings adjustments, app updates, or factory resets.

Hybrid app – convert and edit your videos

0

Hybrid app is a single, all-inclusive package that lets you edit and convert videos in addition to doing other things with the software.

Videos can be converted into many media formats and modified in a number of ways, including by tagging, muxing, and performing other routine processes.

Numerous Formats Are Supported
The variety of media formats supported by this program is one of its outstanding features. Along with a few less practical but still widely used video formats, it will handle all of the most common ones. These comprise raw VC-1 and AVC files, formats that FFmpeg and MPlayer can decode, and various other formats such as x264, Xvid, VP8, x265, ProRes, and others.

The application is more than capable of managing many encoding modes in addition to supporting the different formats. Every encoding style has easily configurable characteristics, like bitrate and constant rate factors.

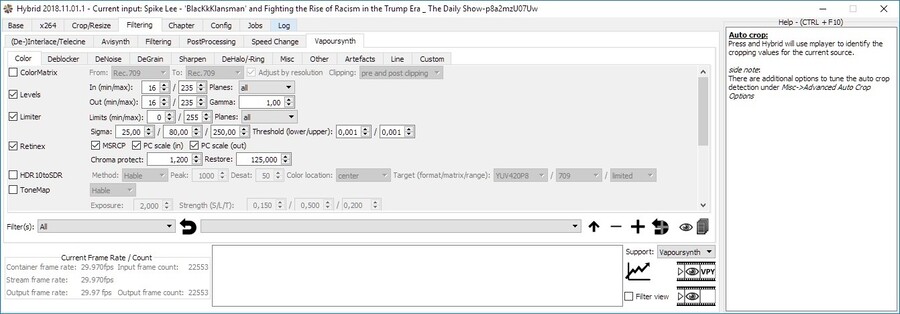
Hybrid app
Hybrid

It makes it compatible with several formats, including AVCHD and Blu-ray discs.

With Hybrid program, audio extraction is also possible. Formats including MP3, OCG, AAC, FLAC, AC3, DTS, and others can be produced by it. Not just any extraction, though; it will support both the most and least common audio modes.
Modes of Advanced Configuration
Hybrid also has a lot to offer users who are more experienced. As we’ve already said, you may simply change the encoding option, which allows you to change the song, the bitrate, and the entropy coding mode. Additionally, you can create new photographs, adjust aspect ratios, crop images, and resize loaded images.

You will have various other filtering functions in addition to all of these editing possibilities. Filtering options allow you to improve and modify your files before encoding. Additionally, you can use telecine, color correction, deinterlacing, etc.

With the help of these features, you may easily yet effectively edit your photos to create significant and long-lasting changes.
Include tags and subtitles
Adding tags and subtitles to the videos is another helpful function of the program. Additionally, you can use the chapter editor to alter the video’s structure.

Tasks that were formerly completed entirely by hand can now be automated.

In summary, Hybrid app is a powerful tool that offers a plethora of video editing and encoding features. If you’re a more experienced editor, the program allows you to make extensive modifications in addition to simple adjustments. Both novice and expert users will love it, while experienced users will definitely find the software more helpful than those who are just starting out with editing. With Hybrid app, you can organize, edit, and convert your video content into a variety of media types all in one convenient package.

Here’s a general feature list of Hybrid app

tagging support for avi/mkv/mp4/mov
chapter support for mkv/mp4/Blu-ray
subtitle support for mkv/mp4/Blu-ray
separated audio-, video-, filter- and ‘a/v-combi’-profiles
an integrated bitrate calculator
accepts raw VC-1, AVC, MPEG-2, MPEG-4 ASP input files
manual&automatic creation&pass-through of chapters
ability to encode single title/chapters
a job/queue based processing system
AAC/MP3/AC-3/Vorbis/Opus/FLAC/DTS/PCM/EAC-3 audio encoding using dcaenc/MEncoder/FFmpeg/Aften and different AAC-encoders
supported aac encoders: qaac, FDK AAC, faac, fhg, neroaacenc
filtering through Vapoursynth, Avisynth (Windows only) and some basic filtering through FFmpeg
accepted input: avs and nearly everything that mplayer/ffmpeg can decode
supported video output formats: MPEG-4 ASP (Xvid), MPEG-4 AVC (x264, qsvencc, nvencc, vceencc, ffmpeg nvenc), VP8/VP9 (vpxenc), ProRes (ffmpeg), MPEG-4 HEVC (x265, kvazaar, DivX265, nvencc, qsvencc, vceencc, ffmpeg nvenc), FFV1 (ffmpeg), UT video (ffmpeg), FFvHuff (ffmpeg), AV-1 (aomenc, rav1e)
supported audio output formats: dts, ac3, ogg vorbis, mp3, aac, flac, pcm, opus, pass-through
supported containers: mov/mp4/mkv/m2ts/webm/avi, Blu-ray or a AVCHD structure
audio/video pass-through -> can be used for muxing, tagging, chapter editing
a bunch of options to automate stuff

Hybrid download page

Top Viewing Experience with the LOEWE bild i.77 dr+ TV

0

In the realm of top-tier television experiences, the LOEWE bild i.77 dr+ TV stands tall, both literally and figuratively. With its impressive 77-inch OLED panel, this television promises an immersive viewing experience like no other. But is it worth the hefty price tag of £5,999? Let’s dive into the details and find out.

Design: The first thing that strikes you about the LOEWE bild i.77 dr+ TV is its sleek and sophisticated design. Crafted with premium materials, its slim bezels elegantly frame the expansive OLED display, ensuring that your focus remains solely on the stunning visuals. The minimalist stand adds a touch of modernity while providing sturdy support. This TV is not just a piece of technology; it’s a statement piece for your living room.

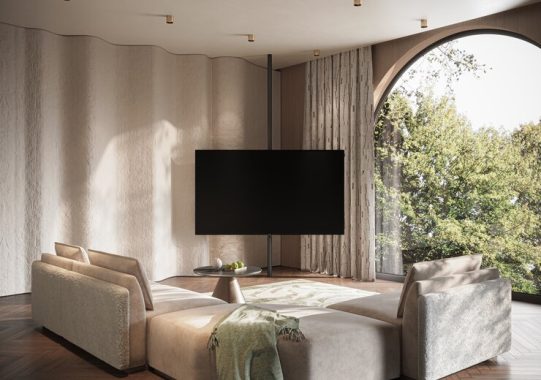
LOEWE bild i.77 dr+ TV

Screen and Picture Quality: The star of the show here is undoubtedly the 77-inch OLED panel. With a resolution of 3,840 x 2,160 pixels, every image comes to life with breathtaking clarity and detail. Whether you’re watching your favorite blockbuster movie or indulging in a gaming marathon, the vibrant colors and deep blacks offered by OLED technology ensure an unparalleled viewing experience. The inclusion of High Dynamic Range (HDR10, HLG, Dolby Vision) further enhances the contrast and color accuracy, bringing out the subtle nuances in every scene.

Performance: When it comes to performance, the LOEWE bild i.77 dr+ TV does not disappoint. Powered by the advanced Loewe os7 smart TV platform, navigating through menus and switching between apps feels smooth and effortless. Whether you’re streaming content from popular services like Netflix, Amazon Prime Video, Disney+, or browsing the web, the TV’s powerful processor ensures snappy performance without any lag or stuttering. With four HDMI 2.1 interfaces, connecting your favorite gaming console or high-end audio equipment is a breeze, delivering an immersive entertainment experience like never before.

Gaming: For gaming enthusiasts, the LOEWE bild i.77 dr+ TV is a dream come true. With its lightning-fast response times and support for Variable Refresh Rate (VRR), gaming feels incredibly smooth and responsive, with minimal input lag. Whether you’re exploring vast open worlds or engaging in intense multiplayer battles, the TV’s stunning visuals and immersive sound ensure that you’re fully immersed in the action. And with Dolby Atmos support, the audio experience is just as impressive, making every explosion and gunshot feel lifelike and immersive.

LOEWE bild i.77 dr+ TV
bild i.77 dr+ TV – images: LOEWE

DR+ Storage Capacity: One of the standout features of the LOEWE bild i.77 dr+ TV is its integrated 1 TB DR+ hard disk. This allows you to easily record your favorite programs, ensuring that you never miss a moment of your favorite shows. Whether you’re binge-watching the latest series or catching up on the news, the DR+ storage capacity provides ample space to store all your recordings, giving you the freedom to watch them at your leisure.

Software and Unique Features: The Loewe os7 smart TV platform is where the magic happens. With access to a wide range of streaming services, including Apple TV+, Netflix, Amazon Prime Video, Disney+, and YouTube, the possibilities for entertainment are endless. And thanks to the integrated app store, you can customize your viewing experience with additional apps and services tailored to your preferences. Whether you prefer to control your TV with the remote control or voice commands, the intuitive interface makes it easy to navigate through menus and access your favorite content with ease.

Price and Quality: At £5,999, the LOEWE bild i.77 dr+ TV is undoubtedly a premium investment. However, when you consider the stunning picture quality, impressive performance, and array of features it offers, it’s clear that this TV delivers exceptional value for money. From its sleek design to its intuitive software and immersive gaming experience, every aspect of the LOEWE bild i.77 dr+ TV exudes quality and craftsmanship. If you’re looking to elevate your home entertainment setup to the next level, this TV is certainly worth considering.

Conclusion: the LOEWE bild i.77 dr+ TV is a masterpiece of modern technology and design. With its stunning OLED display, powerful performance, and array of features, it offers an unparalleled viewing experience that will delight even the most discerning of enthusiasts. While the price may be steep, the quality and craftsmanship of this TV make it a worthwhile investment for anyone who values top-tier entertainment. Whether you’re watching movies, playing games, or simply relaxing with your favorite shows, the LOEWE bild i.77 dr+ TV ensures that every moment is an unforgettable experience.

SpecsLOEWE bild i.77 dr+
Screen
TechnologyOLED
Screen Size77″
Pixel Resolution3840 x 2160
HDRYes
HDR FormatsDolby Vision, HDR10, HLG
Panel Frequency120 Hz
Response Time1 ms
Display
Screen Resolution4K Ultra HD
Smart Features
Full Web BrowserYes
Netflix 4K StreamingYes
Smartphone controlYes
Connectivity
ARC – Audio Return ChannelYes – eARC
BluetoothYes
HDMI4
Headphone SocketYes
USB4
Wi-Fi Built InYes
Wi-FiYes
General
Manufacturer’s Warranty5 years
Tuner
Analogue TunerYes
Audio
Speakers2 x 20W / 2 x 40W
FeaturesDolby Atmos
USB Video PlaybackYes
Energy Consumption
Power Consumption – Standby0.3W
Dimensions
VESA Fittings300 x 200
Wall Mount RequiredVESA – 300 x 200
Accessories
Remote ControlYes
StandManually Rotatable (+/– 110°)

BIOSTAR Introduces the BRAND-NEW A620MS Motherboard

0

BIOSTAR, a well-known manufacturer specializing in motherboards, graphics cards, and storage devices, introduces the brand-new A620MS motherboard, designed for both business and leisure usage.

The BIOSTAR A620MS motherboard stands out as a versatile solution that harmonizes professional productivity with home entertainment seamlessly. It caters to the diverse needs of office professionals, home users, and system integrators alike, whether it’s optimizing work efficiency, indulging in online entertainment, or managing intricate business operations and data. Demonstrating reliability and adaptability, the A620MS sets a benchmark in accommodating various computing environments.

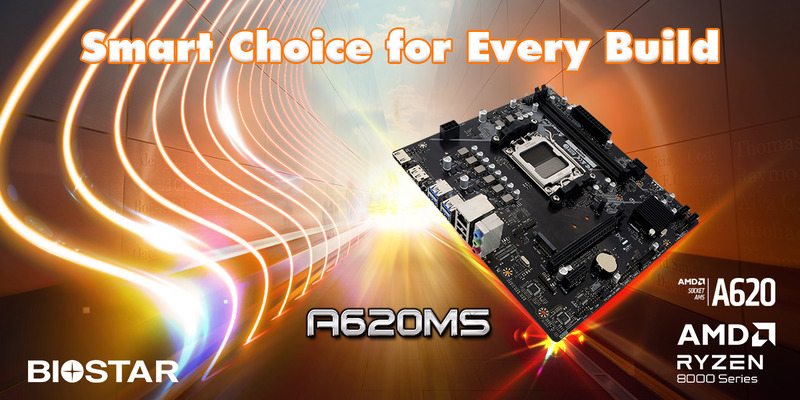
A620MS motherboard
A620MS motherboard – images: BIOSTAR

Harnessing the cutting-edge Socket AM5, the A620MS motherboard extends comprehensive support to the latest AMD Ryzen 7000 and 8000 series processors, ensuring compatibility with the forefront of CPU technology. Leveraging AMD’s A620 single-chip architecture, it establishes a stable and efficient computing foundation. With support for up to 96 GB of DDR5 memory across two DIMM slots, it delivers substantial capacity and superior speed for demanding tasks, positioning itself as a powerhouse for present and future computing demands. Additionally, it embraces PCIe 4.0 M.2 (64Gb/s) for advanced high-speed storage solutions, guaranteeing a streamlined and efficient computing experience.

Engineered with state-of-the-art BIOSTAR technologies, the A620MS motherboard aims to elevate performance, streamline user experience, and fortify system stability. Features such as A.I FAN and A.I TP Control enhance cooling and overclocking accessibility, amplifying system efficiency and capability. Integration of a CPU OPT Header facilitates advanced cooling systems to uphold performance under intense workloads. The inclusion of Debug LED offers real-time system status insights for swift diagnostics, expediting troubleshooting procedures. Stability is further reinforced by Super Hyper PWM, ensuring consistent power delivery, and Super LAN Surge Protection guarding against electrical surges, thus ensuring system longevity and stable internet connections. Smart Update and SMART BIOS UPDATE simplify system maintenance, enabling hassle-free updates. These collective features position the A620MS as an ideal choice for users valuing high performance, reliability, and ease of use across any computing scenario.

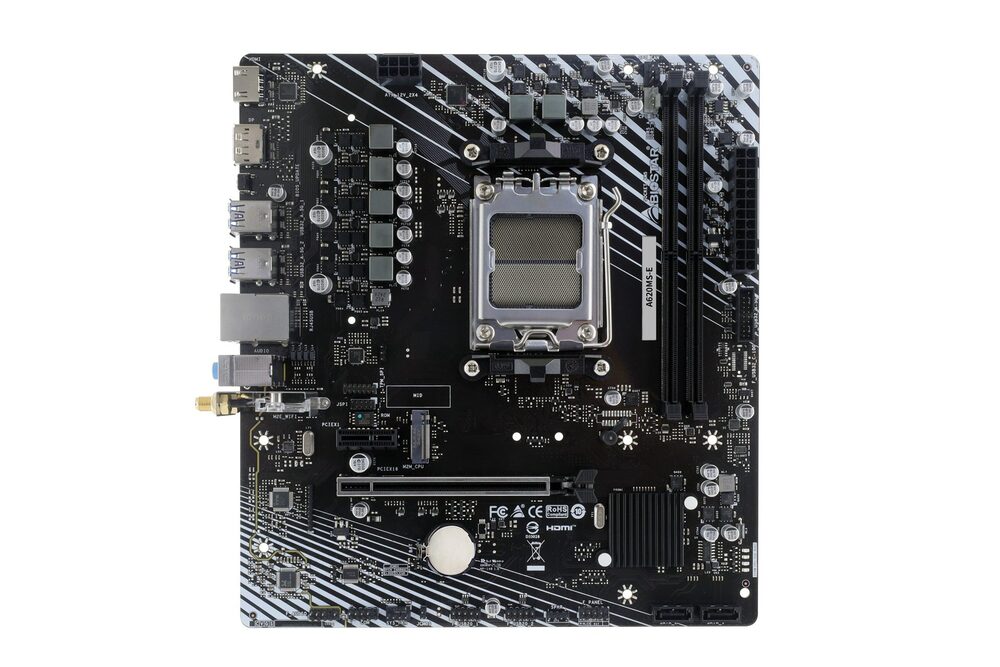
A620MS
A620MS

The BIOSTAR A620MS motherboard boasts a well-equipped REAR I/O panel, enhancing usability and connectivity. It incorporates a SMART BIOS UPDATE button for easy firmware enhancements, alongside HDMI 1.4 and DisplayPort 1.2 for diverse high-definition video outputs, including support for 4K resolution via HDMI. The panel also comprises four USB 3.2 Gen1 Type-A ports for rapid data transfer, two USB 2.0 Type-A ports for additional device connections, a Giga LAN port for reliable high-speed internet, and three audio jacks for comprehensive sound output. Furthermore, it accommodates front USB 3.2 Gen1 connectivity for accessible external connections.

Performance & Speed Capabilities

Processor Support and Speed Potential

The BIOSTAR A620MS motherboard features an AMD AM5 socket, enabling compatibility with AMD Ryzen 7000, 8000, and even 9000 series processors. These CPUs range from efficient lower-power models to high-performance multi-core chips designed for gaming and content creation, giving builders a lot of flexibility when choosing their processor.

Because the board uses the AMD A620 chipset, it supports a wide range of Ryzen CPUs but does not include high-end chipset features like advanced overclocking that you’d find on B650, X670, or higher-tier boards. Instead, the A620 focuses on stable operation and broad compatibility.

In practical terms:

  • You can install a powerful Ryzen chip, such as a Ryzen 9, but the overall performance ceiling may be influenced by the board’s VRM design and power delivery (typically sufficient for mid-range CPUs).

  • Entry-level to mid-range CPUs (e.g., Ryzen 5 / Ryzen 7) are a more ideal match for consistent performance without stressing power delivery.

  • The board’s compact Micro-ATX form factor often means less robust cooling than larger boards, so adequate airflow in the case is recommended for best sustained speed performance.

Memory (RAM) Support & Speed

A key performance factor in any system is memory bandwidth and frequency. The BIOSTAR A620MS supports:

  • DDR5 memory, which is the latest generation of system RAM, offering higher bandwidth and better efficiency than older DDR4 standards.

  • Two DIMM slots, allowing up to 128 GB of total memory capacity — more than enough for most gaming, productivity, and multitasking scenarios.

Memory speed specifications indicate support for high frequencies, including:

  • DDR5-6000 MHz (and potentially higher through “OC/optimized” profiles) depending on the RAM modules and CPU used.

Higher memory speeds significantly improve system responsiveness, especially in memory-intensive applications like video editing, large dataset processing, and gaming. While the board itself supports fast DDR5 speeds, the effective speed you get will depend on the particular CPU and memory combination you choose.

BIOSTAR A620MS motherboard

Storage & Expansion Performance

The A620MS offers several storage and expansion options that influence overall system responsiveness.

M.2 NVMe Support

  • A single M.2 slot supporting PCIe 4.0 x4 NVMe SSDs is available. This allows modern solid-state drives to run at very high sequential read/write speeds (up to ~5000 MB/s or more with the right SSD).

NVMe SSDs significantly outperform SATA drives — reducing boot times, speeding up application launches, and improving large file transfers.

SATA and RAID

  • There are 4 × SATA III (6 Gb/s) ports for traditional SSDs and HDDs, with support for RAID modes like 0, 1, and 10 if your needs require redundancy or performance configurations.

Integrated Graphics Handling

The A620MS does not include its own GPU, but it does offer video output ports powered by the integrated graphics of supported AMD Ryzen processors. This means:

  • If your Ryzen CPU has integrated Radeon graphics, you can use the board’s display outputs.

  • If your processor does not include integrated graphics (many Ryzen CPUs don’t), you will need a dedicated graphics card for any video output.

Video Outputs & Capabilities

The rear I/O panel provides two common video ports:

  • HDMI 1.4 — supports up to 4K resolution, but because it’s version 1.4 rather than 2.0/2.1, refresh rates at 4K may be limited (commonly up to 30 Hz).

  • DisplayPort 1.2 — capable of better high-resolution and refresh rate combinations compared to HDMI 1.4 (e.g., 1080p and 1440p gaming at higher refresh rates).

These video outputs make the board suitable for everyday tasks, media consumption, and light gaming without a discrete GPU (when used with an appropriate CPU). For serious 3D gaming or demanding graphical workloads, a dedicated graphics card installed in the PCIe x16 slot is recommended.

Protection Features & Reliability

Protection and durability features ensure the motherboard is both safe and reliable over long periods of use — especially important for users building long-lasting systems.

Smart BIOS Update and Firmware Support

One of the standout usability and safety features is the SMART BIOS UPDATE button on the rear I/O panel. This allows:

  • Easy firmware updates without a CPU installed — useful for ensuring compatibility with newer generations of Ryzen CPUs.

  • Updates to system firmware can fix bugs, improve performance, and enhance security without needing to boot into an operating system.

This can help protect your system from outdated firmware issues and ensures smoother compatibility with future hardware.

The BIOSTAR A620MS strikes a balance between affordability and modern functionality:

  • Speed — With support for AMD Ryzen processors and fast DDR5 memory up to 6000 MHz+, along with PCIe 4.0 storage capabilities, it offers solid performance for mainstream users.

  • Video Support — Standard video outputs (HDMI 1.4 and DisplayPort 1.2) make the board versatile for everyday graphics tasks; adding a dedicated GPU unlocks its full potential.

  • Protection & Reliability — Features like SMART BIOS UPDATE and stable hardware components provide ongoing reliability and ease of maintenance, though high-end protections are naturally limited given the board’s price and target market.

Overall, the BIOSTAR A620MS is a capable choice for users building a budget to mid-range AMD system that still wants modern memory and storage technologies without unnecessary complexity or high cost.

With advanced features, superior performance, and a commitment to reliability and user-friendliness, the BIOSTAR A620MS motherboard emerges as the top choice for building or upgrading computers. Whether for business, entertainment, or complex system integration, this motherboard surpasses the expectations of diverse users, affirming BIOSTAR’s leadership in the technology industry.