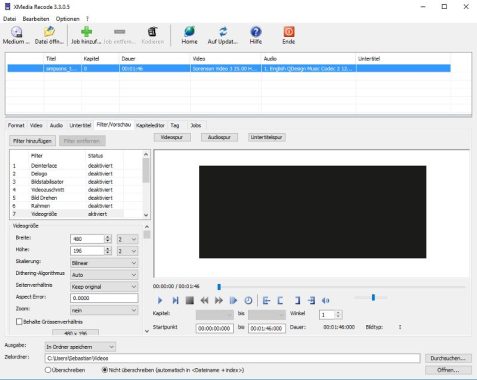
XMedia Recode has evolved into a versatile tool that seamlessly converts a many of video and audio formats without any complications. Supporting over 30 formats, including MP4, MKV, WMV, DVDs, and Blu-Rays, this application ensures a swift encoding process, even on entry-level computers.
The challenge many users face when dealing with multimedia files lies in the inability to convert them into diverse formats. This task is often crucial as it empowers users to handle multiple files simultaneously for various purposes.
XMedia Recode
Enter XMedia Recode—a comprehensive solution designed to facilitate the conversion of video and other files into different formats. With its user-friendly interface, even beginners can navigate through its intuitive design, where essential tools are neatly organized into a tabbed interface.
The application not only supports a wide array of formats but also simplifies the conversion process. Whether you are converting files or undertaking additional tasks, such as adding subtitles, adjusting parameters, or filtering files, XMedia Recode proves to be a valuable tool.
Here are some noteworthy features and benefits of XMedia Recode:
Blu-ray/DVD conversion
Audio/video conversion
Convenient drag-and-drop functionality for video encoding
Subtitle import capability
Chapter creation
Tag editor for metadata management
Automatic cropping to remove black borders
Color correction options (brightness, contrast, gamma, hue, saturation)
Zoom options (none, letterbox, media, Pan Scan, Fit to Screen)
In summary, XMedia Recode is an excellent tool for converting media files into various formats and accomplishing a range of multimedia tasks. Its features and user-friendly design make it a go-to solution for both beginners and experienced users alike. Download XMedia Recode HERE
The Android operating system has become a dominant force in the tech world, powering smartphones, tablets, wearables, and a myriad of gadgets. While the Google Play Store is the go-to platform for Android apps, you might find yourself wishing to run these applications on a larger screen, such as your Windows PC. Fortunately, there are various methods to achieve this, each with its own merits and drawbacks.
1. BlueStacks: One popular solution is BlueStacks, which, although presenting itself as a mere app runner, operates a heavily modified version of Android beneath its surface. Boasting a built-in Play Store, BlueStacks offers seamless access to purchased content and mimics an Android phone in the Play Store device list. However, its custom modifications can lead to compatibility issues, making it less suitable for app development. Despite being a freemium service, it provides a $2 pro subscription option or the option to install sponsored apps.
To open an APK file on your PC, you can use an Android emulator. An Android emulator allows you to run Android applications on your computer. Here’s a step-by-step guide using a popular emulator called BlueStacks:
Follow the on-screen instructions to download and install the emulator.
Install BlueStacks:
Run the downloaded installer.
Follow the installation wizard’s instructions to complete the installation.
Set up BlueStacks:
Open BlueStacks.
Sign in with your Google account. If you don’t have one, you’ll need to create an account.
Install APK file:
Once BlueStacks is set up, you can install APK files.
Drag and drop the APK file into the BlueStacks window, or click on the “Install APK” button, and then browse to the location of the APK file on your computer.
BlueStacks will install the app, and you’ll find it in the “My Apps” section.
Open the app:
After the installation is complete, you can open the app from the BlueStacks home screen or the “My Apps” section.
Please note that there are other Android emulators available, such as NoxPlayer, Genymotion, or LDPlayer. The steps might be slightly different depending on the emulator you choose, but the general process is similar.
photo: stablediffusionweb
2. Android Studio: For a more developer-oriented approach, Google’s Android Studio comes equipped with an emulator that allows the creation of virtual Android devices for testing apps. While this method offers an unmodified Android experience, lacking the Play Store means you’ll have to manage APK files manually. This option is ideal for developers seeking to test app builds before deploying them onto actual devices, but its lack of hardware acceleration may deter casual users.
3. Windows Subsystem for Android (Windows 11): Windows 11 introduces the Windows Subsystem for Android, a collaboration between Microsoft and Amazon that enables the seamless running of Android apps on compatible PCs. Utilizing the Amazon Appstore, users can easily access a variety of apps, though the selection might be limited. Sideloading apps outside of the Amazon store is possible, but keep in mind that some may require Google’s mobile services framework, not present in Windows. This method is a convenient choice for those wanting multiple apps with minimal effort.
Sideloading Process for Windows Subsystem:
Enable Developer Mode in Android subsystem settings.
Obtain the IP address displayed on the settings page.
Download Google’s SDK Platform Tools.
Open a command prompt in the platform tools folder.
Connect to Android with adb connect IP_address.
Install the APK file with adb install file_path.
Additional Considerations:
While the methods mentioned offer diverse ways to run Android apps on a Windows PC, there are some important considerations to keep in mind.
1. Hardware Requirements:
BlueStacks and Android Studio’s emulator may benefit from a powerful CPU, especially one that supports hardware virtualization. This enhances the overall performance of the Android apps on your PC.
Windows Subsystem for Android on Windows 11 requires a sufficiently powerful PC. Although performance may not be flawless, it provides a convenient option for running Android apps without an additional emulator.
2. Touch Input:
BlueStacks is designed to work well with touch input, making it suitable for devices with touch screens. This allows users to interact with apps that rely on multi-touch gestures.
Android Studio’s emulator and Windows Subsystem for Android also support touch input, ensuring compatibility with a wide range of applications designed for touchscreen devices.
3. App Compatibility:
BlueStacks, while providing access to the Play Store, may face issues with certain apps due to its customized environment. Developers should be cautious when using it for testing purposes.
Android Studio’s emulator offers a closer-to-stock Android experience, ensuring that apps render similarly to how they would on physical devices.
Windows Subsystem for Android integrates with the system, allowing users to sideload and run apps from sources other than the Amazon Appstore. However, compatibility may vary, and some apps may require additional configurations.
4. Your Phone Integration (Microsoft):
If you own a phone compatible with Microsoft’s Your Phone features, this provides an effortless way to mirror and interact with Android apps directly on your PC. While this option is limited to specific devices, it offers a seamless integration of your smartphone with your PC environment.
In choosing the best method to run Android apps on your Windows PC, it’s crucial to consider your specific needs, hardware capabilities, and preferences. Developers focused on app testing may find Android Studio’s emulator to be the most suitable, while those looking for a user-friendly experience may prefer the Windows Subsystem for Android. BlueStacks, with its Play Store integration, offers a middle ground but may encounter compatibility issues. Additionally, users with compatible phones can benefit from Microsoft’s Phone Link, (previously Your Phone) integration for a seamless cross-device experience. Ultimately, the choice rests on the user’s use case and the desired balance between ease of use and development capabilities.
Explore these hidden iPhone messaging features to enhance your texting experience. With each update, Apple introduces new functionalities and refines existing ones, ensuring a smoother and more secure user experience.
Unsend a Text: Ever sent a message you instantly regret? You can now unsend a text within two minutes of sending it. However, there are some caveats to keep in mind:
The recipient can read the message before you unsend it.
While the message disappears from their screen, they will be notified of your action.
To unsend a message, tap and hold the message in an iMessage conversation, then select “Undo Send.”
Edit a Sent Text: Made a typo or want to rephrase a message? You have a 15-minute window to edit a text, and you can make up to five edits. The recipient can read the original and edited versions and view the edit history.photo: Pixabay
To edit a message, tap and hold the message in an iMessage conversation, choose “Edit,” make your changes, and tap the blue checkmark when done.
Turn Off Read Receipts: Read receipts can be distracting or even pose a safety issue. You can disable them for all or individual conversations:
To disable for all conversations, go to Settings > Messages, and slide the toggle next to “Send Read Receipts” to the left.
For individual conversations, open a conversation, tap the contact’s name, and toggle off “Send Read Receipts.”
Mute Notifications for a Conversation: Group messages can become overwhelming. To mute notifications without leaving the group, touch and hold a conversation, then tap “Hide Alerts.” You can also turn off notifications for mentions by going to Settings > Messages and disabling “Notify Me” under Mentions.
Search Through Messages: Easily find specific messages by using the search function in the Messages app. Type your search word in the Search field, tap “See All” for a list of relevant messages, and tap on a conversation to view specific messages.
Pin Conversations: Pin important conversations for quick access. Tap and hold a conversation thread, then select “Pin.” To unpin, go to Edit Pins in the Messages app.
Shake to Undo: Made a typing error? Shake your phone after typing a message to open an Undo Typing window. Tap “Undo” to delete the text or “Redo Typing” to revert your action.
Share Your Location Through iMessage: Easily share your location with trusted contacts. Open a conversation, tap the contact name, and choose “Send my Current Location.” You can also specify the duration for which your location is shared.
Use Your Phone With One Hand: With smartphones getting larger, using them with one hand can be challenging. Apple provides solutions:
Enable the one-handed keyboard in Settings > General > Keyboard.
Turn on Reachability in Settings > Accessibility > Touch to lower the top half of your screen for easier access.
Discover the full potential of your iPhone’s messaging capabilities by exploring these tips and tricks. Don’t forget to stay up-to-date with the latest iOS updates for the best user experience.
The Samsung Galaxy A33 5G, priced at approximately $250, stands out as a cost-effective smartphone with a 90Hz AMOLED display, a 48-megapixel quad-camera system, a robust 5,000mAh battery, and an IP68 rating for dust and water resistance. While the device comes equipped with the Bixby digital assistant, designed to streamline various tasks efficiently, users may prefer Google Assistant for its superior functionality.
This guide will walk you through the steps to not only deactivate the Bixby trigger from the side key but also disable the wake-up command on your Galaxy A33 5G, providing a seamless user experience without the intrusion of Bixby.
Deactivate Bixby from the Galaxy A33 5G Side Key:
Swipe down from the top of the screen.
Tap the settings icon located at the top right corner.
Scroll down and select “Advanced features.”
Choose the “Side key” option.
Under the “Press and hold” section, switch from “Wake Bixby” to “Power off menu.”
Following these steps ensures that pressing and holding the side key on your Samsung Galaxy A33 5G will display the power-off menu instead of triggering Bixby. This menu offers options for powering off and restarting the phone.
photo: Pixabay
Turning off Bixby’s Wake-Up Command:
Open the app drawer on your Galaxy A33 5G and tap on Bixby.
On the floating Bixby bar, tap the compass icon on the right.
Tap the three-dot icon at the top right corner.
Select “Settings.”
Look for “Voice wake-up” and toggle it off.
By completing these steps, you ensure that Bixby won’t launch even when someone uses a voice command, providing you with a Bixby-free experience on your Samsung Galaxy A33 5G.
Factory resetting your Toshiba laptop can be a crucial step in resolving issues or starting with a clean slate. This article provides detailed instructions on how to reset Toshiba laptops running Windows 11, Windows 10, Windows 7, and offers valuable tips to ensure a smooth process.
How to Reset a Toshiba Laptop (Windows 11 and Windows 10)
Resetting your Toshiba laptop is irreversible, so it’s essential to choose between keeping personal files or removing them entirely. Follow these steps:
Backup Important Data:
Before initiating the reset, back up any critical files, even if you choose to keep them.
Note that preinstalled Windows software will be restored after the reset.
Access Reset Options:
Open the Start menu and search for ‘Reset.’
Select “Reset this PC” for Windows 11 users and “Get started” for Windows 10 users.
Choose Reset Type:
Decide between keeping files (Keep my files) or wiping all data (Remove everything).
Follow on-screen prompts to complete the reset.
Wait for Completion:
The computer will restart during the reset, and the duration depends on the chosen option and your computer model.
Post-Reset Setup:
After completion, follow on-screen prompts to set up your fresh Windows 11/10 installation.
You’ll be left with a clean desktop.
photo: Pixabay
Tips for Resetting in Windows
Identify Issue Nature:
If the issue is hardware or network-related, a reset may not be the solution.
Multi-User Considerations:
If multiple user accounts exist, coordinate with others to back up their essential data.
Irreversibility:
Unlike System Restore, a reset is irreversible, so proceed with caution.
Resetting a Toshiba Satellite Laptop to Factory Settings
For Toshiba Satellite laptops, the easiest method is using the recovery partition:
Power Off:
Hold the power button for 10 seconds to power off.
Boot with 0 Key:
Press and hold the power button and 0 key simultaneously.
Release the 0 key when the laptop beeps.
Initiate Recovery:
Select “Yes” for System Recovery, then choose “Recover to Out-of-Box State” to start the process.
Factory Reset on Toshiba Laptop Running Windows 7
For Windows 7 users on Toshiba laptops:
Power Off and Disconnect:
Turn off the laptop and disconnect external devices.
Boot with 0 Key:
Press the power button, then hold the 0 key until a Recovery Warning message appears.
Select Recovery Option:
Choose the recovery process, such as “Recovery of Factory Software,” and follow the prompts.
Factory Reset without Password
If locked out of your Toshiba laptop:
On Login Screen:
Press the power button and Shift key simultaneously.
Access Troubleshoot:
Select “Troubleshoot” and then “Reset This PC.”
Conclusion
Factory resetting a Toshiba laptop can be a powerful solution for various issues. Remember to follow these steps carefully, back up essential data, and choose the reset option that aligns with your needs.
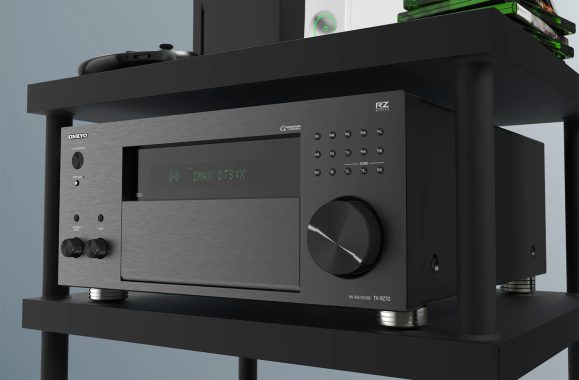
When it comes to AV receivers, the market is flooded with options, each claiming to be the best in its class. But let me tell you, the Onkyo TX-RZ70 AV Receiver is not just another addition to the mix; it’s a powerhouse that redefines the audio-visual experience. In this review, I’ll dive deep into its compatibility, performance, sound quality, cinema technology, price, and quality, and I’ll also shed light on its design, software, and unique features.
One of the standout features of the Onkyo TX-RZ70 AV Receiver is its exceptional compatibility. This receiver is not just versatile; it’s a chameleon that effortlessly adapts to any environment. Whether you’re a vinyl enthusiast, a gamer, or a movie buff, the TX-RZ70 has got you covered.
For starters, the tuner radio capabilities of this receiver are top-notch. With both AM and FM options, you can tune in to your favorite radio stations with crystal-clear clarity. It’s a small touch, but one that ensures you can enjoy a wide range of content.
Onkyo TX-RZ70 AV Receiver
As expected from a top-tier AVR, the Onkyo TX-RZ70 boasts comprehensive support for major surround sound formats. It accommodates a wide range of formats, including IMAX Enhanced, Dolby Atmos, DTS:X, DTS Neural:X, and Auro-3D. With this extensive format compatibility, you have the flexibility to configure your surround sound speaker system, whether you prefer a basic setup with ‘virtual height’ speakers or a full-fledged 7.2.4 system that authentically replicates the cinema experience right in your living room.
Klipsch Optimized Mode is an exclusive feature from Onkyo, enhancing the audio experience, particularly when paired with Klipsch Reference and Reference Premiere speakers. The collaboration between Onkyo and Klipsch has led to the integration of precise crossover values within the Onkyo system. This integration ensures that you can easily access optimized sound quality with a simple button press, delivering an exceptional listening experience.
The Onkyo TX-RZ70 is no slouch when it comes to performance. With a whopping 140W per channel (100+ Watts per CH), it delivers power-packed audio that fills your room with breathtaking sound. Whether you’re cranking up the volume for an action movie or enjoying a quiet acoustic concert, this AV receiver doesn’t disappoint.
The Dolby Atmos and DTS:X technologies take your audio experience to the next level. These immersive audio formats create a three-dimensional soundstage that makes you feel like you’re right in the middle of the action. Explosions, raindrops, and whispers all come to life, enveloping you in a world of audio magic.
When it comes to sound quality, the Onkyo TX-RZ70 AV Receiver is an audiophile’s dream come true. With its high-power output, it delivers sound that is crisp, clear, and balanced. The depth and richness of the audio are truly remarkable, making it an ideal choice for music lovers and home theater enthusiasts.
One of the standout features is the Multiroom capability, including Zone 2/3 support. This allows you to enjoy music in different rooms simultaneously or have different audio sources in separate zones. It’s perfect for entertaining or creating the right ambiance throughout your home.
The Onkyo TX-RZ70 is a marvel of cinema technology. Its compatibility with Dolby Atmos and DTS:X ensures that you experience movies like never before. The spatial sound technology creates a realistic three-dimensional audio environment, making you feel like you’re right in the middle of the action.
HDR support with Dolby Vision and HDR10+ means that you get the best possible picture quality. The deep blacks, vibrant colors, and enhanced contrast make every frame come to life. It’s like having a cinematic experience in the comfort of your living room.
Now, let’s talk about the price. The Onkyo TX-RZ70 AV Receiver isn’t the most budget-friendly option out there, retailing at $2,800. However, when you consider the level of quality, compatibility, and performance it offers, it’s well worth the investment. If you’re serious about your audio and video setup, this receiver won’t disappoint.
The build quality of the Onkyo TX-RZ70 AV Receiver is exceptional. It feels solid and robust, which instills confidence in its durability. You can tell that Onkyo has paid great attention to detail, ensuring that this receiver not only performs well but also looks good while doing it.
The design of the TX-RZ70 is sleek and modern. Its clean lines and minimalistic aesthetic make it blend seamlessly into any home entertainment setup. The front panel is intuitive and easy to navigate, and the display is crisp and informative.
The software on the Onkyo TX-RZ70 is user-friendly, but it might take a little getting used to for those who are new to AV receivers. The included remote control and on-screen menu make it easy to adjust settings and configurations. Additionally, the receiver offers app control, which allows you to manage it from your smartphone, making it more convenient.
One unique feature that sets the TX-RZ70 apart is its extensive connectivity options. With 4 analogue RCA inputs, eARC (Audio Return Channel), Bluetooth, 2 coaxial inputs, 1 component input, 2 optical digital inputs, a phono input (perfect for vinyl lovers), 2 sub outputs, and even Wi-Fi built in, you won’t find yourself lacking in options to connect your devices. This level of versatility ensures that you can integrate your entire entertainment ecosystem seamlessly.
In terms of compatibility, the Onkyo TX-RZ70 plays nice with major smart platforms, including Amazon Alexa, Sonos, and Google. Whether you prefer voice control or app-based control, you’re covered.
The 2-year manufacturer’s warranty is a reassuring addition, giving you peace of mind that your investment is protected.
TX-RZ70 AV Receiver
The Onkyo TX-RZ70 AV Receiver is a top-tier audio and video solution that combines exceptional compatibility, performance, sound quality, and cinema technology. While it comes at a premium price of $2,800, the quality and features it offers make it a sound investment for those who are serious about their home entertainment setup. Its sleek design, user-friendly software, and unique features like extensive connectivity options and smart platform compatibility make it a standout choice in the world of AV receivers. So, if you’re in the market for a receiver that will elevate your audio-visual experience to new heights, the Onkyo TX-RZ70 is a solid choice that won’t disappoint.
The Fujifilm X-S10 camera is a versatile and compact mirrorless camera that packs a punch in terms of performance and image quality. Priced at $899.00, this camera offers a wide range of features that cater to both photography enthusiasts and vloggers. In this review, we’ll dive deep into its compatibility, performance, autofocus capabilities, image quality, photo shooting speed, vlogging options, battery life, and more, while also touching on the camera’s design and unique features.
Compatibility and Design
The Fujifilm X-S10 boasts compatibility with a range of Fujifilm X-mount lenses, which is a significant advantage for those who already own Fujifilm lenses or plan to expand their collection. With the Fujifilm X-mount, you have access to a wide selection of high-quality lenses, providing you with ample creative options for your photography.
Fujifilm X-S10
In terms of design, the X-S10 is both stylish and functional. It features a comfortable and ergonomic grip, making it easy to hold for extended periods without hand fatigue. The camera is well-balanced, allowing for a firm grip and steady shooting. It’s clear that Fujifilm put considerable thought into the design of the X-S10, making it user-friendly and appealing to a wide audience.
Performance
With its 26.1-megapixel APS-C X-Trans CMOS 4 sensor and a powerful image processor, the X-S10 delivers impressive image quality. The sensor’s ability to capture fine details and reproduce colors accurately is a testament to Fujifilm’s commitment to producing top-notch image quality.
The 5-axis in-body image stabilization system provides a substantial boost in performance by compensating for camera shake. This feature is especially useful in low-light conditions or when using telephoto lenses, as it allows for capturing sharp images at slower shutter speeds. For videographers, the image stabilization system ensures smooth and stable footage, a critical aspect for vlogging and video content creation.
The Fujifilm X-S10 excels in travel photography, delivering impressive out-of-the-box image quality while keeping noise at bay even at moderately high ISO levels. Although we haven’t assessed the camera with Fujifilm Simulation modes activated (which can add a touch of creativity to your shots), it’s worth noting that these modes are exclusively applicable to JPG files. The camera offers a generous shutter speed range, catering to capturing fast-paced moments and intricate long-exposure shots. Its ergonomic design contributes to a comfortable shooting experience, and its sturdy build is commendable. However, it’s essential to be mindful of your usage patterns and settings, as the single-charge battery life may fall short during extended shooting days.
For studio video work, the Fujifilm X-S10 shines. Video quality in both FHD and 4k is sharp and detailed, although some graininess might be observed when shooting in low-light conditions. It boasts F-Log shooting, enhancing the dynamic range in video and enabling comprehensive color grading during post-production, though our evaluation did not cover this feature. While the camera can record 8-bit 4:2:0 color video internally, it offers the capability to output 10-bit 4:2:2 color video through its HDMI port, a feature you can leverage with an external recorder. The inclusion of dedicated headphone and microphone jacks enhances audio control. Moreover, the option to charge the camera via USB during operation proves advantageous for extended recording sessions.
Photo Autofocus Performance
The X-S10 employs an Intelligent Hybrid Autofocus system that combines contrast-detection and phase-detection AF. This system excels in various shooting scenarios, whether you’re capturing fast-moving subjects, portraits, or macro shots. Face and eye detection autofocus is particularly effective, ensuring your subjects remain in focus, even during challenging conditions.
With a focus range down to -7.0EV when using specific lenses like the XF50mmF1.0, the X-S10 proves its capabilities in low-light conditions. This impressive low-light performance is a great asset for night photography or indoor shooting without compromising on image quality.
Image Quality
The X-S10’s ability to produce stunning images is a standout feature. With a wide sensitivity range from ISO 160 to 12800 (expandable to ISO 80 and 51200), this camera handles various lighting conditions effectively. It delivers clean and detailed images at lower ISOs while still maintaining decent quality in higher ISO settings.
The X-Trans sensor’s unique design helps to reduce moiré and false color, resulting in sharp and true-to-life images. The 14-bit RAW capability allows for extensive post-processing, making this camera an excellent choice for photographers who want to fine-tune their images.
For those who appreciate fast shooting capabilities, the X-S10 offers a range of shooting modes. It provides a mechanical shutter with a range from 4 seconds to 1/4000 seconds and an electronic shutter for even faster capture. The electronic shutter can go up to an impressive 1/32000 seconds. This wide range of shutter speeds allows for creative control over exposure and movement in your shots.
The X-S10 also supports continuous shooting at up to 8 frames per second (fps), ensuring that you never miss the perfect moment. This feature is beneficial for sports, wildlife, and action photography.
Vlogging Option
One of the standout features of the Fujifilm X-S10 is its suitability for vlogging. The fully-articulated touchscreen is a game-changer for vloggers, as it enables you to monitor your recording even when the camera is pointed at you. This feature is incredibly handy for ensuring you stay in the frame and maintain the desired composition.
Additionally, the X-S10 is relatively lightweight and compact, making it an ideal choice for on-the-go vlogging. The camera’s ergonomic grip offers a comfortable and secure hold, ensuring you can vlog for extended periods without discomfort.
Battery Life
Battery life is an essential factor for any photographer or vlogger. The X-S10 uses the NP-W126S Li-ion battery, which provides approximately 325 frames in normal mode with the XF35mmF1.4 R lens. In terms of video recording, you can expect around 40 minutes of 4K or Full HD footage with face detection off. While this is decent, it’s advisable to have spare batteries on hand for extended shooting sessions.
Fujifilm X-S10 – Pros and Cons
Let’s summarize the pros and cons of the Fujifilm X-S10 camera:
Pros:
Excellent image quality with the X-Trans CMOS 4 sensor.
Effective in-body image stabilization.
Fast and accurate autofocus, particularly with face and eye detection.
Versatile shooting modes and fast shutter speeds.
Compatibility with a wide range of Fujifilm X-mount lenses.
Ergonomic and user-friendly design.
Fully-articulated touchscreen, ideal for vlogging.
Cons:
Battery life could be improved for prolonged use.
Noise may be noticeable in low-light video recording.
Limited customization compared to higher-end Fujifilm models.
Price and Quality
The Fujifilm X-S10 camera is reasonably priced at $899.00, considering the features and performance it offers. Its build quality and image quality live up to the Fujifilm reputation for excellence. It’s an excellent choice for both photographers and vloggers who want a versatile and portable camera that delivers fantastic results.
The Fujifilm X-S10 camera is a solid choice for anyone looking for a well-rounded mirrorless camera. Its compatibility, performance, image quality, vlogging capabilities, and ergonomic design make it a reliable companion for various photographic endeavors. Whether you’re capturing stills or recording videos, the X-S10 is up to the task, and its competitive price point adds to its appeal.
Innovative program offers ZenScreen portable monitor rental services at select JustCo centers to promote productive and versatile co-working space setups.
ASUS and JustCo, Asia’s leading flexible workspace solutions provider, today announced the launch of the ASUS ZenScreen Rental Service Program, which will be offered at select locations. Under this innovative program, JustCo Taiwan members will enjoy convenient access to a range of portable monitors to boost their productivity and viewing comfort when working.
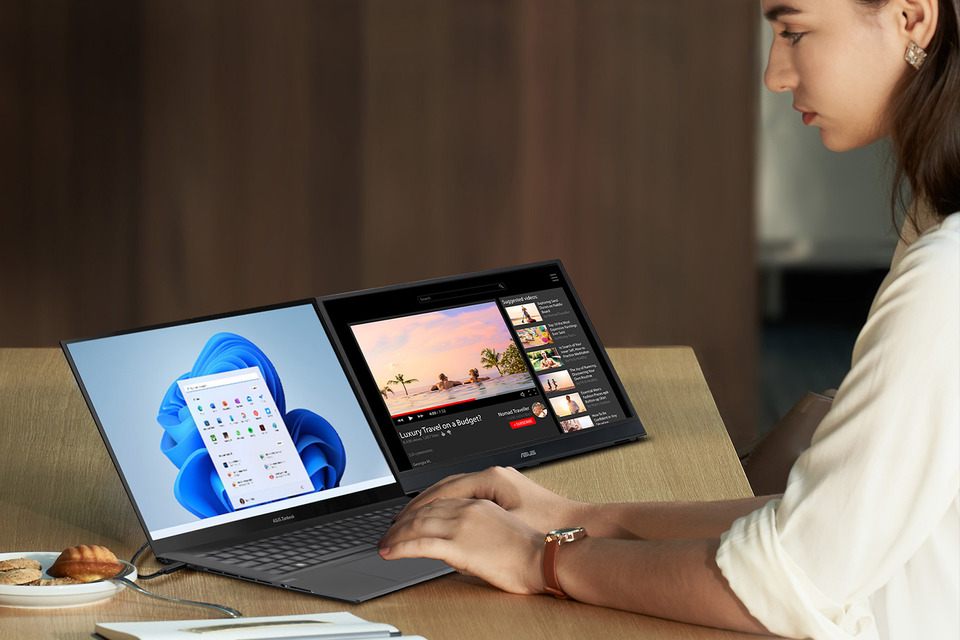
JustCo members working at the JustCo Dian Shih Center location can now rent an ASUS ZenScreen portable monitor to create a versatile dual-screen mobile work setup. The ASUS ZenScreen Rental Service Program features the latest ZenScreen models (OLED MQ16AH, MB16QHG, and MB249C) of various sizes, offering hourly, daily, or longer rental options as a value-added service designed to boost members’ overall productivity and efficiency. A survey conducted by JustCo Taiwan found that almost 70% of its members typically bring in just a single laptop. Having a second display to work with makes multitasking easier and allows for more comfortable viewing.
ASUS
ZenScreen portable monitors can be used in portrait mode for coding or for reading long-format documents, or in landscape mode for multitasking, videoconferencing, for sharing content during in-person discussions, or for other standard tasks. The slim and lightweight design of ZenScreen makes it easy to move around when hot-desking. In addition, ZenScreen features an ergonomic stand and is easy to set up, requiring just a single USB-C® connection to a laptop.
ASUS and JustCo are excited to embark on this partnership, each viewing the ASUS ZenScreen Rental Service Program as a perfect solution for the modern hybrid professional looking for a portable and versatile display to pair with their laptop and other devices to improve their work experiences.
“As Asia’s leading flexible workspace solutions provider, JustCo is committed to improving the overall workplace experience for our members,” said George Chen, Vice President and Head of Taiwan JustCo. “We are excited to partner with ASUS on this initiative, which will offer additional comfort and enhanced productivity for our members. This partnership is also a testament to our commitment to working with innovative stakeholders like ASUS to create the best-possible experiences for new-age hybrid workers.”
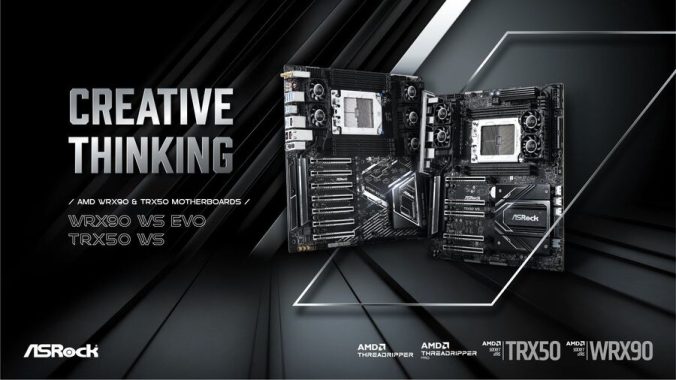
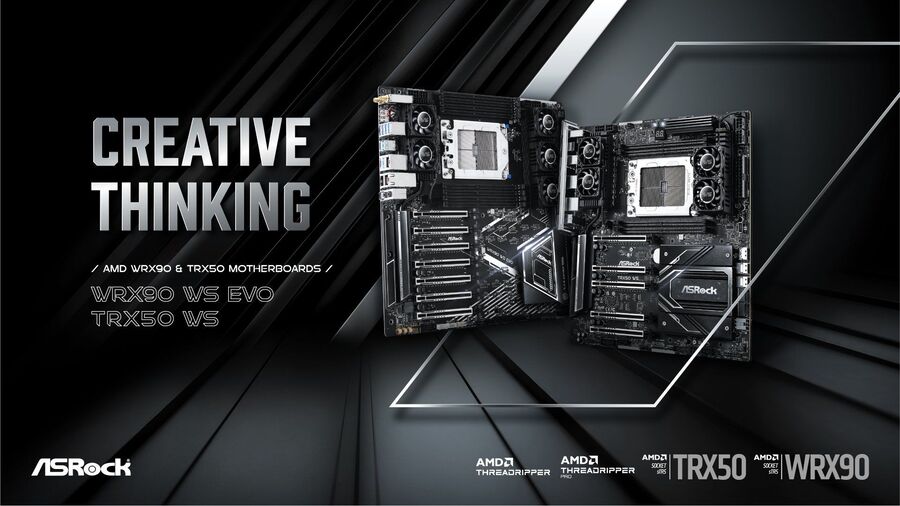
Leading global motherboard manufacturer, ASRock, proudly announces its new WRX90 WS EVO & TRX50 WS motherboard for new AMD Ryzen™ Threadripper™ 7000 and AMD Ryzen™ Threadripper™ PRO 7000 WX-Series processors. The new motherboards support 4/8 channel memory up to 1TB/2TB DDR5 ECC RDIMM, PCI-Express 5.0 expansion slots, server grade storage expansion such as Slim-SAS & MCIO and 10Gbps Ethernet, giving ultimate performance for almost every application such as content creating, video rendering, high-end workstation and even AI machine learning.
To ensure stability for AMD Ryzen™ Threadripper™ 7000 and AMD Ryzen™ Threadripper™ PRO 7000 WX-Series processors in all conditions and systems loads, the WRX90 WS EVO & TRX50 WS has been given a flagship-class server grade ultra-low loss PCB and 18+3+3 phase SPS Dr.MOS VRM design to ensure ultimate performance and superb reliability, even when subjected to the most demanding sustained workloads.
WRX90 & TRX50 Motherboards
To deliver ultimate performance and longevity, both motherboard is equipped with super large aluminum heat-pipe designed heatsink with server grade cooling fans, providing ultimate heat dissipation especially under overclocking.
The new processor provides monstrous amount of PCIe 5.0 lanes and PCIe 4.0 lanes, with 144 usable PCIe 5.0/4.0 lanes for the WRX90 and 88 PCIe usable 5.0/4.0 for the TRX50, both motherboard is equipped with ample amount of PCIe slots for expansion, PCIe 5.0 x4 ‘Blazing’ M.2 NVMe SSD Sockets, SlimSAS(SFF-8654) and MCIO connector offering the latest high speed and stable storage expansion possibilities, providing numerous storage options making them the perfect choice for your next high end desktop or even workstation build.
Fast large file transferring is crucial for content creators, therefore TRX50 WS is equipped with Marvell10 GbE & Realtek 2.5 GbE LAN to ensure superfast file-transfer speed to local server, NAS or Cloud storage. Wireless network is also available on both motherboard, Wi-Fi 6E with 2×2 antenna improves connection reliability and provides gigabit-class wireless networking, giving the convenience of high-speed, wire-free connectivity.
For WRX90 WS EVO, it’s been armed with server grade Intel® X710 dual 10GbE solution to ensure ultimate stability and networking performance. And besides the vast connectivity of WRX90 WS EVO motherboard, it also supports remote management via AST2600 BMC Server Management Processor, giving system administrators out-of-band managing and monitoring through IPMI interface.
TRX50 WS
Supports AMD Ryzen™ Threadripper™ PRO 7000 and AMD Ryzen™ Threadripper™ 7000 Series Processors
In the ever-evolving landscape of home networking, the Linksys Atlas Pro 6 Wi-Fi 6 router emerges as a beacon of technological advancement and reliability. Packed with features that cater to the demands of today’s digital age, the Linksys Atlas Pro 6 offers compatibility, outstanding performance, robust security options, and seamless connections, all wrapped up in a sleek design. At a price of $249.99, it stands as a compelling option for those looking to enhance their home network experience. In this review, we’ll take an in-depth look at this remarkable router, covering its design, software, unique features, and everything you need to know to make an informed decision.
Design: Elegant, Functional, and Space-Saving
First impressions matter, and the Linksys Atlas Pro 6 makes a striking one. With its sleek, minimalist design, the router will blend seamlessly into any modern home decor. It’s compact and unobtrusive, with a slim profile that takes up very little space. The matte black finish and subtle LED indicators not only make it aesthetically pleasing but also functional.
The compact size of the Linksys Atlas Pro 6 doesn’t compromise on performance. It boasts a dual-band AX5400 Wi-Fi configuration, with up to 600 Mbps on the 2.4GHz band and an impressive 4800 Mbps on the 5GHz band. The router is equipped with a 160 MHz channel bandwidth, ensuring fast connectivity and reducing congestion. Powered by a robust 1GHz dual-core processor, it delivers high-performance connectivity, making it ideal for bandwidth-intensive activities like streaming and gaming.
Linksys Atlas Pro 6 Wi-Fi 6 router
Software: User-Friendly Control at Your Fingertips
One of the standout features of the Linksys Atlas Pro 6 is the user-friendly software experience it offers. The Linksys app, available for both Apple and Android devices, allows for seamless setup, control, and monitoring of your network. The app connects to the router via Bluetooth, simplifying the setup process, and offering an intuitive interface for users of all tech-skill levels.
Whether you’re a tech-savvy enthusiast or just looking for a hassle-free setup, the app provides a user-friendly platform for customizing your network settings. This means you can easily manage your Wi-Fi, parental controls, guest network, and much more, all from your smartphone.
Unique Features: Creating the Ultimate Home Network
The Linksys Atlas Pro 6 distinguishes itself with a set of unique features that enhance your home network experience. One of the most notable features is its compatibility with Amazon Alexa voice controllers. This means you can control your network with voice commands, adding a layer of convenience to your digital life. If you’re an Alexa user, this feature can truly make your daily routines smoother.
Beyond voice control, the Linksys Atlas Pro 6 offers the option to expand into a whole-home mesh network by adding one or more modules (sold separately). This mesh network is a game-changer for larger homes. It seamlessly extends your Wi-Fi coverage, so you can enjoy fast, reliable connectivity no matter where you are in your house. The entire mesh network shares a single Wi-Fi name (SSID), eliminating the need to manually switch between networks as you move around your home.
The introduction of Orthogonal Frequency-Division Multiple Access (OFDMA) is another game-changing feature. OFDMA enables efficient simultaneous data transmission to multiple connected devices, resulting in minimal latency during streaming and gaming. This ensures that every member of your household can enjoy their online activities without experiencing lag or buffering.
Security Options: Protecting Your Digital World
In today’s digital age, security is paramount. The Linksys Atlas Pro 6 takes this seriously and offers an array of security features to safeguard your digital world. It supports WPA2, WPA3, and WPS with 128-bit encryption, ensuring that your network remains protected from potential threats.
To cater to your guests, the router enables you to create a separate password-protected guest network. This feature ensures that visitors have secure, isolated access to your Wi-Fi without compromising your main network’s security. It’s a thoughtful touch that adds an extra layer of protection.
For families, the parental control options are a great addition. You can easily restrict access to inappropriate content and block specific devices from accessing the internet. This feature gives you peace of mind, knowing that your children are safe while navigating the online world.
Connections: Reliable and Efficient
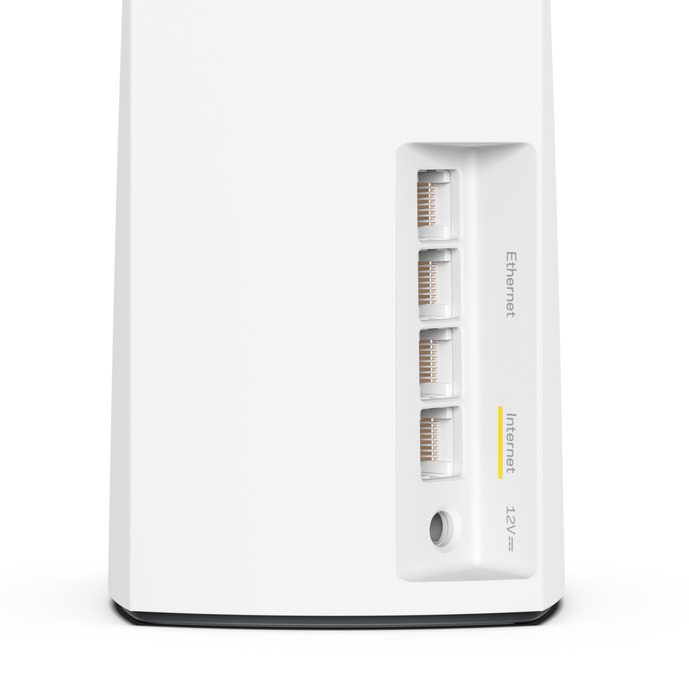
The Linksys Atlas Pro 6 router offers a range of connectivity options to meet your needs. It comes equipped with a WAN port for connecting to your modem, with an Ethernet cable included. Additionally, it features three LAN auto-sensing Gigabit Ethernet ports for wired connections, with speeds of 10/100/1000Mbps Gigabit. These ports are perfect for connecting devices like gaming consoles, smart TVs, or desktop computers that benefit from a wired connection.
Now let’s talk about the performance, which is where the Linksys Atlas Pro 6 Wi-Fi 6 router truly shines. The dual-band AX5400 Wi-Fi configuration delivers blazing speeds, making it perfect for both everyday tasks and demanding activities like 4K streaming and online gaming. The 2.4GHz band provides up to 600 Mbps, while the 5GHz band soars to 4800 Mbps, ensuring that all your devices get the bandwidth they need.
With the 160 MHz channel bandwidth, you’ll experience faster and more stable connections, even in homes with multiple devices vying for bandwidth. This is a game-changer for larger households with numerous smart devices, where congestion can be a common problem with older routers.
The powerful 1GHz dual-core processor at the heart of the router ensures that all your devices, from smartphones to smart home gadgets, enjoy consistent and smooth connectivity. This is particularly important for activities that demand low latency, like gaming and video conferencing.
Price: A Compelling Investment
At $249.99, the Linksys Atlas Pro 6 Wi-Fi 6 router offers an excellent balance between performance and value. Considering its impressive features, including compatibility with Amazon Alexa, OFDMA technology, and the ability to create a mesh network, it’s a compelling investment for those who want a reliable and future-proof networking solution.
When you factor in the cost of purchasing additional modules to create a mesh network, it’s important to note that the investment increases. However, this is a testament to the flexibility of the Linksys Atlas Pro 6, as it allows you to tailor your network to your specific needs. For larger homes or those with challenging layouts, the mesh network capabilities can be a game-changer.
Wrap Up: The Linksys Atlas Pro 6 is a Wi-Fi Powerhouse
The Linksys Atlas Pro 6 Wi-Fi 6 router is a formidable networking solution that excels in compatibility, performance, security options, connections, and overall quality. Its sleek design, user-friendly software, and unique features make it a standout choice in the market. Whether you’re a tech enthusiast looking for the latest Wi-Fi technology or a family seeking to protect and enhance your home network, the Linksys Atlas Pro 6 delivers on its promises. With a price point of $249.99, it offers excellent value for the features it brings to the table.
The router’s compatibility with Amazon Alexa, OFDMA technology, and the option to create a mesh network set it apart from the competition. These features add convenience and versatility to your home network, ensuring that it can adapt to your specific needs.
The user-friendly Linksys app simplifies setup and management, making it accessible to users of all experience levels. Whether you want to adjust your Wi-Fi settings, implement parental controls, or monitor your network’s performance, you can do it effortlessly from your smartphone.
Security is another strong suit of the Linksys Atlas Pro 6. With support for WPA2, WPA3, and WPS with 128-bit encryption, your network remains secure against potential threats. The ability to create a separate guest network with its own password adds an extra layer of protection, keeping your main network safe from unauthorized access. For families, the parental control features provide peace of mind by allowing you to manage and monitor your children’s online activities.
The performance of the Linksys Atlas Pro 6 is where it truly shines. The dual-band AX5400 Wi-Fi configuration with impressive speeds on both the 2.4GHz and 5GHz bands ensures that all your devices get the bandwidth they need. The 160 MHz channel bandwidth minimizes congestion, resulting in a more stable and faster connection. The powerful 1GHz dual-core processor ensures that your network can handle multiple devices simultaneously without sacrificing speed or performance.
When it comes to connections, the Linksys Atlas Pro 6 offers a range of options to suit your needs. Whether you’re connecting to your modem or using the LAN auto-sensing Gigabit Ethernet ports, you can rely on a stable and efficient connection. For wired devices like gaming consoles and smart TVs, the Gigabit Ethernet ports provide fast and reliable access to your network.
Priced at $249.99, the Linksys Atlas Pro 6 represents a compelling investment for those seeking a high-performance Wi-Fi 6 router. While the cost of adding additional modules for a mesh network can increase the investment, it’s a worthwhile option for larger homes or those with challenging layouts. The mesh network capabilities allow you to extend your Wi-Fi coverage seamlessly, ensuring that every corner of your home enjoys fast and reliable connectivity.
The Linksys Atlas Pro 6 Wi-Fi 6 router is a true Wi-Fi powerhouse. It excels in every aspect, from its elegant and space-saving design to its user-friendly software, unique features, robust security options, and stellar performance. If you want a router that delivers on its promises and provides the foundation for a seamless, high-speed, and secure home network, the Linksys Atlas Pro 6 is a top choice. With its competitive price point and the ability to expand into a mesh network, it offers outstanding value for users who demand the best in Wi-Fi technology. This router truly sets a new standard in home networking, and it’s poised to meet the needs of modern households in an increasingly connected world.
Here’s a specs for the Linksys Atlas Pro 6 Wi-Fi 6 router:
Required for setup: (1) Internet connection with Modem. (2) Mobile device with Android 6.0.1 or iOS 11.4 and higher, Bluetooth preferred. Simple and secured App-based setup
Key Features
4×4 MU-MIMO, OFDMA, High Power PAs, Supporting 160MHz channel bandwidth, Automatic Firmware Updates, Advanced Security, Easy setup and control with the Linksys App, Intelligent Mesh™ Technology, Easily Expandable and Seamless Mesh WiFi system