Numerous lesser-known computer tricks can be quite handy. Here are a few that might prove useful:
Virtual Desktops: On Windows 10 and macOS, you can create and manage multiple virtual desktops. This can help you organize your work by separating different tasks or projects onto different desktops.
Clipboard History: Windows 10 has a clipboard history feature that allows you to store multiple items in your clipboard. Press Windows key + V to access it.
Hidden Game in Microsoft Excel: In Excel 2000, there’s a hidden flight simulator game. Open a new Excel sheet, press F5, type “X97:L97” and press Enter, then press the Tab key, hold Ctrl + Shift, and click the chart wizard button. Enjoy the flight simulator!
Quick Calculator: On macOS, Spotlight (Cmd + Space) can be used as a quick calculator. Type in a simple math equation and get the result without opening a separate calculator app.
photo: Pixabay
Middle-Click Scrolling: If you have a three-button mouse, you can often use the middle button to scroll by clicking it and then moving your mouse up or down. This can be much faster than using the scroll wheel.
Keyboard Shortcuts for Web Browsing: In most web browsers, you can use Ctrl + Tab to cycle through open tabs, and Ctrl + Shift + Tab to cycle in reverse. Also, pressing Ctrl + Enter automatically adds “www.” and “.com” to the text in the address bar.
Rename Multiple Files at Once: On Windows, you can select multiple files, press F2 to rename the first one, and the rest will follow with a sequential numbering.
Hidden Chrome Dinosaur Game: When you’re offline and try to visit a webpage in Google Chrome, you can press the spacebar to start a hidden dinosaur-themed game.
Screenshots with Annotations: On macOS, pressing Shift + Command + 4 followed by the Spacebar allows you to take screenshots of individual windows. You can also hold the Control key while taking a screenshot to copy it to the clipboard instead of saving it as a file.
YouTube Keyboard Shortcuts: While watching a YouTube video, you can use “K” to pause/play, “J” to rewind 10 seconds, and “L” to fast-forward 10 seconds.
Search Within a Website: On Google Chrome, you can type the website’s name followed by a space in the address bar, then your search term, and it will perform a Google search within that website.
Hidden Context Menu Items: Holding down the Shift key while right-clicking on a file or folder in Windows can reveal additional context menu options.
Emojis on Windows: Press Win + period (.) or Win + semicolon (;) to bring up the emoji picker on Windows.
Calculator Conversations: On some versions of Windows, you can type “4 + 4” or similar calculations into the search bar to see a little calculator widget.
Swiftly minimize all windows: Pressing the Windows key + M simultaneously will instantly minimize all open windows.
Capture a specific screen area: Use the Windows key + Shift + S combination to launch the Snipping Tool, enabling you to select and capture a precise region of your screen.
Launch a fresh program instance: Hold down the Shift key while clicking the program’s icon on the taskbar to initiate a new instance of the program.
Effortlessly switch between open windows: By pressing and holding the Alt key while tapping the Tab key, you can smoothly cycle through your open windows.
Zoom in and out of web pages: Employ the Ctrl key along with your mouse wheel to seamlessly zoom in or out of web pages.
Rename multiple files in one go: Simply select the desired files, right-click, and choose “Rename.” Input the new name, press Enter, and watch as all selected files adopt the new name along with consecutive numbers.
Utilize keyboard shortcuts for efficient navigation: An array of keyboard shortcuts can significantly expedite computer navigation. For instance, Ctrl + C for copying, Ctrl + V for pasting, and Ctrl + Z for undoing actions.
Remember, the availability of these computer tricks might vary depending on your operating system and software versions. Always exercise caution and ensure that any tricks you try won’t harm your system or data. I trust you’ll discover these tricks to be beneficial!
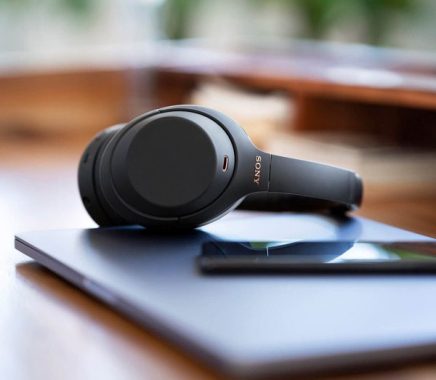
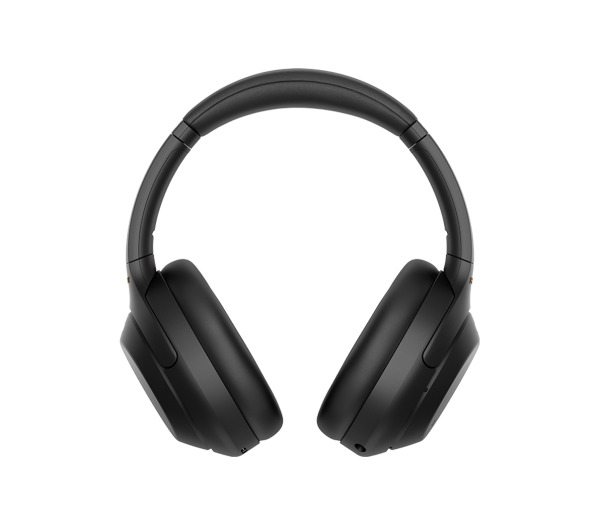
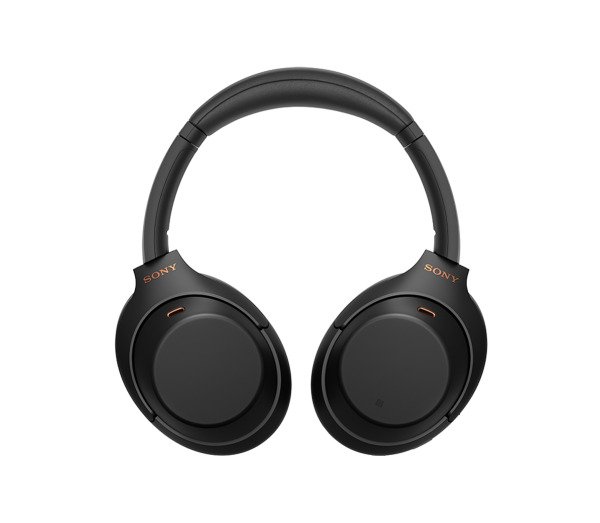
The Sony WH-1000XM4 headphones are a shining example of innovation in the realm of premium audio technology. These closed-back, over-the-ear headphones boast a remarkable combination of cutting-edge features, exceptional comfort, and an audio experience that rivals even the most demanding audiophile expectations. Below, we delve into the pros and cons of these headphones to help you decide if they’re the right fit for your audio needs.
Sony WH-1000XM4 headphones
The Sony WH-1000XM4 features the HD Noise Cancelling Processor QN1 chip, which sets the gold standard for noise cancellation technology. The chip’s adaptive algorithm, capable of analyzing external sounds up to 700 times per second, ensures that unwanted noise is efficiently blocked out, while also allowing you to adjust the level of ambient sound you want to let in.
Equipped with 40mm drivers incorporating an aluminum-coated Liquid Crystal Polymer diaphragm, the WH-1000XM4 delivers a sound profile that is clear, rich, and well-balanced. With deep bass, detailed mids, and crisp highs, these headphones cater to a wide range of musical preferences.
The inclusion of the DSEE Extreme™ processing engine, co-developed with Sony Music Studios Tokyo, takes audio restoration to another level. It intelligently analyzes and restores high-frequency signals lost during compression, ensuring that even compressed digital formats retain their original audio fidelity.
Adaptive Sound Control: The headphones come with intelligent sensors that adapt noise cancellation based on your activity – whether you’re walking, running, or stationary. This feature significantly enhances the listening experience by ensuring optimal noise cancellation and audio quality in various environments.
With up to 30 hours of wireless playback on a single charge, the WH-1000XM4 is ideal for extended listening sessions or long flights. Even more impressive is the quick charge capability, providing 5 hours of playback with just a 10-minute charge.
The intuitive touch controls on the earcups allow you to manage calls, music playback, volume, and more with simple gestures. Additionally, the Quick Attention mode lets you temporarily disable noise cancellation by covering the right earcup, facilitating quick conversations without needing to remove the headphones.
While the headphones are compatible with both Google Assistant and Amazon Alexa, you can only set up one voice assistant at a time. This might be limiting for users who prefer the flexibility of using both assistants interchangeably.
App Dependency: While the Sony Headphones Connect app provides a wide range of customization options, it’s required to repurpose the earcup button for activating noise cancellation. This could be slightly inconvenient for those who prefer a more streamlined experience without the need for app intervention.
Users might find it slightly cumbersome to repurpose the earcup button for activating noise cancellation through the app. This configuration could be more straightforward if handled directly through the physical button.
Sony has leveraged its expertise in adaptive noise cancellation, a technology they’ve been refining for some time now. What’s remarkable is how effective the circuitry is in discerning your surroundings. The headphones incorporate special on-ear sensors that can detect not only your movement but also whether you’re stationary or wearing glasses. Moreover, they’ve included a sensor that monitors barometric pressure, allowing the headphones to optimize noise cancellation for the specific altitude of your flight during travel.
To provide users with direct control over their auditory experience, Sony offers the Headphones Connect mobile app. This app empowers you to fine-tune the amount of external noise you want to permit or block out. Whether it’s adjusting noise cancellation levels or deciding how much ambient sound you wish to hear, you can customize these settings based on your activity, movement, or even your current location.
Sony WH-1000XM4
Sony’s already impressive noise cancellation has reached new level. The incorporation of fresh algorithms and a state-of-the-art wireless chipset has resulted in even more potent and adaptable noise neutralization. Utilizing miniature microphones, the headphones effectively ‘read the room’, tailoring the noise cancellation to the specific acoustic environment you’re in. The outcomes are astonishing—constant low-frequency hums from appliances like dishwashers and intermittent sounds like whistles and water draining were effortlessly silenced.
The introduction of Bluetooth 5.0 marks a significant milestone in the evolution of these headphones. The enhanced wireless connectivity has brought about an entirely new level of reliability.
For those navigating the landscape of remote work, the Sony WH-1000XM4 headphones prove to be a game-changer. The headphones offer the ability to simultaneously pair with both your work laptop and your smartphone. This seamless integration enables effortless toggling between music, podcasts, videos, incoming phone calls, and virtual meetings on platforms like Zoom or Microsoft Teams. Gone are the days of repeatedly pairing headphones each time you switch tasks across different screens. The WH-1000XM4 effortlessly adapts to the demands of a dynamic work-from-home setup. The Sony WH-1000XM4 headphones present an outstanding package of top-tier audio quality, advanced noise cancellation, and intelligent features. The headphones deliver a comfortable fit for extended use and are suitable for a diverse range of activities. The pros significantly outweigh the cons, making these headphones a compelling choice for audiophiles, frequent travelers, and anyone seeking a premium audio experience. Sony has successfully raised the bar for wireless noise-canceling headphones with the WH-1000XM4, setting a new standard that will be hard to surpass. Video: YouTube/Sony
The Roksan Caspian M2 CD Player embodies a sophisticated operating system designed to deliver exceptional digital audio playback. Whether you’re indulging in traditional CDs, CD-Rs, or CD-RWs, this player shines with its remarkable performance. Its frequency response spanning from 20Hz to 20kHz demonstrates unwavering precision, maintaining an impressive variance of only 0.2dB. Harmonic distortion remains nearly imperceptible, measuring less than 0.0015% at 0dB and 1kHz, a remarkable achievement that is typically at 0.0005%. Even at varying signal levels, distortion remains impressively low: < 0.005% at -30dB and 1kHz, and < 0.01% at 0dB and 20kHz. Intermodulation distortion is also virtually nonexistent, measuring < 0.001% at 0dB, typically at 0.0005%.
In terms of signal purity, the S/N ratio stands at an impressive 105dB, meticulously weighted to IHF-A standards. The meticulous engineering of the Caspian M2 is further evident in its wow and flutter performance, where quartz precision ensures minimal deviation. Exceptional channel separation exceeds 100dB at both 1kHz and 20kHz, contributing to the player’s stunning audio fidelity.
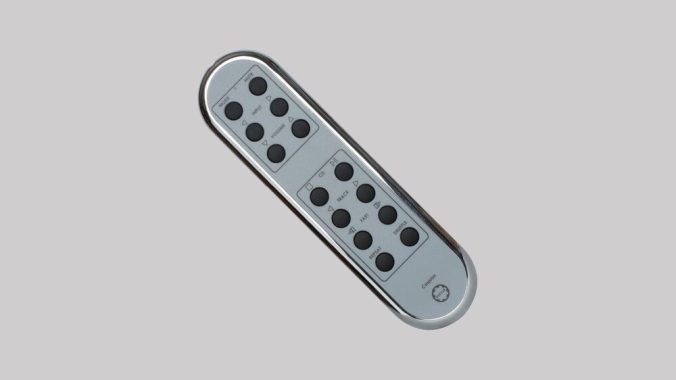
Roksan Caspian M2 CD Player
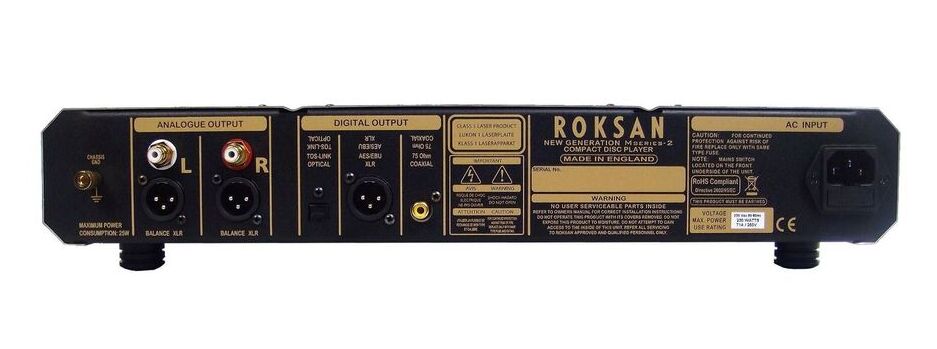
The Caspian M2’s analogue voltage output of 1.95Vrms ensures a robust signal transmission, and the gold-plated L&R RCA and Balanced XLR analogue outputs underscore the player’s commitment to superior connectivity. On the digital front, gold-plated 75 Ohm Coaxial, 110 Ohm Balanced AES/EBU, and Optical Toslink outputs offer versatile options for linking the player to external devices.
The D/A conversion is carried out by the PCM1798 Advance Segment, Audio-Stereo DAC, ensuring accurate rendering of audio with a resolution of 24 bits and a sampling rate of up to 192 kHz. This performance is facilitated by a third overtone oscillation crystal, finely tuned for precision.
Mechanical isolation is a cornerstone of the player’s construction, with decoupling feet on the main chassis and a two-stage decoupling laser mechanism. Jitter, the nemesis of digital audio, is meticulously managed, measuring under 130 picoseconds (typically under 70 picoseconds). Idle patterns are suppressed to a remarkable level of <-105dB, while stop band rejection achieves an impressive <-95dB.
The Caspian M2’s power supply comprises two high-performance, low-noise toroidal transformers and twelve fully regulated power rails. This robust power foundation facilitates the player’s maximum power consumption of less than 30W, contributing to its eco-conscious design.
Beyond the technical specifications, the Roksan Caspian M2 CD Player has garnered praise from both customers and professionals alike, firmly establishing itself as a preeminent contender within its class. The player’s ability to convey the rhythmic pulse of music is unrivaled, enhancing enjoyment across various genres. This is achieved without sacrificing refinement, rendering classical compositions with the same finesse as R&B, pop, and rock.
The Caspian M2’s sonic supremacy emerges not from gimmicks, but from a meticulous attention to design and construction. Notable features include a decoupled and isolated laser mechanism that aligns with precision, reducing reliance on error correction in favor of the genuine digital signal. An independent analogue output stage PSU eliminates signal corruption between digital and analogue domains, resulting in heightened clarity.
Professionals seeking the pinnacle of sound quality will appreciate the balanced XLR analogue and digital outputs of the Caspian M2. This pro-grade connectivity enhances audio clarity by reducing interference, elevating every sonic detail to prominence.
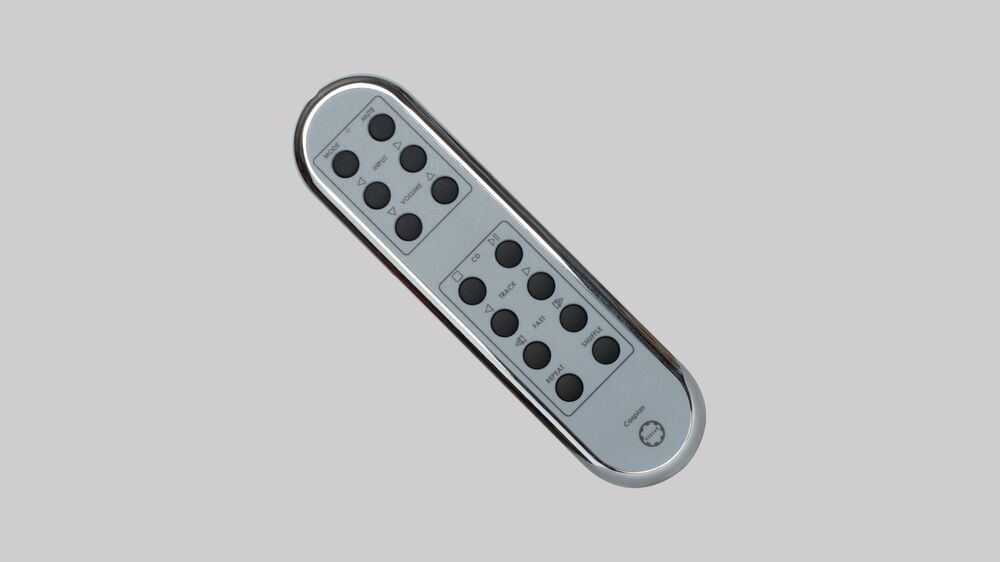
While the Caspian M2’s focus remains firmly on sonic excellence, it doesn’t skimp on essential features. Programming and repeat functions are at your disposal, complemented by a user-friendly remote control. Beyond the balanced XLR digital output, the player provides optical and coaxial connections, enabling compatibility with a wide array of DACs and digital amplifiers.
Roksan Caspian M2 CD pros & cons
Pros:
Exceptional Sound Quality: The Roksan Caspian M2 CD Player excels in delivering superb audio quality, boasting an impressively low harmonic distortion, high signal-to-noise ratio, and precise frequency response.
Precision Engineering: Meticulous attention to detail is evident in the design and construction of the player, with features like decoupled laser mechanisms, precise master clocks, and third overtone oscillation crystals, all contributing to its high-quality performance.
Balanced Connectivity: The inclusion of balanced XLR analogue and digital outputs enhances sound clarity by reducing interference, making it particularly appealing to professionals seeking studio-quality performance.
Versatile Compatibility: The player supports various formats, including traditional CDs, CD-Rs, and CD-RWs. It also offers a range of digital output options, such as optical and coaxial connections, ensuring compatibility with a wide range of external devices.
Mechanical Isolation: The player’s use of decoupling feet for the main chassis and a two-stage decoupling laser mechanism effectively minimizes vibrations and mechanical noise, contributing to an undisturbed audio experience.
Positive Reputation: The Caspian M2 CD Player has garnered glowing reviews from both customers and professionals, solidifying its reputation as a top-tier CD player within its class.
Cons:
Price: The Roksan Caspian M2 CD Player falls into the higher price range, which might make it less accessible to budget-conscious consumers. – price £2,300
Focus on Sound: While the player prioritizes exceptional audio quality, it lacks some of the advanced features found in more modern CD players, which could be a drawback for those seeking a more feature-rich experience.
Limited Streaming Options: As a CD player, it doesn’t offer built-in streaming capabilities or the ability to access online music services, which might limit its versatility for those who prefer digital streaming.
Size and Weight: The player’s substantial weight and dimensions might not be ideal for those with limited space or those looking for a more portable solution.
Minimal Display: The player’s design appears to prioritize simplicity, with a focus on sound quality rather than elaborate display features, which might be a con for those who prefer more visual feedback.
Power Consumption: While its maximum power consumption is relatively low, it’s still higher than more energy-efficient digital music sources like streaming services.
In sum, the Roksan Caspian M2 CD Player stands as a benchmark for superior CD sound quality. Its precision-engineered components, meticulous attention to detail, and commitment to exceptional performance make it a true standout in the realm of high-fidelity audio playback.
Specification
Details
Operating system
CD digital audio system (CD, CD-R, CD-RW)
Frequency response
20Hz – 20kHz ± 0.2dB
Harmonic distortion
< 0.0015% @ 0dB, 1kHz (Typically 0.0005%)
< 0.005% @ -30dB, 1kHz
< 0.01% @ 0dB, 20kHz
Intermodulation distortion
< 0.001% @ 0dB (Typically 0.0005%)
S/N ratio (IHF-A Wtd.)
105 dB
Wow & flutter
Quartz precision
Channel separation
>100 dB @ 1kHz
>100 dB @ 20kHz
Analogue voltage
1.95Vrms
Analogue outputs
L&R, RCA Gold plated
L&R Balanced XLR Gold plated
Digital outputs
75 Ohm Coaxial, RCA Gold plated
110 Ohm Balanced AES/EBU
XLR Gold plated
Optical, Toslink
D/A Conversion
PCM1798 Advance Segment, Audio-Stereo DAC
Resolution/sampling
24 bits / 192 kHz
Oscillation
3rd Overtone Oscillation
Crystal
Super precision, custom made
Mechanical isolation
Main chassis de-coupling feet, custom made
Laser mechanism
2 stage de-coupling
Jitter
<130 psec (Typically <70 psec)
Idle pattern
<-105 dB
Stop band rejection
<-95 dB
Power supply
x2 high performance low noise toroidal transformers
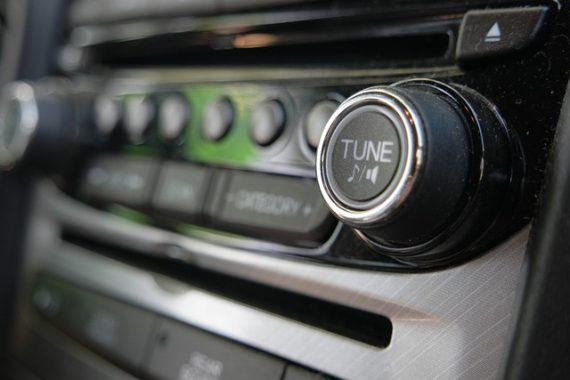
Setting up a car stereo system involves a series of steps that, when followed, enable you to install the system effectively, providing an upgraded audio experience while driving. Below is a comprehensive guide detailing the process:
Collect Required Equipment: Before beginning, ensure you have all the necessary components for your car stereo installation. These typically include a head unit (stereo receiver), speakers, amplifier (if desired), wiring harnesses, mounting brackets, screws, and tools such as wire cutters, crimpers, and screwdrivers. Confirm compatibility with your vehicle and align with your audio preferences.
Disconnect the Car Battery: As a precaution, disconnect the negative terminal of your car’s battery before any work. This step is crucial to prevent electrical shorts or damage while working with the vehicle’s electrical components. Locate the negative terminal, typically marked with a “-” sign, and use a wrench or socket to loosen the terminal nut and detach the negative cable.
Installing a Car Stereo – photo: Pixabay
Remove Existing Stereo (if applicable): For cars with factory-installed stereos, removal may be necessary before installing the new one. The process varies by vehicle, so consult your car’s manual or specific instructions for your make and model. Generally:
a. Remove trim pieces or panels around the stereo carefully. b. Locate and remove screws or brackets securing the stereo. c. Gently extract the stereo unit, disconnecting attached wiring harnesses or connectors while noting the connections.
Install the Head Unit: The head unit is central to your car stereo. Follow these steps to install it:
a. Mount the new head unit into your car’s stereo opening using the appropriate kit or brackets for your car’s make and model. Follow instructions for secure placement. b. Attach the wiring harness adapter to your car’s wiring harness, matching wire colors. Labels on the adapter indicate wire purposes. c. Connect the other end of the adapter to the respective ports on the head unit. Ports are labeled for power, ground, speaker outputs, and antenna. d. If the new head unit needs an antenna connection, attach the cable to the designated port.
Connect the Speakers: Next, connect the speakers to your car stereo:
a. Identify speaker locations in your car and run speaker wires from the head unit or amplifier to each speaker location. b. Connect positive and negative wires from each speaker to their respective terminals on the head unit or amplifier, following standard color coding.
photo: Pixabay
Install the Amplifier (if desired): For enhanced audio power and quality, consider installing an amplifier:
a. Select a secure, well-ventilated location for the amplifier, avoiding interference with other components. b. Connect power wire from the battery, ensuring proper sizing and a protective fuse or circuit breaker. c. Ground the amplifier to the vehicle chassis, ensuring a clean connection to metal. d. Connect the remote turn-on wire from the head unit, RCA cables, and speaker wires from the amplifier to speakers.
Route and Secure Wiring: Properly route and secure wiring for safety and aesthetics:
a. Route wiring away from moving parts, heat, and moisture. b. Secure wiring with ties, clips, or holders, preventing tangling or damage. c. Avoid proximity to the exhaust system due to heat.
Test the System: Now, test your car stereo system:
a. Reconnect the negative battery terminal. b. Power on the head unit and adjust settings. c. Test each speaker individually, ensuring proper sound location. d. If applicable, verify amplifier and subwoofer functionality.
Finalize the car stereo Installation: Conclude the installation process:
a. Securely mount the head unit and amplifier (if used) using brackets or screws. b. Replace removed trim pieces or panels. c. Verify connections, wiring routing, and security.
With successful installation, you’ve set up your car stereo system. Enjoy improved audio quality during your drives.
Essential Tips:
Consult equipment manuals for precise guidelines. Seek professional help if uncertain or lacking tools/skills. Prioritize safety; disconnect the battery when working with electrical components. Take time for neat wiring and routing. Add sound deadening materials for noise reduction. Regular maintenance ensures long-term performance. Adapt the process based on your vehicle and chosen components, referencing provided instructions.
The AORUS FI32U Gaming Monitor enters the arena with a promise to redefine your gaming and visual experience. With a 31.5-inch SuperSpeed IPS panel, cutting-edge features, and a focus on performance, this monitor aims to capture the attention of avid gamers and content creators alike. In this review, we’ll delve into its design, performance, advantages, disadvantages, and overall value.
AORUS FI32U
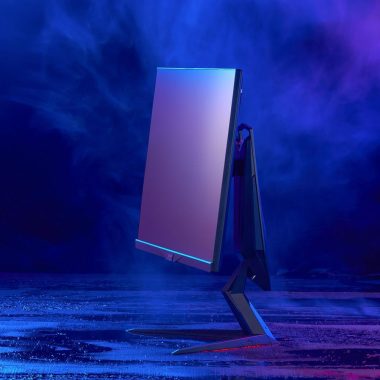
– The AORUS FI32U boasts a sleek design that merges style with functionality. The 31.5-inch display is framed by slim bezels, which contribute to an immersive viewing experience. The edge-type backlighting enhances the aesthetics while maintaining a slim profile. The non-glare display surface ensures comfortable extended use, reducing the strain on the eyes. The monitor’s overall build quality feels sturdy, and the adjustable stand provides versatile positioning options.
– When it comes to performance, the AORUS FI32U doesn’t disappoint. The 4K UHD resolution (3840 x 2160) paired with a 144Hz refresh rate delivers smooth visuals, making it suitable for both gaming and multimedia content creation. The 1ms GTG response time and 1ms MPRT minimize motion blur, resulting in crisp and sharp images, especially during fast-paced gameplay. The inclusion of VESA Display HDR400 and 90% DCI-P3 color saturation ensures vibrant and lifelike visuals with improved contrast and color accuracy.
High Refresh Rate and Resolution: The combination of 4K UHD and 144Hz refresh rate provides a visually stunning and smooth gaming experience.
Color Accuracy: With 90% DCI-P3 color coverage, the monitor offers impressive color accuracy and vibrancy suitable for content creation.
Low Input Lag: The monitor’s low input lag enhances responsiveness, making it ideal for competitive gaming.
Versatile Connectivity: The availability of HDMI 2.1, DisplayPort 1.4, USB Type-C, and USB 3.0 ports ensures compatibility with a wide range of devices.
Advanced Features: Features like Active Noise Cancelling, Aim Stabilizer Sync, and Black Equalizer contribute to a more immersive gaming experience.
Adjustability: The monitor offers various ergonomic adjustments, including tilt, swivel, pivot, and height adjustment, allowing for optimal viewing comfort.
Price: from $603.89 – The advanced features and high specifications come at a premium cost, which might be a concern for budget-conscious consumers.
Speaker Absence: The lack of built-in speakers might be disappointing for users who prefer not to use external audio devices.
HDR Limitation: While the monitor supports HDR400, it might not deliver the same level of HDR performance as higher-tier HDR monitors.
It’s worth noting that the AORUS FI32U doesn’t compromise on connectivity options. The inclusion of HDMI 2.1, DisplayPort 1.4 with DSC, and USB Type-C ensures that users can easily connect a variety of devices, from gaming consoles to laptops, without the need for adapters or dongles. This flexibility adds to the monitor’s convenience and versatility.
The monitor’s Active Noise Cancelling 2.0 feature is an interesting addition that can help create a more immersive environment by reducing background noise distractions. This can be particularly useful in noisy gaming environments or busy workspaces.
The OSD Sidekick offers a user-friendly interface for adjusting settings, and the inclusion of a 6-axis color control allows users to fine-tune color accuracy according to their preferences. The presence of RGB Fusion 2.0 adds customizable lighting effects, contributing to the monitor’s aesthetic appeal.
AORUS FI32U Gaming Monitor
The Super Speed IPS panel delivers exceptional color quality, enhanced by crystal technology that reduces the response time to an impressive 1ms GTG. The AORUS FI32U boasts a 10-bit display utilizing an 8-bit + FRC configuration, resulting in a remarkable 90% coverage of the DCI-P3 color space. This expansive color gamut not only provides a wider range of hues but also ensures heightened color accuracy for a truly immersive visual experience.
Taking a page from high-end audiophile sound systems, AORUS integrates this concept into the monitor’s micro system. This innovation is exemplified by the embedded ESS SABRE chip, which empowers the monitor to deliver sound that’s both pure and potent. Whether it’s the delicate notes of a classical orchestra or the explosive audio in your virtual battleground, the AORUS FI32U’s audio system resonates with a depth that enhances your overall immersion. The monitor’s audio capabilities extend further, offering up to 120dB Signal-to-Noise ratio playback quality and compatibility with headphones up to 600 ohms. Notably, the latest upgrade allows gamers to opt for premium audio whether they’re using headsets or not. This versatility ensures that every aspect of the gaming experience, including soundscapes, is finely tuned to meet the demands of discerning users.
In the realm of gaming monitors, the AORUS FI32U stands as a formidable contender. Its combination of 4K resolution, high refresh rate, rich color accuracy, and a suite of advanced features makes it a well-rounded choice for gamers and content creators seeking a premium experience. The monitor’s sleek design, ergonomic adjustments, and thoughtful connectivity options further solidify its position as a top-tier display.
AORUS FI32U
Ultimately, the decision to “invest” in the AORUS FI32U will depend on your individual priorities and budget. If you’re looking for a monitor that delivers excellent gaming performance, accurate colors, and a range of innovative features, this monitor certainly warrants consideration. It’s a showcase of modern display technology that aims to enhance your overall computing and gaming experience, pushing boundaries and setting new standards in the process.
Specification AORUS FI32U
Details
Panel Size (diagonal)
31.5” SS IPS
Display Viewing Area (HxV)
697.3056 x 392.2344 (mm)
Panel Backlight/Type
Edge type
Display Surface (non-glare/glare)
Non-glare
Color Saturation
90% DCI-P3/ 123% sRGB
True Resolution
3840 x 2160 (UHD)
Pixel Pitch
0.181 (H) x 0.181 (V) (mm)
Brightness
350 cd/m² (TYP)
Contrast Ratio
1000 : 1 (TYP)
Viewing Angle
178°(H)/178°(V)
Display Colors
10 bits (8 bits + FRC)
Response Time
1ms GTG / 1ms MPRT
Refresh Rate
144Hz
Refresh Rate for Console Game
120Hz
HDR
VESA Display HDR400
Flicker-free
Yes
HBR3
Yes
Connectivity
– HDMI 2.1 (support 4K 144Hz 4:4:4 @ DSC) x2
– DisplayPort 1.4 (DSC) x1
– USB Type-C x1
Earphone Jack
Yes
Microphone Jack
Yes
Speaker
N/A
Unique Features
– OSD Sidekick
– Active Noise Cancelling (ANC) 2.0
– Aim Stabilizer Sync
– Black Equalizer 1.0
– Dashboard
– Timer
– Counter
– Crosshair
– PiP/PbP
– Auto-Update
– KVM
– RGB Fusion 2.0
– 6 axis Color Control
– Smart OD
USB port(s)
USB 3.0 x2
Power Type
Build-in
AC Input Max
120W
Power Saving Mode
0.5W
Power Off Mode
0.3W
Voltage
AC 100-240V ~ 50/60Hz
Tilt(angle)
-5°~+20°
Swivel(angle)
-20°~+20°
Pivot(angle/direction)
-0°~+90°
Height Adjustment (mm)
130
VESA Wall Mounting(mm)
100×100
Kensington lock
Yes
Phys. Dimension with Stand(WxHxD)
717.6 x 598.3 x 283 mm
Phys. Dimension w/o stand (WxHxD)
717.6 x 424.3 x 71.3 mm
Box Dimension (WxHxD)
1000 x 585 x 198 mm
Net Weight with stand (Esti.)
10.9 kg
Net Weight without stand (Esti.)
7.7 kg
Gross Weight (Esti.)
15.4 kg
Accessories
Power cable/HDMI cable/DP cable/USB cable/Type C cable/QSG/Warranty card
Note
HDMI2.1 supports PS5 and Xbox Series X at 4K UHD@120Hz (4:2:0)
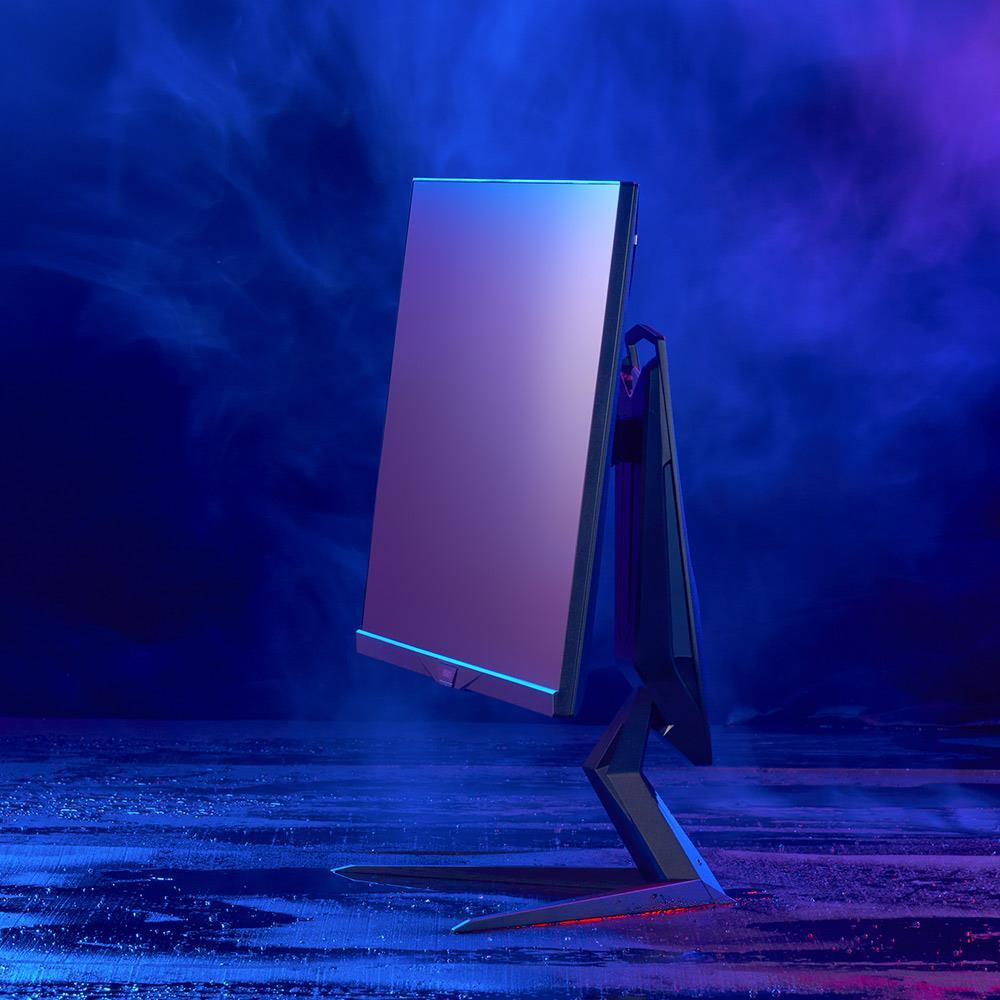
The MSI MAG 274UPF is a feature-packed gaming monitor that aims to offer an immersive and high-performance gaming experience. With its impressive specifications and innovative technologies, this monitor has both its strengths and weaknesses. The MSI MAG 274UPF monitor offers an impressive array of functions tailored to gamers and tech enthusiasts. With its rapid IPS panel technology, 4K UHD resolution, high refresh rate, and HDMI 2.1 support, it excels in providing immersive gaming experiences. The addition of the Gaming Intelligence app for personalized settings and the Less Blue Light PRO technology for reduced eye strain showcase MSI’s commitment to enhancing user comfort and convenience.
MSI MAG 274UPF
Taking into consideration the price tag of $600 for the 274UPF, MSI’s chosen physical design indicates a strategic allocation of resources within the Bill of Materials (BOM). The company has opted to prioritize performance over aesthetic elements, a common approach for entry-level gaming monitors. MSI’s investment in manufacturing costs is clearly directed towards enhancing the monitor’s performance capabilities.
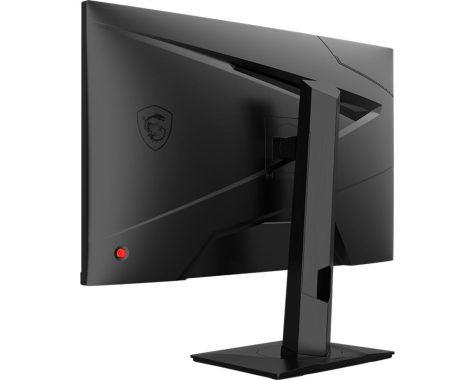
This latest 4K gaming monitor from MSI offers all the fundamental specifications one would anticipate from a 4K gaming display. Buyers can expect the signature MSI monitor design that has been a hallmark of the company’s gaming monitor lineup for a considerable time. The 274UPF is encased in a black plastic shell featuring a textured, grainy finish. Notably, in contrast to previous MSI gaming monitors, the 274UPF abandons the RGB lighting on its rear, embracing a sleeker appearance that complements its 27-inch form factor.
In terms of connectivity options, MSI has equipped the MAG 274UPF with a comprehensive set of ports, including 1x DisplayPort 1.4, 2x HDMI 2.1 ports, 1x USB-C with 65W Power Delivery (PD) charging capability, 2x USB 2.0 Type-A ports, 1x USB 2.0 Type-B port, and 1x headphone out port. A notable departure is the absence of a dedicated power button, while the familiar multi-directional tool on the rear of the monitor has been retained for controlling the On Screen Display (OSD) settings.
While the monitor has some minor drawbacks, such as energy efficiency concerns and potential color accuracy variations, these factors may not significantly impact its target audience of gamers. The inclusion of HDMI 2.1 and the Console Mode make it an attractive option for console users looking to maximize their gaming setups.
Console Mode and HDMI 2.1 – The HDMI 2.1 support is a significant advantage for console gamers, as it allows seamless compatibility with the latest consoles. The ability to achieve 4K UHD at 120Hz (4:2:0) on consoles like the PS5 and Xbox Series X ensures a future-proof gaming experience.
Less Blue Light PRO – The inclusion of the Less Blue Light PRO technology is a thoughtful addition for users concerned about eye strain during extended gaming sessions. By reducing blue light emissions in the 415 to 455 nm wavelength range, the monitor aims to provide a more comfortable viewing experience.
Frameless Design and PIP/PBP Function – The frameless design enhances the monitor’s aesthetics, providing a sleek and modern appearance. The Picture-in-Picture (PIP) and Picture-by-Picture (PBP) functions add multitasking capabilities, allowing users to display content from multiple sources simultaneously.
MSI MAG 274UPF Pros:
Rapid IPS Panel with 1ms Response Time: The standout feature of the MSI MAG 274UPF is its Rapid IPS panel, which boasts an impressive 1ms GtG response time. This ensures minimal motion blur and eliminates screen tearing, delivering smoother gaming experiences.
Rapid IPS display with 1ms GTG response time reduces blur, giving you a clear, competitive edge
4K UHD High Resolution: The monitor’s 4K UHD resolution (3840 x 2160) provides stunning visual clarity and detail, making games look even better and displaying more intricate textures and environments.
High Refresh Rate: With a 144Hz refresh rate, the monitor enables smoother motion and responsiveness, allowing gamers to react quickly and enjoy fluid gameplay.
HDMI 2.1 Support: The inclusion of HDMI 2.1 is a significant advantage, particularly for console gamers. It supports 4K resolution at 120Hz, making it an ideal choice for next-gen consoles like PS5 and Xbox Series X.
Gaming Intelligence app: The gaming intelligence app is a unique feature that lets users customize and optimize viewing settings for different games, ensuring the best possible visuals and performance. Gaming Intelligence app, a software designed to enhance user interactions with their monitors by enabling screen function adjustments through mouse-based operations, thereby replacing the need for physical buttons. This software is aimed at optimizing operational efficiency and streamlining firmware updates to provide users with an enhanced overall experience.
Gaming Intelligence app
Gaming Intelligence app consolidates a wide range of functions within its interface. These encompass game monitoring, real-time in-game information displays, management of game-specific settings, system-level adjustments, customizable Hotkeys, joystick-based controls, and an array of supplementary features. Notably, it enables advanced functionalities like picture-in-picture mode on MSI monitors. Through this comprehensive software suite, MSI aims to offer users a more intuitive and user-friendly approach to monitor customization and control.
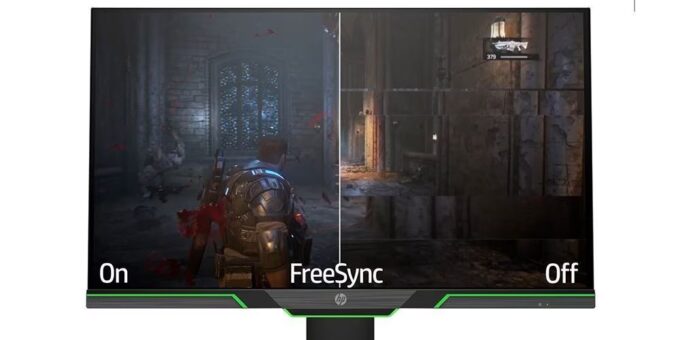
AMD Free-Sync Premium Technology: This technology minimizes screen tearing and stuttering, enhancing the fluidity of gameplay.
Adjustable Stand and VESA Mounting: The monitor’s adjustable stand and VESA mounting compatibility allow users to find the perfect ergonomic position for extended gaming sessions.
VESA DisplayHDR 400: The DisplayHDR 400 certification ensures improved contrast and shadow adjustments, leading to more vibrant and realistic visuals.
Night Vision: The smart black tuner enhances visibility in dark areas, making it easier to spot enemies or details in dimly lit game environments.
USB Type-C with 65W Power Delivery: The built-in USB Type-C port with power delivery simplifies device connectivity and charging.
MSI MAG 274UPF Cons:
Energy Efficiency: The monitor’s energy efficiency is rated as relatively low (Energy Efficiency Rating: F). This could potentially result in higher energy consumption over time.
Color Accuracy: While the monitor boasts high Adobe RGB, DCI-P3, and sRGB coverage percentages, the actual color accuracy may vary. Professional designers and content creators might require a more color-accurate display.
Off-mode Power Consumption: The off-mode power consumption of 0.3W is slightly higher than some energy-efficient monitors.
Audio Ports: The absence of built-in speakers might be a drawback for users who prefer not to use external audio devices.
Weight: With a weight of 6.05 kg (without stand), the monitor might be on the heavier side for some users who plan to frequently move or transport it.
The MSI MAG 274UPF is a compelling gaming monitor with a range of impressive features geared towards gamers and power users. Its rapid IPS panel, 4K UHD resolution, high refresh rate, and HDMI 2.1 support make it well-suited for both PC and console gaming. The adjustable stand and VESA mounting options enhance its ergonomic appeal, while the innovative Gaming Intelligence APP adds customization options for an optimized gaming experience. However, users should consider its energy efficiency and color accuracy for tasks beyond gaming. Overall, the MSI MAG 274UPF offers a blend of performance and features that cater to gamers seeking a visually captivating and responsive monitor.
For HP users seeking to optimize their monitor experience, the HP Display Center software proves to be an invaluable tool. Designed to cater to both Windows and Mac users, this software can be acquired from the Microsoft Store for Windows devices and the Apple Store for Mac users. If you own an HP monitor, the software is often automatically downloaded upon connecting your display.
The HP Display Center is more than just a software; it’s a gateway to tailor your HP monitor display to your preferences. This software empowers you to tweak not only display settings but every aspect related to your monitor, effectively tailoring it to meet your unique requirements and boost productivity.
Diving deeper into the functionalities of HP Display Center reveals a wealth of possibilities:
Instant Display Customization: Gain access to display settings and make real-time adjustments that align with your preferences.
Personalized Color Presets: Craft and save color presets that resonate with your aesthetic preferences.
Effortless Display Calibration: Fine-tune your monitor’s display for accurate colors and visuals.
Resolution Control and Input Configuration: Easily modify screen resolution, change input sources, and configure speaker settings.
Desktop Partition Settings and Pivot: Utilize the View menu to manage desktop partition settings and pivot orientations.
Advanced Settings: Unlock a host of advanced options, including theft deterrence, OSC controls, batch controls, power-saving modes, and firmware updates.
The Power of Color Management
HP Display Center supports a diverse array of color space options, including industry-standard and unconventional colors. While manufacturers often calibrate color spaces, this software provides the ability to further customize and recalibrate them. The software also facilitates saving multiple color settings, enhancing the control over the display’s color gamut.
Introducing HP Display Manager
Embedded within HP Display Center is the HP Display Manager feature, offering valuable insights into your connected monitors. Access data related to display status, manufacturer information, backlight age, and manufacturing year. With graphical representations of this data, the dashboard area is both informative and visually engaging.
Simplified Display Adjustment with HP Display Assistant
Fine-tuning monitor settings for optimal performance can be challenging, especially for beginners. The HP Display Assistant streamlines this process, utilizing the Display Data Channel to swiftly adjust display settings and calibrate colors. By automating these adjustments, the software eliminates the need for manual intervention, thus ensuring an optimal viewing experience.
Installation Guide: HP Display Center for Mac and Windows
Mac Users:
Access the download page via the provided link.
Click the download button to initiate the software download.
Wait for the installation process to conclude.
Upon completion, launch the HP Display Center Mac version and start personalizing your display.
Allow the download and initialization to finalize.
Once completed, enjoy the enhanced display experience.
The HP Display Center software extends its capabilities to a wide range of HP monitors, catering to both commercial and consumer needs. Here’s a glimpse of the extensive list of supported HP monitors that can benefit from the software’s features:
Commercial Monitors:
HP P24h G4 FHD
HP E24u G4 FHD USB-C
HP EliteDisplay E243m 23.8-inch
HP E243d 23.8-inch Docking
HP E34m G4 WQHD Curved USB-C Conferencing Monitor
HP P24 G4 24 FHD
HP Z25xs G3 QHD USB-C DreamColor
HP Z24f G3 FHD Display
HP Z43 42.5-inch 4K UHD Display
HP E22 G4 FHD
HP P22 G4 22 FHD
HP P34hc G4 WQHD USB-C Curved Monitor
HP E24 G4 FHD
HP Z24u G3 WUXGA USB-C Display
HP Z27q G3 QHD Display
HP E24t G4 FHD Touch Monitor
HP Z34c G3 WQHD Curved Display
HP E24i G4 WUXGA
HP E27d G4 QHD USB-C Conferencing Monitor
HP P22h G4 FHD
HP EliteDisplay E273m 27-inch
HP Z40c G3 WUHD Curved Display
HP E24mv G4 FHD Conferencing Monitor
HP Z27xs G3 4K USB-C DreamColor Display
HP E23 G4 FHD
HP E27q G4 QHD
HP Z27u G3 QHD USB-C Display
HP Z38c 37.5-inch Curved Display
HP E24q G4 QHD
HP E27 G4 FHD
HP Z32 UHD 4K Displays
HP E27u G4 QHD USB-C
HP Z27k G3 4K USB-C Display
HP E24d G4 FHD USB-C Conferencing Monitor
HP E27m G4 QHD USB-C Conferencing Monitor
HP P27h G4 FHD
HP E24m G4 FHD USB-C Conferencing Monitor
HP Z24n G3 WUXGA Display
Consumer Monitors:
HP M32f FHD
HP U28 4K HDR
HP M24fwa FHD
HP U32 4K HDR
HP M27 Webcam
HP M27f FHD
HP M24fw FHD
HP V24v G5 FHD
HP M24fd FHD USB-C
HP V22v G5 FHD
HP M22f FHD
HP M24 Webcam Monitor
HP M27fq QHD
HP M24f FHD
HP V24i G5 FHD
HP M27fe FHD
HP M27fd FHD
HP M24fe FHD
HP M34d WQHD Curved Monitor
HP V22ve G5 FHD
HP M27fw FHD
HP M27fwa FHD
HP V27i G5 FHD
This comprehensive array of supported monitors underscores the HP Display Center’s versatility and its ability to cater to various user preferences and needs across the commercial and consumer sectors.
Unlocking Enhanced Display Performance with HP Display Center
The HP Display Center FREE software encapsulates the power to transform your HP monitor experience. Whether you’re seeking a more personalized display, accurate color representation, or simplified adjustment controls, this software presents a user-friendly solution. It caters to both novices and experts, eliminating the complexities of manual adjustments and allowing you to harness the full potential of your HP monitor.
Say goodbye to the one-size-fits-all approach to displays and welcome the era of customization and optimization. With HP Display Center by your side, your monitor transforms into a canvas that adapts to your needs, enabling you to delve into work, entertainment, and creative endeavors with newfound clarity, vibrancy, and precision. The HP Display Center stands as a comprehensive solution to customize and optimize your HP monitor display. By catering to individual preferences and eliminating the complexities of manual adjustments, the software boosts productivity and enriches the visual experience. Whether you’re an advanced user or new to monitor calibration, this software serves as an indispensable asset for anyone seeking to make the most of their monitor display.
Defining Vsync: Balancing the interaction between your GPU and monitor to achieve optimal performance levels.
When perusing a PC game’s settings menu, you’ve likely pondered over the significance of Vsync and whether to enable it.
Occasionally, settings menus lack explanatory tooltips or relevant information about these options. Consequently, some gamers opt for caution and enable Vsync, while others bypass it, potentially missing out on its advantages.
Moreover, Vsync extends beyond gaming and applies to any form of 3D-rendered content, including 3D animation. Essentially, anyone involved with such content can reap the rewards of Vsync.
Understanding Vsync:
Vertical synchronization, or Vsync, is a display configuration that harmonizes a game’s or 3D-rendered scene’s frame rate with the monitor’s refresh rate. The primary purpose is to counteract “screen tearing,” where multiple frames are concurrently displayed, leading to disjointed images resembling torn and misaligned visuals.
Picture your graphics card generating 100 frames per second (fps), while your monitor’s effective display rate is 60fps due to its 60Hz refresh rate. Without Vsync, the monitor might simultaneously present one frame and sections of another frame in transit from the GPU. As the monitor only renders a single image per refresh cycle, partial frames overlap the prior ones, causing the “tearing” effect.
Vsync steps in by capping the game’s frame rate to match the monitor’s refresh rate. For a 60Hz monitor, Vsync limits the frame rate to 60fps, and likewise for other refresh rates.
Advantages of Vsync in Graphics Performance:
Vsync’s primary advantage lies in its elimination of screen tearing, providing a seamless visual experience. By synchronizing the game’s frame rate with the monitor’s refresh rate, it delivers consistent and predictable graphics quality, enhancing visual fidelity even if the frame rate is slower.
Additionally, Vsync reduces the GPU’s load. By imposing a frame rate cap, the GPU avoids excessive strain in generating frames that the monitor cannot adequately display. This can result in cooler temperatures, reduced power usage, and potential hardware longevity with consistent usage.
Potential Drawbacks of Vsync:
Nonetheless, Vsync is no solution for all graphical issues and can introduce challenges in specific scenarios. Notably, it can introduce input lag—an inconsequential delay between a user’s action (e.g., a mouse click) and the on-screen response. Such delays can be problematic, especially in fast-paced competitive games where every millisecond counts.
Another concern is “stuttering,” occurring if the GPU struggles to sustain the Vsync-capped frame rate, causing it to dip below the monitor’s refresh rate.
For users with high-performance gaming setups, boasting top-tier graphics cards and monitors with elevated refresh rates (e.g., 144Hz or 240Hz), Vsync might become superfluous. In these cases, technologies like NVIDIA’s G-SYNC or AMD’s FreeSync, which dynamically adjust the monitor’s refresh rate based on the GPU’s performance, could be more fitting solutions, obviating the need to tinker with Vsync settings.
What distinguishes VSYNC from framerate limiting? Although both VSYNC and framerate limiting address screen tearing, they employ slightly distinct methods. VSYNC aligns your graphics card’s frame rate with your monitor’s refresh rate, whereas framerate limiting establishes a maximum cap on the frames per second your graphics card can produce.
Are there further considerations for using VSYNC? Enabling VSYNC can enhance onscreen smoothness and visual appeal, yet its necessity varies based on your computer activities. Moreover, if you encounter screen tearing or input lag despite enabling VSYNC, other factors might contribute to these issues beyond its activation status.
What exactly is Fast Sync? Fast Sync is a relatively recent innovation from NVIDIA, compatible exclusively with GTX 900 series graphics cards, as well as 10-series GPUs and newer models. Fast Sync excels at eradicating screen-tearing and input lag while maintaining an impressively low level of latency. This advanced technology often delivers superior and more consistent performance when compared to VSync.
One key factor driving gamers to keep VSync off is the potential for latency to rise beyond 100 ms. By activating Fast Sync, latency is notably diminished, even achieving a level of performance comparable to gameplay with VSync entirely disabled.
How to Enable or Disable VSync?
Switching VSync on or off is a straightforward process. Follow these simple steps to manage your control options effectively.
Step 1: Open the NVIDIA Control Panel by typing “NVIDIA Control Panel” into your Windows search bar.
Step 2: Choose “Manage 3D Settings.”
Step 3: Under the “Global Settings” tab, you’ll discover a list of features. Scroll down to locate “Vertical Sync.”
Step 4: Using the dropdown menu on the right, opt for “Force On.”
Remember, specific settings may vary based on your graphics processor, but this four-step method provides a universal approach for accessing your VSync preferences.
Bixby is the virtual assistant developed by Samsung for their smartphones. If you want to turn off Bixby on your Samsung phone, you can follow these steps:
Using Bixby Settings:
Open the Bixby app by pressing the Bixby button or swiping right on your home screen if your device has a dedicated Bixby button.
Tap the three-dot menu icon in the upper-right corner of the screen to access the Bixby settings.
Look for an option like “Bixby Voice” or “Bixby Voice Settings.”
In the settings, you should find an option to disable Bixby Voice or the Bixby wake-up feature. Turn off the toggle switch to disable Bixby.
photo: Pixabay
Using Bixby Home:
Swipe right on your home screen to access Bixby Home.
Tap the three-dot menu icon in the upper-right corner.
Select “Settings.”
Find the option to disable Bixby Home and turn off the toggle switch.
Using the Galaxy Store:
Open the Galaxy Store on your Samsung device.
Search for “Bixby” in the search bar.
Look for the Bixby app and open it.
You might find an option to uninstall or disable the app.
Using Application Manager:
Go to your device’s “Settings.”
Scroll down and tap on “Apps” or “Applications.”
Find and tap on the Bixby app.
Depending on your device and software version, you might have the option to uninstall or disable the app.
Using Package Disabler Apps (Advanced):
There are third-party apps available on the Google Play Store that can help you disable system apps like Bixby. These apps usually require certain permissions and might require a bit more technical knowledge.
Remember that the steps might vary slightly depending on the Samsung device model and the version of Android it’s running. Also, keep in mind that the ability to fully disable Bixby might depend on your device’s software version and any updates that have been released since my last knowledge update.
Please proceed with caution when disabling system apps, as it might affect other functionalities or future updates. If you’re unsure, you might consider reaching out to Samsung’s support or searching for more recent instructions online based on your specific device and software version.
How to Deactivate the Bixby Button on Galaxy S23, S22, S21, S20, Note 10, and Note 20 Devices:
The Bixby button is positioned below the volume keys on the right side of Samsung’s Galaxy S23, S22, S21, S20, and Note 20 smartphones. On Note 10 phones, it’s situated on the left side, also serving as the power button. While the Bixby function activates with a long-press, you might prefer it exclusively as your power button. To fully disable Bixby on this button, follow these steps:
Swipe downward on the screen to unveil the notifications menu, then tap the power icon located on the top right corner.
The power menu will appear, along with the “Side Key Settings” option. Select it to proceed.
The settings will appear, including the “Press and Hold” choices. By default, the “Wake Bixby” option is enabled. Instead, tap “Power Off” from the menu to deactivate Bixby.
That’s it! Now you can freely press the side button without triggering Bixby. A satisfying change, isn’t it?
What is Samsung Free?
Samsung Free is a feature available on some Samsung smartphones that offers a content discovery platform directly on your device’s home screen. It provides access to various types of content, such as news articles, videos, games, and more. Samsung Free aims to provide users with easily accessible and curated content to enhance their smartphone experience. It’s often found as a dedicated panel on the leftmost side of the home screen or can be accessed by swiping to the right from the main home screen.
Here are a few key points about Samsung Free:
Content Variety: Samsung Free typically offers a mix of news articles, videos, games, and other types of content from various sources and partners.
Customization: Users can sometimes customize the types of content they want to see based on their interests. However, the extent of customization might vary depending on the device’s software version and region.
Data Usage: Streaming videos and other content through Samsung Free might use mobile data if you’re not connected to Wi-Fi. Users should keep an eye on their data usage if they frequently use this feature.
Disabling Samsung Free: If you find that you don’t use Samsung Free or would prefer not to have it on your home screen, you can disable it.
Updates and Variations: Samsung’s software interface and features can vary between different models and versions. As a result, the availability and functionality of Samsung Free might differ on various devices.
How to remove Samsung Free:
Press and hold on an empty area of your Galaxy phone’s home screen to access the home screen settings. You can also pinch two fingers inward to reach this screen.
Swipe to the left-most home screen, where you’ll find “Samsung Free.”
Tap the toggle switch at the top of the screen to disable Samsung Free.
To re-enable Samsung Free, repeat steps one and two, then toggle the “Samsung Free” option again.
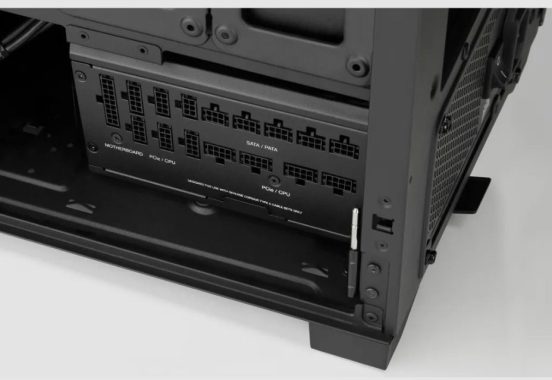
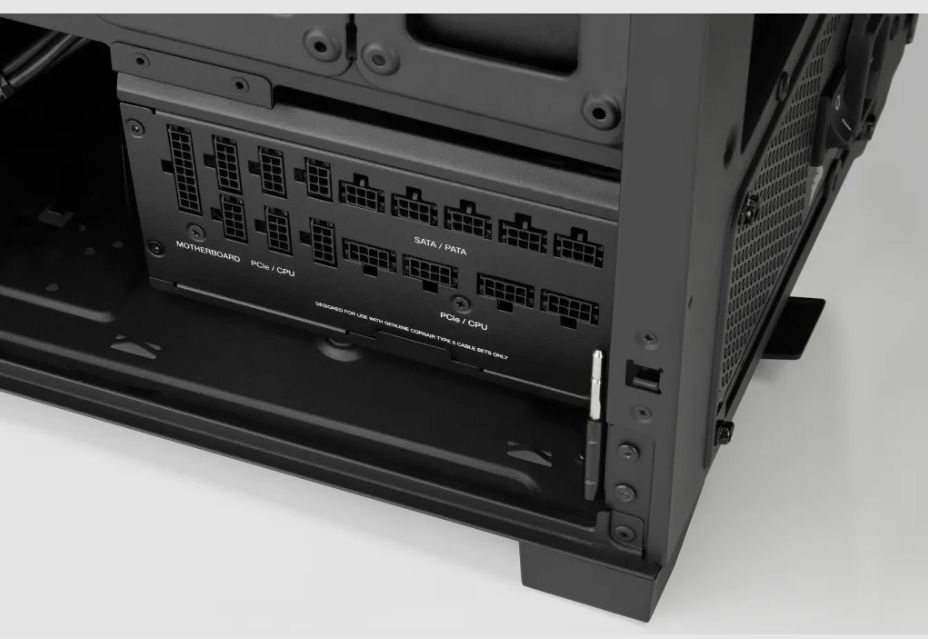
The Corsair RM1200x SHIFT PSU brings a refreshing change to cable management with its innovative side-mounted modular bay design. This series introduces the “Shift” suffix, highlighting the relocation of the modular connector panel from the back to the side, allowing easy access to cables and connectors, particularly in wide chassis setups. It’s important to note that compatibility with all cases may vary, but this design enhancement encourages chassis manufacturers to adapt.
The RMx SHIFT series excels in supporting PC building and upgrading, adhering to ATX 3.0 standards, and offering a ten-year warranty. With fully modular micro-fit connectors and Japanese 105°C-rated electrolytic capacitors, reliability and durability are assured. The 140mm fluid dynamic bearing fan ensures silent operation, especially in Zero RPM mode, during low and medium loads.
The Corsair RM1200x SHIFT PSU stands out with its unique side-mounted modular bay design, although opinions on this innovation vary. The PSU performs admirably, maintaining industry-standard efficiency levels. Noise output is low, thanks to the switch to an FDB fan in the RMx units. The series features build quality to last beyond the extensive warranty, utilizing high-quality Japanese capacitors.
Efficiency is optimal at half of the maximum load rating, achieving 92% efficiency at 230 Volts. The PSU is ideal for gaming setups with high-end graphics cards, consuming around 350 to 400 watts during intense gaming. While efficiency ratings range from Bronze to Platinum, the differences are small and have minimal impact on energy consumption and bills.
The RMx SHIFT series PSU is stable, with no complaints about voltage drops at half load. Some ripple tests suggest room for improvement, but overall, the product is expected to perform well. Aesthetically, the series boasts a captivating design, combining style and functionality. The modular design allows customizable cable management, keeping the system interior clean and organized.
As the Corsair RMx SHIFT series gains traction, its impact on the PSU market begins to resonate with users who appreciate the benefits of its side-mounted modular bay design. The ability to access connectors easily has simplified the process of system maintenance and upgrades, especially for enthusiasts who value clean and organized interiors. This innovative approach, while limited by case compatibility, sends a clear signal to chassis manufacturers to adapt to this new trend, potentially leading to a broader range of compatible cases in the future.
The performance aspect of the RMx SHIFT series, coupled with its focus on efficiency, ensures that it meets the demands of modern gaming and high-performance computing. The shift to an FDB fan has improved noise levels during typical operation, offering a quiet computing experience. The high-quality Japanese capacitors and the extended ten-year warranty highlight Corsair’s commitment to reliability, reassuring users of a long-lasting and stable power supply solution.
Efficiency, as a critical factor for power supplies, aligns with the industry standards, and the RMx SHIFT series doesn’t disappoint in this regard. While the differences between efficiency ratings (Bronze to Platinum) are relatively small, the series strives to achieve an optimal balance, especially in the 350-400 watt range that caters to gaming PCs with demanding graphics cards. Users can appreciate the long-term cost savings on their electricity bills thanks to this focus on efficiency.
The aesthetics of the RMx SHIFT series further enhance its appeal. Its sleek and visually captivating design, with dark accents and black sleeved cables, provides a clean and elegant look that complements modern gaming rigs and high-end setups. The modular design not only aids in cable management but also adds a touch of customization for those who prefer a tailored interior layout. Corsair RM1200x SHIFT PSU 80 PLUS Gold Fully Modular price: $269.99
The journey of the Corsair RMx SHIFT series is marked by innovation and practicality. It addresses challenges and sparks conversations about the future direction of PSU design. Corsair has introduced a functional change that benefits users with ample PC chassis space, but it’s also an encouragement for the industry to evolve. This series has opened the door to new possibilities, and as the PSU market evolves, we can expect further refinements and adaptations that cater to a wider range of cases, offering the convenience of the side-mounted modular bay to an even broader audience. Whether this concept becomes a staple or evolves into something even more revolutionary, the RMx SHIFT series has undoubtedly left its mark on the world of power supply units.