The below steps would show you how to play and watch Popcorn Time videos or streamings on VLC media player:
Make sure you have downloaded and installed both Popcorn Time and VLC media player on your pc. Start Popcorn Time client on your computer. On the primary user interface, locate the target movie, and then double click the movie you want to playback. Popcorn Time will begin to load target video. It will play back loaded movie after loading completes. On your pc, launch VLC media player and then click the “Media > Stream” option on the menu bar. On the “Open Media” window, click the “+Add” button and after that navigate to the loaded movie in Popcorn Time folder for loading it to VLC media player. Once you find target Popcorn Time loaded video, check it and click on the “Open” button. Next, follow the on-screen suggestions to continue. Then, the Popcorn Time video will show up in VLC media player.
Popcorn Time is a excellent solution to take pleasure in online videos and streams. You may get multiple options to help you solve the problem of VLC can’t play Popcorn Time videos. You could check out to modify the VLC media player and Popcorn Time configurations, or turn to Popcorn Time video converter software regarding to your own requirements.
VLC Not Playing on Popcorn Time, How to Fix?
Occasionally, VLC media player might not play Popcorn Time movies or videos for you. How to fix this issue? In fact, there are 3 efficient solutions for you to turn to.
Download and Install VLC in the Default Location
For Windows users, the default VLC application installation folder is C:\Program Files For macOS users, VLC player must be installed in the /Applications location
Change VLC Settings
You could also adjust the VLC media player settings to make it run on Popcorn Time video playback:
Start up VLC media player. Click “Tools > Preferences” window. Tap “Video > Output” option and then open the drop-down options. Select “Automatic > Save” button successively. Close and quit VLC media player and after that relaunch it again.
Load Popcorn Time Movies to VLC
You can also manually load Popcorn Time videos to VLC media player for playback:
Open Popcorn Time, select a desired movie you want to watch and tap “Watch Now” to play it. Don’t pick any external video player. Right after the Popcorn Time movie gets smooth playback, run VLC video player. In VLC, click “Media” > Open File > Downloads > Popcorn Time > tap “Preload” file folder > open the folder with the specific date > select the Popcorn Time movie you’re playing. Now, this movie is switching to VLC player for playback. Make sure your VLC is release 3.0.8 or above.
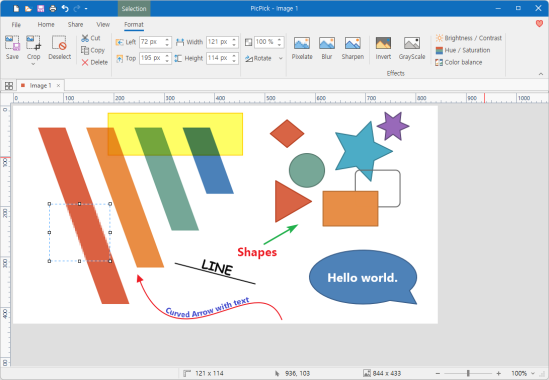
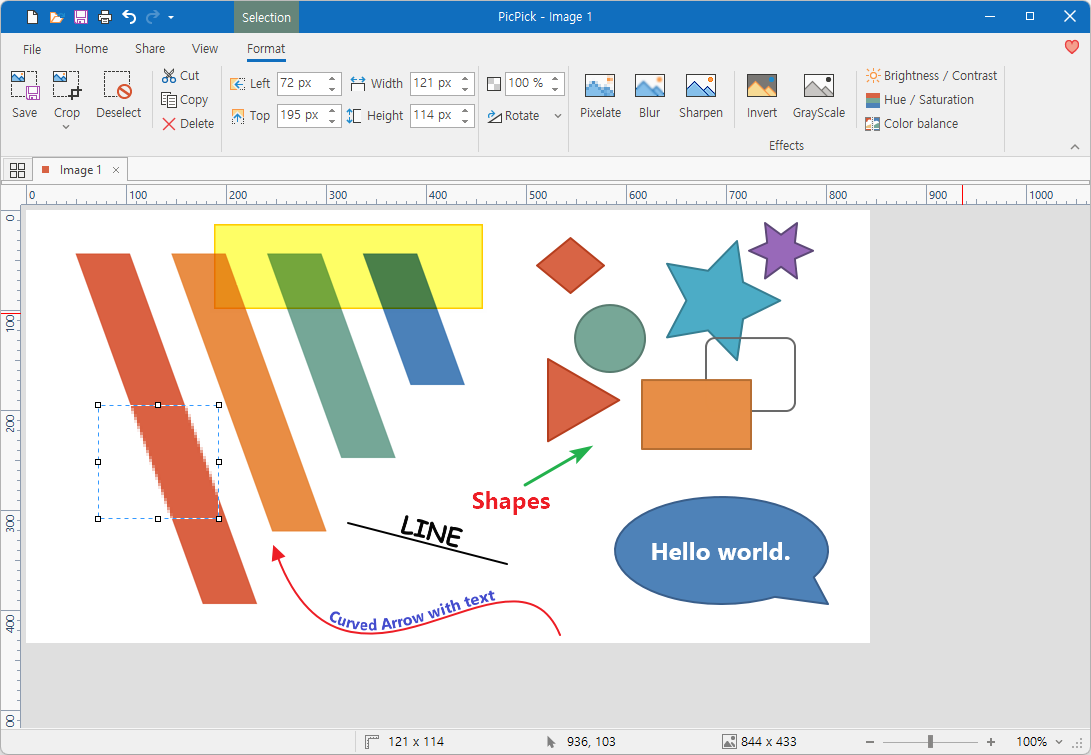
PicPick is a complete editing tool for making screenshots, modify them, and personalize them using a huge range of editing tools inside the user interface.
If you require to take screenshots daily or even more frequently, using the Windows built-in screenshotting tool might not be the very best choice. While it does function some fine tools, you won’t have the editing tools at your disposal very simply, which is why many people turn towards third-party applications alternatively.
One of the ideal ones is a PicPick tool. It is an application focused to taking screenshots and editing them, as it features a awesome palette of options for editing the screenshots. It allows you to customize how you take screenshots, where you keep them, and how they look in a bit more detail.
Take and Edit Screenshots The 1st thing you will notice with this software is that it will appear very comparable to Paint in Windows. In fact, it will offer some very similar tools, but it is also more extensive in some elements of use, particularly when it comes to editing tools.
To take screenshots, you will first want to assign the hotkey for managing them. You can select which button will execute the screenshot-taking capability, making it simple for you to take it quickly.
You can also pick whether you want to capture the whole screen or just a part of it – it’s totally up to you.
Personalize the Application It is also excellent when it comes to tailoring the entire experience to your requirements. You’ll be able to modify many aspects in the Configurations panel, such as where you’ll save files, how you’ll name them, and the hotkeys that you’ll use to take screenshots. You can as well select the autosave function if you want and a lot of other tools with such a software.
Summary PicPick is a detailed screenshot-taking tool that helps you to take screenshots and then edit them with simplicity, as it comes with a wide range of editing tools that you can choose from.
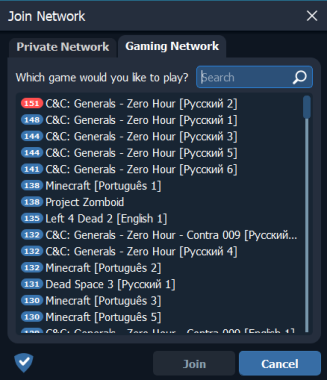
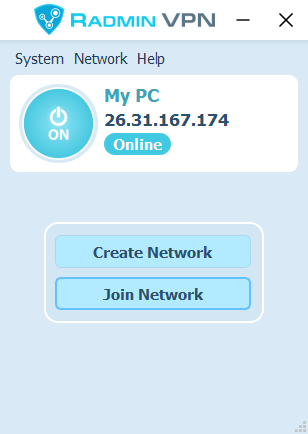
Radmin VPN is a excellent choice if you would like to create virtual private networks, 100% free, which you can use for a numerous reasons, such as video gaming, keeping secure on the internet, and much more, many thanks to this tool’s capabilities. It is designed to be an user-friendly application that assists users create their virtual private networks and connect to the networks created by some other users.
It is followed by an intuitive user interface that makes it simple for its users to create these networks and join other networks simply and easily. A great thing about Radmin VPN is that it can provide a good operation level even for those users who don’t have a lot of technical knowledge.
Photo: Radmin VPN
First off, it’s really worth mentioning that you will need to install the software, but it won’t offer you any extra software along the way. To be able to get started, you can start creating new VPN tunnels in a pair of clicks. In the list, you’ll be able to see the connections you’ve made and the connections you’ve connected to in the past several days or lately. Right from there, you’ll be able to see the info, such as the IP, and copy it to the clipboard in situation you’ll need it later.
Connect to VPNs and Create Your Own Radmin VPN is a fine tool for building your VPN networks that other users can use to connect. To do that, you’ll have a wide range of possible choices and functionalities to set up your network.
You will be capable to access the node operations and functions, modify the credentials that allow users to connect to the network, and a lot more.
At the same time, you will also be able to connect to other networks along the way. You can also use the Radmin Remote Control, which will be nice if you require a way to connect to another pc of your choice remotely. Play your preferred LAN games with your buddies over the Web. Totally free Radmin VPN does not limit the number of gamers. Thanks to high speed of Radmin VPN you will not see the difference – you will play your favourite games as if you were playing in the LAN. 100% free – Radmin VPN is absolutely free software, with no advertisements and any kind of paid features.
Radmin VPN
Bottom line Radmin VPN is a helpful tool for creating VPN networks and connecting to other networks, enabling you to surf the web safely and play online games.
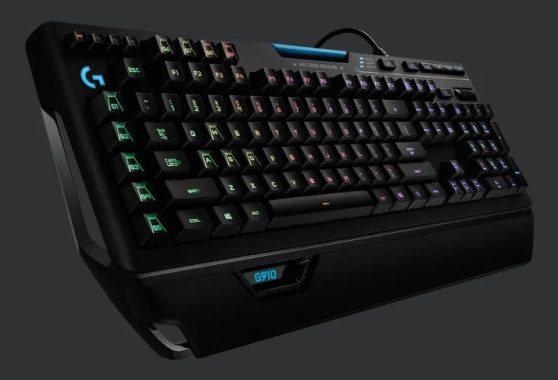
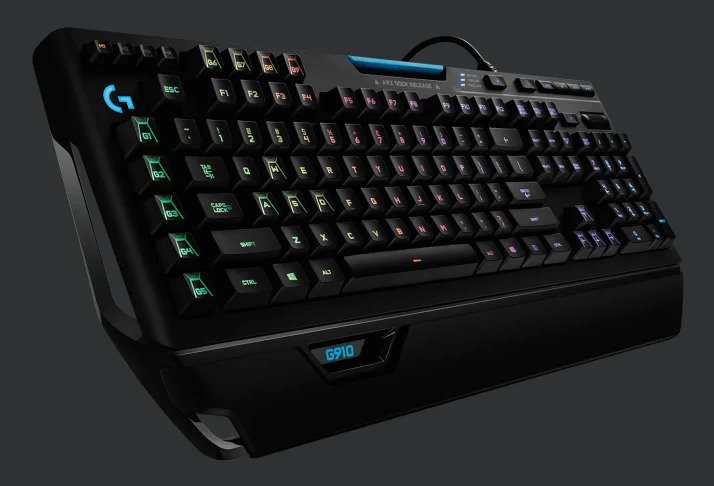
The Logitech G910 looks quite cheap compared to other mechanical gaming keyboards. The frame is made of thin plastic, and the keys have an unusual notched design. They feel a bit cheap like the Razer Cynosa keys. The finish is prone to oily shine and fingerprints. For a better built keyboard, check out the Razer Black Elite.
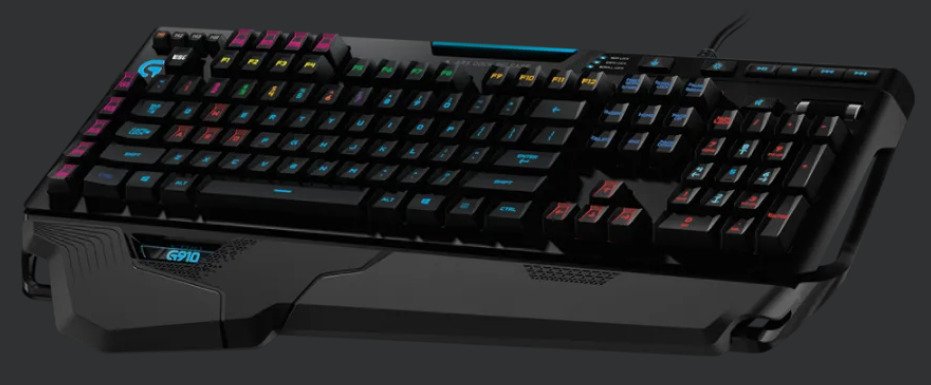
This keyboard does not offer great ergonomics. The palm rest is fixed and is only useful for the left side of the keyboard. It seems that the rest of the wrist was only done with players using their left hand on the board with their right hand on their mouse in mind. This keyboard quickly causes fatigue when typing and is quite uncomfortable for the right hand. If you want a keyboard with a detachable palm rest, consider the Logitech G513 instead.
Currently, the Logitech G910 Orion Spark offers a plethora of design innovations, comfortable options, features, and dedicated functions that justify its $180 price tag. The ARX app is provided free of charge and holds immense potential. Moreover, the customizable illumination sets this keyboard apart from others, creating a striking visual presence even when unattended. When it comes to gaming and typing, it reigns supreme in its price range.
While the Orion Spark excels in design, a comparable experience can be obtained with the Logitech G710+. The standout feature of the Orion Spark is its wide range of backlighting options, allowing you to choose between a dignified blue, a pulsating rainbow effect, or individual key colors (with millions of options available, even similar colors appear distinctly). The Logitech Gaming Software simplifies the customization process, offering a variety of lighting patterns to suit your preferences. You can create effects such as random key lighting, color changes upon pressing, or assign specific colors for different functions. Personally, I found programming the 1 key to be green before pressing, red when pressed, and yellow during skill recharge quite enjoyable.
While Logitech’s membrane keyboards have had mixed reviews, their previous mechanical offering, the G710+, was highly regarded, and I was eager to see how Logitech would build upon that success. The result is a keyboard that closely resembles its predecessor, incorporating numerous intelligent design choices.
The Logitech G910 has excellent additional features. It has dedicated multimedia keys, many programmable macro keys and the AR dock. The stand itself doesn’t do anything, but you can use the AR companion appx Please note, however, that this dock does not charge the mobile phone and the application is only useful for some games, and does not appear to be compatible with the Logitech G HUB, only with the previous Logitech game software.
This keyboard uses patented Logitech Romer-G Tactile switches. They have a small tactile protrusion before the actuation point, like the popular Cherry MX Brown switches.
ROMER-G TACTILE
The choice of top esports professionals, Romer-G switches deliver quiet, precise mechanical performance with incredible feel and durability. G910 features the tactile variant with discernible actuation feedback. Romer-G is a completely custom design with enhancements specifically for gaming. The short-throw 1.5mm actuation and low-force 45g actuation point is 25% faster than the competition’s standard mechanical switches.
The Logitech G910 keyboard is an acceptable option for office work. This keyboard has mechanical switches that are not too noisy, but its design provides mediocre ergonomics. It has half a palm rest on the left side, which makes it uncomfortable and tiring to use both hands to type. The Keys also feel cheap and have an unusual jagged design that makes typing more difficult if you don’t hit them in the center. Photo: LogitechLogitech G910 is an excellent gaming keyboard. It has very fast-acting Romer-G Tactile switches that have a very short pre-travel distance. You can set up a lot of macros, and it also has full RGB lighting, but the board looks a bit flimsy and cheap. Logitech G910 Orion Spark is a solid gaming keyboard with some cool features, but maybe it’s too game-oriented. While the customizable functions are great, the design, especially the asymmetrical distribution of the sculpted keys, is beneficial for the game, but not for everyday productivity. Logitech G910 Orion Spark is an perfect gaming keyboard equipped with patented Logitech Romer-G touch switches. Unfortunately, while the keyboard offers superb RGB lighting, it looks pretty cheap and the keys have an unusual indented design. It also has a palm rest, giving the impression that this keyboard is made only for games, since the right hand should be on the mouse instead of the keyboard. Video: YouTube/Logitech
Despite a few minor drawbacks, the Logitech G910 Orion Spark proves to be a dependable companion for gamers across various genres. Although it may require a significant investment, this device guarantees a captivating product that will illuminate your gaming setup for years to come.
G910 Spark Physical Specs
Height: 19.88 in (505 mm)
Width: 8.26 in (210 mm)
Depth: 1.39 in (35.5 mm)
Weight: 3.30 lbs (1.5 kg)
Cable: 6 ft (1.8 m)
ROMER-G TACTILE KEY SWITCHES
Durability: 70 million key presses
Actuation distance: 0.059 in (1.5 mm)
Actuation force: 1.58 oz (45 g)
Total travel distance: 0.11 in (3.0 mm)
REQUIREMENTS
Windows 7 or later
macOS X 10.10 or later
Chrome OS
Android 3.2 or later
Optional*: Internet access for Logitech G HUB. Advanced settings require G HUB 8.96 or higher. Refer to LogitechG.com/downloads (Logitech G HUB) for details.
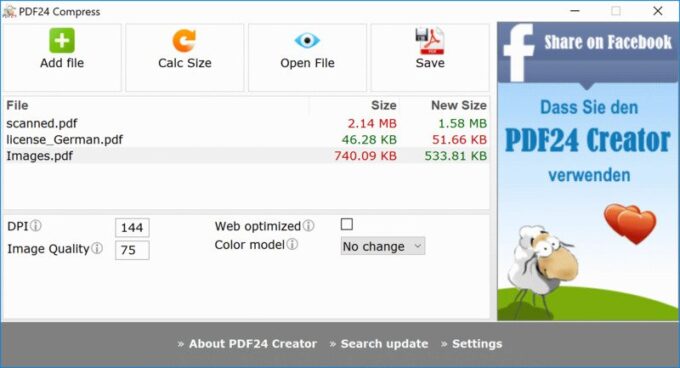
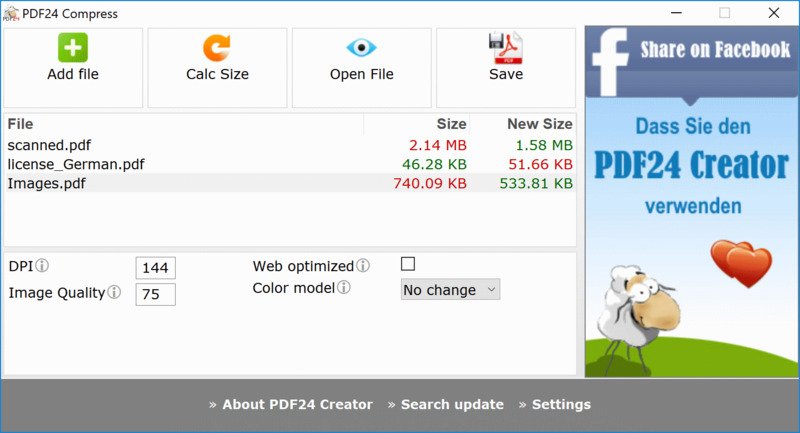
PDF24 Creator is a free PDF creation software that enables you to create, control, merge, split, and execute some other jobs with PDF files, as it arrives with a huge array of functions that makes it possible to make the most out of your PDFs.
PDF is one of the most broadly used formats in the world. It is used to create reports, texts, invoices, and many other tasks. But doing work with PDF files might not be as uncomplicated as it seems. For one, you’ll need to have the correct tools at your disposal to make it all possible. One this kind of tool is PDF24 Creator, an efficient tool for creating, organizing, merging, and doing all tasks with PDF files.
It’s one of the most widely used PDF tools on the market, and more notably, it’s totally free to use, delivering all of the same capabilities that you would come to expect from more advanced PDF tools to the marketplace for free. Personalize, Create, and Manage PDFs To start with, we must mention that it’s possible to create PDFs from scratch using this software. It has a pre-installed file explorer, making it easy for you to transfer data files into the user interface, but it’s also simple to create them for the first time.You will be able to add more text and numerous features to the PDF, merge, split, and create PDFs, as well as control certificates, exchange pages throughout different files, arranged document protection, and take care of other data inside the application. Photo: pdf24.org You’ll also be able to modify the appearance of the file and insert photos to it. The PDF24 Creator is effective to manage multiple PDF printers. Each PDF printer can be set up in a different way. For instance, if you want to keep a file automatically, you can very easily do this with a dedicated PDF printer. To manage PDF printers, use the configurations utility. There you can add, remove or configure PDF printers.
Convert to some other Formats If you are working with a PDF file, but want to convert it to some other format, it’s possible to do that with this application. Some of the most commonly supported formats inside of the tool contain PS, PCL, PNG, JPEG, BMP, PCX, TIFF, PSD, or TXT.Summary PDF24 Creator is a frequently used PDF tool for producing and managing PDF files, as it comes along with numerous helpful tools.
Create PDF files from almost any Windows application, re-order pages, merge, split, and password-protect your existing PDF files – Download PDF24 Creator HERE
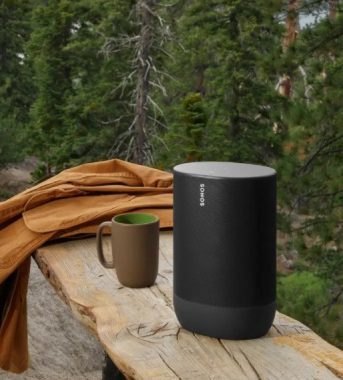
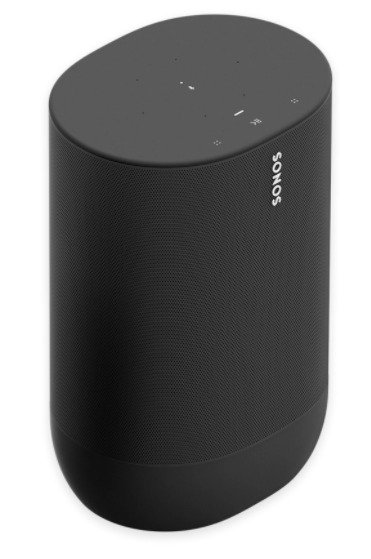
The Sonos Move speaker, just like its name implies, is incredibly portable. It is not quite big and can be used wirelessly with its integrated battery. There is also a empty part at the back of the speaker that acts as a handle for one-hand holding. If you’re searching for a more compact Sonos speaker that is even much easier to bring along with you when you’re out and about, take a look at the Sonos Roam and the Sonos Roam SL. The Sonos Move’s build quality is excellent. It feels really reliable, though the plastic material on its top may possibly feel a little bit cheaper than the other parts of its build. Its drivers are secured by a metal grille, and it’s rated IP56 for dust and water resistance, which means it’s certified to be protected against direct contact with water for up to 3 mins and dust for close to 2 to 8 hours.
The Sonos Move’s battery overall performance is fantastic. We have tested around TEN hours of constant playback when used wirelessly, though battery performance can also differ based upon on your usage, and your real-world experience may vary. You can either use the charging dock or a standard USB-C connector for re-charging, although there is no cable included. It will go into sleep mode after being idle for a while, or you can force the sleep mode with a simple press of the power button. The manufacturer as well sells replacement battery sets for this speaker should its original battery wear out.
The Sonos Move’s Sonos S2 application is excellent. There are bass and treble sliders you can use to fine-tune the speaker’s sound to your taste. You can use the application to pair this speaker to an additional compatible speaker to create a stereo pair. There is also a multi-room feature you can use to listen to different audio in different rooms of your home at the same time. Regrettably, it does not have more robust sound customization functions for example a graphic EQ. Its Trueplay room correction option is also only available with iOS products, which may dissatisfy some Android customers.
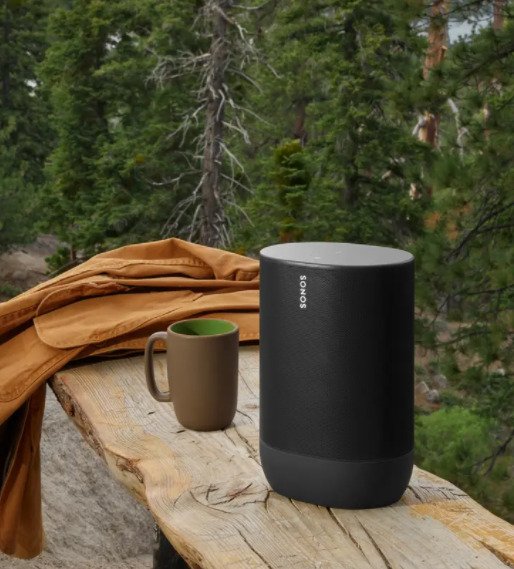
The Sonos Move speaker is great for outdoor use. It’s well-built with an IP56 rating for dust and water resistance, so you don’t need to be concerned about it getting a little bit dirty or wet when taking it outdoors with you. Its battery lasted over 10 hours in our tests, making it appropriate for long listening periods spent outdoors, even though this can vary depending on your usage. It can be paired to up to 2 devices at once, which is practical when you need to quickly switch between audio sources. Its Bluetooth range is also really good, so your paired device continues to be connected even if it’s far away from the speaker. The Sonos Move is an superb voice assistant speaker. It can capture your voice from pretty far and fully understand you. It has both Alexa and Google Assistant built-in. You’ll need to be connected via Wi-Fi as the voice assistants don’t work through Bluetooth, unfortunately. For those who have a privacy aspect, you can very easily mute the microphone so that it doesn’t always listen to you.
The Sonos Move speaker is good for music. With its Trueplay room correction function turned on, its sound profile is very well-balanced, making it suited for listening to lots of various types of music. Unfortunately, there’s a lot of compression present in the bass range at maximum volume that can affect the quality of your music. It also needs two units to play stereo audio and down-mixes stereo content to mono when using it on its own, which isn’t very as impressive. That said, for a non-360-degree speaker, its directivity is quite remarkable, so your audio sounds crystal clear from most angles. The Sonos Move is merely fine for watching video content. With its Trueplay room correction feature enabled, it has a well-balanced sound profile, but won’t be ideal if you listen to videos via Bluetooth due to its latency. Also, it down-mixes stereo content to mono when using it on its own, which isn’t very fascinating. On the benefit, AirPlay users should not notice any delay, which is great. Photo: Sonos
The Sonos Move is a very good all-around portable speaker that has a well-balanced sound profile with its Trueplay room correction function enabled, making it suitable for a wide range of audio content. It supports both Bluetooth and Wi-Fi, it’s very well-built, and has a handle for one-hand transporting wherever you go. Additionally, its voice assistant efficiency is really impressive and works at a great distance. Unfortunately, Trueplay is solely available with iOS devices, which may disappoint many Android users. Its soundstage also is not very immersive due to its mono design. That said, its directivity is still very good for a non-360-degree speaker, so your audio sounds very clear from most angles.
Amplifier
Two Class-D digital amplifiers.
Tweeter
One tweeter creates a crisp and accurate high frequency response.
Mid-Woofer
One mid-woofer ensures the faithful playback of mid-range vocal frequencies plus deep, rich bass.
Microphones
Far-field microphone array.
Microphone LED, hard-wired to the voice microphones for extra privacy control so you’re always aware when the microphone is active.
Voice Control
Integrated voice control.
Networking*
Wireless Connectivity
Connects to WiFi network with any 802.11a/b/g/n 2.4 or 5 GHz broadcast-capable router
General
Power Supply
Charging base:100-240 VAC, ~50/60 Hz, 1.2 A. Output: 18.0 VDC, 2.5 A, 45.0 W
USB port: USB type C PD power with 45W, 20V/2.25A.
Battery pack
Capacity: 2420-2500maH
Replacement: Visit our website www.sonos.com for more information.
Disposal: Check with your local waste or recycling company to determine the proper disposal method in your area.
Dimensions (H x W x D)
9.44 x 6.29 x 4.96 in (240 x 160 x 126 mm)
Weight
6.61 lb (3.0 kg) (including the battery)
Operating Temperature
32º to 113º F (0º to 45º C)
Storage Temperature
-13º to 158º F (-25º to 70º C)
Humidity Resistant
Move meets IP56 water and dust resistance levels. Just don’t leave it out in a soaking rainstorm.
Note:The charging base included with Move is for indoor use only.
Product Finish
Black with black grille
Package Contents
Sonos Move, charging base, and Quickstart guide.
Charging base
Just set Move on the charging base for easy recharging.
Charging base is for indoor use only—be sure to keep it dry.
Note:Move’s remaining battery life is always visible in the Sonos app.
AC power
100-240 VAC, ~50/60 Hz, 1.2A. Output: 18.0 VDC, 2.5 A, 45.0 W
Windows 11 usually installs USB 3.0 drivers by default or automatically. If USB 3.0 devices aren’t working, however, the USB 3.0 drivers may be missing or corrupt.
Install USB 3.0 Drivers on Windows 11
Follow these tips to install USB 3.0 drivers on Windows 11:
Open the Windows Start menu and perform a Windows Search for Device Manager. Device Manager should appear as the first result. Select it.
Expand the Universal Serial Bus controllers category in Device Manager.
If it is visible, right-click USB Root Hub (USB 3.0) and then click Uninstall device. If it’s not visible, proceed to the next step.
Some PCs will display multiples USB 3.0 hubs. Uninstall every entry shown before proceeding.
Open the Action menu in Device Manager and select Scan for hardware changes. Windows 11 will automatically search for devices, including the USB Root Hub (USB 3.0) and install drivers.
If successful, the USB Root Hub (USB 3.0) will reappear in Device Manager. Reboot your PC if it does not appear.
Photo: Pixabay
Install USB 3.0 Drivers With Windows Update
The steps above will install USB 3.0 drivers on Windows 11 but won’t update them. That could be a problem if your USB 3.0 driver is faulty. While you can update drivers through Device Manager, Windows Update is the better choice.
Open the Windows Start menu and select the Settings app.
Select Windows Update from the left-hand menu.
Tap Advanced options.
Select Optional updates.
Expand Driver updates and select the drivers shown. Then tap Download & Install. Download and installation may take some time, but you can continue to use your PC while this happens in the background.
Manually Install USB 3.0 Drivers on Windows 11
The steps in this guide will install USB 3.0 drivers on most PCs, but you may face issues if Windows 11 doesn’t recognize the make and model of your PC. You’ll need to track the drivers down and manually install them.
Your PC manufacturer’s support website will often provide these drivers. Support sites differ between manufacturers, so we can’t provide step-by-step instructions. However, you’ll generally need your PC’s model number or serial number to search for your PC. This can be found on a label printed on your desktop or laptop.
If drivers aren’t available through your PC manufacturer, or the PC is a custom build, you can try downloading drivers directly from the manufacturer of your PC’s motherboard. Download a Windows system information tool and launch it. Note the brand and model number of the motherboard manufacturer, head to the manufacturer’s support site, and search for the motherboard model number. This may lead you to USB drivers you can download and install.
If Windows can identify the printer automatically, installing it takes just a few of minutes and there’s not really anything you have to do except click a few buttons. A printer can be added manually or automatically, so both sets of directions are provided.
Open Settings. One way to get there is by right-clicking the Start button and selecting Settings.
Navigate to Bluetooth & devices > Printers & scanners.
Select Add device, wait a few seconds for Windows to locate the printer, and then select Add device next to the one you want to install.
Wait while the printer gets installed. It’ll show up in the list with any other printers and scanners you’re already using.
Photo: Pixabay
How to Manually Add a Printer to Windows 11
If your computer isn’t recognizing the printer automatically, you can try to add it manually.
Open Settings, and go to Bluetooth & devices > Printers & scanners > Add device.
Wait a few seconds while Windows attempts to locate the printer automatically. When you see the Add manually link, select it.
There are several options here, depending on your situation and how you plan to connect to the printer.
All five options work for wireless or network-attached printers. If your printer is attached locally/directly to your computer, choose Add a local printer or network printer with manual settings, and then Next.
Choose the port the printer is attached to, and then select Next.
If it’s connected via USB, select it from the list. There are also options for parallel (LPT) and serial (COM) ports.
Next are your options for installing the printer driver. If the printer came with a disc that includes the driver, select Have Disk to browse for it. Otherwise, choose Windows Update.
Wait while Windows populates a list of options. You’ll see a screen with the message Windows is updating the list of printers. This might take a few minutes.
Choose the printer’s manufacturer from the left column, and then the model from the right column. Select Next.
Name the printer, and then select Next. This can be anything you want, since it’s just for your reference.
Wait while the printer is installed in Windows 11.
Choose Do not share this printer, and then select Next. Unless, of course, you do want to share it with other devices on your network, in which case select Share this printer and fill out those details.
You should now see a success page. Select Print a test page if you want to test the printer, otherwise choose Finish to see the printer in your list of devices.
LDPlayer is an Android emulator that focuses on providing emulation for the many modern Android video games right on your personal computer. It has been boosted to run really efficiently on PC hardware.
It means that it has much better storage, GPU, CPU, and RAM abilities than some other similar software. It can take your PC and turn it into a highly effective gaming laptop or desktop machine. It does this while allowing you to run the most powerful mobile software with a high level of compatibility.
Compatibility One of the very outstanding functions about LDPlayer app is that it can control a variety of different types of games that you might want to play. Think of favorite game titles like Clash Royale, Clash of Clans, PUBG, or also Call of Duty.
You can increase your bandwidth and latency so that you can play more effectively and be successful more often. LDPlayer – Installation and use LDPlayer app is lightweight. It can be installed on varieties of Windows vers. that are the most modern installation. If you want to get the most out of this emulator software, the programmers say you should check out their FAQ and tutorials that they have made available on their website.
Photo: LDPlayer
This online help is a method to find out any types of solutions that you might be looking for. It comes with rendering, smooth frames, and a lot more. Keep in mind that the better your PC hardware is, the better your gaming experience will be.
However, no matter what, you shouldn’t have much trouble playing their 2D games.
Customize There are 4 tabs in terms of modification. This goes from innovative, standard properties, all the way to network and shortcuts. You can modify these configurations however you want for the emulation.
The advanced tab is crucial. This is simply because it keeps the configuration. The configuration is a rendering setting. You will discover many different customized resolutions that you might want to play around with.
Here, you can as well find active CPU cores, RAM, and you can even setup strings to tell the servers which machine you’re emulating at that time in the game. The basic tab, on the other hand, deals with things like microphone support, language, rotation, and window sizing. Support There is the capability to create custom maps and micros. That way, if you want support for finger taps or mouse and computer keyboard, you have your decision between the two. This makes it much easier to go with your personal playstyle.
Conclusion LDPlayer app is a superb way to emulate Android games on your COMPUTER. It’s quick, it’s light-weight, and it’s simple to use. In addition, there are a lot of options to personalize your experience. Mainly because of those reasons, it definitely stands out from the rest. And that is why we think players must consider installing it right now.
File size: 4.06 MB
License: Free
Supported OS: Windows 11 / Windows 10 / Windows 8 / Windows 7
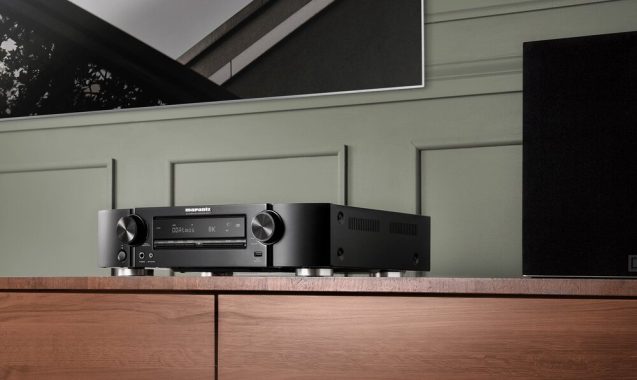
Marantz recognizes that not every single room can support a large home theater receiver. That is why they produced the NR1711. This slim line, 8K-compatible receiver can easily power up to 7 speakers at the same time, yet suits into places where a typical receiver may be too tall.
Use it to power your 5.1.2-channel Dolby Atmos system. Or go with a 5.1-channel set up, and power an extra pair of speakers in another room at the same time.The low-profile NR1711 provides top quality home theater sound without taking up a lot of space. Last year’s lineup of Marantz slimline home theater receivers was very popular with consumers. 2022 brings even more functions to the table, such as 8K video upscaling, Bluetooth transmission to headphones, and improved Audio Return Channel (eARC), which lets you pass full-resolution surround sound signals from your TV to your receiver.
A lot of power under the hood The Marantz NR1711 uses a high-current, discrete power amplifier for every of its 7 channels. So while 50 watts per channel may not sound like a significant on paper, this receiver has plenty of horse power to drive most small- to medium-sized speakers with simplicity.
Take pleasure in music from a wide variety of sources The Marantz NR1711 8K Ultra HD AV receiver isn’t only a excellent choice for watching movies – it’s lot of fun with music, as well.
Stream tunes from your smartphone or tablet through Wi-Fi, Bluetooth, or Apple AirPlay 2. Or, use the built-in phono input for your turntable. You can even play high-resolution tracks from a USB drive or networked pc.
Increase your system together with HEOS Built-in HEOS Built-in technology lets you access all kinds of different content via the NR1711. Listen to internet radio programs, or to preferred streaming services like Pandora®, Spotify®, and TIDAL.
You can additionally integrate the NR1711 into a wi-fi multi-room audio system with appropriate speakers or streaming components. Sophisticated room calibration The Marantz NR1711 8K Ultra HD AV receiver includes Audyssey MultEQ® – one of the industry’s best room-correction systems. Photo: Marantz
Audyssey measures the acoustics of your living room with the integrated microphone, and then fine-tunes the output of your system to ideal match the unique sonic characteristics of your space. The resulting sound is crystal clear, soft and ultra-detailed, with tight bass and significant dynamics.
The Marantz NR1711 is a highly capable home theater receiver that encompasses all the essential features. It provides an immersive three-dimensional surround sound experience, including overhead sound. With two additional height channels alongside 5.1 audio, it supports Dolby Atmos and DTS: X, which are object-based 3D audio formats. These formats contain metadata that determines the placement of audio objects, regardless of the number of channels or speakers connected to the receiver.
Moreover, the NR1711 includes Dolby Atmos Height Virtualization and DTS Virtual: X, which replicate elevation channels without the need for dedicated speakers. While not a perfect substitute for physical elevation speakers, these features enhance the illusion of three-dimensional sound compared to having them turned off.
If you prefer not to have overhead sound but desire an extra pair of rear speakers, the receiver can easily be configured as a standard 7.1 setup. However, if you have the option to install ceiling speakers or use specialized Atmos speakers on top of the front speakers, I highly recommend doing so. This configuration expands the soundscape, creating a larger and more realistic audio experience.
The NR1711 also incorporates cutting-edge video circuits, enabling support for 8K video signals, as well as 4K at 120 frames per second. It also supports variable frame rate, which is particularly beneficial for gamers. The receiver caters to the gaming experiences provided by consoles like the PS5 and Xbox Series X, delivering full Ultra HD resolution and lightning-fast movements.
Additionally, the NR1711 features eARC (Enhanced Audio Return Channel), allowing high-resolution audio to be transmitted from the TV through the connected HDMI cable. This enables you to connect all your video and gaming sources directly to the TV, extracting the audio in high definition to the amplifier via a single HDMI cable. For gaming purposes, I strongly recommend utilizing eARC to achieve the lowest possible input lag, which is crucial during gameplay.
Being an all-in-one surround receiver, the NR1711 excels in its ability to stream music. It incorporates the HEOS interface, similar to Sonos, enabling other HEOS products to be synchronized in a multi-room setup. By downloading the HEOS app and logging into your preferred music services like Spotify, Tidal, or Deezer, you can easily enjoy your favorite tunes. Although HEOS lacks support for Apple Music and YouTube Music, the receiver compensates for this limitation with built-in AirPlay and Bluetooth support.
Among the slim receivers we have tested in the past, Marantz consistently emerges as the top performer in its class. The NR1711, a 7.1 receiver, represents Marantz’s most impressive offering thus far.
The sound produced by the NR1711 is exceptionally well-balanced and pleasant. It possesses ample power to fill a small living room with immersive audio, even during action-packed and suspenseful movies. While it can also suffice for larger living rooms measuring over 25 square meters, it falls short of replicating the overpowering audio experience of a commercial movie theater, as it delivers 50 watts per channel.
Moreover, the Marantz NR1711 includes all the necessary features, including two memory slots for speaker autocalibration. This simplifies the process of testing different speaker setups and locations, allowing for seamless switching between configurations.
For those seeking a slim form factor without compromising sound quality, the NR1711 is an excellent choice. In this regard, there are few alternatives that can rival its capabilities and performance.
The Marantz NR1711 is a cutting-edge receiver that caters to a modern lifestyle, designed for a top-tier home theater experience. Its extensive feature set makes it a crowd-pleaser, offering a seamless audio setup for your home.
It features built-in HEOS, ideal for synchronized multiroom playback with other HEOS speakers. Apple AirPlay 2 serves a similar purpose, enhancing its versatility. With both 2.4GHz and 5GHz Wi-Fi options and Bluetooth connectivity, you can easily stream content from your mobile device or pair wireless headphones for private listening during late-night or personal moments. Notably, the expanded headphone functionality is readily available out of the box, thanks to an update introduced after the NR1710’s initial release. The twin Wi-Fi/Bluetooth antennas attach to the back panel with ease.
Support for object-oriented audio is included, covering Dolby Atmos and DTS:X. Even if you lack physical height speakers, the Marantz NR1711 offers Dolby Atmos Height Virtualization and DTS Virtual:X to simulate a three-dimensional audio experience without the need for dedicated height speakers.
When it comes to an affordable and seamlessly integrated home cinema solution, the Marantz NR1711 stands out. It’s well-equipped with a plethora of wireless connectivity options and introduces some exciting new features. Notably, it offers 4K 120fps support, and where available, 8K support, making it an enticing upgrade for those who own earlier NR models. What’s remarkable is that it delivers a performance far more powerful than its slimline form factor might suggest.
With a price of £650, the Marantz NR1711 is a fantastic choice for those seeking a future-ready receiver that combines an extensive feature set with stellar performance, making it an ideal addition to any home theater setup.