FreeSync is a technology developed by AMD (Advanced Micro Devices) for adaptive synchronization of the refresh rate between a computer’s graphics card and a compatible monitor. It is designed to address the issue of screen tearing, which occurs when the display refresh rate and the frame rate output from the graphics card are not synchronized.
Traditionally, monitors have a fixed refresh rate (e.g., 60Hz, 144Hz) at which they update the displayed image. However, the frame rate output by the graphics card can vary depending on the complexity of the scene being rendered. When the refresh rate and frame rate are not aligned, screen tearing can occur, leading to a visible horizontal split in the displayed image.
FreeSync works by dynamically adjusting the monitor’s refresh rate to match the output frame rate of the graphics card. This synchronization is achieved through the use of the DisplayPort or HDMI interface, which allows the graphics card to communicate with the monitor and exchange information about the current frame being rendered.
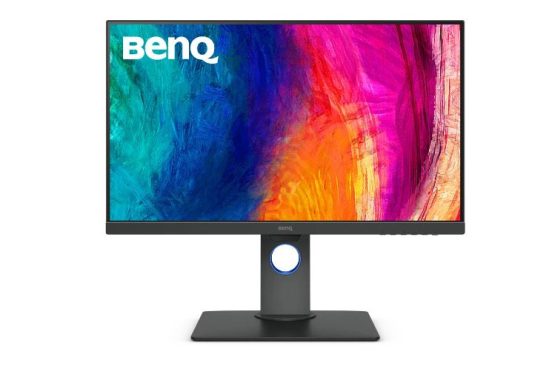
PD2700U – monitor with FreeSync technology photo: Benq
By synchronizing the refresh rate and frame rate, FreeSync helps to eliminate screen tearing and provides a smoother and more visually pleasing experience during gaming or other graphics-intensive tasks. It also reduces input lag, making the overall gameplay or graphics rendering more responsive.
It is worth noting that FreeSync is specifically developed by AMD and is compatible with AMD graphics cards. For NVIDIA graphics cards, a similar technology called G-Sync is available, but it requires specific hardware and is not compatible with FreeSync monitors. However, some FreeSync monitors may support a feature called “G-Sync compatible” or “Adaptive Sync,” allowing them to work with NVIDIA graphics cards to some extent.
To make FreeSync work with an NVIDIA graphics card, you need to ensure the following:
NVIDIA Graphics Card: You need a compatible NVIDIA graphics card that supports FreeSync. Starting from the GTX 10 series (Pascal architecture) and newer, NVIDIA GPUs have the capability to work with FreeSync monitors.
NVIDIA Driver: Make sure you have the latest NVIDIA graphics driver installed on your computer. NVIDIA has introduced a feature called “G-Sync Compatible” with certain driver versions, which allows FreeSync monitors to be used with NVIDIA graphics cards.
DisplayPort Connection: Connect your FreeSync monitor to your NVIDIA graphics card using a DisplayPort cable. HDMI connections may work in some cases, but for optimal compatibility and functionality, DisplayPort is recommended.
Enable G-Sync Compatible Mode: In the NVIDIA Control Panel, navigate to the “Display” section and select “Set up G-Sync.” Enable the “Enable G-Sync Compatible” option. If your FreeSync monitor is recognized as compatible, you should be able to enable G-Sync functionality for it.
It’s important to note that not all FreeSync monitors will work flawlessly with NVIDIA graphics cards, even in G-Sync Compatible mode. While NVIDIA has certified many FreeSync monitors as G-Sync Compatible, there may still be some monitors that exhibit issues like flickering or other compatibility problems. Checking NVIDIA’s official list of certified G-Sync Compatible monitors can give you an idea of which monitors have been tested and verified to work well with NVIDIA GPUs.
By following these steps, you should be able to utilize FreeSync functionality on your FreeSync monitor with an NVIDIA graphics card.
Chrome, being the default browser on Android phones, may not always meet your preferences or requirements. Whether you wish to avoid Google apps, prioritize stronger privacy safeguards, or simply have a secondary browser as a backup or for specific tasks, there are numerous alternative browsers available for download on Google Play.
However, when it comes to using a Android browser for business purposes, it is advisable to stick with trusted and well-known brands. Four such business-friendly alternative browsers are DuckDuckGo, Microsoft Edge, Firefox, and Opera. This guide aims to outline the distinctive features that set these browsers apart from Chrome, along with a few tips to help you maximize their potential. It’s important to note that unless stated otherwise, these browsers are free to use.
DuckDuckGo, known for its privacy-oriented search engine, extends its user privacy philosophy to its Android browser. The browser boasts a clean interface where new tabs are free from cluttered recommendations or news. To search the internet using DuckDuckGo, simply type your search words into the browser’s address bar.
DuckDuckGo’s browser actively blocks websites from tracking your online activities, resulting in a potentially faster browsing experience as trackers and most embedded ads are not loaded. The browser also claims to prevent websites from creating personalized profiles based on your browsing habits and device settings.
DuckDuckGo
To swiftly close all open tabs and erase your browsing activity and information, you can utilize the Fire button. Simply tap the fire icon located to the right of the address bar. A panel will appear, allowing you to select “Clear All Tabs and Data.”
In the event that you want to save your sign-in information for a specific website even after using the Fire button, you can “fireproof” the site to preserve its cookies and keep yourself signed in. Open the website you wish to save, and tap the three-dot icon on the browser toolbar. In the panel that appears, select “Fireproof This Site.” Note that third-party trackers on the site will still be blocked.
To view a list of the websites you have fireproofed, access the same panel and tap on “Settings.” Then, scroll down and choose “Fireproof Sites.”
Sometimes, certain websites may require you to disable privacy protection for functionalities like signing in. If you trust a website to track you, you can temporarily disable privacy protection for that specific site. With the website open, tap the three-dot icon on the browser toolbar and select “Disable Privacy Protection” from the panel.
To view a list of sites with privacy protection disabled, tap the three-dot icon, followed by “Settings,” and then “Unprotected Sites.”
If you use Microsoft 365 and the Edge browser on your PC for work, installingMicrosoft Edge on your Android phone can be convenient for keeping your work-related browser information, such as Collections or shared web links with your co-workers, in sync. You can simply sign in to Edge on your phone with your Microsoft 365 account to achieve this.
Similar to Chrome, Microsoft Edge comes with default privacy settings that tend to share your online activity with the browser’s developer and the websites you visit. However, Edge Android browser offers extensive privacy and security settings that you can manually adjust to align with your preferences.
By default, a new tab in Edge appears quite busy, displaying a search bar and icon links to suggested websites against a background image chosen by Microsoft’s servers for the day. Swiping up reveals a vertically scrolling feed of news and suggested articles.
Edge includes a reader mode feature that enhances article readability by removing unnecessary graphics and text from the web page layout. This mode may not always be available but is typically offered for long-form articles. You can identify the availability of reader mode when a two-page icon appears to the right of the address bar. Tapping that icon will reformat the text on the web page for easier reading.
One of Edge’s most impressive features is its ability to read aloud the text on a web page. To utilize this feature, open a web page and tap the three-bar icon on the right side of the browser toolbar. In the panel that opens, select “Read aloud.”
Note that Edge begins reading from the top of the page, which may include site names, menu items, and other extraneous content before reaching the main article. Therefore, it’s often preferable to enable reader mode (if available) as mentioned earlier and then tap the “Listen to this article” icon (a capital A with sound waves) for a better experience.
While the digital voice reads the page, a toolbar will appear at the top. Tapping the headshot icon on the right side of the toolbar opens the Voice options page. Here, you can adjust the voice’s reading speed, choose a different language for translation while reading (a wide range of languages are available), and even modify the voice’s gender and speaking style.
If you have a Windows 10 or 11 PC signed in to OneDrive using your Microsoft account, you can utilize Edge to upload documents, photos, or videos from your Android phone to your OneDrive cloud storage. To do this, tap the three-line icon on the browser toolbar, then swipe right on the panel that opens and select “Drop.” On the subsequent page, tap the “+” symbol in the lower left corner. A panel will appear, allowing you to choose either “Photo” or “Document,” which will open your phone’s photo album or file manager for selection. Alternatively, selecting “Camera” or “Video” will open your phone’s camera for capturing a new photo or video. Any item you create or select will be automatically uploaded to OneDrive.
On your Windows PC, you can find the uploaded items from your phone within the “Microsoft Edge Drop Files” folder in OneDrive.
Among the browsers mentioned in this roundup, Operastands out with its relatively cluttered default new tab. It features a panel that displays an overwhelming amount of news and articles across various categories, including numerous ads and sponsored content. Fortunately, you can disable this panel by tapping the three-dot icon in the upper right corner and selecting “Customize.”
Similar to Edge and Firefox, Opera also offers a reader mode. When available for an article on a web page, you’ll see an icon with the letter “A” on a document page to the right of the address bar. Tapping this icon will reformat the main text, removing unnecessary elements and enhancing readability.
Opera’s My Flow feature allows you to share links, images, videos, and other files among your devices through encrypted storage. To utilize this feature, ensure you have the desktop version of Opera installed on your PC and that you are signed in to your Opera account on both your phone and PC.
Opera
On the Android browser toolbar, tap the headshot icon, then scroll up the panel and select “Flow.” Follow the instructions on the subsequent page to establish a wireless connection between your phone and PC.
Once your phone is connected to My Flow, you can access the Flow interface by tapping the headshot icon and then selecting “Flow” at any time. The interface resembles a chat window. To upload a file, tap the “+” icon in the lower left corner, which will open your phone’s file browser. Choose a file, and it will be inserted into the Flow interface.
On your PC, click the right-pointing arrow along the left sidebar to open the My Flow panel. The file you inserted from your Android phone will be displayed in the Flow interface.
Opera’s most compelling feature is its built-in VPN (Virtual Private Network). To enable it, tap the headshot icon on the browser toolbar, then select “VPN” in the panel that appears. Next, tap “Settings” in the lower right corner. On the subsequent page, you can choose the region (America, Asia, Europe) from which you want website servers to perceive your browsing origin.
If you have a pro account with Opera, you can select from a wide range of specific countries as your point of origin and encrypt traffic for every app on up to six devices, not just the Opera browser.
Firefox, a well-known alternative browser for PCs, is also available for mobile devices. Developed and maintained by a global community of open-source developers overseen by the Mozilla Foundation and its subsidiary, Mozilla Corp, Firefox prioritizes users’ online rights and privacy.
Similar to Edge, Firefox’s default new tab page features a search engine box, links to suggested websites, and a panel displaying news and articles. The browser allows you to sync data across devices, save content to collections for later use, and add websites to your home screen, among other options.
Just like its desktop version, you can enhance the functionality of the Firefox Android browser by installing add-ons. Tap the three-dot icon on the browser toolbar and select “Add-ons” from the menu panel that appears. On the following page, you can browse through a list of recommended add-ons provided by Firefox developers and install them with a tap.
Firefox includes a reader mode, similar to Edge’s functionality. When available for an article, you’ll see a page icon to the right of the URL address bar. Tapping this icon removes non-essential elements from the page, focusing solely on the main text.
For users seeking enhanced privacy controls, Firefox offers a “lite” version called Firefox Focus. By default, this version has stronger privacy settings and automatically blocks ads and trackers. Similar to DuckDuckGo’s Fire button, you can tap the trashcan icon to the left of the address bar in Firefox Focus to instantly delete browsing history, passwords, and cookies.
Firefox Focus features a minimal interface without elements such as newsfeed clutter on a blank browser window. However, it lacks a reader mode. In fact, Firefox Focus is designed to allow only one web page to be open at a time, as it doesn’t support tabs. While this limitation may seem restrictive, it helps you focus on one page at a time and ensures top performance since the browser only needs to handle one tab in its memory.
The Sony HT-A3000 soundbar exudes elegance and refinement with its sleek matte black finish and metal grille, showcasing a sophisticated appearance. Its top surface is equipped with convenient touch controls for power, volume, input selection, Bluetooth, and a shortcut key, allowing easy access to popular music services like Spotify. Additionally, an OLED text display provides essential information such as the current input, volume level, and audio formats.
Measuring 37 inches in length and just over 2.5 inches tall, this soundbar perfectly complements most TVs and offers the flexibility to be placed on a stand or wall-mounted according to your preferences. The satellite speakers also offer versatility, as they can be wall-mounted if desired.
The Sony HT-A3000 is a remarkable addition to your AV setup, boasting a compact and sturdy construction. With its dimensions of 950(w) x 64(h) x 128(d)mm, it comfortably fits beneath the majority of TV screens. Its design showcases an appealing combination of three distinct finishes: a lightly textured vinyl effect on the top edge, a slightly textured rear with a “snake skin” pattern that curves around into the top edge, and a metallic grille covering the speaker-front that also curves into the top edge. While it may seem cluttered on paper, in reality, it exudes charm and character.
Each end of the A3000 features small built-in ports, and the top edge accommodates a series of touch-sensitive control buttons. For added convenience, the soundbar can be controlled using the provided remote control. The remote, although full-sized and button-loaded with a logical layout, would have benefited from backlighting. Alternatively, you can control the soundbar through Sony’s Music Centre app on your phone. Furthermore, the A3000 supports an onscreen menu system, accessed by pressing the Home button on the main remote, aligning with the other A series models.
– HT-A3000 soundbar –
Setting up the A3000 is a breeze if you’ve just acquired it. Simply place it under your TV (wall mounting is supported), plug it in, and utilize the onscreen menus and Sony Music Centre app to connect it to your Wi-Fi system.
While it can be slightly inconvenient to switch between the onscreen menus and the Sony Music Centre app to access all the setup features, the only potential complication lies in the absence of an HDMI loop-through. This means you’ll need to ensure that your TV’s eARC system is functioning properly, which can be a more straightforward process on some TVs than others.
During our installation, adding the optional extra speakers to the A3000 required heading into the setup section of the onscreen menus and switching the “add extra wireless speakers” option from Manual to Auto. Although it involved a minor inconvenience, we soon forgot about it as the soundbar automatically initiated a quick yet highly effective auto calibration system once the additional speaker connection was established.
The remote control is relatively easy to navigate and covers all the essential day-to-day functions. Additionally, the soundbar features a small but easily readable LED display on its front edge, providing information on your selected input, volume level, sound mode, and incoming sound format.
The “Alexa Ready” voice control support has its limitations, but if you enjoy interacting with your AV equipment and have an Alexa listening device, you might find it useful to utilize this feature occasionally.
The Sony HT-A3000 soundbar features a 3.1 channel configuration, consisting of three front speakers, including a dedicated center speaker for enhanced dialogue clarity, along with a built-in dual subwoofer for powerful and deep bass reproduction. Utilizing advanced technologies such as Vertical Surround Engine and S-Force PRO Front Surround, it delivers an immersive virtual surround sound experience that envelops you from all directions, allowing you to fully immerse yourself in the captivating audio of Dolby Atmos® and DTS:X®.
When it comes to reproducing deep bass sounds, the movement of the speaker diaphragm becomes more pronounced. This can result in a phenomenon known as phase modulation distortion, particularly when the diaphragm is required to simultaneously reproduce higher frequencies. To address this issue, Sony has developed unique signal processing technology that compensates for the distortion, resulting in clearer dialogue and more localized sound. By enhancing the modulated waveform, the HT-A3000 achieves improved clarity and prevents vocal distortion, enhancing the overall audio experience.
While the Sony HT-A3000 soundbar on its own might have felt slightly overpriced at its original price of £699, at £499 it becomes an exceptional deal. Its power, attention to detail, expansive soundstage, and seamless transition between impressive film and music playback make it one of the best soundbars we’ve encountered in the sub-£500 price range.
Sony HT-A3000 soundbar
However, things become a bit more complex when considering the optional extra RS3S and SW3 rear and subwoofer speakers. In terms of performance, they are both outstanding, offering a premium audio experience that can easily complement Sony’s higher-end A5000 soundbar while also adapting well to the less powerful A3000.
The drawback with the RS3S and SW3 lies in their cost. Priced at £449 each, when you add both of them to the A3000, the total cost reaches just under £1,400. This firmly places the system in the premium soundbar category, comparable to options like Samsung’s powerful 11.1.4-channel HW-Q990C, which costs a similar amount.
While I acknowledge the level of craftsmanship Sony has put into the RS3S and SW3, and recognize that they offer an upgrade over typical optional extra soundbar speakers, their high price ultimately makes them less sensible choices for most consumers when paired with the A3000. If you can afford the A3000 with the RS3S and SW3, it seems more reasonable to consider stepping up to a more powerful A5000/RS3S/SW3 system instead.
However, it’s important not to overlook the fact that if you have £500 to spend, you’ll have a hard time finding a better soundbar than the standalone Sony HT-A3000 within that price range.
Processing
Advanced DSP Modes
Amplifier Type
Digital Amplifier, S-Master
Amplifier Power
250W
Surround Sound Formats
Dolby Digital Dolby Digital Plus Dolby TrueHD Dolby Atmos DTS DTS ES DTS 96/24 DTS-HD High Resolution DTS-HD Master Audio DTS:X 360 Reality Audio
Signal messenger for desktop is a messaging application that enables you to send text messages to your friends and engage in various forms of communication, including file sharing and mobile messaging.
Privacy and security are often primary concerns when choosing a messaging app, as not all platforms prioritize these aspects. However, private messaging applications have been available for some time, although they are not as widely used as mainstream apps.
Signal Desktop stands out as one of the most secure messaging applications available. It combines robust security features with advanced messaging capabilities commonly found in mainstream apps.
With Signal Desktop, your data and conversations are kept hidden and secure, allowing you to chat without worrying about your information being compromised.
An Open-Source Messaging App Signal is an open-source messaging and chatting application that prioritizes user privacy. By using Signal, you can engage in private conversations with your friends and family while keeping your information confidential.
Signal has established itself as one of the leading providers of privacy protocols since its inception in 2013, when Matthew Rosenfeld founded it.
Many of great features: Originally designed to rival major messaging apps, Signal’s creators recognized the importance of privacy and developed one of the most secure platforms available.
Signal Desktop offers a comprehensive range of communication options that you would expect from a messaging app. While text messages serve as the primary mode of communication, Signal Desktop allows for greater versatility.
You can send files, audio messages, and various data types, enhancing the effectiveness and comprehensiveness of your communications.
Signal Desktop is the desktop version of the Signal app, providing a secure and private environment for chatting with your friends. It supports different communication modes, ensuring a safe and versatile messaging experience.
In Signal, you won’t encounter any ads, affiliate marketers, or intrusive tracking. This means you can fully concentrate on sharing meaningful moments with the people who truly matter to you.
Signal prioritizes your privacy and ensures that your conversations remain free from distractions and unwanted interruptions. Without the presence of ads or affiliate marketers, you can communicate without any commercial interests interfering with your interactions.
Furthermore, Signal’s commitment to avoiding creepy tracking means that your personal data and online activities won’t be monitored or used for targeted advertising. You can communicate and share without concerns about your information being exploited or compromised.
With Signal messenger, you can cherish and focus on the moments that hold significance in your relationships, fostering genuine connections with the individuals who are important to you.
Signal ensures the highest level of security for your conversations through state-of-the-art end-to-end encryption, powered by the open-source Signal Protocol. This encryption technology guarantees that your messages and calls are kept completely secure and private.
The end-to-end encryption employed by Signal means that only the intended recipients of your messages or calls can decipher and access the content. Neither Signal nor any other third party can read your messages or listen to your calls, ensuring that your communications remain confidential.
Privacy is not an optional feature in Signal—it is an integral part of the platform’s design and operation. Every message you send, every call you make, is protected by this robust encryption, preserving your privacy consistently and without compromise.
Signal’s commitment to privacy ensures that your conversations remain completely secure, allowing you to communicate with confidence and peace of mind.
Signal messenger offers a unique and distinct messaging experience compared to other messaging platforms. Here’s why Signal provides a different messaging experience:
Privacy-First Approach: Signal prioritizes privacy as a fundamental aspect of its platform. Unlike many mainstream messaging apps, Signal does not collect or store your personal data, ensuring that your conversations and information remain confidential.
End-to-End Encryption: Signal employs state-of-the-art end-to-end encryption powered by the open-source Signal Protocol. This means that your messages, calls, and shared media are encrypted from sender to recipient, protecting them from unauthorized access.
No Ads or Tracking: Signal stands apart by not including any advertisements or engaging in user tracking. This absence of ads and invasive tracking enhances your messaging experience, allowing you to focus on communication without distractions.
Open-Source Foundation: Signal’s open-source nature enables independent experts to review its code for security and privacy standards. This transparency fosters trust and confidence among users, knowing that the app’s design and protocols are subject to scrutiny and improvement.
Cross-Platform Support: Signal offers seamless cross-platform support, allowing you to access your conversations and messages across multiple devices, including smartphones, tablets, and desktop computers.
Rich Features: While prioritizing privacy, Signal doesn’t compromise on essential messaging features. You can send text messages, make voice and video calls, share files, and enjoy a range of other features, making your conversations comprehensive and engaging.
Signal’s focus on privacy, security, and user-centric design provides a messaging experience that values your personal data and prioritizes secure communication, setting it apart from many other messaging platforms available today. Download Signal for Android, Mac or Windows HERE
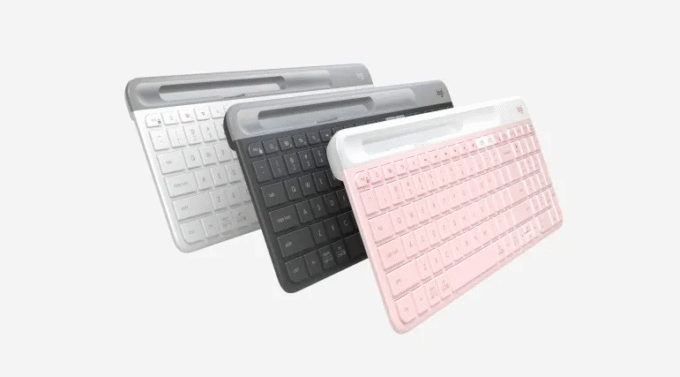
The Logitech K585 keyboard stands out for its sleek and lightweight design, making it a convenient choice for mobility within your home or office. While it may not be as compact as some comparable keyboards without a Numpad, it remains relatively easy to move around. The overall build quality is satisfactory, although the all-plastic construction feels somewhat cheap and flexes to some extent. Nevertheless, the keyboard retains a reasonable level of sturdiness. The keys themselves offer stability, and the rubber feet on the underside effectively prevent the keyboard from slipping during typing. However, it is worth noting that some users have reported fragility and difficulty reattaching the plastic segment on the top of the keyboard, which houses the device holder, battery, and USB receiver compartment.
One notable drawback of the Logitech K585 is the lack of backlighting, making it less suitable for use in low-light environments where the key legends may be hard to see. On the bright side, the keyboard boasts decent ergonomics despite the absence of a wrist rest. Its low-profile design contributes to a relatively comfortable typing experience, and unlike many similar keyboards that are flat, this model features a default incline angle. Unfortunately, the angle is not adjustable, limiting customization options.
The keyboard offers wireless connectivity through the Logitech Unifying USB receiver included in the package, as well as Bluetooth capability. It even allows simultaneous pairing with two devices, and switching between them is a breeze thanks to the color-coded channel buttons located on the keyboard’s function row.
Logitech claims that the K585 keyboard can provide up to 24 months of battery life, although this estimate will naturally vary depending on individual usage patterns.
The Logitech K585 keyboard features a convenient slot for holding devices at a comfortable viewing angle. However, it’s important to note that the slot is only 17 cm wide, which may not accommodate all devices. By default, the function row buttons on the keyboard offer media and OS-specific controls, while the F1-F12 buttons serve as secondary hotkeys accessed by holding the FN key. However, you have the option to reverse this behavior using the Logi Options+ companion software or by enabling the FN-key lock with the FN-ESC combination.
In terms of typing quality, the Logitech K585 keyboard delivers a mediocre experience. Although the keys are stable, the overall layout feels somewhat cramped, and the keystrokes lack crispness, resulting in a mushy feel. The keycaps are constructed from cheaper ABS plastic, giving them a generic texture, but they do offer a slight grip, preventing slipperiness. Overall, the typing experience resembles that of many laptop keyboards.
The Logitech K585 keyboard utilizes Logitech’s Logi Options+ software, which boasts a user-friendly interface. While it may not offer as many customization options as higher-end keyboards, it allows you to configure multi-device pairing, reprogram function row key behavior, and save app-specific custom settings to cloud storage.
The Logitech K585 keyboard is a decent option for users seeking a reliable and functional keyboard. However, it does come with some limitations when it comes to customization. Let’s take a closer look at its features.
One of the notable aspects of the K585 keyboard is its replaceable Cherry stabilizers. This feature allows for smoother key movements and reduces wobbling during typing. However, it’s worth mentioning that the stabilizer fixation is non-customizable, meaning you won’t have the flexibility to adjust it according to your preferences.
Similarly, the spacebar stabilizer size and the size of the right modifier keys are non-customizable as well. This can be a drawback for users who prefer a more personalized keyboard layout.
Another aspect to note is that the Logitech K585 keyboard does not offer hot-swappable switches. This means that you cannot easily replace the switches without soldering, limiting your ability to customize the typing experience.
Additionally, the switch stem shape and the switch PCB socket are non-customizable, further restricting customization options. If you have a particular preference for switch types or want to experiment with different switch options, this keyboard may not provide the desired flexibility. Lastly, the keyboard has non-customizable design features related to north-facing Cherry MX interference. This may affect the compatibility of certain keycap sets or limit your ability to fully customize the keycap arrangement.
While the Logitech K585 keyboard offers some useful features such as replaceable Cherry stabilizers, it falls short in terms of customization options. The non-customizable design aspects related to stabilizer fixation, spacebar stabilizer size, modifier key size, switch options, and switch PCB socket may limit the keyboard’s appeal to users seeking a highly personalized typing experience.
The Logitech K585 keyboard is a versatile option for mobile devices such as phones and tablets. It offers a slim and lightweight design that allows for easy portability between workstations in the office or even from your desk to the couch at home. You can connect it wirelessly using a USB receiver or Bluetooth, and the keyboard supports simultaneous pairing and quick switching between two devices.
However, when it comes to typing quality, the Logitech K585 falls short. The switches feel mushy, resulting in a mediocre typing experience. Additionally, the keys are placed fairly close together, which may be a downside for those who prefer a more spacious layout.
For programming purposes, the Logitech K585 is sub-par. The typing quality remains mediocre due to the mushy keys and cramped layout. While the build quality is decent overall, the all-plastic construction feels cheap, and unfortunately, there are no adjustable incline angles to customize your typing position. Moreover, the lack of backlighting makes it challenging to see the key legends in dimly lit environments, which can be a disadvantage for those who prefer working in darker rooms. On the positive side, this keyboard is compatible with all major operating systems and supports Bluetooth pairing with two devices simultaneously.
In terms of gaming, the Logitech K585 is passable but not specifically designed for gaming. It offers reasonable build quality, and the switches are responsive with low pre-travel distance, providing a decent gaming experience. However, the keyboard does have higher latency compared to dedicated gaming keyboards, making it less suitable for fast-paced or competitive gaming. Nonetheless, it can still serve adequately for casual gaming sessions.
The Logitech K585 keyboard offers mobility and versatility for mobile devices, but its typing quality, lack of adjustable incline angles, and absence of backlighting may pose limitations for programming or gaming enthusiasts seeking a more customized and optimized experience. K585 keyboard price: $49.99
Logitech K585 keyboard: Specs
Dimensions USB Receiver Height: 0.57 in (14.4 mm) Width: 0.74 in (18.7 mm) Depth: 0.24 in (6.1 mm) Weight: 0.07 oz (2 g) Keyboard Dimensions Height: 5.6 in (143.9 mm) Width: 14.7 in (373.5 mm) Depth: 0.84 in (21.3 mm) Weight (with batteries): 19.68 oz (558 g) (including battery) Slot Dimensions Height: 0.43 in (11 mm) Width: 6.92 in (175.7 mm) Depth: 0.41 in (10.3 mm) – with a hook that holds the phone at 6.2 mm from the bottom Technical Specifications Battery life Keyboard: 24 months Battery type: 2AAA (included) Wireless operating distance: 10 m (33ft) – Wireless range may vary Wireless technology: Logitech Unifying™ Receiver or Bluetooth® low energy technology Unifying ready receiver: Yes
If you’re encountering a black screen when booting up your PC, this guide provides troubleshooting steps to help you resolve the issue. Learn how to tackle the problem and get your computer up and running again.
It seems like you’re experiencing a black screen issue when booting up your Windows 10 PC. Here are a few troubleshooting steps you can try to resolve the problem:
Power cycle your PC: Turn off your computer completely, unplug the power cable, and remove the battery (if applicable) from your laptop. Wait for a few minutes, then reinsert the battery (if applicable) and plug in the power cable. Turn on your PC and see if the issue is resolved.
photo: Pixabay
Check your hardware connections: Ensure that all the cables connecting your computer to the monitor are securely plugged in. If you’re using a desktop PC, you can try reseating the graphics card and RAM modules to make sure they are properly connected.
Reset BIOS settings: Restart your computer and press the “Del” key repeatedly during the startup process to enter the BIOS setup. Look for an option like “Load Optimized Defaults” or “Reset to Default Settings” and select it. Save the changes and exit the BIOS. See if the issue persists.
Try booting into Safe Mode: Since you mentioned that you’re unsure how to boot into Safe Mode, here’s how you can do it:
Start your computer and repeatedly press the “F8” key before the Windows logo appears. This should bring up the Advanced Boot Options menu.
From the menu, select “Safe Mode” or “Safe Mode with Networking” using the arrow keys on your keyboard.
Press Enter to start your computer in Safe Mode. If you’re able to boot into Safe Mode without encountering the black screen issue, it might indicate a problem with a driver or software conflict.
Perform a system restore: If you can access Safe Mode, you can try performing a system restore to revert your computer back to a previous working state. Go to the Control Panel, search for “System Restore,” and follow the instructions to restore your system.
Use Windows Startup Repair: If you have a Windows installation media (USB or DVD), you can try using the Startup Repair tool to fix any startup issues. Insert the installation media, restart your computer, and boot from the installation media. Choose the “Repair your computer” option, then select “Troubleshoot” > “Advanced options” > “Startup Repair” and follow the instructions.
If none of these steps resolve the black screen when booting up issue, it might be necessary to seek professional assistance or contact the manufacturer’s support for further guidance.
Having trouble switching your monitor’s refresh rate from 60Hz to 144Hz? This article provides troubleshooting steps to help you resolve the issue and enjoy the higher refresh rate on your display. Explore solutions such as checking monitor settings, verifying cable connections, updating GPU drivers, and more. Don’t settle for 60Hz when you originally aimed for 144Hz—follow these steps to troubleshoot and resolve the problem.
switch from 60Hz to 144Hz – photo: Pixabay
It seems like you’re facing an issue with your monitor’s refresh rate not being able to switch from 60Hz to 144Hz. This can be frustrating, but there are a few steps you can try to troubleshoot and resolve the problem:
Check the monitor settings: Ensure that your monitor’s settings are properly configured to support a 144Hz refresh rate. Navigate through the monitor’s on-screen display (OSD) menu and verify that the refresh rate is set to 144Hz.
Verify the cable and connection: Since you’re using a DisplayPort cable, make sure that the cable is securely connected to both your GPU and monitor. Try using a different DisplayPort cable if possible to rule out any cable-related issues.
Test with a different display or GPU: If you have access to another monitor or GPU, try connecting your GPU to a different display or connect a different GPU to your current monitor. This will help determine if the issue lies with the monitor or the GPU.
Update GPU drivers: Even though you mentioned updating your GPU drivers, it’s worth double-checking that you have the latest drivers installed. Visit the Nvidia website and download the latest drivers for your RTX 2080 Super. Perform a clean installation of the drivers to ensure that any potential software conflicts are resolved.
Try a different port: If your GPU has multiple DisplayPort outputs, try connecting your monitor to a different port on the GPU. This can help determine if the problem is specific to a particular port.
Test on another computer: If possible, try connecting your monitor to a different computer and see if you can achieve the desired 144Hz refresh rate. If it works on another computer, it may indicate a compatibility issue or a problem with your current setup.
Contact customer support: If none of the above steps resolve the issue, it’s recommended to reach out to the customer support of both BenQ (monitor manufacturer) and Nvidia (GPU manufacturer). They may have specific troubleshooting steps or be able to provide further assistance or potential solutions.
Remember to provide them with all the relevant information, including your monitor model, GPU model, and steps you have already taken to troubleshoot the issue.
Hopefully, one of these steps will help you resolve the problem and restore the 144Hz refresh rate on your monitor.
Error 0xc000000f is a common Windows error that indicates an issue with the boot configuration data (BCD) store. This error usually occurs when your computer is unable to locate the operating system files required to start up.
Windows 10 – photo: Pixabay
Here are some steps you can take to troubleshoot and resolve the error:
Use Windows Startup Repair: Boot your computer using a Windows 10 installation media (USB or DVD). Select your language preferences and click “Repair your computer” instead of installing Windows. From the options, choose “Troubleshoot” > “Advanced options” > “Startup Repair.” This will attempt to automatically fix any issues with the boot configuration.
Rebuild BCD using Command Prompt: If Startup Repair didn’t resolve the issue, you can try manually rebuilding the BCD. Follow the same steps as above to access the Command Prompt. In the Command Prompt window, type the following commands one by one, pressing Enter after each one:
Check disk errors: Sometimes, disk errors can cause boot issues. You can use the Command Prompt again and type the following command:
bash
chkdsk C: /f /r
This will scan and repair disk errors on your Windows partition (assuming C: is your system drive). Restart your computer after the process completes.
Use System Restore: If you have previously created a system restore point, you can use it to revert your computer to a previous working state. Boot your computer with the Windows installation media, go to “Troubleshoot” > “Advanced options” > “System Restore,” and follow the on-screen instructions.
Reinstall Windows: If none of the above methods work, you may need to consider reinstalling Windows. Make sure to back up your important files before proceeding with the reinstallation process.
If you’re still unable to resolve the error, it may be helpful to consult with a computer technician or seek support from Microsoft or the manufacturer of your computer.
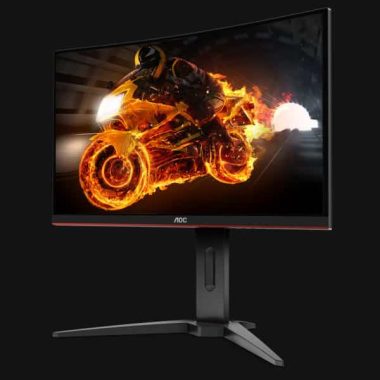
The AOC CQ27G1 is a 27-inch curved display, 1440p monitor. It’s a great choice for the game thanks to its incredibly low input delay and quick response times, resulting in clear motion, and supports FreeSync’s Variable refresh Frequency (VRR) technology to reduce screen tear in games. With a VA panel, it has an excellent contrast ratio, resulting in deep black, but that comes at the expense of its viewing angles, which are poor and you lose the accuracy of the image when you see it to one side. The lack of HDR support may disappoint some people, but it has ready-to-use color accuracy and displays a wide range of colors in SDR. Although not very bright to combat glare in most rooms, it has decent reflex handling, so it will still work well in a room with medium light.
Decent monitor for mixed use. Players will appreciate the incredibly low entry delay and great response time, plus it supports FreeSync for an almost tearless gaming experience. The 27-inch screen is big enough for productivity, but viewing angles are scarce. It is a decent monitor for watching videos or editing photos, as it displays a wide range of colors and has great color accuracy ready to use, but does not support HDR content. The contrast ratio is ideal for displaying dark rooms and bright rooms; it doesn’t get very bright, but it has a decent handling of the reflection.
The AOC CQ27G1 is well for office use. The 27-inch and 1440p display is large enough to open multiple windows at once, but poor viewing angles mean it’s not ideal for sharing the screen with colleagues. However, the uniformity of gray is excellent, so solid colors, like on a web page or a document, look great. It is best suited for rooms with little light, as it has a decent reflection management and does not become very bright.
Great gaming monitor – The AOC CQ27G1 has an amazing low input delay, fast response time to its maximum refresh speed and supports FreeSync VRR technology to reduce tearing in games. The 1440p screen offers an immersive gaming experience, but unfortunately, viewing angles are poor, so it’s not recommended for cooperative games. However, it works well in the dark rooms thanks to its excellent contrast ratio, showing deep blacks.
The CQ27G1 is fine for multimedia use – The 1440p resolution shows refined details and the size of 27 inches is big enough to sit and enjoy your favorite videos. Unfortunately, it doesn’t support HDR and viewing angles are poor, so it’s not suitable for viewing content with others. However, it shows a wide range of colors and has an excellent contrast ratio, resulting in deep blacks when seen in dark rooms.
Decent for media creation. There’s plenty of screen space on the 27-inch curved monitor, and it has plenty of coverage of the Adobe RGB color space used in photo editing. Unfortunately, it is not ideal to share the screen with others because of its naughty viewing angles. However, it has an excellent gray uniformity, so that the screen does not darken around the edges. Photo:AOC
The AOC CQ27G1 monitor performs admirably as a gaming display, particularly given its attractive price point of just under $250. It boasts features like Freesync, a curved 1440P 144Hz panel, and a well-rounded OSD feature set. However, its primary shortcomings lie in its display’s lack of contrast and brightness.
It’s crucial to highlight the exceptional warranty program this monitor offers, which includes a three-year zero dead pixel guarantee, a three-year advanced replacement guarantee, and a one-year one-time accidental damage warranty. This warranty package stands among the best available in the market.
For gaming purposes, you can mitigate some of its drawbacks by adjusting the “gaming” presets. Nevertheless, if you intend to use this monitor for tasks other than gaming or for extended periods, it may fall short.
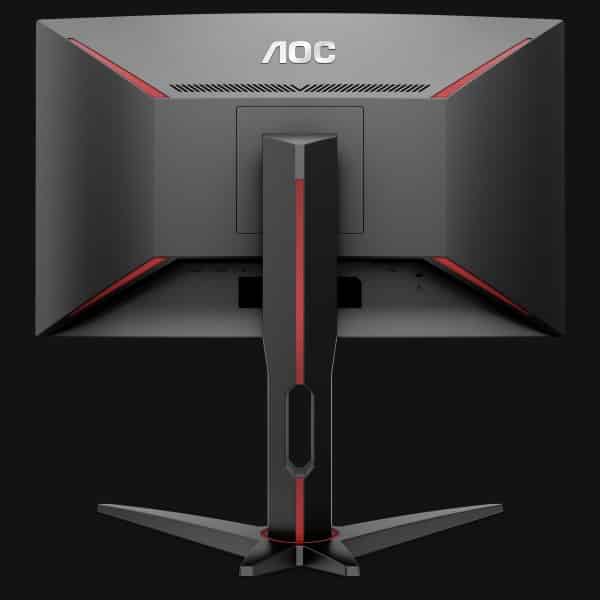
Monitor AOC CQ27G1
If I were seeking a daily-use desktop monitor, this one wouldn’t be my first choice. Personally, I’d be willing to invest around a hundred dollars more to acquire a higher-quality panel with a brightness rating of at least 350 nits.
However, if you don’t mind these limitations and are searching for the best-value monitor in this price range, the AOC CQ27G1 is worth considering. Just keep in mind that you generally get what you pay for, so while it excels as a gaming monitor, its overall value may diminish outside of that specific use case.
AOC CQ27G1 Specifications:
Monitor colorBlack
Monitor size27 inch
Resolution2560×1440
Refresh rate144Hz
Response time (mprt)1 ms
Panel typeVA
freesync30-144
BacklightWLED
Color SRGB coverage102
FlickerFree yes
Aspect ratio16:9
Brightness250
Contrast (dynamic)80M:1
Contrast (static)3000:1
Pixel pitch 0.2331
Active Screen Area 596.736 x 335.664 mm
Viewing Angle (CR10)178/178 º
Colors16.7 Million
Bezel typeBorderless
Weight without stand4.58 kg
Adobe RGB Coverage (%)75
OSD languages EN, FR , ES, PT, DE, IT, NL, SE, FI, PL ,CZ, RU, KR, CN (T), CN (S), JP
Discover effective troubleshooting techniques to resolve the most common network hosting problems, ensuring uninterrupted connectivity and a smooth user experience.
The past few years have witnessed a significant increase in user dependency on network connectivity and systems. The landscape of network and programming infrastructures has been reshaped by modern technology, applications, and hosting services. These advancements have empowered users to accomplish various tasks with greater precision and efficiency, saving valuable time. Moreover, the exceptional performance of equipment and systems has fueled the demand for robust network connectivity.
However, despite these advancements, intermittent connectivity remains a major obstacle for many users. The root cause of this problem often lies in numerous hosting issues related to network infrastructure. Such issues can adversely impact program performance, leading to frustration and a poor user experience.
photo: Pixabay
To mitigate these challenges, it is crucial for users to familiarize themselves with common network hosting issues and learn how to troubleshoot them. With that in mind, let’s explore some recurring problems and their potential solutions.
Problem 1: Duplicate and Static IP Address
In general, it is not possible for two systems to share the same IP (Internet Protocol) address. When an attempt is made to do so, it leads to “Address Already in Use” errors, causing a loss of network access. This situation commonly occurs when users introduce new devices to their network.
Solution: To address this issue, it is advisable to disable the DHCP (Dynamic Host Configuration Protocol) server on the new device. Simply put, each router has its own DHCP configuration. If DHCP assigns an existing address (static IP) to a new device, it disrupts the network. By disabling this server, the connectivity of the initially connected device can be restored.
Additionally, users can take preventive measures to avoid IP conflicts in the future. One such step is to upgrade the router’s configuration and start assigning DHCP addresses from the top end of the subnet. This ensures that the lower addresses are available for other devices requiring static IPs.
Problem 2: IP Address Exhaustion
While IPv4 (Internet Protocol Version 4) provides a total of 4.3 billion addresses, each service provider is allocated a limited number of addresses based on anticipated demand. The increasing usage of smartphones, other devices, and the internet is likely to lead to address depletion. If a user’s system has an IP address starting with 169.x.x.x, it indicates that no address is currently available from the DHCP server.
Solution: Understanding network hosting and its management can be overwhelming, particularly without the necessary IT infrastructure and knowledge. Therefore, it is advisable to seek assistance from IT managed service providers. They can help audit the network infrastructure, manage directory services for server access, and provide day-to-day troubleshooting. Additionally, they can remotely manage the infrastructure to ensure easy internet access and smooth performance.
Furthermore, users can consider investing in standalone routers or WiFi access points. This helps create a local pool of internal addresses, mitigating the risk of address exhaustion.
Problem 3: Unable to Connect to the Internet
If only a single workstation displays a “No internet” message when opening a web browser, while other systems on the network have seamless and healthy connectivity, it is a common issue that severely impacts the user experience.
Solution: To troubleshoot this issue, users need to identify and eliminate potential communication barriers such as a weak WiFi connection, faulty cables, incorrect drivers, or a failing network card. It is also important to ensure that the network adapter is properly connected to the subnet, DNS servers, and has the correct IP configuration.
If the issue persists, it is worth checking the firewall software on the system to ensure that the required ports for external network connectivity are available.
Problem 4: DNS Configuration Issues
Issues such as “IP Address Could Not Be Found,” “The Network Path Cannot Be Found,” or “DNS Name Does Not Exist” indicate DNS configuration problems. To check DNS settings, users can utilize the “nslookup” command. Once the issue is confirmed, they can take the following steps to troubleshoot the error.
Solution: The network device may be using its own DNS server instead of the server assigned by DHCP. Users should check the “IPv4” (TCP/IP) settings to identify an incorrect DNS server and select “Obtain DNS server address automatically.” Alternatively, users can consider modifying their network’s DHCP settings for the same purpose, particularly in busy network environments.
Conclusion: These are some common network hosting problems that can disrupt the end user’s experience. It is important to familiarize oneself with the necessary measures to resolve these issues and enjoy uninterrupted network connectivity. Additionally, users can connect with managed service providers to leverage their expertise and benefit from their services.