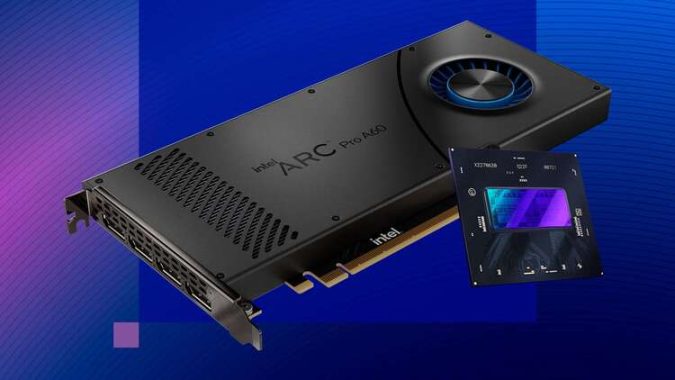
Intel introduced the Intel® Arc™ Pro A60 and Pro A60M as new members of the Intel® Arc™ Pro A-series professional range of graphics processing units (GPUs). The new products are a significant step up in performance in the Intel Arc Pro family and are carefully designed for professional workstations users with up to 12GB of video memory (VRAM) and support for four displays with high dynamic range (HDR) and Dolby Vision® support.
With built-in ray tracing hardware, graphics acceleration and machine learning capabilities, the Intel Arc Pro A60 GPU unites fluid viewports, the latest in visual technologies and rich content creation in a traditional single slot factor.
Intel Arc Pro A-series graphics offer a new option to the workstation GPU space. Compared to existing Intel Arc Pro products, the Intel Arc Pro A60 and A60M offer double the number of PCIe lanes with 16, twice the memory bandwidth at 384 gigabytes per second, twice the dedicated AI Xe Matrix Extensions (XMX) engines with 256, and twice the number of ray tracing units with 16. They also feature full media encode and decode support, including AV1. These make Intel Arc Pro GPUs ideal for computer-aided design and modeling (CAD/CAM), AI inferencing tasks and media processing in dedicated business environments.
Intel Arc Pro A60 and Pro A60M GPUs – photo: Intel
Intel Arc Pro GPUs are backed by quarterly driver releases for regular performance optimizations and ISV-certified1 by leading workstation applications used within the architecture, engineering and construction, and design and manufacturing industries, such as:
Autodesk 3ds Max
Autodesk AutoCAD
Autodesk Fusion 360
Autodesk Inventor
Autodesk Maya
Bentley MicroStation
Dassault Systèmes SOLIDWORKS
Nemetscheck VectorWorks
PTC Creo
Siemens NX
Siemens Solid Edge
Intel’s workstation GPUs are also optimized for media and entertainment applications like Blender and run rendering and ray tracing libraries in the Intel® oneAPI Rendering Toolkit to enable the creation of high-performance, high-fidelity visual experiences at scale.
About Availability: The Intel Arc Pro A60 GPU for workstation desktops will be available from Intel authorized distributors in the coming weeks, while the Intel Arc Pro A60M GPU for mobile systems will be available from original equipment manufacturers (OEM) partners in the coming months. Additional workstation designs featuring the Intel Arc Pro A40 GPU are now available from HP, with Dell and Lenovo anticipated to follow in 2023’s third quarter.
The Intel Arc Pro GPU family is also validated for use with Intel® NUC 13 Extreme small form factor (SFF) PCs, which offer 125W unlocked 13th Gen Intel® Core™ processors.
Intel Arc Pro desktop products come with a three-year limited warranty.
Explore the differences between laser, LCD, LCoS, and LED projectors. Learn about their unique features, advantages, and limitations. Find the perfect projector for your needs based on brightness, color accuracy, lifespan, and more.
What is a Laser projector?
A laser projector is a type of projector that uses laser diodes as its light source. Laser projectors have gained popularity in recent years due to their ability to produce high brightness, excellent color accuracy, and a wide color gamut. They are commonly used in large venues, theaters, and professional installations.
In a laser projector, the laser diodes emit intense beams of light, which are then modulated and controlled to create the projected image. The lasers provide high brightness levels, allowing laser projectors to produce vivid and sharp images even in well-lit environments. Laser projectors typically have higher brightness outputs compared to lamp-based or LED projectors.
One of the key advantages of laser projectors is their long lifespan. Laser diodes have an exceptionally long operational life, often exceeding 20,000 hours. This longevity reduces maintenance requirements and costs associated with replacing lamps or bulbs. Additionally, laser projectors usually have consistent brightness throughout their lifespan, unlike traditional lamp-based projectors that gradually lose brightness over time.
Laser projectors are known for their excellent color accuracy and color reproduction. They can achieve a wide color gamut, resulting in vibrant and lifelike images. Laser projectors also offer a high level of control over color calibration, allowing precise adjustment for accurate color representation.
Another benefit of laser projectors is their quick startup and shutdown times. They can power on and off almost instantaneously, eliminating the need for warm-up or cool-down periods. This feature is particularly useful in time-sensitive applications or environments where projectors need to be turned on and off frequently.
While laser projectors offer numerous advantages, they tend to be more expensive compared to other projector technologies. The initial cost of a laser projector is higher due to the complexity of the laser diode system. However, the long lifespan and lower maintenance costs of laser projectors can offset this initial investment over time.
Laser projectors are ideal for applications that require high brightness, precise color accuracy, and long-lasting performance. They are commonly used in large venues, auditoriums, museums, and other professional settings where image quality and reliability are of utmost importance.
What is a LED projector?
An LED projector is a type of projector that uses LED (Light Emitting Diode) technology as its light source. LED projectors have gained popularity in recent years due to their compact size, energy efficiency, long lifespan, and improved color performance compared to traditional lamp-based projectors.
Instead of using a traditional lamp, LED projectors utilize an array of LED bulbs to produce the light required for image projection. LEDs are known for their high brightness, color accuracy, and ability to produce vibrant and saturated colors. LED projectors often have a wide color gamut and can display a broader range of colors compared to other projector technologies.
One significant advantage of LED projectors is their extended lifespan. LED bulbs have a significantly longer operational life compared to traditional projector lamps. LED projectors can typically last for thousands of hours before the bulbs need replacement, resulting in lower maintenance costs and longer-lasting projection solutions.
LED projectors are also more energy-efficient than lamp-based projectors. LEDs consume less power, resulting in reduced energy consumption and lower operating costs over time. Additionally, LED projectors have quicker startup and shutdown times, eliminating the need for warm-up or cool-down periods.
Another notable feature of LED projectors is their compact size and portability. Due to the smaller size and lower heat generation of LED bulbs, projectors built with LED technology can be more lightweight and compact, making them easier to transport and set up in various environments.
While LED projectors offer numerous advantages, they do have some limitations. One common drawback is their lower brightness output compared to traditional lamp-based projectors, especially for larger screen sizes or environments with high ambient light. However, advancements in LED technology have led to brighter LED projectors over time.
LED projectors are an excellent choice for applications that require portability, energy efficiency, and good color performance. They are commonly used for home theaters, small meeting rooms, classrooms, and other settings where compactness, longevity, and accurate colors are desired.
What is LCoS Projector and how does it work?
LCoS stands for Liquid Crystal on Silicon, which is a technology used in projectors. LCoS projectors are a type of display technology that combine elements of both DLP (Digital Light Processing) and LCD (Liquid Crystal Display) technologies.
In LCoS projectors, an LCoS panel is used as the imaging device. The LCoS panel consists of liquid crystals on top of a reflective silicon backplane. This backplane reflects light and modulates it with the liquid crystals to create the projected image.
LCoS projectors offer several advantages. They typically provide high resolution and image quality, with excellent color reproduction and contrast ratios. LCoS technology also eliminates the “screen door effect” that can be seen on some LCD projectors, where the individual pixels are visible.
Another advantage of LCoS projectors is their ability to produce smooth and seamless images. They are known for their ability to display deep blacks and handle dark scenes effectively. This makes them popular for home theater applications and professional installations where image quality is crucial.
However, LCoS projectors tend to be more expensive than other projector technologies, such as DLP and LCD. They also tend to be larger and heavier than their counterparts. Additionally, LCoS projectors may have a slight delay in pixel response, which can result in motion blur for fast-moving scenes.
LCoS projectors offer high-quality image reproduction and are favored by enthusiasts and professionals who prioritize image accuracy and performance.
LCD projector?
An LCD projector, also known as an LCD video projector, is a type of projector that uses LCD (Liquid Crystal Display) technology to create and project images. LCD projectors are widely used in various settings, including classrooms, boardrooms, home theaters, and public venues.
The key component of an LCD projector is the LCD panel, which consists of millions of tiny liquid crystal cells. These cells act as individual pixels and can be manipulated to control the amount of light passing through them. The LCD panel divides the projected image into separate red, green, and blue components, which are then combined to create a full-color image.
LCD projectors offer several advantages. They typically provide bright and vibrant images with accurate colors. They have good color reproduction and can display a wide range of colors, making them suitable for presentations, movies, and other multimedia content. LCD projectors also tend to be more affordable compared to other projector technologies.
One notable feature of LCD projectors is their ability to produce sharp and detailed images, even at high resolutions. They can handle fine text and intricate graphics effectively. Additionally, LCD projectors generally have a longer lifespan for their lamps compared to other projector types.
However, LCD projectors also have a few limitations. One common drawback is the “screen door effect,” where the individual pixels are visible, especially at close distances. This effect can be more noticeable on lower-resolution LCD projectors. Additionally, LCD projectors may have lower contrast ratios compared to other technologies like DLP or LCoS.
In recent years, advancements in LCD technology have led to the development of higher-resolution LCD projectors, improved contrast ratios, and enhanced image processing capabilities. As a result, LCD projectors continue to be a popular choice for many applications due to their balance of image quality, affordability, and versatility.
SnapTube – YouTube Downloader HD Video is a practical Android application that allows direct downloading of music and videos from various online platforms using your Android smartphone or tablet. It efficiently handles numerous advertisements while ensuring fast downloads.
This exceptional application enables the direct download of music and videos to any Android device. Consequently, users can effortlessly access the latest work of their favorite artists and explore a vast array of videos on YouTube.
Snaptube Mod Apk is an Android app that allows you to download videos. It serves as an alternative to the SnapTube VIP (Premium) version and is essentially a modified version of the original SnapTube app. The term “Mod Apk” refers to a modified version of the main APK (Android Package). In this case, Snaptube Mod Apk is equivalent to Snaptube Pro, with no discernible difference between the two.
photo: Pixabay
Snaptube Mod Apk is a fully unlocked video downloader app for Android that doesn’t require a VIP subscription. It is a powerful app designed for downloading videos on Android devices. Regarded as the world’s best mobile video downloader app, Snaptube allows you to download videos in various formats, including 240P, 360P, 480P, 720P HD, 1080P HD, and 2K-4K resolution. Additionally, you can convert videos into audio formats such as MP3 70K, MP3 128K, MP4A 128K, and MP3 160K. The app also provides a clean interface for managing your downloads, and all of these features are available for free. The greatest advantage of SnapTube Mod Apk VIP v6.25.0 (6253910 stable) MOD APK is the absence of annoying ads.
By installing the free version of Snaptube, you will encounter internal ads while using the app. To eliminate these ads, a VIP Snaptube subscription is required. However, you can enjoy the premium features of Snaptube for free by using Snaptube Mod APK. In this article, I will guide you on how to download and install the Snaptube VIP version without any cost. Keep reading until the end for the complete instructions.
Features of Snaptube Mod VIP APK:
Removal of ads.
Activation of all VIP/Premium features.
No need to install the VIP AdBlock key.
No forced ads upon exiting the app.
Batch download feature enabled.
2K and 4K download options available for some HD videos.
Download SnapTube Mod Apk VIP v6.25.0 6253910 stable.
How to Install SnapTube Mod Apk VIP: Installing Snaptube Mod Apk on your smartphone is a straightforward process. Follow these steps:
Download ( copy link: https://mega.nz/file/0WAwWCYC#ukWtFu5eXwciEJFZDQgUNYGy2Kf9eXwkL5Egom_BoR4 ) the latest version of Snaptube .apk file from the provided link. Wait for the download to complete.
After the download finishes, enable the “Unknown Sources” option on your Android phone. This option can be found in the “Security” or “Settings” menu. Enabling it allows the installation of third-party apps outside the Google Play Store, and you may receive an installation block notice.
To enable Unknown Sources:
Go to your phone’s Settings.
Navigate to Security.
Scroll down to find the Unknown Sources option.
Tap on Unknown Sources to enable it.
Open the downloaded .apk file.
Tap on the install button and wait for the installation process to complete.
Once the installation is finished, click on the Snaptube icon to open the app. You are now ready to get started and enjoy its features!
PicPick is a feature-rich editing tool designed for capturing, editing, and customizing screenshots within its intuitive interface.
photo: Pixabay
If you find yourself needing to take screenshots on a daily basis or even more frequently, relying solely on the Windows built-in screenshotting tool may not be the most optimal solution. While it offers some useful features, it lacks readily available editing tools, prompting many users to seek third-party applications.
Among the top contenders in this category is PicPick. It is a dedicated application for capturing and editing screenshots, offering a wide range of options for enhancing your captures.
PicPick enables you to personalize your screenshot-taking experience by allowing customization of capture settings, file storage locations, and specific appearance preferences.PicPick is an exceptional all-in-one design tool that offers a wide range of features to enhance your design and editing workflow. Whether you are a graphic designer, photographer, or simply someone who needs to capture and edit images, PicPick provides an array of useful tools and functionalities to meet your requirements.
One of the standout features of PicPick is its powerful screenshot capturing capabilities. You can easily capture screenshots of your entire screen, active windows, scrolling windows, or any specific region of your desktop. This flexibility allows you to capture exactly what you need, making it ideal for creating tutorials, documentation, or sharing information with others.
The inclusion of a protractor tool is a unique and valuable addition to PicPick. This tool enables you to find angles on your screen by selecting a center, a location, and measuring the angle in degrees. This feature is beneficial for a variety of applications, including photography, math, and graphic design. It adds an extra level of precision and accuracy to your work.
PicPick also boasts a comprehensive image editor with a modern Ribbon style menu. You can annotate and highlight your images with text, arrows, shapes, and more. The editor allows you to add effects such as drop shadows, frames, watermarks, mosaic, motion blur, and control brightness to enhance your images. It provides a user-friendly interface and powerful editing capabilities, making it easy to achieve professional-looking results.
Sharing your images is effortless with PicPick, as it supports a wide range of platforms. You can save, share, or send your images via the web, email, FTP, Dropbox, Google Drive, OneDrive, Box, Evernote, Facebook, Twitter, and more. This integration with popular services ensures that you can easily distribute your work to the desired destinations.
PicPick also offers a variety of graphic design accessories, including a color picker, color palette, pixel ruler, crosshair, magnifier, and a whiteboard. These tools provide additional convenience and efficiency when working with graphics. The color picker, in particular, allows you to find the exact pixel color code on your screen with a built-in magnifier window, supporting RGB, HTML, C++, and Delphi.
To top it off, PicPick provides customizable settings that allow you to tailor the tool to your specific needs. You can customize hotkeys, file naming conventions, image quality, and numerous other options to optimize your workflow and enhance your productivity.
Capture and Edit Screenshots Upon launching the application, you’ll immediately notice the familiar interface resembling the Windows Paint program. While it offers similar tools, PicPick surpasses it in terms of comprehensive editing capabilities.
To take screenshots, you can conveniently assign a hotkey of your choice to trigger the capture function, enabling you to capture screenshots effortlessly.
Furthermore, you have the flexibility to capture either the entire screen or a specific region, based on your preference and requirements.
Customize the Application PicPick also excels in its ability to adapt to your individual needs, offering extensive customization options. Through the Configurations panel, you can modify various aspects such as file saving locations, naming conventions, and hotkey assignments for capturing screenshots.
Additionally, the application provides features like autosave and several other tools to enhance your workflow.
PicPick is a comprehensive tool for capturing and editing screenshots, providing an array of editing tools that facilitate the process with ease. PicPick is All-in-one design tool is a versatile and powerful software that combines an excellent range of features for capturing, editing, and sharing images. With its intuitive interface, extensive toolset, and customizable options, PicPick proves to be an invaluable asset for graphic designers, photographers, and anyone else involved in image manipulation and design. For personal, non-commercial use only, FREE PicPick tool download HERE
Learn about the different levels of PSU modularity and their importance in gaming PCs. Whether you’re considering non-modular, semi-modular, or fully modular power supplies, discover how they impact future upgrades and cable management. Read our guide to gain insights into choosing the right PSU modularity for your gaming needs.
Power supplies for gaming PCs can be categorized as non-modular, semi-modular, or fully modular. While power supply modularity may not be the primary concern during PC assembly, it becomes significant when considering future upgrades and cable management. In this article, we will elucidate and explore the distinctions between these PSU modularities.
Non-modular power supplies represent the most basic type available in the market. They come with all necessary cables permanently attached to the unit, leaving no option to remove unwanted cables. Furthermore, non-modular power supplies generally offer fewer features compared to their modular counterparts. However, they are often more affordable, making them a suitable choice for budget-conscious buyers.
Semi-modular power supplies provide a middle ground between non-modular and fully modular units. They come with some cables pre-attached, while also including a selection of modular cables that can be used as needed. This grants a degree of flexibility during installation and enables customization of cable management to some extent.
Semi-modular power supplies also tend to be more affordable than fully modular units, making them an attractive option for those seeking more flexibility than non-modular units offer without the additional cost associated with fully modular models.
Fully modular power supplies offer the highest level of flexibility when it comes to installation and cable management. As the name implies, all cables on a fully modular unit are detachable, allowing you to utilize only the necessary cables. This results in a cleaner and simpler installation process, free from excess cables obstructing the way. Additionally, fully modular units provide the freedom to use cables that are more appropriate for your specific build. For instance, if you don’t require two GPU cables, you can remove one and replace it with an extra SATA power cable to accommodate additional storage. Fully modular units often boast more features compared to non-modular or semi-modular units, targeting enthusiasts who are willing to pay extra for those added functionalities.
Nevertheless, the advantages of a fully modular PSU may not be as relevant to budget-conscious buyers. It is recommended to consider fully modular units only if cable management and flexibility are significant priorities for you.
Recommendation for non-modular PSU: Corsair CX450
The Corsair CX450 non-modular PSU is an excellent choice for budget-conscious buyers seeking a reliable power supply unit for their PC builds. Priced at $60/£60 or less, it offers great value for money without compromising on essential features. Let’s dive into its specifications and reasons why it’s worth considering.
In terms of specifications, the manufacturer (OEM) for this PSU is either Channel Well Technology or Great Wall, both reputable companies in the industry. The maximum DC output is 450W, providing sufficient power for most mid-range gaming systems. It carries an efficiency rating of 80 PLUS Bronze, ensuring a reasonable level of energy efficiency. Furthermore, the PSU has been certified by Cybenetics as Bronze (CWT) or Silver (GW), indicating its solid performance in terms of efficiency.
Noise levels are an important consideration, and the Corsair CX450 PSU performs admirably in this aspect. According to Cybenetics, the CWT version operates at a noise level of A- (20-25 dBA), while the GW version falls under the Standard+ category (35-40 dBA). This means that it remains relatively quiet during regular usage, contributing to a more pleasant gaming or computing experience.
Corsair CX450 – photo Corsair
The PSU’s form factor is ATX12V v2.4, complying with the latest industry standards. It is equipped with a 120mm Rifle Bearing Fan, either the HA1225M12F-Z or D12SM-12 model, which helps in keeping the temperatures under control while operating silently. Although the unit is non-modular, meaning that the cables are permanently attached, it still provides sufficient connectivity options with 1x EPS and 1x PCIe connectors.
Corsair ensures reliability and peace of mind with a generous 5-year warranty, demonstrating their confidence in the product’s durability and performance. This warranty period surpasses the industry average, assuring users that the PSU is built to last.
Now, let’s explore the reasons to consider buying the Corsair CX450 PSU. First and foremost, its low price is a major advantage, especially for those on a tight budget. Despite the affordable price tag, this PSU doesn’t compromise on important features, making it a compelling option.
The unit also comes with a full set of protection features, safeguarding your PC components against voltage spikes, overcurrent, and other potential hazards. This ensures that your system remains safe and stable, providing additional peace of mind.
Corsair’s attention to detail is evident in the excellent soldering quality of this PSU. This enhances its reliability and overall performance, reducing the chances of any manufacturing defects or potential failures down the line.
The inclusion of a Rifle Bearing Fan is another notable highlight. This type of fan offers efficient cooling while operating quietly, ensuring that your PC stays cool even during intense gaming sessions or demanding tasks.
Lastly, the Corsair CX450 PSU is backed by a five-year warranty, which is impressive considering its price point. This extended warranty period demonstrates the brand’s commitment to quality and customer satisfaction.
The Corsair CX450 PSU is a top choice for budget-conscious buyers seeking an affordable and reliable power supply unit. With its low price, full set of protection features, excellent soldering quality, rifle bearing fan, and a five-year warranty, it provides excellent value for money. If you’re looking to build a cost-effective gaming or computing system without compromising on performance, the Corsair CX450 PSU should definitely be on your list.
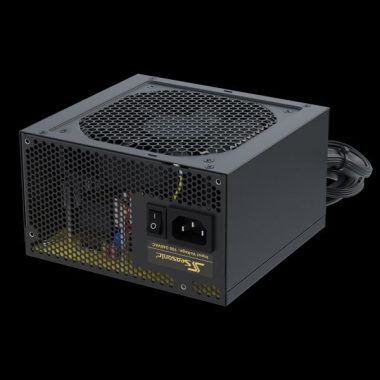
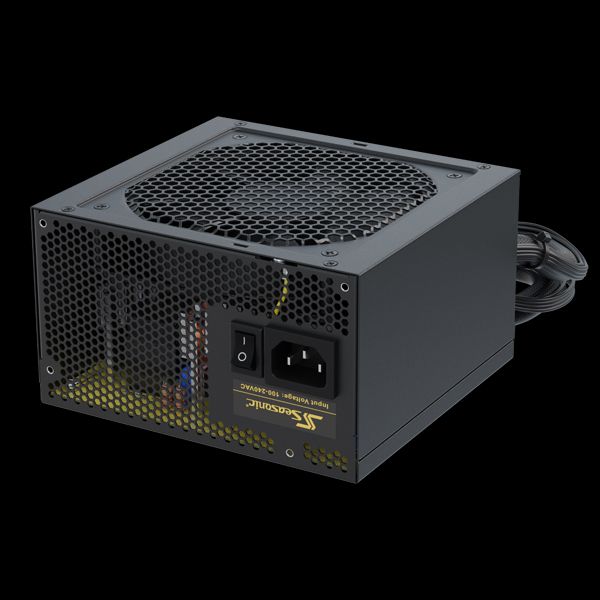
Recommendation for semi-modular PSU: Seasonic Core-GM-500 500W Semi Modular Power Supply
The Seasonic Core-GM-500 is a reliable and efficient power supply unit that caters to the needs of PC enthusiasts and gamers. With its impressive features and specifications, it stands out as a solid option for those seeking a semi-modular PSU. Let’s delve into the details to understand why it’s worth considering.
One of the key highlights of the Seasonic Core-GM-500 is its 80 PLUS Gold certification, indicating excellent energy efficiency. This certification ensures that the power supply operates at high efficiency levels, resulting in reduced power consumption and lower energy bills. It is an environmentally-friendly choice that also minimizes heat generation.
Being semi-modular, the Core-GM-500 strikes a good balance between convenience and flexibility. The essential cables, such as the motherboard power connector (20+4 pin ATX), are permanently attached to the unit, simplifying the installation process. At the same time, other cables can be connected as needed, reducing cable clutter and aiding in better cable management within the system.
The power supply’s tight voltage regulation is another noteworthy feature. This means that it delivers stable and consistent power to your PC components, ensuring optimal performance and protection against voltage fluctuations. This is particularly crucial for sensitive components like CPUs, GPUs, and memory modules.
The Seasonic Core-GM-500 incorporates S2FC (Smart and Silent Fan Control) technology, which intelligently adjusts the fan speed based on the system’s temperature and load. This results in quieter operation during regular usage or light tasks, as the fan remains at lower speeds. However, when the system demands more power and higher cooling is required, the fan speed adjusts accordingly, maintaining optimal temperature levels.
The power supply utilizes a DC to DC converter design, which enhances overall efficiency and power delivery. This design allows for improved voltage regulation and reduced energy wastage, ensuring that your components receive stable and clean power.
In terms of specifications, the Seasonic Core-GM-500 offers a total power output of 500W, making it suitable for mid-range to high-end systems. The wide AC input voltage range of 100-240V ensures compatibility with various power sources around the world. The PSU conforms to the standard ATX form factor, fitting most PC cases seamlessly.
Cooling is handled by a 12cm fan, which efficiently dissipates heat generated by the power supply unit. This active cooling solution keeps temperatures under control, contributing to system stability and longevity.
The physical dimensions of the Core-GM-500 are compact and well-suited for various PC setups. With a width of 150mm, depth of 140mm, and height of 86mm, it should fit comfortably in most standard-sized cases.
The Seasonic Core-GM-500 500W Semi Modular Power Supply is an impressive choice for PC builders and gamers alike. Its 80 PLUS Gold certification ensures excellent energy efficiency, while the semi-modular design provides flexibility and convenience during installation. The tight voltage regulation, S2FC fan control, and DC to DC converter design contribute to stable and reliable power delivery. With a total power output of 500W and compact dimensions, it is well-suited for mid-range to high-end systems. If you prioritize efficiency, reliability, and optimal performance in your PC build, the Seasonic Core-GM-500 should be high on your list of considerations.
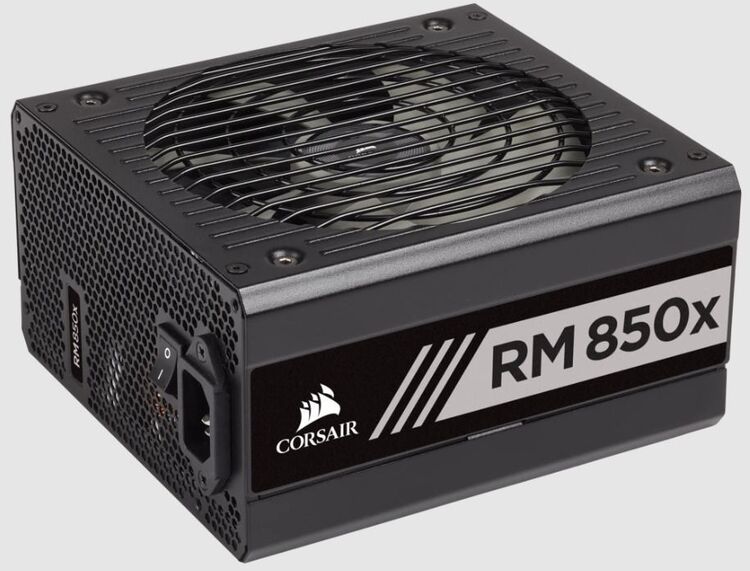
Recommendation for fully Modular PSU: CORSAIR RMx Series RM850x 80-Plus Gold (Fully-Modular)
The CORSAIR RMx Series RM850x is an exceptional power supply unit that combines high efficiency, modular design, and a range of impressive features. Designed with performance and reliability in mind, this PSU is an excellent choice for gaming enthusiasts and PC builders seeking top-notch power delivery. Let’s explore its specifications and features in detail.
With an 80-Plus Gold efficiency certification, the RM850x ensures optimal energy efficiency, translating to reduced power consumption and lower electricity costs. It meets high standards of performance, ensuring that your PC components receive clean and stable power while minimizing wastage.
The fully-modular design of the RM850x provides maximum flexibility during installation and cable management. All cables are detachable, allowing you to connect only the necessary ones, reducing cable clutter within the system. This not only enhances airflow but also makes the build process easier and more organized.
The PSU is compatible with ATX12V v2.4 and EPS12V 2.92 standards, ensuring broad compatibility with a wide range of motherboards and systems. Its ATX form factor fits most standard-sized PC cases, making it suitable for various builds.
The RM850x is equipped with a 140mm fan featuring rifle bearing technology. This fan efficiently cools the PSU while maintaining low noise levels, contributing to a quieter and more comfortable computing experience. Additionally, the fan operates in a Zero RPM mode, meaning it remains completely silent when the load is low, further minimizing noise.
Corsair’s RM850x boasts impressive cable specifications. It includes two EPS connectors, providing compatibility with motherboards that require additional power for high-end CPUs. With 10 SATA connectors, you have plenty of options to connect multiple storage drives, while the inclusion of six PCI-E connectors makes the PSU suitable for multi-GPU setups.
The low-profile, all-black cables add a sleek and professional aesthetic to your PC build, enhancing its overall visual appeal. The inclusion of a single floppy connector ensures compatibility with legacy hardware.
With a continuous power output of 850 Watts, the RM850x is capable of delivering ample power to handle demanding gaming rigs and high-performance systems. Its robust build and high-quality components ensure stable power delivery, even under heavy loads.
Corsair demonstrates their confidence in the RM850x’s durability by offering an impressive 10-year warranty. This extended warranty period provides peace of mind and reflects the PSU’s reliability and longevity.
The CORSAIR RMx Series RM850x is a powerhouse of a power supply unit that delivers exceptional performance, efficiency, and flexibility. With its 80-Plus Gold efficiency, fully-modular design, advanced cooling features, and a comprehensive set of connectors, it meets the demands of high-end gaming systems and resource-intensive tasks. Backed by a 10-year warranty, this PSU offers longevity and reliability, making it an excellent investment for enthusiasts and builders. If you seek a top-tier power supply unit for your PC build, the CORSAIR RMx Series RM850x should undoubtedly be at the top of your list.
When choosing a PSU, considering modularity is important for future upgrades and overall system aesthetics. While non-modular PSUs are more affordable, they may present challenges in cable management. Semi-modular PSUs offer a middle ground, while fully modular PSUs provide the most flexibility and customization options. Ultimately, the choice of PSU modularity depends on individual needs, priorities, and budget.
Discover the essential tips and techniques for effectively and safely cleaning your OLED TV screen. Learn what to avoid and the best practices to prevent permanent damage while maintaining optimal screen quality.
Cleaning an OLED TV screen requires a gentle approach to avoid damaging the delicate display. Here are some steps to follow:
Turn off the TV: Before cleaning the screen, make sure the TV is turned off and unplugged from the power source. This ensures your safety and prevents any accidental damage.
Use a microfiber cloth: Get a soft, lint-free microfiber cloth specifically designed for cleaning screens. Avoid using paper towels or rough materials that can scratch the surface.
Gently wipe the screen: Lightly dampen the microfiber cloth with distilled water or a screen-cleaning solution designed for electronics. Avoid spraying liquid directly onto the screen. Instead, moisten the cloth and gently wipe the screen in a circular motion. Be cautious not to apply excessive pressure.
Remove stubborn stains: If there are stubborn smudges or fingerprints, you can moisten the cloth slightly more or use a small amount of screen-cleaning solution. Apply gentle pressure and be patient, as rubbing vigorously can damage the screen.
Dry the screen: After cleaning, use a dry part of the microfiber cloth to wipe away any moisture or streaks. Ensure the screen is completely dry before turning the TV back on.
Avoid harsh chemicals and substances: Do not use alcohol, ammonia, or other harsh chemicals on the OLED screen, as they can damage the display. Stick to distilled water or gentle screen-cleaning solutions specifically designed for electronic devices.
Remember, OLED screens are sensitive, so it’s essential to be gentle during the cleaning process. Regularly dusting the screen with a dry microfiber cloth can help prevent the accumulation of dirt and smudges, reducing the need for more intensive cleaning.
The OLED television screens feature a delicate anti-glare coating that can be easily damaged. Therefore, it is important to choose a cloth that is exceptionally soft, clean, dry, and lint-free. This type of cloth will ensure that the screen remains unscratched and free from any residue. Most OLED TVs are accompanied by a microfiber cloth, but if you don’t have one, you can easily purchase it online or offline.
Is vinegar suitable for cleaning OLED TVs? Certainly, white vinegar can be used as a gentle and effective cleaning agent for TV screens, including OLED. However, it is recommended to use vinegar specifically for certain cases. In instances where stubborn marks need to be removed, it is advisable to dilute the vinegar with water. Spray the diluted mixture onto a cotton swab and gently apply it to the desired area.
Is it safe to use glass cleaner on OLED TVs? Using glass cleaner on OLED TV screens is not recommended since the screen is predominantly made of plastic. Plastic is more susceptible to scratches compared to glass. However, if there is a particularly stubborn mark or stain that needs to be dealt with, you can cautiously use a glass cleaner. It is important to ensure that the glass cleaner you use is free from acetone, ammonia, and alcohol, as these substances can potentially harm the screen.
Here are some guidelines to follow when cleaning an OLED TV screen to avoid causing permanent damage:
Avoid harsh liquids: Stay away from cleaning solutions that contain acetone, alcohol, ammonia, soap, scouring powder, window cleaner, wax, or other harsh solvents. These ingredients can harm your screen.
Choose a soft, non-abrasive cloth: Select a cleaning cloth that is extremely soft, non-abrasive, and lint-free. Avoid using pads, tissues, or paper towels, as they can scratch the screen or remove the protective coating.
Be gentle: OLED TV screens are fragile, so avoid applying excessive pressure while wiping. Being gentle will prevent the tearing of the anti-glare coating.
Don’t spray liquids directly: Refrain from spraying liquids or water directly onto the TV screen, even if they are advertised as screen-friendly. This can lead to electric shock or other accidents. Instead, apply liquid to a cloth and then gently wipe the screen.
Unplug and let it cool: Always unplug the TV before cleaning and ensure that it has completely cooled down.
Prevent dust accumulation: Regularly remove dust from the TV screen to prevent it from accumulating on the ventilation, which can cause overheating issues.
Use a slightly damp cloth: When dampening the cloth, ensure it is only slightly wet. Using an overly wet cloth can lead to liquid seeping into the screen and causing damage.
Consult the manual: Read the TV’s manual before cleaning to ensure you follow any specific instructions or recommendations provided by the manufacturer.
Avoid detergents or dishwashing solutions: Never use detergents or dishwashing solutions on the screen, regardless of the circumstances.
Ensure the screen is dry: Before turning on the TV, make sure the screen is completely dry to prevent any potential damage.
How to Clean Your OLED Monitor Screen
Materials Needed:
3 soft, clean, lint-free microfiber cloths
Distilled water or a cleaner designed for electronic screens
For QD-OLED monitors: 70% ethanol solution (optional)
Instructions:
Power Off the Monitor:
Turn off and unplug your OLED monitor. This ensures safety and makes smudges or fingerprints more visible.
Prepare the Cleaning Solution:
Distilled Water: Lightly dampen one corner of a microfiber cloth (slightly moist, not wet).
Screen Cleaner: Apply a small amount to the cloth. Never spray directly onto the screen to prevent moisture damage.
Gently Wipe the Screen:
Starting at the top, wipe gently in a horizontal or circular motion toward the bottom using the damp cloth.
Apply minimal pressure to avoid damaging the delicate OLED surface.
Reconnect and Power On:
Ensure the screen is fully dry and clean, then reconnect and power on the monitor to verify the display is clear and functional.
Tips:
Avoid ammonia, household glass cleaners, or abrasive products, as they can damage the OLED screen.
Use only clean, soft, lint-free microfiber cloths to prevent scratches.
Do not apply excessive pressure; OLED panels are thin and fragile.
Avoid compressed air, as dust can enter through small gaps.
Do not attach items to the screen, as removal may cause damage.
Minimize direct contact with the screen to prevent oil and dust buildup.
By following these precautions, you can safely clean your OLED TV screen and maintain its visual quality.
Learn the meaning of third-party apps and explore the reasons why they can pose security risks to your device and personal information.
Third-party apps refer to software applications that are developed by individuals or organizations other than the original manufacturer or provider of a device or platform. For example, on a smartphone, third-party apps are those that are not pre-installed by the device manufacturer or available on the official app store of the operating system.
While many third-party apps are legitimate and provide useful functionality, they can also present potential risks. Here are a few reasons why third-party apps are often considered “unsafe”:
Security risks: Third-party apps may have vulnerabilities or be designed with malicious intent. Malware, spyware, or viruses can be disguised within these apps, potentially compromising the security of your device and personal information.
Lack of regulation: Unlike apps available on official app stores, third-party apps are not subject to the same level of scrutiny and quality control. This means there is a higher chance of encountering poorly designed or malicious apps that can harm your device or data.
photo: Pixabay
Data privacy concerns: Third-party apps might request access to sensitive information on your device, such as your contacts, photos, or location. If these apps are not reputable or have inadequate security measures, your personal data could be at risk of being misused or exposed.
Compatibility issues: Third-party apps may not be optimized or thoroughly tested for compatibility with your specific device or operating system version. This can lead to instability, crashes, or other technical issues that can impact the overall performance of your device.
It’s important to exercise caution when downloading and installing third-party apps. Stick to reputable sources, such as official app stores, and review user feedback and ratings before installing any apps. Additionally, consider enabling security features on your device, such as app permission controls and regular software updates, to mitigate potential risks associated with third-party apps.
How to enhance your security when using third-party apps?
To enhance your security when using third-party apps, consider following these guidelines:
Stick to official app stores: Download apps only from reputable and official sources like Google Play Store for Android or the App Store for iOS. These platforms have security measures in place to minimize the risk of malicious apps.
Read app reviews and ratings: Before installing a third-party app, check user reviews and ratings to get an idea of its reliability and security. Be cautious if an app has a low rating, negative reviews, or a small number of downloads.
Verify app permissions: When installing an app, review the permissions it requests. Be wary of apps that ask for unnecessary access to sensitive data or features. If an app requests permissions that seem excessive for its intended purpose, it might be a red flag.
Check app developer information: Research the developer of the app to ensure they have a good reputation and a history of creating reliable apps. Verify their website, contact information, and user feedback to gauge their credibility.
Update your device regularly: Keep your device’s operating system and installed apps up to date. Developers release updates to address security vulnerabilities and improve overall stability, so it’s crucial to install these updates promptly.
Install reputable security software: Consider using a reputable mobile security app that can scan for malware, provide real-time protection, and help identify potentially unsafe apps or activities on your device.
Exercise caution with sideloading: Sideloading refers to manually installing apps from sources other than official app stores. While this can offer access to a wider range of apps, it also carries more significant risks. Only sideload apps from trusted sources and be mindful of the potential security implications.
Enable app installation from trusted sources only: On Android devices, disable the option to install apps from unknown sources in your device settings. This helps prevent accidental installation of potentially harmful apps.
Read app privacy policies: Check the app’s privacy policy to understand how it handles your data. Reputable apps will have clear privacy policies that outline how your information is collected, used, and protected.
Trust your instincts: If an app seems suspicious, exhibits unusual behavior, or requests excessive permissions, trust your gut feeling and refrain from installing or using it.
By following these guidelines, you can minimize the risks associated with third-party apps and increase the overall security of your device.
Chroma Optimizer is a term commonly associated with Canon printers and inkjet technology. It refers to a specialized ink cartridge or coating used in certain Canon printers, particularly those designed for professional and high-quality photo printing. The Chroma Optimizer is an additional cartridge or coating that is used alongside the standard ink cartridges in these printers.
Purpose and Mechanism
Chroma Optimizer addresses several challenges inherent in inkjet printing, particularly when using pigment-based inks on glossy or semi-glossy papers. Pigment inks, while durable and fade-resistant, can create uneven surfaces due to the varying heights of ink droplets on the paper. This unevenness scatters light, leading to inconsistent gloss levels, reduced color vibrancy, and optical artifacts like bronzing (a metallic sheen in certain lighting conditions). Chroma Optimizer mitigates these issues by acting as a leveling agent and optical enhancer.
When applied, Chroma Optimizer forms a transparent coating over the printed image. It fills in microscopic gaps between ink droplets, creating a smoother, more uniform surface. This leveling effect reduces diffuse light reflection, ensuring that light reflects evenly across the print. As a result, the print exhibits consistent glossiness, enhanced color saturation, and deeper blacks. Additionally, Chroma Optimizer expands the color gamut by optimizing how light interacts with the ink layers, allowing for more vivid and accurate color reproduction. It also suppresses bronzing by controlling irregular light reflection, which is particularly noticeable in monochrome prints or areas with dense ink coverage.
The purpose of the Chroma Optimizer is to enhance the overall print quality and improve the appearance of prints, especially when printing on glossy or semi-glossy paper. It helps to minimize the appearance of bronzing, which is a phenomenon where metallic or glossy areas of a print appear to have a bronzed or shiny sheen when viewed from certain angles. The Chroma Optimizer helps to even out the surface of the print, resulting in a more uniform and professional-looking output.
In addition to reducing bronzing, the Chroma Optimizer also helps to enhance color vibrancy, increase the optical density, and improve the overall glossiness and smoothness of the printed surface. It can also contribute to better color accuracy and longevity of the prints by providing a protective layer that helps to prevent fading and discoloration over time.
It’s worth noting that Chroma Optimizer is specific to Canon printers and their proprietary inkjet technology. Other printer manufacturers may have their own equivalents or similar technologies that serve a similar purpose but might be referred to by different names.
Application in Printing
Chroma Optimizer is integrated into the printing process through Canon’s advanced print head technology, specifically the FINE (Full-photolithography Inkjet Nozzle Engineering) system in PIXMA printers or the LUCIA PRO system in imagePROGRAF models. The printer selectively applies Chroma Optimizer based on the media type and clear coating settings chosen by the user. These settings, accessible via Canon’s print drivers or software like Professional Print & Layout, include:
Auto: The printer automatically determines where and how much Chroma Optimizer to apply, optimizing for ink efficiency and print speed. This mode is suitable for most users but may not always deliver the best results for critical applications.
Overall: Chroma Optimizer is applied across the entire print surface, ensuring maximum gloss uniformity and color enhancement. This mode is ideal for high-quality prints on glossy media but consumes more ink.
None: Chroma Optimizer is not used during printing, though it may still be consumed during print head maintenance cycles, such as cleaning. This setting is typically used for matte papers, where gloss enhancement is unnecessary.
The application of Chroma Optimizer is media-specific. It is most effective on glossy, semi-glossy, or baryta papers, where gloss uniformity and color vibrancy are critical. For matte papers, its use is minimal or unnecessary, as these media prioritize texture over gloss. However, some users have noted that Canon printers may still consume small amounts of Chroma Optimizer for matte prints, possibly due to maintenance cycles or misconfigured settings.
Benefits of Chroma Optimizer
Gloss Uniformity: By leveling the print surface, Chroma Optimizer ensures consistent gloss across the image, eliminating patchiness that can occur with pigment inks. This is particularly valuable for gallery-quality prints displayed under varied lighting conditions.
Expanded Color Gamut: The optimizer enhances light reflection, allowing colors to appear more saturated and vibrant. This is critical for reproducing subtle hues in landscapes, portraits, or fine art prints.
Deeper Blacks: Chroma Optimizer increases black density by reducing light scatter, resulting in richer, more impactful dark tones. This is especially noticeable in high-contrast images or monochrome prints.
Bronzing Reduction: By controlling irregular light reflection, Chroma Optimizer minimizes bronzing, ensuring that prints maintain their intended appearance under different lighting angles.
Surface Protection: While not primarily a protective coating, Chroma Optimizer may offer some resistance to scratches and environmental factors, though its longevity benefits are less documented compared to dedicated protective sprays.
Professional Finish: The overall effect is a polished, true-to-life print that rivals traditional silver halide or offset printing, making it a staple for photographers and fine art professionals.
Third-Party Alternatives and Innovations
Some third-party ink manufacturers, like Piezography, offer their own versions of Chroma Optimizer (e.g., Gloss Chroma Optimizer for Piezography Pro systems). These are designed to work with specific ink sets and media, often for black-and-white or fine art printing. However, their performance compared to Canon’s formula varies, and compatibility with Canon printers is not guaranteed. Additionally, aftermarket coatings, such as aerosol sprays, can mimic some of Chroma Optimizer’s effects but lack the precision of in-printer application.
Chroma Optimizer is a cornerstone of Canon’s professional inkjet printing technology, offering unparalleled control over gloss, color, and print quality. Its ability to level ink droplets, enhance color gamut, deepen blacks, and reduce bronzing makes it indispensable for photographers and artists seeking gallery-worthy prints. However, its benefits come with trade-offs, including higher ink consumption and costs, particularly for maintenance cycles. By understanding its application and optimizing printer settings, users can maximize its advantages while minimizing drawbacks. For those invested in Canon’s ecosystem, Chroma Optimizer is a powerful tool that elevates the art of inkjet printing, delivering results that rival traditional photographic processes.
One excellent printer with Chroma Optimizer technology
Canon PRO-300 Printer
The Canon imagePROGRAF PRO-300 is a professional-grade inkjet printer designed for high-quality photo printing. It is part of Canon’s imagePROGRAF series and is specifically targeted towards photographers and artists who require precise color reproduction and exceptional print quality.
Key features of the Canon PRO-300 printer include:
Print Technology: The PRO-300 utilizes a 9-color LUCIA PRO pigment ink system, which includes dedicated channels for matte black, photo black, gray, cyan, photo cyan, magenta, photo magenta, yellow, and red inks. This wide color gamut allows for accurate color reproduction and smooth gradations.
Print Resolution: The printer offers a maximum print resolution of 4800 x 2400 dpi, which ensures sharp details and precise image reproduction.
Print Sizes: The PRO-300 supports various paper sizes, including letter, legal, 4×6 inches, 5×7 inches, 8×10 inches, and up to 13×19 inches (A3+).
Connectivity: It features both wired and wireless connectivity options. You can connect it to your computer via USB or Ethernet, or print wirelessly using Wi-Fi or mobile printing technologies such as AirPrint or Canon’s own Print app.
Media Handling: The printer includes a rear tray for most standard paper types and a manual feed slot for thicker media like fine art paper or cardstock. It also supports borderless printing for a professional finish.
Chroma Optimizer: Similar to what I mentioned earlier, the Canon PRO-300 printer incorporates a Chroma Optimizer cartridge, which helps enhance the glossiness and overall print quality, reducing bronzing and providing a uniform finish on glossy and semi-glossy paper.
Software: The printer comes bundled with various software tools to assist with color management, layout customization, and print optimization. These include Canon’s Professional Print & Layout software, Digital Photo Professional (DPP), and a Print Studio Pro plugin for seamless integration with popular photo editing software.
The Canon PRO-300 printer is designed to deliver exceptional print quality, accurate color reproduction, and flexibility in media handling. It is a popular choice for photographers, graphic artists, and other professionals who demand high-quality prints.
Local dimming is a technology used in modern LED (Light-Emitting Diode) televisions and displays to enhance contrast and improve black levels.
LED TVs typically use an array of LED backlights behind the LCD (Liquid Crystal Display) panel to illuminate the screen. Local dimming allows for selective control of these LED backlights, adjusting their brightness or turning them off in specific zones of the screen. This targeted dimming can result in deeper blacks and increased contrast, making dark scenes appear more vibrant and detailed.
The basic principle behind local dimming is that when a particular area of the image is supposed to be dark or black, the LEDs behind that area are dimmed or turned off entirely, reducing the backlight bleeding or “halo effect” that can occur and enhancing the perceived contrast ratio. In contrast, brighter areas of the image can have the LEDs behind them turned up to maintain brightness and detail.
There are different types of local dimming techniques, including full-array local dimming (FALD) and edge-lit local dimming. FALD TVs have LED backlights arranged in a grid pattern behind the screen, allowing for more precise control over specific zones. Edge-lit local dimming, on the other hand, uses LEDs located along the edges of the screen, and the dimming zones are broader and less precise.
Local dimming technology can greatly improve the viewing experience, especially in darker environments, by delivering deeper blacks, higher contrast ratios, and improved overall picture quality. However, the effectiveness of local dimming can vary depending on the quality and implementation of the technology in a particular TV model.
How to test test local dimming?
To test the local dimming capabilities of a television or display, you can follow these steps:
Find a suitable test video or image: Look for content specifically designed to test local dimming performance. There are various test patterns and videos available online that can help evaluate different aspects of local dimming, such as black level performance, blooming, and uniformity.
Dim the lights in the room: For better visibility of the display’s performance, dim the lights in the room or create a dark viewing environment. This will help you observe the effects of local dimming more effectively.
Adjust the TV settings: Enter the TV’s settings menu and make sure the local dimming feature is enabled. Some televisions may have different modes or settings related to local dimming, so ensure that it is activated according to your TV’s specific instructions.
Run the test content: Play the test video or display the test image on the screen. Look for scenes or patterns that specifically showcase dark areas, such as scenes in a dimly lit room or test patterns with black and white contrast.
Observe black levels and blooming: Pay attention to the black levels in dark scenes. The areas of the screen that should be black should appear deep and without any noticeable grayish tint or backlight bleed. Also, look for any blooming or halo effects around bright objects on a dark background. Blooming occurs when the dimming zones are not precise, and the backlight bleeding causes a glow around bright objects.
Evaluate uniformity: Assess the uniformity of the backlight across the screen. Look for any visible differences in brightness or color in different areas of the display. A good local dimming implementation should result in a uniform and consistent backlight across the entire screen.
Repeat for different settings: If your TV has different local dimming settings or modes, try experimenting with them and repeat the test to see how they affect the performance. Some TVs may have different levels of dimming or customization options for local dimming behavior.
Remember that the effectiveness of local dimming can vary between TV models and brands. It’s also worth noting that some test patterns or videos may be specifically designed for professional calibration purposes, so consider using reliable sources or consulting professional reviews for accurate testing guidelines.
Local dimming is designed to improve contrast on a television or display. By selectively dimming or turning off specific zones of LEDs behind the screen, local dimming enhances the difference between dark and bright areas of the image, resulting in a higher contrast ratio.
In scenes with dark content, local dimming allows the LEDs behind the dark areas to dim or turn off, which reduces the backlight intensity in those specific regions. This darkens the black levels, making them deeper and more accurate. As a result, the dark parts of the image appear darker, enhancing the overall contrast between dark and bright elements.
By controlling the backlighting in this manner, local dimming technology helps to mitigate the backlight bleeding or “halo effect” that can occur when bright areas of the screen bleed into adjacent dark areas, reducing the perceived contrast. The ability to selectively adjust the backlight intensity in different zones allows for more precise control over the contrast and can result in a more immersive and visually appealing viewing experience.
It’s important to note that while local dimming can significantly improve contrast, the effectiveness of the technology can vary depending on the quality and implementation in a particular television or display model. High-end TVs with full-array local dimming (FALD) tend to offer superior contrast performance compared to edge-lit local dimming configurations.
Discover the importance of black & gray uniformity on screens and monitors. Learn how inconsistencies in gray tones can affect your visual experience, from web browsing to content creation. Find out how manufacturing tolerances contribute to variations in display quality.
What is gray uniformity?
Gray uniformity refers to the consistency of displayed gray tones across a screen or display panel. It measures how evenly the gray shades are reproduced without any noticeable variations, such as patches of brighter or darker areas, blotches, or discoloration.
In the context of electronic displays, gray uniformity is particularly important for applications that require accurate and consistent color representation, such as graphic design, photography, video editing, and professional content creation. In these fields, any inconsistencies in gray uniformity can lead to inaccurate color representation, which can negatively impact the quality and accuracy of the work.
photo: Pixabay
Gray uniformity is often assessed by displaying a uniform gray image on the screen and observing for any visible deviations or imperfections. It is typically evaluated by measuring the luminance or color variations across different parts of the display. A higher level of gray uniformity indicates a display with more consistent and accurate reproduction of gray tones.
Manufacturers of displays strive to improve gray uniformity in their products by employing various techniques, including advanced panel technologies, calibration processes, and quality control measures. However, it’s important to note that some degree of variance is inherent to display technology, and achieving absolute perfect gray uniformity across an entire screen can be challenging.
Gray uniformity refers to the consistency of a screen’s display. When a monitor lacks uniformity, it may exhibit dark patches along the edges or a smearing effect in the center, commonly referred to as the “Dirty Screen Effect” (DSE). These uniformity issues can have an impact on various activities, including general web browsing on a website with a single uniform color, as well as the work of content creators. Additionally, they become noticeable when viewing wide panning shots or scrolling through a document.
It’s important to note that uniformity issues can vary from one monitor to another due to manufacturing tolerances, resulting in no two panels being exactly alike.
What does black uniformity actually mean?
Black uniformity refers to the consistency of displaying deep black levels across a screen or display panel. It measures how evenly the black areas are reproduced without any noticeable variations, such as backlight bleed, clouding, or uneven lighting.
When it comes to electronic displays, achieving good black uniformity is crucial for delivering high-quality image and video content, especially in applications where dark scenes are prominent, such as watching movies or playing video games with low lighting. Any irregularities in black uniformity can result in distracting anomalies like grayish patches or uneven lighting in dark areas, which can compromise the viewing experience.
Black uniformity is typically evaluated by displaying a fully black image on the screen and examining for any visible deviations or imperfections. Common issues that can affect black uniformity include backlight bleed (light leaking from the edges or corners of the screen), clouding (uneven lighting across the screen), or hotspots (areas of the screen that appear brighter than the surrounding black).
Manufacturers employ various techniques to improve black uniformity, including using advanced panel technologies, implementing local dimming zones (in displays that support it), and conducting rigorous quality control to minimize defects. However, it’s important to note that achieving perfect black uniformity across an entire screen can be challenging, and some degree of variance is often present due to the inherent characteristics of the display technology.