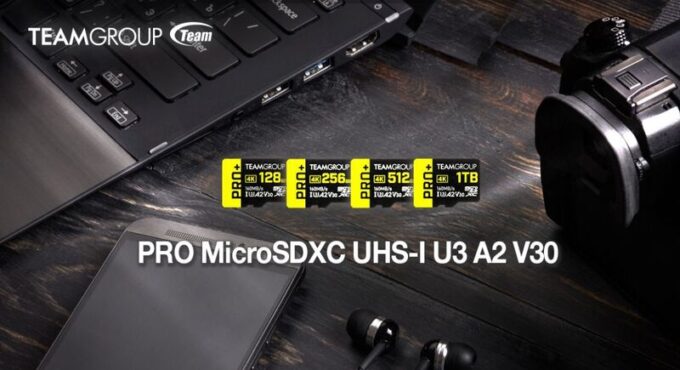
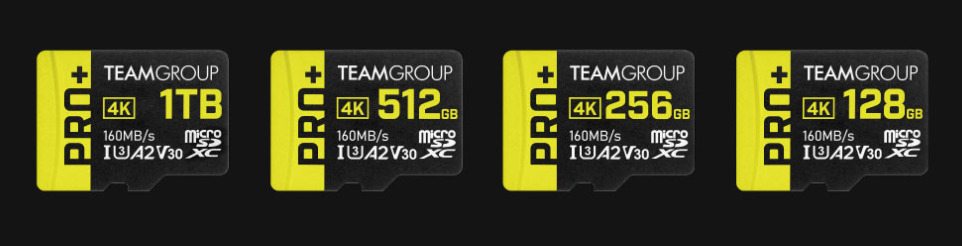
TEAMGROUP has recently launched the advanced TEAMGROUP PRO+ MicroSDXC UHS-I U3 A2 V30 Memory Card, catering to the needs of memory enthusiasts. This cutting-edge memory card conforms to the Application Performance Class A2, UHS Speed Class 3, and Video Speed Class V30 standards. With impressive read and write speeds of up to 160 MB/s and 110 MB/s respectively, users can expect seamless performance.
The TEAMGROUP PRO+ MicroSDXC UHS-I U3 A2 V30 Memory Card is not only highly compatible with a wide range of mobile devices and cameras but also enables users to capture and relish high-definition 4K videos and photos, preserving precious memories in exceptional detail.
Featuring outstanding reliability and stable performance, this memory card is rated at UHS Speed Class 3 and Video Speed Class V30. It boasts a speedy read rate of up to 160 MB/s and a maximum write rate of 110 MB/s. This makes it an ideal choice for storing and accessing high-definition 4K photos and video recordings, allowing users to seize every cherished moment. Furthermore, with its A2 Application Performance Class rating and excellent IOPS performance, this top-of-the-line memory card ensures swift and seamless operation on mobile devices.
The TEAMGROUP PRO+ MicroSDXC UHS-I U3 A2 V30 Memory Card offers hassle-free storage expansion with capacities available in 128GB, 256GB, 512GB, and 1TB options. It is compatible with a wide range of smart devices, cameras, and other equipment. Designed to withstand extreme conditions, it has undergone rigorous testing for waterproof, dustproof, shockproof, anti-static, anti-X-ray, and extreme temperature resistance. Users can confidently record and play their media, knowing that this memory card is built to last.
The TEAMGROUP PRO+ Memory Card offers a lifetime warranty, ensuring long-term reliability and peace of mind for users. This exceptional product has undergone extensive experiments and testing to validate its durability and resilience. It is designed to be waterproof, dustproof, shockproof, anti-static, X-ray-proof, and resistant to both high and low temperatures. With these robust features, users can trust that their data is safe and secure in any environment or situation.
TEAMGROUP PRO+ MicroSDXC UHS-I U3 A2 V30
TEAMGROUP is committed to sustainable development, and in line with this principle, the TEAMGROUP PRO+ MicroSDXC UHS-I U3 A2 V30 Memory Card is manufactured using eco-friendly printing technology and ink, reducing its carbon footprint. Additionally, TEAMGROUP provides a comprehensive lifetime warranty, giving users peace of mind knowing that their precious memories are safeguarded. The TEAMGROUP PRO+ MicroSDXC UHS-I U3 A2 V30 Memory Card has been made available for purchase on Amazon’s North American store since June. For more detailed sales information, stay tuned to the latest updates on TEAMGROUP’s official website and social media channels.
MicroSDXC UHS-I U3 A2 V30 Specifications
Model
MicroSDXC / SD 6.1 / UHS-I
Standard / Class
UHS-I / Class 10 / U3 / A2 / V30
Capacity
128GB / 256GB / 512GB / 1TB
Voltage
2.7V ~ 3.6V
Operation Temperature
-25˚C ~ 85˚C
Storage Temperature
-40˚C ~ 85˚C
Performance
with professional card readers: 128GB: Read up to 160 MB/s; Write up to 90 MB/s 256GB ~ 1TB: Read up to 160 MB/s; Write up to 110 MB/s UHS-I: 128GB ~ 256GB: Read up to 100 MB/s; Write up to 80 MB/s 512GB ~ 1TB: Read up to 100 MB/s; Write up to 90 MB/s
Weight
1g
Dimensions
15(L) x 11(W) x 1(H) mm
Applicable files and devices
exFAT format This memory card is compatible with Micro SDXC slots or products with Micro SDXC logo, and is also backward compatible with products with MicroSDHC and MicroSD slots.[4]
The error tvq-pb-100 you are encountering on Netflix indicates a playback problem with the selected title on your television. This error typically occurs when there are issues with the network connection, the Netflix app on your TV, or the streaming server.
To troubleshoot the error tvq-pb-100, you can try the following steps:
Check your internet connection: Make sure your TV is connected to the internet and that the connection is stable. You can test the connection by opening other streaming apps or websites on your TV.
Restart your TV: Power off your television completely and unplug it from the power source. Wait for a few minutes, then plug it back in and turn it on. Launch the Netflix app again and see if the error persists.
Update the Netflix app: If there is an available update for the Netflix app on your TV, make sure to install it. Outdated app versions can sometimes cause playback issues.
Clear app data or reinstall: Depending on your TV’s operating system, you can try clearing the cache or data of the Netflix app. Alternatively, you can uninstall and reinstall the Netflix app to ensure a fresh installation.
Netflix – photo Pixabay
Check for firmware updates: If your TV has a firmware update available, consider installing it. Firmware updates can address compatibility issues and improve the overall performance of your TV.
Try a different title: Select a different TV show or movie on Netflix and see if it plays without any issues. If only a specific title is causing the problem, it could be a temporary issue with that particular content.
If you’re still experiencing the tvq-pb-100 error after trying the aforementioned steps, here are a few additional suggestions to troubleshoot the Netflix error code:
Switch to a wired connection: If you’re currently using a wireless connection, try connecting your TV to the internet using an Ethernet cable. This can help determine if the wireless connection is causing the playback problem.
Test on a different device: If possible, try streaming Netflix on a different device, such as a computer, smartphone, or tablet. This will help determine if the issue is specific to your TV or if it’s a broader problem with your Netflix account or network.
Check for system updates: Ensure that your TV’s operating system is up to date. Sometimes, system updates can resolve compatibility issues and improve app performance.
Reset your TV to factory settings: This should be considered as a last resort, as it will remove all settings and personal preferences. Consult your TV’s user manual or the manufacturer’s support website for instructions on how to perform a factory reset.
Contact Netflix support: If none of the above steps resolve the issue, it’s advisable to reach out to Netflix customer support directly. They have specialized knowledge and tools to assist you further in troubleshooting the error code.
When contacting Netflix support, provide them with the specific error code (tvq-pb-100) and any other relevant details about your TV model, network setup, and steps you’ve already taken to troubleshoot the issue. This will help them in diagnosing the problem accurately and providing you with the most appropriate solution.
Remember that Netflix support is available through various channels, including phone, live chat, and online help centers. Choose the method that is most convenient for you to get in touch with their support team.
The Netflix error code ATV-ui92 typically indicates a problem with the Netflix app on Apple TV. This error can occur due to various reasons, including a network connectivity issue, a problem with the app’s data, or a temporary server issue. Here are some steps you can take to troubleshoot the ATV-ui92 error:
Check your internet connection: Ensure that your Apple TV is connected to a stable and reliable internet connection. You can test the connection by opening other streaming apps or accessing websites on your Apple TV.Netflix – photo Pixabay
Restart your Apple TV: Try restarting your Apple TV by going to Settings > System > Restart. This will help refresh the device and clear any temporary issues.
Sign out and sign back in: Navigate to Settings > Users and Accounts > Netflix, and select “Sign Out.” After signing out, sign back in using your Netflix account credentials. This process can help refresh the app’s data and resolve any login-related issues.
Update the Netflix app: Check if there are any updates available for the Netflix app on your Apple TV. Go to the App Store, search for “Netflix,” and see if an update is available. If an update is found, install it and try using Netflix again.
Reset network settings: In some cases, resetting the network settings on your Apple TV can help resolve network-related issues. Go to Settings > System > Reset > Reset Network Settings. After the reset, reconnect to your Wi-Fi network and try accessing Netflix.
Update Apple TV software: Ensure that your Apple TV is running the latest software version. Go to Settings > System > Software Updates > Update Software. If an update is available, follow the on-screen instructions to install it and then try using Netflix again.
Check for restrictions: If you have enabled any content or parental restrictions on your Apple TV, it’s possible that they are blocking access to Netflix. Go to Settings > General > Restrictions and ensure that Netflix is allowed.
Contact Netflix support: If the error persists after trying the above steps, it’s recommended to reach out to Netflix support directly. Provide them with the error code ATV-ui92 and any additional details, and they will be able to assist you further in troubleshooting and resolving the issue.
If the previous steps didn’t resolve the ATV-ui92 error on your Apple TV, here are a few more troubleshooting steps you can try:
– Check HDMI connection: Ensure that the HDMI cable connecting your Apple TV to your television is securely plugged in on both ends. Try disconnecting and reconnecting the cable to make sure it is properly seated.
– Restart your home network: Restart your modem and router by unplugging them from the power source, waiting for about 30 seconds, and then plugging them back in. Once your network equipment has restarted, wait for it to fully reconnect before trying Netflix again on your Apple TV.
– Reset Apple TV settings: If the issue persists, you can try resetting your Apple TV to its factory settings. Go to Settings > System > Reset, and choose either “Reset All Settings” or “Restore.” Keep in mind that these options will reset your Apple TV to its default settings, so you will need to set it up again.
– Try a different network: If possible, connect your Apple TV to a different network, such as a mobile hotspot or a different Wi-Fi network, to see if the error persists. This can help determine if the problem is specific to your home network.
– Update your television firmware: If you have a smart TV connected to your Apple TV, ensure that it is running the latest firmware version. Check the manufacturer’s website for any available updates and follow the instructions to update your TV’s firmware.
– Contact Apple support: If none of the above steps resolve the issue, it’s advisable to reach out to Apple support for further assistance. They have specialized resources to help diagnose and troubleshoot Apple TV-specific issues.
It’s worth noting that the ATV-ui92 error code may also occur due to temporary server issues on Netflix’s end. In such cases, the problem usually resolves itself without any action required from your side. However, if the error persists for an extended period, it’s best to reach out to Netflix or Apple support for further guidance.
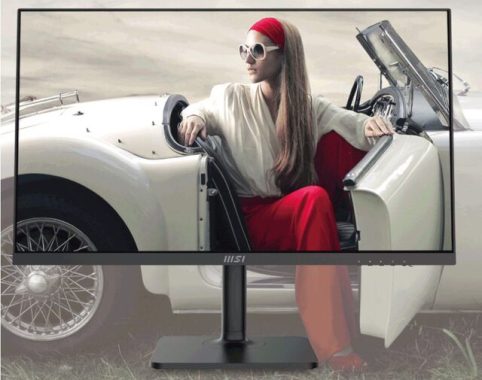
The MSI Modern MD271QP Series Monitor is a 27-inch display that offers an impressive set of features for an enhanced viewing experience. With its WQHD resolution of 2560×1440, this monitor delivers sharp and detailed images, making it ideal for content creators, professionals, and gamers alike.
One notable feature of the MD271QP is its IPS panel, which ensures accurate color reproduction and wide viewing angles of 178 degrees both horizontally and vertically. This means that you can enjoy vibrant and consistent colors from any position without any loss in quality.
The monitor also incorporates anti-flicker and less blue light technologies, which reduce eye strain during extended periods of use. This is especially beneficial for those who spend long hours in front of the screen. Additionally, the anti-glare surface treatment minimizes reflections, allowing you to work or play without distractions caused by ambient lighting.
MD271QP
The MD271QP comes with a VESA mount support, giving you the flexibility to mount it on a compatible monitor arm or stand for a clutter-free and ergonomic setup. It also features built-in speakers, eliminating the need for external speakers or headphones for basic audio needs.
In terms of connectivity, the monitor offers HDMI 1.4 and DisplayPort 1.2 inputs, providing compatibility with various devices. The frameless design adds a sleek and modern touch to the overall aesthetics of the monitor, while the adjustable stand allows you to tilt, swivel, adjust height, and even pivot the display according to your preference.
While the MD271QP does not support HDR or offer a high refresh rate, it compensates with its excellent color accuracy and overall image quality. With a contrast ratio of 1000:1 and a dynamic contrast ratio of 100000:1, the monitor delivers deep blacks and bright whites, resulting in a visually immersive experience.
The product dimensions and compact stand make it suitable for both desktop and limited space setups. The VESA mounting option gives you the freedom to mount the monitor on the wall or a monitor arm, further optimizing your workspace.
With its 27-inch screen size, the MSI Modern MD271QP provides ample screen real estate for multitasking and immersive entertainment. The WQHD resolution ensures crisp and detailed visuals, making it a great option for graphic designers, photographers, and anyone who values image clarity.
The inclusion of 8-bit color depth and support for 16.7 million display colors ensures accurate and vibrant color reproduction. The monitor covers a wide range of color spaces, including NTSC, sRGB, Adobe RGB, and DCI-P3, allowing you to work with color-critical content and ensuring that your images and videos appear true to life.
The MSI Modern MD271QP Series monitor features multiple connectivity options, including HDMI 1.4 and DisplayPort 1.2, ensuring compatibility with a wide range of devices such as laptops, desktops, and gaming consoles. The built-in speakers offer convenience for casual audio needs, although dedicated external speakers or headphones would provide a better audio experience for more demanding requirements.
One notable aspect of the MD271QP is its thoughtful eye-care features. The anti-flicker technology reduces screen flickering, which can cause eye fatigue, while the low blue light emission helps minimize eye strain, particularly during extended usage sessions. These features contribute to a more comfortable and healthier viewing experience.
The adjustable stand allows you to tilt the monitor from -5 to 20 degrees, swivel it from -30 to 30 degrees, adjust the height by up to 110 mm, and even pivot it from -90 to 90 degrees. This level of adjustability ensures ergonomic positioning, reducing the risk of neck and back strain.
The frameless design adds a sleek and modern aesthetic to the monitor, and the narrow bezels provide a seamless viewing experience when using multiple monitors side by side. The VESA mount compatibility allows you to create a customized setup and save valuable desk space.
In terms of power consumption, the MD271QP utilizes an external adapter with a power input range of 100~240V, making it energy-efficient and suitable for international use.
MSI MD271QP
Pros:
High-resolution display: The WQHD resolution provides sharp and detailed visuals, making it suitable for tasks that require precise image quality.
Accurate color reproduction: With support for multiple color spaces and 8-bit color depth, the monitor delivers vibrant and true-to-life colors, making it ideal for creative professionals.
Wide viewing angles: The IPS panel ensures consistent image quality and color accuracy from various viewing angles, allowing multiple people to view the screen without distortion.
Eye-care features: The anti-flicker and low blue light technologies help reduce eye strain and fatigue, making it comfortable for extended use.
Versatile connectivity: The monitor offers HDMI and DisplayPort inputs, ensuring compatibility with a wide range of devices, such as laptops, desktops, and gaming consoles.
Adjustable stand: The stand allows for tilt, swivel, height adjustment, and pivot, enabling users to find the most comfortable and ergonomic viewing position.
Frameless design: The slim bezels and frameless design create an immersive viewing experience, especially when using multiple monitors in a multi-display setup.
VESA mount compatibility: The monitor supports VESA mounting, allowing users to mount it on a wall or monitor arm for a clutter-free and customizable workspace.
Cons:
Lack of HDR support: The monitor does not feature HDR technology, which means it may not deliver the same level of contrast and color range as HDR-enabled displays.
Limited refresh rate: The 75Hz refresh rate may not be sufficient for fast-paced gaming or motion-intensive applications, as it may result in motion blur or lag.
Basic built-in speakers: While the monitor has built-in speakers, the audio quality may not be as robust or immersive as dedicated external speakers or headphones.
Lack of DVI and D-Sub ports: The absence of DVI and D-Sub ports may limit connectivity options for older devices that rely on these connections.
IPS Panel: Experience stunning visuals with the MSI Modern MD271QP Series Monitor’s IPS panel. Whether you’re creating online videos or simply enjoying multimedia content, this panel instantly optimizes screen colors and brightness, ensuring every detail is presented at its best. Immerse yourself in vibrant and lifelike visuals for a truly captivating viewing experience.
Multiple Input Design: Enhance your productivity while working or learning from home with the MD271QP’s multiple input design. Equipped with HDMI™, Type-C, and DP ports, this monitor offers efficient connectivity for multiple devices. Seamlessly switch between your laptop, gaming console, or other peripherals, making multitasking a breeze.
Built-in USB Type-C Connection: Say goodbye to cable clutter. The MD271QP features a built-in USB Type-C connection, allowing you to effortlessly connect and charge your devices. Streamline your setup and enjoy the convenience of a single cable connection for both data transfer and power delivery.
MSI MD271QP
While the MSI Modern MD271QP Series monitor offers some attractive features like its IPS panel and multiple input design, there are a few areas that could be improved upon. The built-in USB Type-C connection is convenient, but it would be beneficial to have additional USB ports for enhanced connectivity. Additionally, the adjustable stand is a useful feature, but it may not offer the same level of flexibility as more advanced ergonomic stands. Furthermore, while the WQHD resolution is impressive, it would have been ideal if the monitor supported HDR for a more immersive visual experience. Overall, the MD271QP provides decent performance and functionality, but there are some limitations that potential buyers should consider.
Adjustable Stand: Find your perfect viewing and working position with the MD271QP’s adjustable stand. With four ways of adjustment, including tilt, swivel, height, and pivot, you can customize the monitor to suit your comfort and preferences. Achieve optimal ergonomics and maximize your productivity with ease.
2560 x 1440 (WQHD) Resolution: Immerse yourself in a world of stunning detail and enhanced readability with the MD271QP’s WQHD resolution. With a resolution of 2560 x 1440, this monitor expands your viewing and working area, allowing you to see more content at once. Experience sharper text, more vivid three-dimensional effects, and indulge in the aesthetic beauty that this high-resolution display brings to your life.
The MSI Modern MD271QP Series monitor combines a feature-rich IPS panel, versatile connectivity options, an adjustable stand, and a high-resolution display to elevate your viewing and working experience. Enjoy stunning visuals, seamless multitasking, and ergonomic comfort, making it an excellent choice for professionals and enthusiasts alike.
The MSI Modern MD271QP Series monitor is a reliable and feature-packed display that offers a high-quality viewing experience. Whether you’re a professional seeking accurate colors or a gamer wanting sharp visuals, this monitor delivers on its promises and is a solid choice for various applications. MSI Modern MD271QP price $280.79.
MSi Modern MD271QP Specs
Screen Size 27″ (69 cm) Active Display Area (mm) 596.736(H) X 335.664(V) Curvature Flat Panel Type IPS Resolution 2560×1440 (WQHD) Pixel pitch 0.2331(H)X0.2331(V) Aspect Ratio 16:9 SDR Brightness (nits) 250 Contrast Ratio 1000:1 DCR (Dynamic Contrast Ratio) 100000:1 Signal Frequency 30~112 KHz(H) / 48~75 Hz(V) Refresh Rate 75Hz Response Time (GTG) 5ms Response Time (Tr + Tf) 14ms View Angles 178°(H)/178°(V) NTSC (CIE1976 area percentageoverlap) 95.10%/80.10% NTSC (CIE1931 area percentageoverlap) 77.30%/72.00% sRGB (CIE1976 area percentageoverlap) 109.02%/97% sRGB (CIE1931 area percentageoverlap) 109.13%/96.20% Adobe RGB (CIE1976 area percentageoverlap) 93.34%/85.70% Adobe RGB (CIE1931 area percentageoverlap) 80.90%/74.80% DCI-P3 (CIE1976 area percentageoverlap) 86.92%/83.20% DCI-P3 (CIE1931 area percentageoverlap) 80.45%/79.60% Surface Treatment Anti-glare Display Colors 16.7M Color bit 8 bits Note_DP 2560 x 1440 (Up to 75Hz) Note_HDMI 2560 x 1440 (Up to 75Hz) HDMI 1 HDMI version 1.4 HDMI HDCP version 2.2 DisplayPort 1 DisplayPort versio 1.2 DisplayPort HDCP version 2.2 USB Type C (DisplayPort Alternate) 1 Headphone-out 1 Lock type Kensington Lock Power Type External Adaptor 19V 3.42A Power Input 100~240V, 50/60Hz
A screenshot is a captured image or snapshot of what is displayed on a computer or device screen at a specific moment. It is a visual representation of the contents visible on the screen, including any open applications, windows, documents, web pages, or images. Screenshots are commonly used for various purposes, such as illustrating software features, reporting issues or errors, sharing information, providing visual instructions or guides, or documenting a specific screen layout or design. They are a convenient way to capture and share visual information from a computer or device screen.
There are several excellent screenshot apps available for Windows that offer various features and functionalities. Here are five of the best screenshot apps you can consider:
Snagit: Snagit is a popular and feature-rich screenshot and screen recording software. It offers a wide range of capture options, including full screen, specific windows, regions, scrolling web pages, and more. Snagit also provides powerful editing tools to annotate and enhance your screenshots.
Photo: Snagit
Snagit also lets you easily apply special effects to an image (like grayscale, text, arrows, and borders) without aspiring to be a super-tool like Adobe Illustrator. In addition, its video-recording feature lets you include an audio track from either a microphone or Windows’ own audio output—for example, from an MP3 recording on disk or a YouTube video. TechSmith’s related, and free, Fuse mobile apps for Android and iOS let you export images from your smartphone to a desktop running Snagit (or Camtasia) if the devices are on the same Wi-Fi network. To get past this Wi-Fi restriction, you’ll need to sync your files across an outside cloud storage service, and then open that storage to access those files on whatever device you want. That’s pretty easy to do, but Droplr does a better job putting all your files into one easy cloud ecosystem for all devices. Snagit’s editor serves two purposes: it opens captured images and houses all of your screencaps. One great thing about Snagit’s image saving is that any screenshot you snag is accessible from the program cache, even if you don’t explicitly save it. Screencast-O-Matic and Ashampoo Snap do the same, although Snap’s interface is far too busy, with menus running across the entire perimeter.
Greenshot: Greenshot is a free and open-source screenshot tool that offers a simple and intuitive user interface. It allows you to capture screenshots of specific areas, windows, or the entire screen. Greenshot provides basic editing features, such as adding text, shapes, and arrows to your screenshots. Greenshot is an on-premise photo editing tool, which enables technical writers, software developers, project managers, and other professionals to capture screenshots of a selected area and entire web pages. Users can utilize a drag-and-drop interface to add images and graphics to screenshots according to individual requirements. Greenshot helps managers set up time lags and customize hotkeys to create screenshots. Professionals can import images from the clipboard and use the image editor to add shapes, annotations and text to captured screens. Additionally, software developers can save screenshots within files and draw shapes using various tools to highlight specific sections.
LightShot: LightShot is a lightweight and easy-to-use screenshot tool that enables you to capture and share screenshots quickly. It offers customizable capture options and provides basic editing tools like highlighting, cropping, and adding annotations. LightShot also allows you to upload and share your screenshots online.
ShareX: ShareX is a powerful and feature-packed screenshot and screen recording tool. It supports various capture methods, including full screen, active windows, regions, and scrolling captures. ShareX provides extensive customization options and offers a comprehensive set of editing tools. It also includes features for capturing screencasts and sharing files online. ShareX is a robust and versatile screenshot app that goes beyond simple capture functionality. It offers multiple capture methods, including full-screen, active window, active monitor, region, web page, and text. After capturing, ShareX provides a wide range of post-capture tasks such as adding image effects or watermarks, annotation, copying, printing, saving thumbnails, and uploading. It also supports image uploading and includes screen recording features, including the ability to create GIFs.
PicPick: PicPick is a versatile screenshot tool that offers a combination of screen capture, image editing, color picker, and other useful utilities. It provides flexible capture options and supports various output formats. PicPick includes basic editing features like cropping, resizing, adding text, and applying effects. PicPick is a free software only for private use, which quickly generates screenshots from your computer screen and allow you to modify them according to a variety of purposes, in the same comfortable interface. This program has a wide range of graphic editing features. You can choose from a rich set of tools such as Color Picker (which allows you to choose a color on the screen and then use it in the image), a magnifying glass, a pixel ruler, a whiteboard, viewfinder, goniometer, blackboard and much more for creating the perfect shot.
If you encounter network problems and suspect that the WiFi driver is the cause, you may need to uninstall and reinstall the driver to resolve the issue. Here’s a step-by-step guide on how to properly uninstall and reinstall WiFi drivers in Windows 11.
Uninstalling the WiFi Driver:
Press Win + R to open the Run dialog box.
Type “devmgmt.msc” and click OK to open Device Manager.
In Device Manager, expand the “Network adapters” section.
Right-click on the wireless driver and select Properties. The driver may be labeled as Intel or another manufacturer, depending on your computer.
In the Properties window, make note of the WiFi adapter name and driver version (optional, but helpful for manual reinstallation).
Click OK to close the Properties window.
In Device Manager, click on View > Devices by connection. This will display all devices associated with the driver.
Right-click on the driver package “oem20.inf” (or “netwtw08.inf”) for the WiFi device and choose “Remove Driver.”
Select the option to “Uninstall this driver software from any devices it is installed on” and “Delete the driver software for this device.”
Click Remove to uninstall the driver. The process may take a few seconds to complete.
This will successfully uninstall the WiFi driver without removing the WiFi adapter. Windows will temporarily switch to using generic Microsoft wireless drivers.
WiFi – photo: Pixabay
Reinstalling the WiFi Driver:
There are two methods to reinstall the WiFi driver: using Windows Updates or manually downloading it from the manufacturer’s website.
Method 1: Reinstalling via Windows Updates
Press Win + I to open the Settings app.
Go to the “Windows Update” tab in the left pane.
Click on “Check for updates.” Windows will scan for missing system updates, including the wireless driver update for your WiFi adapter. Wait for the installation to complete.
Method 2: Manually Reinstalling from the Manufacturer’s Website
Visit the manufacturer’s website (e.g., Intel’s Download Center) in your web browser.
Search for your specific WiFi adapter model number.
From the search results, select the appropriate driver package for Windows 10 and Windows 11.
Click the Download button to download the WiFi driver package.
Run the installer and follow the on-screen instructions to complete the installation.
After reinstalling the driver, you should have the latest version of the WiFi driver on your PC. To verify the driver version, open Device Manager, right-click on the WiFi adapter, select Properties, and go to the Drivers tab.
Windows is proficient at automatically managing system driver requests. However, there are times when it becomes necessary to uninstall and reinstall the WiFi driver for troubleshooting purposes. The process involves utilizing Device Manager to uninstall the driver and then reinstalling it through Windows Updates.
If the network problem persists, you can try using the built-in troubleshooter or perform a network reset to resolve the issue.
The Gigabyte S55U is a BIG gaming monitor that offers a many of impressive features and specifications. With its 54.6-inch VA panel and 4K UHD resolution, this monitor delivers immersive visuals and a captivating gaming experience. Let’s dive into its various aspects and features in detail:
Display: The monitor features a 54.6-inch VA panel, offering a large viewing area for an immersive gaming and multimedia experience. The True Resolution of 3840 x 2160 ensures sharp and detailed visuals, making it ideal for gaming and content creation.
The Gigabyte S55U boasts a 96% DCI-P3 color saturation and 140% sRGB coverage, delivering vibrant and accurate colors for a visually stunning display. The Direct panel backlight technology provides consistent and uniform brightness across the screen.
GIGABYTE S55U Gaming Monitor
Brightness and Contrast – With a maximum brightness of 500 cd/m2 (typical) and a peak brightness of 1500 cd/m2, the monitor offers excellent visibility even in brightly lit environments. The high contrast ratio of 5000:1 enhances the depth and richness of colors, resulting in more lifelike visuals.
Viewing Angle and Response Time: The monitor offers wide viewing angles of 178 degrees horizontally and vertically, allowing for consistent colors and image quality from different viewing positions. The response time of 2ms GTG (minimum) and 5ms GTG (average) ensures smooth and fluid motion, reducing motion blur during fast-paced gaming sequences.
Refresh Rate and V-Sync: With a refresh rate of 120Hz, the monitor provides smoother and more responsive gameplay, especially in fast-action games. It supports FreeSync Premium technology, reducing screen tearing and stuttering for a more enjoyable gaming experience.
HDR Support: The Gigabyte S55U supports various HDR formats, including Dolby Vision, HDR10, HDR10+, and HLG. This allows for a wider dynamic range, providing more vibrant colors, deeper blacks, and brighter highlights, enhancing the visual quality and realism.
Connectivity: The monitor offers a range of connectivity options, including two HDMI 2.1 ports, two HDMI 2.0 ports, USB 3.2 Gen 1 downstream and upstream ports, USB 2.0 ports, an earphone jack, Ethernet, wireless 802.11ac, and Bluetooth. These options ensure seamless connectivity with multiple devices and peripherals.
Audio and Sound Modes: The built-in dual 10W speakers provide immersive audio output, accompanied by Dolby Atmos and DTS HD support for enhanced sound quality. The monitor offers multiple sound modes, including Standard, Movie, Sports, Music, Speech, and Late Night, allowing users to customize the audio experience.
Unique Features: The Gigabyte S55U incorporates several unique features to enhance the gaming experience. These include Aim Stabilizer Sync, Black Equalizer, Crosshair, Refresh Rate Timer, 6-axis Color Control, HDMI CEC, Noise Reduction, Parental Control, and Local Dimming (132 zones). These features provide customization options and optimize the visuals for different gaming scenarios.
Its performance is top-notch, offering a swift response time as low as 2ms and an impressive refresh rate of up to 120Hz. The monitor’s brightness and contrast capabilities are commendable, with a color gamut covering 96% of the DCI-P3 spectrum. Adding to its visual prowess, the monitor features a backlight array with 132 local dimming zones, enhancing contrast and immersion in gaming and content consumption.
Beyond its stunning display, the Gigabyte S55U boasts an array of impressive features. It operates on the Android OS and comes equipped with the convenience of Google Assistant and built-in Chromecast support. The monitor also features twin 10W speakers with Dolby Atmos and DTS HD, providing immersive audio experiences. With a wide selection of sound profile presets, users can tailor the audio output to their preferences. Furthermore, the monitor offers a comprehensive range of ports, including the latest HDMI 2.1, various USB ports, Ethernet for wired connections, and both Wi-Fi and Bluetooth for seamless wireless connectivity.
The Gigabyte S55U is more than just a visually striking monitor—it’s a powerhouse of features that cater to both the audio-visual demands of users. Whether you’re a gamer, content creator, or multimedia enthusiast, this monitor promises an immersive and enjoyable experience with its stunning display, impressive performance, and extensive feature set.
The monitor runs on the Android operating system, offering access to Google Assistant and the Google Play app store. Users can enjoy various apps, stream content, and access a range of entertainment options directly from the monitor.
Power Consumption and Saving Modes: The monitor has a power consumption of 83W during operation, ensuring efficient energy usage. It features power-saving modes that reduce power consumption to 0.5W in power-saving mode and 0.3W in power-off mode. The monitor supports a voltage range of 100~240Vac.
The Gigabyte S55U is an exceptional gaming monitor designed specifically for 4K console gaming at 120Hz. Packed with advanced features like Variable Refresh Rate (VRR) and Auto Low Latency Mode (ALLM), it offers gamers a highly immersive experience free from distractions. Additionally, the eARC function simplifies connectivity and provides seamless audio optimization and component discovery.
Cons of the Gigabyte S55U:
Large Size and Space Requirement: The 55-inch display may be too large for some setups or spaces, requiring ample desk or wall space.
Flicker-Free Technology: Unlike some other monitors, the Gigabyte S55U does not explicitly mention the inclusion of flicker-free technology, which could potentially cause eye strain for some users.
Limited Ergonomic Adjustability: The monitor may have limited ergonomic adjustment options, such as tilt, swivel, and height adjustment, which may not cater to the specific preferences of all users.
Lack of Advanced HDR Support: While the monitor supports HDR formats, it does not specify support for advanced HDR technologies like HDR10+ or Dolby Vision IQ, which offer enhanced dynamic range and optimized image quality.
It’s important to note that individual preferences and specific requirements may vary, so it’s recommended to consider these factors in relation to your own needs when evaluating the Gigabyte S55U.
AIM STABILIZER SYNC: The AIM STABILIZER SYNC feature is a game-changer, reducing motion blur and maintaining exceptional clarity in fast-paced gaming scenarios. By activating this feature, gamers can enhance their aiming abilities and enjoy a smoother overall gaming experience.
BLACK EQUALIZER: With the Black Equalizer feature, the Gigabyte S55U goes above and beyond. It deepens the details of dark areas within a scene without compromising the overall display quality in other areas. This ensures that gamers can perceive crucial details even in dimly lit environments, gaining a competitive edge.
Six Axis Control
SIX AXIS CONTROL: The Six Axis Control feature empowers users to individually adjust six colors (red, green, blue, cyan, magenta, and yellow). This level of control allows for a more accurate and precise display of the color gamut on the monitor. Users can fine-tune each color to their liking, resulting in stunning visuals that truly pop.
The Gigabyte S55U offers an unparalleled gaming experience with its VRR, ALLM, and eARC features. Combined with the AIM STABILIZER SYNC, BLACK EQUALIZER, and SIX AXIS CONTROL functionalities, this monitor ensures gamers can fully immerse themselves in their favorite games with exceptional visuals and minimal distractions. Gigabyte S55U Gaming Monitor price: $899.99
The Gigabyte S55U gaming monitor provides a large and immersive display, vibrant colors, fast response time, and a range of gaming-oriented features. Its support for multiple HDR formats, rich connectivity options, and built-in speakers make it a compelling choice for gamers and multimedia enthusiasts alike.
Specs
Gigabyte S55U Gaming Monitor
Screen basics
54.6-inch diagonal, 3840 x 2160 pixels, VA panel with wide viewing angles, 500 cd/m2(TYP), 1500cd/m2 (PEAK) brightness, 5000:1 contrast, Anti-glare (Haze 3%) coating
10W x 2, Dolby Atmos/ DTS HD, headphone jack, optical fiber out. Modes: Standard / Movie / Sports / Music / Speech / Late Night
Connectivity
2 x HDMI 2.1 (48G, eARC), 2 x HDMI 2.0, 1 x USB 3.2 Gen 1 Downstream ports, 1 x USB 3.2 Gen 1 Upstream port, 1 x USB 2.0, 1 x Earphone Jack, 1 x Ethernet, Wireless 802.11ac 2.4GHz/5GHz, Bluetooth
Other features
Android TV features, Game modes (mentioned above, plus 6-axis color control, HDMI CEC, Noise reduction, Parental controls.
USB 3.1, USB 3.0, USB Type C, and USB 2.0 are different versions and types of USB (Universal Serial Bus) specifications. Each version offers different capabilities and features. Here’s a breakdown of their differences and compatibility:
USB 2.0: USB 2.0, introduced in April 2000, is an older version of USB and is the most widely adopted standard. It supports data transfer rates of up to 480 Mbps (megabits per second). USB 2.0 ports are typically rectangular in shape and have a USB Type-A connector.
USB 3.0/3.1 Gen 1: USB 3.0, also known as USB 3.1 Gen 1, was introduced in November 2008. It offers significant improvements over USB 2.0, with data transfer rates of up to 5 Gbps (gigabits per second), which is ten times faster than USB 2.0. USB 3.0/3.1 Gen 1 ports are backward compatible with USB 2.0 devices, meaning you can connect USB 2.0 devices to USB 3.0/3.1 Gen 1 ports.photos: Pixabay
USB 3.0 Type-A connectors have a similar design to the A-Type connectors used in USB 2.0 and USB 1.1 applications. They also provide a “downstream” connection intended for use on host controllers and hubs.
However, USB 3.0 Type-A connectors have additional pins that are not present in USB 2.0 Type-A connectors. The USB 3.0 connector is designed to support “SuperSpeed” data transfer with a bandwidth of 5 Gbps. It is also backward compatible, allowing for lower data rates when connected to USB 2.0 ports. USB 3.0 connectors are often distinguished by their blue color or the presence of the “SS” logo, helping to differentiate them from previous generations.
USB 3.1 Gen 2: USB 3.1 Gen 2, introduced in July 2013, further improved data transfer speeds over USB 3.0/3.1 Gen 1. It supports data transfer rates of up to 10 Gbps, which is twice as fast as USB 3.0/3.1 Gen 1. USB 3.1 Gen 2 ports and cables are typically identified with a SuperSpeed+ logo.
The USB 3.1 internal connector cables, developed by Intel, are specifically designed for connecting the motherboard to the front panel USB ports of a computer case.
Like the previous USB 3.0 internal connector, the new generation internal connector also includes a 20-pin header version that supports either a single Type-C port or dual Type-A connections. However, the new connector features a smaller form factor and a more robust mechanical latch design. Additionally, a 40-pin header version of the internal connector was introduced to accommodate two full-featured Type-C ports.
USB Type-C: USB Type-C is a connector and cable standard that was introduced in August 2014. It is a small, reversible connector that can be plugged in either way, eliminating the frustration of inserting the connector in a specific orientation. USB Type-C supports various protocols, including USB 3.1 Gen 1, USB 3.1 Gen 2, and Thunderbolt 3 (which offers even higher data transfer speeds). USB Type-C ports are increasingly becoming more common on devices such as laptops, smartphones, and tablets.
The USB Type-C connector, also known as USB-C, is the latest USB interface introduced alongside the USB 3.1 standard. Unlike the previously mentioned USB Type-A and Type-B connectors, the USB-C Type connector can be used on both host controller ports and devices with upstream sockets. Over the past few years, an increasing number of laptops and cellphones have been released with USB-C connectors.
The USB Type-C connector is compatible with USB 2.0, 3.0, 3.1 Gen 1, and Gen 2 signals. A fully featured USB 3.1 Gen 2 USB-C to USB-C cable can achieve a maximum data transfer rate of 10 Gbps. It also supports enhanced power delivery, allowing for up to 20V and 5A (100W) of power transmission. Additionally, USB-C supports DisplayPort and HDMI alternate modes, enabling the transfer of video and audio signals.
USB devices and Compatibility:
USB 2.0 devices can be connected to USB 3.0/3.1 Gen 1 ports without any issues. However, the data transfer speed will be limited to the maximum speed supported by USB 2.0 (480 Mbps).
USB 3.0/3.1 Gen 1 devices are backward compatible with USB 2.0 ports. They will work with USB 2.0 ports, but at USB 2.0 speeds.
USB 3.1 Gen 2 devices can be connected to USB 3.1 Gen 1 ports, but the data transfer speed will be limited to the maximum speed supported by USB 3.1 Gen 1 (5 Gbps).
USB Type-C ports can support multiple protocols, including USB 2.0, USB 3.0/3.1 Gen 1, and USB 3.1 Gen 2. However, the data transfer speed will be limited by the protocol supported by the device and the cable being used.
It’s important to note that while USB Type-C is a connector standard, it doesn’t determine the version or speed of the USB protocol being used. The version and speed are determined by the capabilities of the device, port, and cable being used.
Understanding USB standards and their specifications can be challenging, especially with the numerous updates they have undergone. In this discussion, we will explore the difference between USB 3.1 Gen 1 and Gen 2 and highlight why Gen 2 is an improvement over Gen 1. We will also provide additional information to help you grasp the key aspects of USB standards.
USB 3.0, introduced in 2008, marked a significant advancement from its predecessor, USB 2.0, which debuted in 2000 with a transfer speed of 480 Mbit/s. Over time, USB 3.0 became known as USB 3.1 Gen 1. In essence, USB 3.0 and USB 3.1 Gen 1 refer to the same standard.
The USB Implementers Forum (USB-IF), the organization responsible for maintaining USB specifications and ensuring compliance, implemented this naming convention to provide developers and manufacturers with consistent information and facilitate backward compatibility. USB-IF also plays a role in establishing the naming conventions used for USB cables and devices.
Now, let’s compare USB 3.1 Gen 1 and USB 3.1 Gen 2. The primary difference between them lies in their speed capabilities. USB 3.1 Gen 1 supports speeds of up to 5 Gbit/s, while USB 3.1 Gen 2 can achieve speeds of up to 10 Gbit/s. Initially, USB-IF intended to market USB 3.1 Gen 1 as “SuperSpeed USB” and USB 3.1 Gen 2 as “SuperSpeed USB+.” However, this naming convention did not gain widespread adoption in the industry. As a result, OEMs often list the speeds of 5 Gbps or 10 Gbps in their specifications to differentiate between the two standards, while the broader industry commonly refers to them as “USB 3.1 Gen 1” and “USB 3.1 Gen 2.”
With the introduction of USB 3.2, the USB-A connection, which had been dominant in the industry, started to be phased out in favor of USB-C. USB-C offers higher data transfer speeds and faster charging capabilities for peripheral devices. Consequently, USB 3.2 Gen 2 is primarily associated with USB-C connectors.
It is worth mentioning that Thunderbolt™ is a hardware interface developed by Intel® in collaboration with Apple® for connecting peripheral devices to computers. Thunderbolt 1 and 2 utilized the same Mini DisplayPort (MDP) connector, while Thunderbolt 3 adopted the USB-C connector. The Thunderbolt logo signifies the presence of Thunderbolt technology in a device.
By understanding these key distinctions and developments in USB standards, you can navigate the various specifications and make informed decisions regarding USB connections and devices.
Are you encountering the “Couldn’t refresh feed” error when trying to load your Instagram feed on your iPhone or Android phone? If so, it’s likely due to an issue with your internet connection, preventing the content from being fetched. Fortunately, there are several solutions to help you resolve this problem.
There are other factors that can also contribute to the error and the inability to view your feed content. These include a corrupt app cache, incorrect date and time settings on your phone, using an outdated version of the Instagram app, and more.
In order to address this issue and regain access to your feed, we’ll guide you through some troubleshooting methods.
If you’re experiencing the “Couldn’t refresh feed” error on Instagram, there are several steps you can take to try and resolve the issue. Here are some potential solutions:
Check your internet connection: Ensure that you have a stable internet connection. Try accessing other websites or apps to verify if the issue is specific to Instagram or if it’s a broader connectivity problem.
Restart the Instagram app: Close the Instagram app completely and relaunch it. This simple step can often resolve temporary glitches or bugs.
Update the Instagram app: Make sure you have the latest version of the Instagram app installed on your device. App updates often include bug fixes and improvements that can address issues like the “Couldn’t refresh feed” error.
Clear cache and data (Android): If you’re using an Android device, clearing the cache and data of the Instagram app can sometimes resolve issues. Go to your device’s Settings, find the Apps or Applications section, locate Instagram, and then choose the option to clear cache and data. Keep in mind that clearing data will log you out of the app, so you’ll need to log back in.
Reinstall the Instagram app: If the error persists, you can try uninstalling the Instagram app and then reinstalling it. This process can help eliminate any corrupt files or settings that might be causing the issue.
Check for server issues: Instagram occasionally experiences server problems that can affect the app’s functionality. You can check websites like DownDetector to see if other users are reporting similar issues. If it’s a server problem, you’ll need to wait until Instagram resolves it.
Try on a different device: If possible, try accessing Instagram on a different device, such as a smartphone or computer. If the error doesn’t occur on the other device, it may indicate that the issue is specific to your original device.
Contact Instagram support: If none of the above steps resolve the problem, you can reach out to Instagram’s support team. They may be able to provide further assistance and investigate the issue on their end.
Clear Instagram’s App Cache:
To resolve issues related to Instagram’s app cache, you can follow these steps:
Open the Settings menu on your Android device.
Navigate to the “Apps” or “App management” section within the Settings menu.
Look for Instagram in the list of installed apps and tap on it.
Select the “Storage usage” option.
Tap on the “Clear cache” button.
By clearing the app cache, you can address any potential corruption in Instagram’s cache files, which can lead to various errors within the app. It’s important to note that this method is applicable only for Android devices. If you’re using an iOS device, you’ll need to uninstall and reinstall the Instagram app to remove its cache data.
Clearing the app cache doesn’t delete your account data or log you out of the app. It simply removes temporary files that may be causing issues with Instagram.
Remember that Instagram’s “Couldn’t refresh feed” error can be caused by various factors, and not all solutions may work for everyone. It’s always a good idea to keep your app and device updated, maintain a stable internet connection, and reach out to the official support channels if necessary.
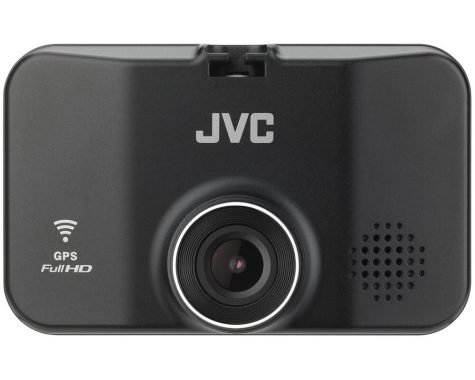
The JVC KV-DR305W HD Dash Cam is a compact and feature-rich device designed to capture high-quality footage of your journeys on the road. With its impressive specifications and user-friendly design, it offers a reliable and convenient solution for recording your driving experiences.
One notable feature of the JVC KV-DR305W is its 2.7-inch color TFT screen, which provides a clear and detailed view of the recorded videos and settings. The screen size is adequate for easy navigation through menus and playback of footage.
Operating at a voltage of DC 5.0V and consuming a maximum of 1A, this dash cam is efficient and can be powered through your vehicle’s USB port or the included car charger cord. The built-in G-sensor adds an extra layer of protection by automatically detecting and recording any incidents or collisions. The collision sensitivity can be adjusted between 0.5G to 3G, allowing you to fine-tune the camera’s response.
KV-DR305W
Equipped with a 1/2.7-inch color CMOS sensor and a 2-megapixel resolution (1920×1080), the JVC KV-DR305W captures sharp and clear images. The wide angles of view (98° horizontal, 52° vertical, and 114° diagonal) provide a broad perspective, ensuring that important details are not missed. The F2.0 lens further enhances the camera’s ability to capture clear footage, especially in low-light conditions.
Operating within a temperature range of -10℃ to +60℃, this dash cam is suitable for use in various climates. The recording resolution of 1920 x 1080 Full HD ensures crisp and detailed videos, with a smooth frame rate of 30fps.
The JVC KV-DR305W offers flexible recording options, allowing you to choose between continuous and event recording modes. You can also set the recording duration to 1, 3, or 5 minutes, depending on your preferences and storage capacity. The videos are saved in the H.264 (MP4) format, ensuring compatibility with most media players and easy sharing.
For capturing still images, the dash cam supports JPEG format with a maximum resolution of 1920 x 1080 pixels. This feature comes in handy when you want to take snapshots of scenery or document any damages or incidents.
The device uses microSDHC cards with a capacity ranging from 4GB to 32GB, and it is recommended to use Class 10 or above for optimal performance. A 16GB microSD card is included in the package, which provides a decent amount of storage for recording your journeys.
In terms of dimensions, the main unit of the JVC KV-DR305W measures 3-1/4″ x 2-1/16″ x 1-1/4″ (83 x 52 x 32 mm), making it compact and unobtrusive when mounted in your vehicle. The lightweight design, weighing just 3.1 ounces (87g), ensures easy installation and portability.
Included accessories such as the car charger cord, mounting bracket with double-sided tape, and the 16GB microSD card contribute to the convenience and value of this dash cam.
The JVC KV-DR305W HD Dash Cam is a reliable and feature-packed device that captures clear videos and photos both while you’re driving and when your vehicle is stationary. With its advanced specifications and user-friendly design, it provides a comprehensive solution for recording your journeys and ensuring your safety on the road.
Equipped with a 1/2.7″ CMOS image sensor boasting 2.13 million pixels, the JVC KV-DR305W captures Full HD (1920×1080) video with excellent clarity. The F2.0 lens with a 114-degree field of view (FOV) ensures a wide perspective, covering a broad area of the road ahead.
JVC KV-DR305W HD Dash Cam
One standout feature of the KV-DR305W is its Wide Dynamic Range (WDR) technology. This built-in feature helps to reduce headlight glare and shadows, particularly in high contrast situations such as backlit environments or near tunnel entrances/exits. With WDR, you can expect balanced and well-exposed footage in challenging lighting conditions.
For added safety, the dash cam incorporates a G-Force Sensor. Its 3-axis sensor detects impacts to the vehicle body from three directions: front/back, left/right, and top/bottom. This feature is essential for automatically capturing and saving footage during sudden movements or accidents.
G-Force Sensor
The JVC KV-DR305W HD Dash Cam also comes with a built-in GPS system that tracks your vehicle’s location information, including speed, latitude, and longitude. This information can be displayed through dedicated PC-linked software, providing a detailed record of your driving history.
Convenience is further enhanced by the 2.7″ LCD screen, which offers live video playback as well as access to recorded videos and photos. The screen displays essential information such as time, date, GPS signal, and recording status. With the push-button controls, you can easily navigate the menu and operate functions like Power, Menu, and Record.
The dash cam offers three recording modes to suit different situations: Continuous, Manual, and Event Recording. Continuous Recording automatically starts and stops video recording in sync with the vehicle’s engine status. Manual Recording allows you to initiate video recording by pressing the “Record” button, ensuring important footage is not overwritten. Event Recording kicks in when the built-in G-Force sensor detects sudden impacts or speed changes.
In addition to video recording, the JVC KV-DR305W enables photo capture in JPEG format (1920×1080 resolution), allowing you to take still images from inside the vehicle. Furthermore, the built-in microphone records audio (2ch PCM) for a complete record of your driving experience, and the recorded audio can be played back through the built-in speaker.
The dash cam utilizes a microSD card slot (supports microSD and microSDHC cards) with a capacity of 4GB to 32GB, recommended as Class 10 or higher for optimal performance. The recorded videos and photos are stored in the FAT32 format, and the storage on the microSD card is divided into three areas: Protected, Video, and Photo. The package includes a 16GB microSD memory card, providing ample storage for your recordings.
The JVC KV-DR305W HD Dash Cam offers a comprehensive range of features for capturing high-quality videos and photos while driving. With its advanced technology, intuitive controls, and reliable performance, it ensures you have a reliable witness on the road, promoting safety and peace of mind during your journeys. JVC KV-DR305W HD Dash Cam price: $99.95