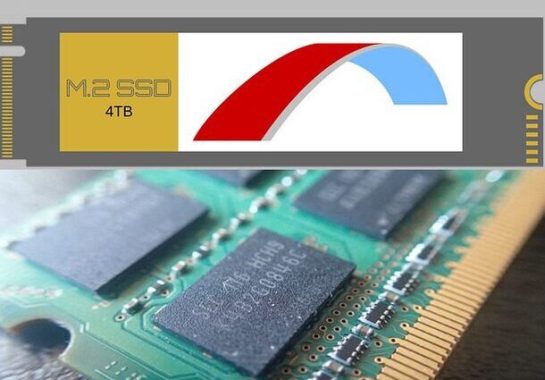
When considering computer performance, two crucial components are RAM and SSDs. RAM, also known as random-access memory, serves as the computer’s short-term memory, storing data that needs quick access. On the other hand, SSD, or solid-state drive, is a storage device utilizing flash memory. So, which holds greater importance, RAM or SSD? Although both components are significant, their importance varies due to their respective functionalities.
RAM plays a vital role in computer performance for several reasons. When launching a program, the computer loads it into RAM to facilitate rapid access. With more RAM, the computer can efficiently run multiple programs simultaneously without slowing down. Insufficient RAM leads to sluggishness, lags, and freezing when running multiple programs concurrently.
RAM vs. SSD – photo: Pixabay
Conversely, SSDs are essential in determining data access speed. Opening a file involves reading it from the storage device and loading it into RAM. A slow storage device, such as a conventional hard drive, significantly hampers data retrieval, ultimately affecting overall computer performance.
Given their faster speeds compared to traditional hard drives, SSDs have gained popularity. Installing an SSD in your computer yields a noticeable improvement in performance. Programs load swiftly, the computer boots up faster, and files open without delay.
Determining the relative importance of RAM and SSD depends on your specific needs and usage. If you engage in multitasking activities like video editing or running virtual machines, having ample RAM proves advantageous. On the other hand, tasks requiring frequent data access, such as gaming or working with large files, benefit from a fast SSD.
In conclusion, both RAM and SSD are indispensable components of a computer, and maximizing both is desirable. A computer equipped with abundant RAM and a fast SSD delivers optimal performance. However, if you must choose between the two, the decision depends on your specific computer usage. For gamers and individuals working with large files, a fast SSD holds greater significance. Conversely, power users engaging in multitasking activities require a substantial amount of RAM.
With the rapid development of multimedia technology, an increasing number of video formats have emerged to cater to various purposes, channels, and devices. While different video formats offer better playback performance, they can also lead to compatibility issues with certain formats or devices. To address these problems, the most direct and efficient solution is to convert videos from their original format to a compatible one for the target device. This is where video converter programs come into play. However, not all video converter tools available on the internet deliver satisfactory results. In this article, we will recommend some of the best video converter programs that simplify the conversion process and eliminate format compatibility problems.
There are several excellent video converters available that can help you convert videos between different formats. Here are some of the best video converters you can consider:
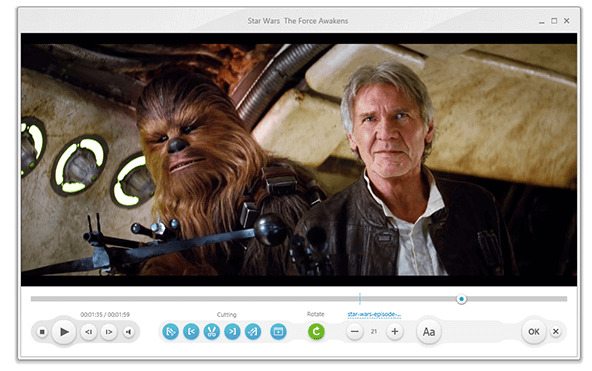
– AVS Video Converter – AVS Video Converter has more functions than just converting videos. One of AVS Video Converter’s best features is the built-in DVD burner. After you convert your video files to an NTSC (U.S.) or PAL (Europe) compatible format, you can simply burn the file to DVD. With AVS Video Converter, you can also do some video editing, including splitting, joining and trimming video, and adding audio tracks. In addition, the video and audio effects are of great fun and ensure that your videos will look and sound in the way you expect. With 84 video effects, you will certainly find what you want to choose to flip, twist, skew, sharpen, emboss, defuse and do pretty much anything to the visuals. Convert from/to 150+ formats: MP4, MOV, MKV, WEBM, DVD, AVI, WMV, MPEG, M2TS, TS, 2K QHD, 4K UHD and DCI 4K, etc.
AVS Video Converter photo
– WinAVI All in One Converter – Like the name suggests, WinAVI All-In-One Converter include multiple functions for you to convert or customize your videos. The program is a professional application designed to convert the most popular video and audio formats, so it can convert almost all videos and audios to play them on PC, portable media players, and so on. WinAVI All-In-One Converter is one of the best and world’s fastest converters for video and audio conversion among popular formats like AVI, MPEG1/2, MP4, WMV, FLV, MOV, VCD/DVD, XviD/Divx, 3GP as well as audio formats including MP3, WMA, WAV, etc. With double conversion speed, it can convert a movie about 4G in only 10 minutes.
– Freemake Video Converter – Freemake Video Converter is a user-friendly tool that supports a wide range of input formats and provides quick and easy conversion options. It also offers additional features like video editing, DVD burning, and more.
Freemake Video Converter is a free tool that allows you to convert videos and movies between over 500 formats, including online videos. You can convert files to popular formats like MP4, MP3, AVI, WMV, DVD, iPhone, and Android. It supports videos of any size or format, providing flexibility in your conversion needs. The best part is that Freemake Video Converter is completely free, without any trials or limitations. You can convert between 500+ formats without any restrictions.
Freemake Video Converter supports all popular and even rare non-protected formats, such as MP4, AVI, MKV, WMV, MP3, DVD, 3GP, SWF, FLV, HD, MOV, RM, QT, Divx, Xvid, TS, MTS, and Fraps. It also allows you to import photos or audio files to create multimedia videos. With its batch conversion feature, you can transform multiple video clips at once, saving you time and effort. The software includes essential codecs like H.264, H.265 (HEVC), MPEG4, AAC, and AV1.
Freemake Video Converter photo
Additionally, Freemake Video Converter enables you to modify videos from platforms like Vimeo, Dailymotion, and more. You can change the video format to MP3, MP4, AVI, WMV, MKV, 3GP, or other file formats. Another convenient feature is that the Free Video Converter automatically uploads converted videos and audio files to iTunes and iOS devices. It also supports the conversion of large HD videos and movies.
– Xilisoft Video Converter Ultimate – Xilisoft Video Converter Ultimate supports popular formats such as WMA, MOV, AVI, MP4 (compatible with most Apple products), MPEG 1 and 2, and VOB (for DVDs). It also handles less common formats like M4V, RM, 3GP, and SWF. While it lacks some advanced editing tools found in other converters, Xilisoft Video Converter Platinum features a built-in video player for previewing videos before conversion. However, the program can be somewhat unstable, occasionally crashing during the conversion process.
– Any Video Converter – Any Video Converter is a versatile tool that supports a variety of input and output formats. It offers a user-friendly interface and includes features such as batch conversion, video editing, and DVD burning.
– FFmpeg – FFmpeg is a powerful command-line tool that can handle almost any multimedia conversion task. It’s free and supports a vast number of formats. While it requires some technical knowledge to use, it offers extensive functionality.
FFmpeg stands as the forefront multimedia framework, offering an extensive array of capabilities to decode, encode, transcode, mux, demux, stream, filter, and play virtually any media format ever devised by humans and machines. It supports both ancient, obscure formats and the latest cutting-edge ones, regardless of whether they were created by standards committees, communities, or corporations.
Moreover, FFmpeg boasts remarkable portability, as it successfully compiles, runs, and undergoes rigorous testing infrastructure (FATE) on various operating systems such as Linux, Mac OS X, Microsoft Windows, the BSDs, Solaris, and more. It proves its versatility across a wide range of build environments, machine architectures, and configurations.
Video converters are software programs that allow you to convert videos from one format to another. They are useful for ensuring compatibility with different devices and platforms, as well as for modifying video files according to specific needs. Some video converters also offer additional features such as video editing, batch conversion, and support for various input and output formats. The best video converters are capable of handling a wide range of formats, provide high-quality conversions, offer user-friendly interfaces, and may include advanced options for customization. It’s important to choose a video converter that suits your specific requirements and supports the formats you need to work with.
To use Recovery Mode on an iPad, you will need a computer with the latest version of iTunes installed. Here’s a step-by-step guide on how to use iPad Recovery Mode:
Connect your iPad to your computer using a Lightning cable.
Open iTunes on your computer. If you have a Mac running macOS Catalina or later, open Finder instead.
Press and hold the Sleep/Wake (Power) button and the Home button (or Volume Down button on iPad models without a Home button) simultaneously.
Continue holding both buttons until you see the Apple logo appear on the iPad’s screen. Keep holding the buttons even after the Apple logo appears.
After a few seconds, the iPad screen will display a “Connect to iTunes” symbol. This indicates that the device has entered Recovery Mode.
On your computer, iTunes or Finder will display a message stating that it has detected an iPad in Recovery Mode. It will offer you the option to Restore or Update the device. Choose the appropriate option based on your needs:
Restore: This option erases all data on your iPad and reinstalls the latest iOS or iPadOS version available. It is recommended if you’re experiencing significant software issues or if you want to start fresh.
Update: This option keeps your data intact and installs the latest iOS or iPadOS version available. It is useful if you’re experiencing minor software issues and want to update the iPad without erasing data.
Click on the “Restore” or “Update” button in iTunes or Finder, and then follow the on-screen instructions to proceed.
Wait for the process to complete. It may take some time, and your iPad may restart multiple times during the restore/update process.
Once the process finishes, you can set up your iPad as new or restore it from a previous backup.
Remember that using iPad Recovery Mode erases your iPad’s data if you choose the Restore option. Therefore, it’s crucial to have a recent backup of your device to restore your data afterward.
Before Forcing iPad Recovery Mode
If you’re experiencing issues with your iPad and want to try some troubleshooting steps before resorting to Recovery Mode, here are a few things you can try:
Restart your iPad: Sometimes, a simple restart can resolve minor software glitches. Press and hold the Sleep/Wake (Power) button until the “slide to power off” slider appears. Slide it to turn off your iPad, then press and hold the Sleep/Wake button again until the Apple logo appears to turn it back on.
Force restart: If your iPad is frozen or unresponsive, you can force restart it. The steps differ based on the iPad model:
For iPad models with a Home button: Press and hold both the Sleep/Wake (Power) button and the Home button simultaneously until the Apple logo appears.
For iPad models without a Home button: Press and release the Volume Up button quickly, then press and release the Volume Down button quickly. Finally, press and hold the Sleep/Wake (Power) button until the Apple logo appears.
Update your iPad: Keeping your iPad’s software up to date can often fix bugs and improve performance. Go to Settings > General > Software Update and check if an update is available. If yes, follow the on-screen instructions to download and install the update.
Reset settings: Resetting your iPad’s settings can help resolve issues without erasing your data. Go to Settings > General > Reset and choose “Reset All Settings.” Note that this will reset your preferences and settings, but your data and media will remain intact.
Restore from backup: If you have a recent backup of your iPad, you can try restoring it to that backup to see if it resolves the problem. Connect your iPad to your computer, open iTunes or Finder, select your iPad, and choose “Restore Backup.” Follow the prompts to select the appropriate backup and initiate the restore process.
If none of these steps resolve your issue, then you can proceed with using Recovery Mode as described in the previous response.
How to Recover Your iPad Without a PC?
Recovering your iPad without a computer can be done by using the iPad’s built-in recovery options. Here’s how you can recover your iPad without a computer:
Ensure that your iPad has sufficient battery power or connect it to a power source.
Connect your iPad to a stable and reliable Wi-Fi network. This step is important as it will be necessary to download the required software during the recovery process.
On your iPad, go to “Settings” and tap on your name at the top. Then, tap on “iCloud” or “Apple ID” depending on your iOS version.
In the iCloud settings, locate and tap on “Find My” or “Find My iPad.”
If the “Find My” feature is enabled, you’ll need to turn it off before proceeding with the recovery process. Tap on “Find My iPad” or “Find My Device” and toggle the switch to disable it. You may need to enter your Apple ID password to confirm the action.
Once Find My is turned off, go back to the main “Settings” screen.
Tap on “General” and then select “Reset.”
In the Reset menu, choose the “Erase All Content and Settings” option. This will erase all data on your iPad and restore it to factory settings.
You will be prompted to enter your passcode (if enabled) and confirm the erasure. Make sure you have backed up any important data before proceeding, as it will be permanently deleted.
The iPad will now begin the erasure process, and it will restart once the process is complete.
Follow the on-screen instructions to set up your iPad as a new device.
During the setup process, you will have the option to restore your iPad from an iCloud backup if you have one available. Choose the appropriate backup and enter your Apple ID and password when prompted.
Your iPad will start restoring the selected backup from iCloud, and once the process is complete, you should have your data and settings restored.
It’s important to note that recovering an iPad without a computer relies on having an iCloud backup available. If you don’t have a backup or if you’re unable to access the iCloud backup, using a computer with iTunes or Finder would be the recommended method for recovery.
How do I factory reset an iPad without the passcode?
To factory reset an iPad without the passcode, you can use the “Recovery Mode” method. Please note that this process will erase all data on the iPad, and you won’t be able to recover it unless you have a backup. Here’s how to do it:
Ensure that your iPad has sufficient battery power or connect it to a power source.
Press and hold the Sleep/Wake (Power) button and the Home button (or Volume Down button on iPad models without a Home button) simultaneously.
Keep holding both buttons until you see the Apple logo appear on the iPad’s screen. Release the buttons when you see the logo.
After the Apple logo disappears, your iPad will enter Recovery Mode. You should see the “Connect to iTunes” screen.
Connect your iPad to a computer that has the latest version of iTunes installed. If you have a Mac running macOS Catalina or later, use Finder instead.
On your computer, iTunes or Finder should recognize the connected iPad in Recovery Mode and display a message prompting you to restore or update the device.
Choose the “Restore” option. This will erase all data on the iPad and install the latest iOS or iPadOS version.
Follow the on-screen instructions to proceed with the restore process. iTunes or Finder will download the necessary software and install it on your iPad.
Wait for the process to complete. Your iPad may restart multiple times during the restore process.
Once the restore is finished, you can set up your iPad as new or restore it from a previous backup if you have one available.
By following these steps, you can perform a factory reset on your iPad without the passcode using the Recovery Mode method.
Why is my iPad stuck on the Apple logo?
If your iPad is stuck on the Apple logo and not progressing beyond that point, it indicates that there may be an issue with the software or the startup process. Here are a few steps you can try to resolve the issue:
Force Restart: Press and hold the Sleep/Wake (Power) button and the Home button (or Volume Down button on iPad models without a Home button) simultaneously until the Apple logo disappears and reappears. Release the buttons and wait to see if the iPad continues past the logo.
Charge your iPad: Ensure that your iPad has sufficient battery power. Connect it to a power source using the original charging cable and adapter. Leave it to charge for a while, and then try restarting it again.
– iPad –
Update the software: If your iPad is running an outdated or problematic iOS or iPadOS version, it can cause issues. Connect your iPad to a stable Wi-Fi network and go to “Settings” > “General” > “Software Update” to check if an update is available. If yes, proceed with the update and follow the on-screen instructions.
Connect to a computer and use iTunes or Finder: If the above steps don’t resolve the issue, try connecting your iPad to a computer that has the latest version of iTunes installed (or Finder on Mac running macOS Catalina or later). Launch iTunes or Finder and follow these steps:
For iPad models with a Home button: Press and hold the Sleep/Wake (Power) button and the Home button simultaneously until the iPad enters Recovery Mode (displaying the “Connect to iTunes” screen). Release the buttons.
For iPad models without a Home button: Press and release the Volume Up button quickly, then press and release the Volume Down button quickly. Finally, press and hold the Sleep/Wake (Power) button until the iPad enters Recovery Mode (displaying the “Connect to iTunes” screen). Release the button.
iTunes or Finder should detect the iPad in Recovery Mode and offer you the option to Restore or Update. Choose the “Update” option first, which will attempt to install the latest software without erasing data. If that doesn’t work, you can choose the “Restore” option to erase all data and restore the iPad to factory settings.
Follow the on-screen instructions in iTunes or Finder to complete the update or restore process.
If the issue persists and your iPad remains stuck on the Apple logo after trying the above steps, it may be necessary to contact Apple Support or visit an Apple Store for further assistance.
The JBL Pulse 5 speaker is a visually stunning portable speaker that offers a combination of impressive design and exceptional audio quality. Its design is undoubtedly its standout feature, with a sleek cylindrical shape and a mesmerizing LED light show that wraps around the entire speaker. The lights pulsate and change colors in sync with the music, creating a captivating visual experience. The speaker is also IPX7 waterproof, making it ideal for outdoor use or poolside parties. The overall build quality is excellent, and the speaker feels robust and durable.
When it comes to audio performance, the JBL Pulse 5 delivers a powerful and immersive sound experience. It features a 360-degree sound projection, which ensures that the music fills the room from every angle. The bass response is deep and punchy, providing a satisfying low-end impact, while the midrange and treble frequencies are clear and well-defined. The speaker can get impressively loud without any distortion, making it suitable for both indoor and outdoor use. It also has a good battery life, offering up to 12 hours of continuous playback, ensuring that the music keeps going for extended periods.
Bluetooth JBL Pulse 5 speaker
Compared to other portable speakers on the market, the JBL Pulse 5 stands out with its unique LED light show feature, which adds an extra dimension to the listening experience. While many other speakers prioritize audio quality alone, the Pulse 5 manages to strike a balance between stunning visuals and exceptional sound performance. The 360-degree sound projection sets it apart from speakers that only provide forward-facing audio, as it fills the entire space with rich sound. Additionally, the IPX7 waterproof rating gives it an edge over some competitors, providing peace of mind for outdoor enthusiasts or those who enjoy listening by the pool or at the beach.
In terms of inputs, the JBL Pulse 5 offers versatility. It supports wireless Bluetooth connectivity, allowing seamless pairing with smartphones, tablets, and other Bluetooth-enabled devices. It also has a USB port, enabling direct playback from USB drives or charging other devices. The inclusion of a 3.5mm auxiliary input further enhances its compatibility, allowing users to connect non-Bluetooth devices. The speaker also features intuitive touch controls on its top surface, making it easy to adjust volume, change tracks, or customize the LED light show.
The Bluetooth JBL Pulse 5 speaker boasts a solid build quality that instills confidence in its durability. The body features a glass-like plastic exterior, wrapped in a thick fabric strap that adds to its sturdiness. It also comes with an IP67 rating for dust and water resistance, allowing it to withstand exposure to the elements. While the plastic exterior tends to collect fingerprints, a simple wipe with a damp cloth easily removes them.
JBL Pulse 5 speaker
One standout feature of this speaker is the JBL Portable app, which offers a range of customization options. You can personalize the RGB lights by selecting different patterns or even turning them off completely. The app also provides a graphic EQ, allowing you to adjust the bass, midrange, and treble to suit your preferences. Moreover, the ambient sound modes offer various atmospheric settings like waves, nighttime, campfire, forest, or river water, and you can set a timer to aid in falling asleep.
Connectivity is a breeze with Bluetooth streaming, ensuring a stable connection even when your mobile device is farther away. The speaker can be paired with up to two devices simultaneously, enabling easy switching between different audio sources. While it delivers powerful sound that can fill an average-sized living room, it may not be suitable for larger or more open spaces. However, even at maximum volume, the audio remains clean and free from distortion.
JBL Pulse 5 speaker
Compared to its predecessor, the JBL Pulse 5 shines with its additional features. The 360-degree design allows for customizable RGB lights, creating an eye-catching visual experience. The JBL Portable app offers enhanced customization options, including a graphic EQ for fine-tuning the sound. The inclusion of ambient noise settings, ranging from campfire sounds to a rushing river, provides a relaxing atmosphere for bedtime. The Bluetooth JBL Pulse 5 speaker stands out from the crowd with its impressive features and versatile customization options.
The JBL Pulse 5 speaker is a fantastic choice for those seeking a portable speaker that not only delivers exceptional sound quality but also provides a captivating visual experience. Its striking design, impressive audio performance, and unique LED light show feature make it stand out among its competitors. With its waterproof construction and versatile connectivity options, the JBL Pulse 5 is a reliable and versatile speaker that will elevate any gathering or personal listening session. JBL Pulse 5 price: $199.95
With the numerous WiFi technologies available, it can be challenging to determine which one is the best fit. In this post, we will explore the differences between WiFi 5, WiFi 6, and WiFi 6E to help you make an informed decision.
Overview of Current WiFi Standards – To gain a realistic understanding of different WiFi technologies, it is crucial to examine the standards that routers, devices, and networking hardware adhere to. These standards were developed by the Institute of Electrical and Electronics Engineers (IEEE) and are overseen by the Wi-Fi Alliance. Previously, WiFi standards were denoted by complex names such as “802.11xx,” but the introduction of WiFi 6 simplified the naming convention. WiFi 5 and WiFi 4, formerly known as 802.11ac and 802.11n, respectively, have now been replaced by WiFi 6, also referred to as 802.11ax. These newer naming conventions are more user-friendly and comprehensible for non-specialists.
photo: Pixabay
WiFi 5 and WiFi 6 are currently the most widely available standards, supported by the majority of devices. WiFi 6E, on the other hand, offers enhancements over WiFi 6 but has yet to achieve widespread adoption. So, what sets these coexisting WiFi standards apart?
Comparing WiFi 5 and WiFi 6
WiFi 5 has been in use since 2014 and is presently the most commonly employed WiFi standard worldwide. However, WiFi 6, introduced in 2019, is rapidly replacing WiFi 5 due to its significant improvements.
One of the most crucial enhancements is speed. WiFi 6 boasts a theoretical data transfer rate of 10Gbps, while WiFi 5 only reaches a maximum speed of 3.5Gbps. Although real-world performance depends on factors such as home hardware setup and physical obstructions, WiFi 6 undeniably offers a substantial speed upgrade over WiFi 5.
Another significant improvement is reduced latency. WiFi 6 minimizes wireless latency, enhances load times, and mitigates disconnections. By utilizing technologies like orthogonal frequency division multiple access (OFDMA), WiFi 6 is more efficient at transmitting data packets via wireless signals.
WiFi 6 also addresses network congestion more effectively. With numerous devices competing for bandwidth, WiFi 5 networks struggled to keep up. Multiple User-Multiple Input Multiple Output (MU-MIMO) enables WiFi networks to simultaneously transmit data to multiple devices in both directions. While WiFi 5 supports up to 4 streams, WiFi 6 outperforms it with support for up to 8 streams.
Not only is WiFi 6 faster than older WiFi standards, but it is also more reliable. WiFi signals select the best channel within the frequency band to transmit data. WiFi 5 requires a clear channel before transmission, but WiFi 6 excels at identifying the source of interference that blocks a specific channel. This allows it to continue transmitting even if other networks are causing interference.
Additionally, WiFi 6 excels in battery saving capabilities. Supported devices can customize how they receive WiFi signals, enabling them to temporarily disable signal reception when inactive, thus conserving battery life.
Lastly, WiFi 6 offers improved security compared to WiFi 5. With support for the WPA3 standard, network encryption on WiFi 6 is considerably harder to crack than older WiFi standards.
Comparing WiFi 6 and WiFi 6E
WiFi 6E, introduced in 2020, extends the capabilities of WiFi 6 to the 6GHz frequency band. The “E” in WiFi 6E stands for “Extended.” This standard grants WiFi 6E access to more channels, wider bandwidth, and reduced congestion for signal transmission compared to already feature-rich WiFi 6 networks. As a result, WiFi 6E is less susceptible to interference from older bands and devices and exhibits lower latency compared to WiFi 6. However, WiFi 6E is less reliable over long distances and when encountering obstacles like thick walls. This limitation stems from the fact that 6GHz radio waves are less effective at traversing barriers compared to lower frequencies.
Availability of WiFi 5, WiFi 6, and WiFi 6E
While you may still be using devices that support WiFi 5, they will become increasingly scarce. WiFi 6 devices and routers have gained rapid popularity, as the cost of routers has gradually decreased, and manufacturers have adopted newer standards for many products.
However, WiFi 6E support is currently limited. Routers that support WiFi 6E tend to be expensive and are predominantly found in high-end phones, laptops, and TVs.
Considering availability, features, and price, WiFi 6 is presently the recommended choice. It offers data transfer rates of up to 10Gbps, encompasses most of the features of WiFi 6E, and is relatively affordable. Moreover, both WiFi 6E and WiFi 6 routers are backward compatible with devices supporting WiFi 5 and older standards. This ensures that regardless of the WiFi standard supported by your laptop or PC, they will function seamlessly with modern routers.
A sound card, also known as an audio card or audio interface, is a hardware component in a computer that allows for the input, output, and processing of audio signals. It is responsible for generating and controlling sound in a computer system.
A sound card typically includes an analog-to-digital converter (ADC) for recording audio from external sources, such as microphones or musical instruments, and a digital-to-analog converter (DAC) for playing audio through speakers or headphones. It may also have additional features like MIDI (Musical Instrument Digital Interface) support for connecting electronic musical instruments or specialized ports for surround sound systems.
Nowadays, many modern computers no longer require separate sound expansion cards. Instead, they integrate the necessary audio technology directly onto the motherboard, which is known as on-board sound cards.
This integrated setup offers a more cost-effective solution while still providing a reasonably capable audio system. For the majority of computer users, including music enthusiasts, this option is a sensible choice.
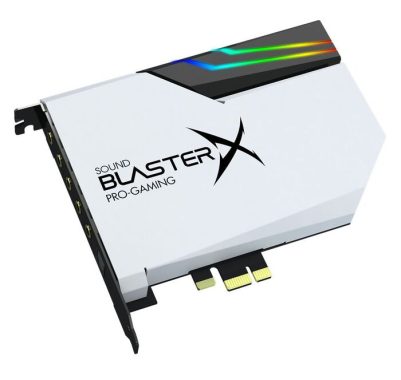
Dedicated sound cards, such as the one featured on this page, are typically only essential for individuals engaged in professional audio work.
It’s worth noting that in most desktop cases, the front-facing USB ports and headphone jacks share a common ground wire. As a result, if you have USB devices connected simultaneously while using headphones, you may encounter static interference.
To address this issue, you can either avoid using the USB ports while using headphones or connect a male-to-female extension cable from the sound card at the back of the computer to your headphones. This setup helps mitigate the interference.
To fix a computer with no sound, you can try the following steps:
Check volume settings: Make sure the volume is not muted or set too low both in the computer’s operating system settings and on any external speakers or headphones connected to the computer.
Update drivers: Outdated or incompatible audio drivers can cause sound issues. Update the sound card drivers by visiting the manufacturer’s website or using automatic driver update tools.
Check physical connections: Ensure that the speakers or headphones are properly connected to the sound card’s audio output port. If using external speakers, check the power and connection cables as well.
Test different audio devices: If possible, test the sound card with different speakers or headphones to rule out any issues with the audio devices themselves.
Run audio troubleshooting tools: Many operating systems have built-in audio troubleshooting tools that can help diagnose and fix common sound problems. Use these tools to identify any specific issues and follow the recommended solutions.
Check for conflicts: Sometimes, conflicts with other hardware or software components can affect sound functionality. Check the Device Manager (Windows) or System Preferences (Mac) for any error symbols or conflicting devices.
Reinstall the sound card drivers: If updating the drivers didn’t solve the issue, try uninstalling the sound card drivers completely and then reinstalling them. This process can be done through the Device Manager (Windows) or System Preferences (Mac).
Test with a different sound card: If none of the above steps resolve the problem, it’s possible that the sound card itself is faulty. To confirm this, you can try using a different sound card in the computer or testing the existing sound card in another compatible computer.
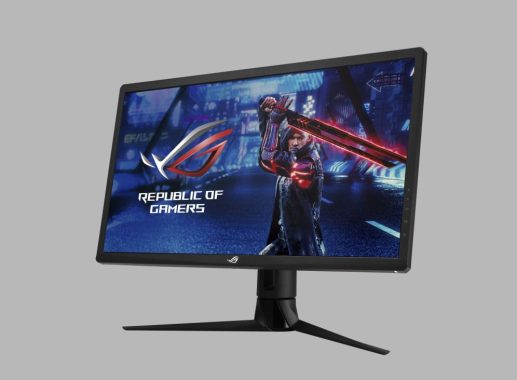
The ASUS ROG Strix XG27UQR is a high-performance gaming monitor that offers impressive specifications and features. With its 27-inch IPS panel and 16:9 aspect ratio, this monitor delivers stunning visuals and a smooth gaming experience. Let’s delve into its various aspects and features in detail:
Display: The monitor boasts a True Resolution of 3840×2160, providing sharp and detailed visuals. The panel size of 27 inches offers a good balance between screen real estate and desktop space. The 90% DCI-P3 color space coverage ensures vibrant and accurate colors, enhancing the visual quality.
Panel Type and Viewing Angle: Featuring an IPS (In-Plane Switching) panel, the ASUS ROG Strix XG27UQR offers wide viewing angles of 178 degrees horizontally and vertically. This ensures consistent color reproduction and image quality, even when viewed from different angles.
ASUS ROG Strix XG27UQR
Brightness and Contrast: The monitor has a maximum brightness of 400cd/m², with a typical brightness of 350cd/m². This allows for excellent visibility in well-lit environments. With a contrast ratio of 1000:1, the monitor provides a good range of dark and light shades, resulting in more defined images and videos.
Response Time and Refresh Rate: Gamers will appreciate the 1ms MPRT (Moving Picture Response Time) of this monitor, which reduces motion blur during fast-paced gaming sequences. Additionally, the 144Hz refresh rate ensures smoother gameplay and enhances the overall gaming experience.
HDR and Color Accuracy: The ASUS ROG Strix XG27UQR supports HDR10, which provides a wider dynamic range and more realistic colors. The monitor also boasts a color accuracy rating of △E≦2, ensuring accurate and precise color reproduction.
Video Features: The monitor includes several features that enhance the gaming experience. The Trace Free Technology minimizes motion blur, while the Low Blue Light feature reduces eye strain during extended gaming sessions. The Shadow Boost feature enhances visibility in dark scenes, allowing gamers to spot enemies or details more easily. Extreme Low Motion Blur further reduces ghosting and motion blur for crisp visuals.
Connectivity: The ASUS ROG Strix XG27UQR offers multiple connectivity options, including two DisplayPort 1.4 DSC ports, two HDMI 2.0 ports, a headphone jack, and a USB hub with two USB 3.2 Gen 2 Type-A ports and two USB 3.0 ports. This allows for easy connection to various devices and peripherals.
Design and Adjustability: With its sleek and stylish design, the monitor complements any gaming setup. It features a non-glare display surface, reducing reflections and glare. The monitor is also adjustable, offering tilt (+20° to -5°), swivel (+25° to -25°), and height adjustment (0-100mm) options for optimal viewing comfort. It is VESA wall-mountable with a 100x100mm pattern.
Additional Features: The ASUS ROG Strix XG27UQR incorporates ASUS’s Aura Sync lighting effect, which can be synchronized with other compatible Aura Sync devices to create an immersive gaming environment. It also includes a Kensington lock for added security.
It excels in customization and gaming features. In addition to G-Sync and FreeSync compatibility, it boasts Asus’s Extreme Low Motion Blur (ELMB) technology, reducing motion blur without adaptive sync. An integrated FPS meter bypasses software limitations, working in any game, while a tool helps align multiple displays with precision. It also includes Shadow Boost/Black Equalizer and on-screen reticles for games lacking them.
ASUS ROG Strix XG27UQR
Accessories: The monitor comes with various accessories, including a color pre-calibration report, DisplayPort cable, HDMI cable, power adapter, power cord, quick start guide, ROG sticker, USB 3.0 cable, warranty card, and certificates for TÜV Flicker-free, TÜV Low Blue Light, VESA DisplayHDR 400, and G-SYNC compatibility.
Pros of the ASUS ROG Strix XG27UQR:
High-quality visuals: The monitor’s 4K UHD resolution and IPS panel deliver sharp and detailed visuals with accurate colors, making it ideal for gaming, multimedia, and content creation.
Fast response time and high refresh rate: With a 1ms MPRT response time and a 144Hz refresh rate, the monitor ensures smooth and fluid motion, reducing blurring and ghosting during fast-paced gaming.
HDR support: The HDR10 compatibility enhances the monitor’s dynamic range, providing more lifelike and vibrant colors, deeper blacks, and brighter highlights, resulting in an immersive viewing experience.
Adaptive-Sync technology: The monitor supports VRR (Variable Refresh Rate) technology, including AMD FreeSync and G-SYNC compatibility, which reduces screen tearing and stuttering for a smoother gaming experience.
Wide viewing angles: The IPS panel offers excellent viewing angles of 178 degrees horizontally and vertically, ensuring consistent colors and image quality from different viewing positions.
Adjustable stand and VESA mount compatibility: The monitor features a versatile stand that allows for tilt, swivel, and height adjustment, enabling users to find the most comfortable viewing position. It is also VESA mount compatible for additional mounting options.
Connectivity options: The monitor provides multiple input ports, including DisplayPort 1.4 DSC and HDMI 2.0, allowing for flexible connectivity to various devices.
Gaming-focused features: The ASUS ROG Strix XG27UQR includes features such as Trace Free Technology, Low Blue Light, Shadow Boost, and Extreme Low Motion Blur, which enhance gaming performance and visuals.
Limited color space coverage: While the monitor offers a decent 90% coverage of the DCI-P3 color space, some professional users who require a wider color gamut may find it lacking.
Price: As a premium gaming monitor with high-end features, the ASUS ROG Strix XG27UQR may have a higher price point compared to other monitors in its category.
Lack of built-in speakers: Unlike some other monitors, this model does not have built-in speakers, requiring users to rely on external speakers or headphones for audio output.
Limited HDR performance: While the monitor supports HDR, its HDR performance may not match that of higher-end monitors with higher peak brightness and local dimming zones.
The ASUS ROG Strix XG27UQR offers a superb gaming experience with its high-resolution display, fast response time, adaptive sync technology, and gaming-oriented features. However, it may not be the ideal choice for professionals requiring extensive color accuracy or users looking for built-in speakers.
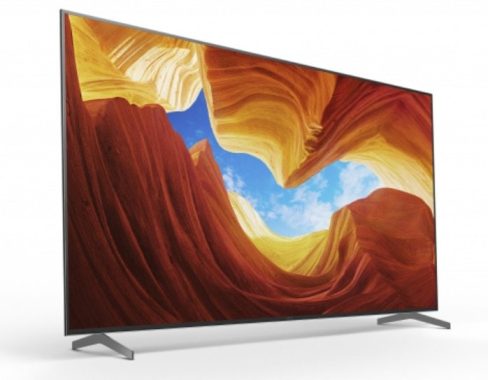
The Sony BRAVIA FWD-85X90H TV impresses with its sleek and modern design. The slim bezels and slim profile make it visually appealing, ensuring that the focus remains on the stunning display. The TV is well-built and feels sturdy, reflecting Sony’s commitment to quality. It blends seamlessly into any living room or commercial space, adding a touch of elegance. The cable management system at the back keeps the wires neatly organized, contributing to the overall clean look. With its design, the Sony BRAVIA FWD-85X90H TV is a stylish addition to any home or professional setting.
In terms of audio performance, the Sony BRAVIA FWD-85X90H TV delivers an immersive experience. The built-in speakers provide clear and crisp sound quality, enhancing the overall viewing experience. The TV also supports various audio technologies, such as Dolby Atmos and DTS Digital Surround, which further enrich the audio output. Whether you’re watching movies, playing games, or streaming music, the audio quality remains impressive and fills the room with immersive sound.
Sony BRAVIA FWD-85X90H TV
When it comes to performance, the Sony BRAVIA FWD-85X90H TV excels in many aspects. The 85-inch 4K Ultra HD display delivers stunning visuals with vibrant colors, deep blacks, and excellent contrast. The Triluminos Display technology ensures a wide color gamut, making the content look lifelike and engaging. The TV’s X1 4K HDR Processor further enhances the picture quality by upscaling non-4K content to near-4K resolution. It also features a high refresh rate and low input lag, making it suitable for gaming enthusiasts. The Android TV operating system provides a user-friendly interface and access to a wide range of apps and streaming services.
Compared to other TVs in its class, the Sony BRAVIA FWD-85X90H offers a compelling package. Its combination of design, audio, and performance sets it apart from the competition. The display quality is outstanding, and the audio performance is impressive, ensuring a complete entertainment experience. Additionally, the TV offers a comprehensive selection of inputs, including multiple HDMI ports, USB ports, and Ethernet connectivity. This allows for easy connectivity with various devices, such as gaming consoles, Blu-ray players, and streaming devices. Overall, the Sony BRAVIA FWD-85X90H TV is a top-notch choice for those seeking a premium large-screen TV with excellent picture quality, immersive audio, and a sleek design.
The Sony X85K excels as a gaming TV, offering advanced features that cater to gaming enthusiasts. With HDMI 2.1 bandwidth and VRR support, it is fully compatible with the Xbox Series X and PS5, ensuring a smooth and immersive gaming experience. The quick response time and low input lag further enhance the responsiveness, allowing for precise and lag-free gameplay. While gaming in dark rooms, the TV impresses with its high native contrast ratio, delivering deep blacks and minimal blooming. However, it is worth noting that the TV lacks a local dimming feature, which could have further improved the contrast.
When it comes to HDR gaming, the Sony X85K is a solid choice. Thanks to its HDMI 2.1 bandwidth, high-frame-rate games can be played in HDR. However, the TV is limited to a 60Hz refresh rate when it comes to Dolby Vision games. It maintains low input lag and a quick response time, ensuring a smooth gaming feel. HDR content appears impressive, with a high native contrast ratio and a wide range of colors. Nevertheless, the absence of a local dimming feature and slightly inaccurate tone mapping may affect the accuracy of brighter colors.
As a PC monitor, the Sony BRAVIA FWD-85X90H proves to be a great option. It displays proper chroma 4:4:4, resulting in clear text, although limited to a 60Hz refresh rate. The low input lag contributes to a responsive desktop experience, and the TV’s brightness helps combat glare. Additionally, it handles reflections well if there are a few lights around. However, it is worth noting that the TV has a narrow viewing angle, and sitting too close to the screen may result in a washed-out image at the sides.
For movie enthusiasts, the Sony X85K offers an enjoyable viewing experience (in dark rooms). Its high native contrast ratio enables deep blacks, creating a rich and immersive atmosphere. Blooming around bright objects is minimal, contributing to a more uniform image. However, the absence of a local dimming feature means that small highlights may not stand out as much as desired. On the positive side, the TV effectively removes 24p judder from any source, enhancing the motion appearance in movies. Additionally, the Google TV interface makes streaming favorite movies a breeze.
The BRAVIA TV’s clean and minimal design ensures that your audience’s attention remains focused on the content being displayed. The sleek styling adds a touch of sophistication to any environment. To enhance the overall audiovisual experience, the inclusion of Dolby Atmos technology delivers pure and immersive sound, providing a rich and captivating audio experience.
With seamless integration into TEOS, Sony’s suite of productivity-focused workplace management solutions, BRAVIA becomes even more versatile. Built-in apps offer additional functionality, such as automation and meeting room support, without requiring additional hardware. The Pro Mode feature further enhances flexibility in business environments by allowing you to customize display settings and easily share them across multiple displays.
Moreover, the Sony BRAVIA FWD-85X90H incorporates an embedded HTML5 platform, simplifying the creation and display of attractive digital signage. This feature enables you to easily design and showcase engaging visual content, making it an ideal choice for businesses or organizations that prioritize effective communication through digital displays.
Sony FWD-85X90H TV
The Sony BRAVIA FWD-85X90H TV stands out with its elegant design, immersive audio, and impressive performance. It combines a slim and stylish appearance with a high-quality display, delivering stunning visuals and vibrant colors. The audio performance is equally exceptional, providing clear and immersive sound. Compared to other TVs in its class, the Sony BRAVIA FWD-85X90H offers a compelling package with its comprehensive connectivity options. Whether it’s for home entertainment or professional use, this TV is a fantastic choice for those who value both style and performance.
Display Screen Size (inch, measured diagonally) 65″(64.5″) 75″(74.5″) 85″(84.6″) 164 cm 189 cm 215 cm Brightness (cd/m²) 620 Native contrast ratio 4000:1 Dynamic contrast ratio 600000:1 Display resolution (H x V, pixels) 3840 x 2160 Dimming type Local Dimming Display device LCD Backlight type Direct (Full Array LED) Aspect Ratio 16:9 Professional Features Operating System Android 9.0 Pie On-board Storage (GB) 16GB Display System TV System (Digital Terrestrial) DVB-T/T2 TV System (Digital Cable) DVB-C TV System (Digital Sat) DVB-S/S2 Number of Tuners (Terrestrial/Cable) 2(Digital)/1(Analog) Number of Tuners (Sat) 2 Network Features Wi-Fi Direct Yes Wi-Fi Certified Yes Apple AirPlay Yes Chromecast built-in Yes Internet Browser Vewd Yes Codec for Home Network MPEG1:MPEG1/MPEG2PS:MPEG2/MPEG2TS(HDV,AVCHD):MPEG2,AVC/MP4(XAVC S):AVC,MPEG4,HEVC/AVI:Xvid,MotinJpeg/ASF(WMV):VC1/ MOV:AVC,MPEG4,MotionJpeg/MKV:Xvid,AVC,MPEG4,VP8.HEVC/WEBM:VP8/3GPP:MPEG4,AVC/MP3/ASF(WMA)/LPCM/WAV/MP4AAC/FLAC/JPEG,WEBM:VP9/AC4/ogg/ AAC/ARW(Screen nail only) Wireless LAN Integrated Convenience Features USB playback codecs MPEG1:MPEG1/MPEG2PS:MPEG2/MPEG2TS(HDV,AVCHD):MPEG2,AVC/MP4(XAVC S):AVC,MPEG4,HEVC/AVI:Xvid,MotinJpeg/ASF(WMV):VC1/ MOV:AVC,MPEG4,MotionJpeg/MKV:Xvid,AVC,MPEG4,VP8.HEVC/WEBM:VP8/3GPP:MPEG4,AVC/MP3/ASF(WMA)/LPCM/WAV/MP4AAC/FLAC/JPEG HDMI-CEC Yes i-Manual Yes On Screen Clock Yes Sleep Timer Yes On/Off Timer Yes Display Language SWA,TAM,TEL,THA,TGL,TUR,UKR,URD,UZB,VIE,zh_CN,zh_HK,zh_TW,ZUL AFR,AMH,ARA,ASM,AZE,BEL,BUL,BEN,BOS,CAT,CZE,DAN,DEU,GRE,E NG,SPA,EST,BAQ,PER,FIN,FRA,GLG,GUJ,HIN,HRV,HUN,IND,ISL,ITA,HEB ,JPN,KAZ,KAN,KOR,KIR,LAO,LIT,LAV,MAC,MAL,MON,MAR,MAY,BUR,N OB,NEP,NLD,ORI,PAN,POL,POR,RUM,RUS,SOL,SLV,ALB,SRP,SWE,SWA, TAM,TEL,THA,TGL,TUR,UKR,URD,UZB,VIE,zh_CN,zh_HK,zh_TW,ZUL Control Specs IP Control Yes Pro mode Yes Inputs & Outputs HDMI Signal** 4096x2160p(24,50,60Hz), 3840x2160p(24,25,30,50,60Hz), 1080p(30,50,60,100,120Hz), 1080/24p, 1080i(50,60Hz), 720p(30,50,60Hz), 720/24p, 576p, 480p HDCP HDCP2.3(for HDMI1/2/3/4) RF (Terrestrial/Cable) Connection Input(s) 1(Side) IF (Satellite) Input(s) 2(Side) Composite Video Input(s) 1(Side) HDMI inputs total 4(Side) USB ports 2(Side) Ethernet inputs 1(Side) HDMI PC Input Format 640×480(31.5kHz,60Hz), 800×600(37.9kHz,60Hz), 1024×768(48.4kHz,60Hz), 1280×1024(64.0kHz,60Hz), 1152×864(67.5kHz,75Hz), 1600×900(55.9kHz,60Hz), 1680×1050(65.3kHz,60Hz), 1920×1080(67.5kHz,60Hz), 3840x2160p(30Hz), 3840x2160p(60Hz, 8bits) PCMCIA Slot(s) 1(Top) Audio Specifications Speaker Position Side Back + Down Firing Audio Power Output 10W + 10W Video Specifications Wide Mode Auto/Wide zoom/Normal/Full/Zoom/14:9,Normal/Full1/Full2 for PC 4:3 Default Yes Video Processing 4K X-Reality PRO 4K Processor 4K HDR Processor X1 HDR (High Dynamic Range) compatiblity Yes(HDR10,HLG,Dolby Vision) Panel Refresh Rate (Native Hertz) 100Hz Design Features Cable Management Yes Frame color Black Stand Design Metal Blade Stand Metal Edge Stand VESA® Hole Spacing Compatible Yes VESA® Hole Pitch(W x H) 30.0 x 30.0 cm 40.0 x 40.0 cm
BitLocker is a useful feature in Windows that allows users to encrypt their drives easily. If you have enabled BitLocker encryption on your Windows laptop and want to reset the device but don’t have the BitLocker recovery key, the process may seem complicated as you will need the recovery key at each step.
However, there is a solution that can help you reset your laptop without the BitLocker recovery key. Before we proceed, let’s understand what BitLocker is and its benefits.
Understanding BitLocker Encryption BitLocker is a built-in feature in Windows that uses a 48-digit numerical password to encrypt data on a physical drive. It provides a recovery key that can be stored in a Microsoft account or other locations such as a portable hard drive or USB flash drive. The recovery key is crucial because losing it can make it difficult to disable BitLocker or access the data stored on the encrypted drive.
Reset your Laptop without BitLocker – photo: learn.microsoft
Finding the BitLocker Recovery Key
Prior to attempting the reset method, it is important to try recovering the password. When resetting a laptop, you will need to enter the recovery key. Even if you have secured the BIOS, you will still need to provide the BitLocker key during the boot process.
BitLocker always emphasizes the need to back up the recovery keys, depending on how you have secured them. If you have a Microsoft account, you can log in to retrieve the keys. Microsoft usually sends these credentials when you activate BitLocker.
If you are working in an organization and have signed in to their email account, the BitLocker keys might be found on the Azure Active Directory of that organization. In this case, you need to consult the administrator to obtain the keys.
Group Policies (GPO) is another Windows OS feature that allows you to back up BitLocker keys from one computer to another in the Active Directory. This is applicable when you are on the same workstations. However, GPO will only be effective if you have previously saved a backup of the keys. If you have forgotten the BitLocker key, you won’t be able to access the GPO backup feature.
Resetting the Laptop without BitLocker Recovery Keys If you are unable to retrieve the BitLocker recovery keys, you can proceed with the following method to clear the protected system drive and reinstall Windows OS on your computer. Please note that this method will erase the encrypted drive along with all the data stored on it. Proceed only if you have a backup or are willing to take the risk.
Requirements:
A USB drive containing Windows Installation Media. If you haven’t created a bootable USB drive, you can use the Windows Media Creation Tool on another PC to create one.
Steps to Reset Windows without BitLocker Recovery Keys:
Turn off your computer, disconnect any external peripherals, and insert the USB drive.
Turn on your laptop and press the relevant key (such as F8 or F12) to access the BIOS menu. The key to enter the BIOS is usually displayed on the screen.
Once in the BIOS, set the USB as the primary boot order and save the changes by clicking on the “Save & Exit” button.
Press the Shift and F10 keys together to open the command prompt.
In the command prompt window, enter the following command to access disk partition:
diskpart
Type the command below to view the list of partitions:
list disk
Once you have the list of drives, use the following command:
select disk 0
To determine the allocated space for the drives, enter the command:
list volume
You will see a list of drives associated with your laptop along with their occupied sizes. To select the system drive (usually C), use the command:
select volume #
Note: Replace “#” with the number corresponding to your C drive. For example, if your C drive is labeled as volume 1, use “select volume 1”.
After selecting the volume, delete it with the following command:
delete volume override
Exit the command prompt by entering:
exit
Now, you can turn off your laptop and turn it on again.
By following these steps, you have successfully removed BitLocker from the system drive. Although this method erases the system drive, it is the only way to remove BitLocker from a drive.
You can now proceed with reinstalling Windows OS on your laptop. The installation process is straightforward. Insert the bootable USB drive and follow the instructions below:
Access the BIOS menu, select USB as the primary boot order.
The Windows Installation page will appear. Select your country, adjust the settings, and click on the “Next” button.
When a pop-up window appears asking for the product key, select “I don’t have the product key”.
Read and agree to the terms and conditions of Windows by clicking on the “Agree” button.
Choose the “Custom” option to install Windows OS.
A list of drives will appear. Delete all the partitions by selecting each one and clicking on the “Delete” button. Repeat this for all the partitions.
Select the partition where you want to install Windows and click on the “Next” button.
The Windows installation process will begin. Once it is completed, you can customize Windows OS according to your preferences.
Now you have successfully reset your laptop without the BitLocker recovery key. It is important to note that this method erases your drives due to the lost BitLocker key. If you require a fresh start and are willing to accept the loss of data, then this method is suitable for you. However, in the future, if you choose to use BitLocker again, make sure to keep the key in a secure location or have a printed copy available.
In conclusion, this method requires some command-line skills and results in data loss. Proceed with caution and only choose this method if you are prepared for a fresh start despite the potential loss of data.
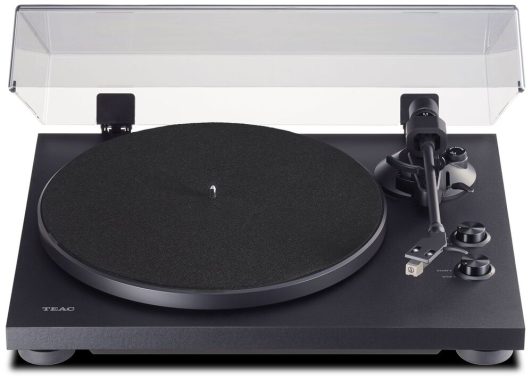
The TEAC TN-280BT-A3 turntable combines the nostalgia of vinyl records with modern convenience. With its built-in Bluetooth capability, you can easily stream your favorite music to compatible speakers or headphones, making it a versatile addition to your audio setup.
One standout feature of this turntable is the built-in switchable phono preamplifier for moving magnet cartridges. This allows you to connect the turntable directly to a standard line input when the switch is set to “ON” (labeled AUX, CD, or TAPE). Alternatively, when set to “THRU,” the turntable can be connected to an external phono preamp or dedicated phono input. This flexibility ensures compatibility with various audio systems and amplifiers.
TEAC TN-280BT-A3 turntable
The straight tonearm with a universal headshell provides precise tracking and reliable performance. The included Audio-Technica AT3600L moving magnet cartridge offers excellent sound reproduction and comes pre-mounted, allowing you to start enjoying your vinyl collection right away.
The TN-280BT-A3 features a 12″ die-cast aluminum platter with a felt mat that protects your records from scratches. It supports both 33-1/3 and 45 rpm speeds, accommodating a wide range of vinyl formats. The high-torque DC motor ensures smooth and consistent playback.
The turntable’s high-density MDF base with vibration-resistant feet minimizes unwanted resonance, resulting in a cleaner sound reproduction. Additionally, the chrome-plated RCA audio jacks provide a secure and reliable connection to your audio system.
Included with the turntable is a detachable dust cover, which helps protect your vinyl collection from dust and debris when not in use. This thoughtful addition ensures that your records remain in pristine condition for years to come.
In terms of performance, the TEAC TN-280BT-A3 delivers a frequency response of 20-20,000 Hz with the included cartridge. This range covers the full spectrum of audio frequencies, allowing you to enjoy the rich nuances of your favorite records. The wow and flutter specification of 0.2% ensures stable and accurate playback, while the signal-to-noise ratio of 67 dB guarantees a low noise floor, allowing the music to shine through.
The TEAC TN-280BT-A3 turntable is a reliable and well-built option for vinyl enthusiasts. Its versatility shines through with the inclusion of a built-in phono preamp, allowing you to connect it directly to various amplifiers or receivers you may own. Additionally, the built-in Bluetooth feature enables easy streaming to compatible speakers or headphones, adding a modern touch to your listening experience.
Beneath its sleek exterior, the TN-280BT-A3 boasts a sturdy MDF base that resists external vibrations, ensuring optimal sound quality. The dense die-cast aluminum platter provides smooth and silent rotation, while the variable-speed belt-drive system isolates motor vibration, accommodating both 33-1/3 and 45 rpm discs. The straight tonearm, complete with a pre-mounted moving-magnet cartridge, guarantees precise tracking and delivers rich tonal accuracy for a satisfying listening session.
Setting up your turntable shouldn’t be a hassle, and TEAC understands that. The TN-280BT-A3 comes nearly ready to play right out of the box. The pre-matched and factory-mounted phono cartridge and tonearm eliminate any guesswork during installation, providing optimized sound quality with minimal effort. A few simple steps to adjust settings like tracking force and anti-skating are all that’s needed to get this turntable primed and ready for your enjoyment. Spend less time setting up and more time immersed in the joy of listening with the TN-280BT-A3.
Setting up the TEAC TN-280BT-A3 turntable is a breeze, even for beginners. If you’re unsure, be sure to read the manual carefully for detailed instructions. To get started, remove the plinth and the mat, then place the belt around the platter and position it back on top of the plinth while ensuring the belt is properly placed over the pulley.
One of the great advantages of this turntable is that the cartridge comes pre-mounted and calibrated, right out of the box. This is excellent news, as the cartridge is a delicate component that requires precision. However, you will need to balance the tonearm by adjusting its position until the cartridge and counterweight are in perfect balance. Additionally, you’ll need to set the counter-weight and anti-skating features to the correct levels, which can be found in the manual. Overall, these steps are relatively easy and not overly technical.
In terms of sound quality, the TEAC TN-280BT-A3 delivers decent performance for its price range. The included moving magnet (MM) cartridge provides a warm and transparent sound that many vinyl enthusiasts seek. While it may not reach the audiophile level, achieving that would require a significant increase in budget. If you’re looking to upgrade anything, we suggest focusing on the cartridge.
Regardless of the connectivity option you choose, the TN-280BT offers good sound quality. The Bluetooth connection works seamlessly without any interruptions, and you can even enjoy your vinyl in different rooms, although there are limitations to the range. Audiophiles may prefer an external preamp to fully optimize their audio setup and enhance the sound quality. However, for the average consumer, the built-in preamp will suffice. Simply use the RCA jacks on the back of the device to connect it to your active speakers or amplifier/receiver. It’s worth noting that the TN-280BT has a convenient button on the back to bypass the built-in preamp if you choose to upgrade your setup in the future.
In conclusion, the TEAC TN-280BT-A3 turntable offers a complete package with a quality cartridge, reliable preamp, and Bluetooth connectivity. Its solid and modern build makes it an ideal choice for vinyl beginners or those looking to upgrade from budget suitcase turntables. The user-friendly setup process and true vinyl experience it provides make it a standout option.
The standout feature of Bluetooth connectivity sets this turntable apart, as it allows you to connect it to various devices, including preamps, amplifiers, or Bluetooth speakers. This feature is not just a gimmick; it brings vinyl into the 21st century. For instance, you can effortlessly connect it to a Bluetooth speaker or the latest AirPods Pro, enjoying your records from anywhere in your house without disturbing others. The future of vinyl is here.
TEAC TN-280BT-A3
Lastly, the potential for future upgrades makes the TN-280BT-A3 perfect for individuals who want to explore vinyl further. They can easily upgrade the cartridge or add an external preamp, expanding their vinyl setup as their passion grows.
TEAC TN-280BT-A3 turntable specs:
Motor
DC Motor
Speed
33 1/3 RPM, 45 RPM RPM
Wow and Flutter
0.2%
Signal-to-Noise Ratio
67dB or higher (A-weighted, 20kHz LPF) 60dB (unweighted, 20kHz, LPF)