Home Blog Page 58

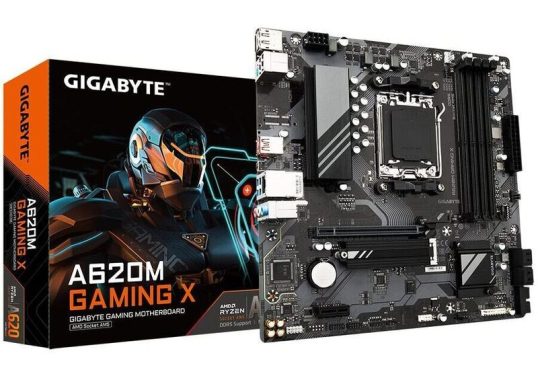
AM5 platform motherboard – GIGABYTE A620M GAMING X

0

The A620M GAMING X (rev. 1.0) motherboard from Gigabyte is a high-quality and powerful motherboard designed for use with AMD Ryzenâ„¢ 7000 Series Processors. With a chipset of AMD A620 and support for DDR5 6400(OC)/6200(OC)/6000(OC)/5600(OC)/5200/4800/4400 MT/s memory modules, this motherboard is designed to provide excellent performance for gamers and other high-performance computing tasks.

One of the key features of the GIGABYTE A620M GAMING X motherboard is its integrated graphics processor, which includes a DisplayPort and an HDMI port. These ports can support up to 3840×2160@144 Hz and 4096×2160@60 Hz, respectively, providing high-quality graphics and video output. The Realtek® Audio CODEC provides high definition audio output for 2/4/5.1/7.1-channel systems, and LAN connectivity is provided by a Realtek® GbE LAN chip.

In terms of expansion slots, the motherboard includes one PCI Express x16 slot supporting PCIe 4.0 and running at x16, and one PCI Express x1 slot supporting PCIe 3.0 and running at x1. Storage connectivity is provided by a single M.2 connector for PCIe 4.0 x4/x2 SSD support and four SATA 6Gb/s connectors, with RAID 0, RAID 1, and RAID 10 support for SATA storage devices.

GIGABYTE A620M GAMING X
GIGABYTE A620M GAMING X photo _ GIGABYTE

Other connectivity options include USB 3.2 Gen 2 Type-A, USB Type-C®, USB 3.2 Gen 1, USB 2.0/1.1, and various internal I/O connectors. The motherboard also features an iTE® I/O Controller Chip for hardware monitoring, including voltage detection, temperature detection, fan speed detection, water cooling flow rate detection, and fan fail warning.

The A620M GAMING X motherboard also comes with a variety of unique features, including support for GIGABYTE Control Center (GCC), Q-Flash, and Q-Flash Plus. It also includes bundled software such as Norton Internet Security (OEM version) and LAN bandwidth management software.

The A620M GAMING X (rev. 1.0) motherboard is an excellent choice for gamers and other high-performance computing tasks. Its powerful chipset, high-quality graphics and audio output, and extensive connectivity options make it a top choice for anyone in need of a reliable and high-performing motherboard.

The A620M GAMING X motherboard has several notable advantages:

Support for the latest AMD Ryzen 7000 Series Processors: This means that the motherboard is ready to handle the latest and most powerful CPUs, providing excellent performance for gaming and other demanding applications.

DDR5 memory support: The A620M GAMING X motherboard is compatible with DDR5 memory modules, providing faster data transfer speeds and more efficient performance compared to DDR4.

PCIe 4.0 support: The motherboard comes with a PCIe 4.0 x16 slot for optimal performance with high-end graphics cards.

Multiple storage options: The A620M GAMING X motherboard features an M.2 connector and four SATA 6Gb/s connectors for ample storage options.

Integrated graphics processor: The motherboard has an integrated graphics processor, allowing for easy setup and use without needing a separate graphics card.

Quality audio: The motherboard features a Realtek® Audio CODEC with High Definition Audio and support for 2/4/5.1/7.1-channel audio, providing high-quality sound for gaming and multimedia.

Network connectivity: The A620M GAMING X motherboard includes a Realtek® GbE LAN chip with 1 Gbps/100 Mbps support, ensuring reliable and fast network connectivity.

Comprehensive I/O connectivity: The motherboard has a variety of USB ports, including a USB Type-C® port with USB 3.2 Gen 1 support, and audio jacks for a range of connectivity options.GIGABYTE A620M GAMING X

While the A620M GAMING X motherboard has several impressive features, there are also some potential cons to consider:

Limited expansion: The A620M GAMING X motherboard only has one PCI Express x16 slot and one PCI Express x1 slot, which may not be sufficient for users who need more expansion options.

No Wi-Fi: This motherboard does not have built-in Wi-Fi, which may be a downside for users who prefer wireless connectivity.

Limited USB 3.2 Gen 2 ports: The motherboard only has one USB 3.2 Gen 2 Type-A port on the back panel, which may not be sufficient for users who need more high-speed USB ports.

No Thunderbolt support: The motherboard does not have Thunderbolt support, which may be a downside for users who need Thunderbolt connectivity.

No multi-GPU support: This motherboard does not support multi-GPU setups like SLI or CrossFireX, which may be a downside for users who need high-end graphics performance.

About 8+2+1 Phases Digital VRM Solution in A620M GAMING X motherboard

The 8+2+1 phase digital VRM (Voltage Regulator Module) solution in the A620M GAMING X motherboard is a power delivery system that ensures stable and efficient power delivery to the CPU. It has eight phases for the CPU, two phases for the iGPU (integrated graphics processing unit), and one phase for the memory.

The benefits of having a high-quality VRM solution like this include:

Better power efficiency: The more phases a VRM has, the better it can regulate the voltage and deliver clean power to the CPU. This can lead to improved power efficiency, which can result in lower temperatures and less power consumption.

Improved overclocking potential: A stable and efficient power delivery system is essential for overclocking. The 8+2+1 phase VRM solution in the A620M GAMING X motherboard can help provide a stable power supply for overclocking the CPU and memory.

VRM Solution in A620M GAMING X motherboard
Define and create your own SPD profile into Native, AMD EXPO™ and Intel® XMP 3.0 memory modules. One user-defined profile can be saved, loaded either locally or from/to an external storage device.
• One empty SPD profile can be defined by users and carry to next computer
• Quick memory performance simulation based on user input clock and timing parameters
• Profile save and load function to share your memory parameters online

Higher durability: A VRM with more phases can help reduce the load on each individual phase, which can result in a longer lifespan for the motherboard.

The 8+2+1 phase digital VRM solution in the A620M GAMING X motherboard is a high-quality power delivery system that can help ensure stable and efficient performance for the CPU, iGPU, and memory.

Smart Fan 6 in A620M GAMING X motherboard
Smart Fan 6 is a cooling technology in A620M GAMING X motherboard that offers a variety of features to optimize and control the cooling performance of your system. It includes multiple temperature sensors and hybrid fan headers, allowing you to configure different fan speeds and settings for different areas of the motherboard and the computer case.

The Smart Fan 6 technology also offers a range of advanced features such as:

Fan Stop – Allows the fan to stop completely when the system is under light load or idle, reducing noise and power consumption.

Dual Curve Mode- Lets you set custom fan curves based on temperature and load, allowing you to optimize cooling performance and noise levels.

Fan Control – Allows you to control the speed and behavior of individual fans connected to the motherboard.

System Information Viewer – Provides real-time monitoring of system temperatures, voltages, and fan speeds, allowing you to keep track of system performance and health.

GIGABYTE’s A620 motherboard lineup features exclusive layout design and BIOS settings that enhance memory performance up to DDR5-6400 for optimal value and performance on the AM5 platform. These comprehensive motherboards offer features to fit users’ needs and budget, making them the ideal choice for those upgrading to the latest AM5 platform. Additionally, GIGABYTE’s A620 motherboards boast innovative PCIe EZ-Latch technology for easy graphics card upgrades while avoiding accidental damage to surrounding components. The exclusive Q-Flash Plus feature allows for BIOS updates without the need for a processor, memory, or graphics card installation. GIGABYTE’s GCC software platform also offers a user-friendly interface and multiple form factor options, ranging from Micro ATX to Mini ITX, making the A620 platform highly competitive.


Marshall Middleton Speaker Review

0

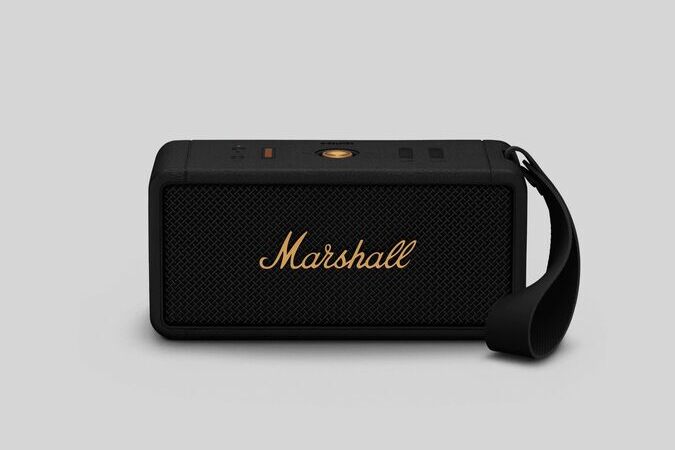
Read our in-depth review of the Marshall Middleton speaker, a portable Bluetooth speaker designed in the company’s signature guitar-amp style. Discover its features, sound quality, and suitability for podcasts, movies, and outdoor use.Marshall Middleton -speaker

The Marshall Middleton speaker boasts excellent build quality, specifically designed for outdoor use with an IP67 rating for dust and water resistance. This means it’s certified to be dust-tight and can be submerged in water up to a meter for half an hour. Its plastic construction feels sturdy, complemented by metal grilles in the front to protect the drivers. However, the manufacturer recommends avoiding dropping it. Despite being slightly larger than the Marshall Emberton, it remains portable, running on battery power, making it easy to carry around without being tethered to a power outlet. Although it’s a bit heavy, it’s still manageable with one hand, aided by a removable carrying strap.

Marshall Middleton speaker
Marshall Middleton speaker – photo Marshall 

The speaker’s controls are conveniently located on the top and user-friendly, with bass and treble adjustments, a Bluetooth button, and a Battery button. Feedback indicators provide information on certain levels, such as the light indicator on the top left, which displays the volume, battery, or bass and treble levels. Audible chimes accompany powering on/off or Bluetooth connection. However, the speaker doesn’t indicate when you’ve reached minimum or maximum volume.

The Marshall Middleton speaker delivers a fantastic soundstage, utilizing Marshall’s True Stereophonic technology to create a multi-directional stereo sound. This results in instruments localized to the left and right, producing a wide and spacious sound overall. Although it’s advertised to last over 20 hours on a single charge, our tests found it lasted just over seven hours. Nevertheless, this should suffice for most listening sessions, and your experience may vary based on your usage habits. Additionally, the speaker shuts off after 20 minutes without an audio connection to conserve battery life. The quick-charge feature provides two hours of playtime with only 20 minutes of charging time. Lastly, the USB-C input can also serve as an output, allowing for convenient charging of other devices.

Marshall Middleton speaker has a sturdy build quality, making it perfect for outdoor use, as it’s dust and water-resistant with an IP67 rating. The speaker’s plastic build appears strong and robust, while the metal grilles at the front protect the drivers inside. However, the manufacturer advises against dropping it.

The speaker is slightly larger than the Marshall Emberton, but it’s still portable and easy to carry with one hand, thanks to its battery power and removable carrying strap, despite being a little heavy. The controls are conveniently placed on top, including bass and treble adjustments, a Bluetooth button, and a Battery button. The speaker has a fantastic soundstage with multi-directional stereo sound reproduction, which is perceived as spacious and wide. It’s advertised to last over 20 hours on a single charge, but our tests show that it lasted a little over seven hours. However, it shuts off automatically after twenty minutes without an audio connection to conserve battery power, and it has a quick-charge feature that gives you two hours of playtime after just twenty minutes of charging. The USB-C input also serves as an output for charging other devices.Marshall Middleton speaker

The speaker has a 3.5mm AUX port for wired audio playback from older devices and a USB-C port that functions as both an input and output for charging. It can pair with up to two devices at once over Bluetooth and maintains a strong connection with great range and low latency. Although it can fill an average-sized room with sound, it’s not ideal for larger spaces and shows some compression at maximum volume. To increase the volume, you can purchase multiple units and pair them together using the Stack Mode party feature in the companion app, which also offers bass and treble adjustments.

The Middleton speaker is suitable for outdoor use, being portable and designed to withstand dust and water. Its battery life is good for a day outdoors, and it’s loud enough for smaller gatherings. However, it’s not intended for watching movies, although it can play video sound from a paired smartphone, with clear dialogue reproduction and adjustable bass and treble levels. Nevertheless, it’s not powerful enough to deliver the same rumble and immersive experience as a home theater setup. It’s more suitable for smaller rooms than larger spaces like basements. The Marshall Middleton speaker is a better option than the Emberton, with additional features and better sound quality, although its battery life is slightly less.

The Marshall Middleton makes for an excellent podcast speaker. Its default settings provide clear and easy-to-follow dialogue, perfect for keeping up with your favorite shows. With the ability to connect to two devices via Bluetooth, you can easily switch between multiple sources. The speaker is compact and portable, allowing you to move around the house while still enjoying your podcasts. It’s powerful enough for average-sized rooms but may struggle to fill larger, more open spaces.

Designed with Marshall’s iconic guitar-amp style, the Middleton is a lightweight and portable Bluetooth speaker that’s perfect for on-the-go music listening. Its waterproof and dustproof design ensures that you can use it outdoors without worrying about damage. The controls are simple to use, allowing you to adjust the bass and treble to your liking. The USB-C port functions as both an input and an output, meaning you can use the speaker to charge your other devices. With its removable carrying strap, you can easily carry it in one hand wherever you go.

Marshall Middleton Portable Bluetooth Speaker – Specifications

CategorySpecification
Audio
Driver TypeDynamic
Frequency Range50 Hz – 20,000 Hz
Drivers2 × 3″ 15W Woofers
2 × 3/5″ 10W Tweeters
2 × Passive Radiators
Audio ControlsAdjustable bass and treble (analogue controls on speaker)
Stereo/MonoStereo
Max Sound Pressure Level87 dB SPL @ 1 m
Cabinet PrincipleSealed with passive radiator
Power Amplifiers
Woofers2 × 20W Class D Amplifiers
Tweeters2 × 10W Class D Amplifiers
Battery
Play Time20+ hours
Battery TypeBuilt-in, rechargeable Li-ion
Quick Charge20 minutes charge = 2 hours playtime
Full Charge Time4.5 hours
Controls & Connectivity
Wireless ConnectivityBluetooth 5.1
Wired Connectivity3.5 mm Input
Bluetooth Range10 m / 30 ft
Custom Sound TuningOn speaker and via app
Top Panel ControlsMulti-directional knob (play/pause, volume, track skip, power)
Bluetooth Pairing Button
Stack Mode Activation
Treble/Bass Control
Battery & Volume Indicators
Smart Features
Wi-FiNo
MicrophoneNo
Voice CommandNo
App SupportMarshall Bluetooth App
OTA UpdatesYes
Physical Unit
Dimensions109 × 230 × 95 mm
4.29 × 9.06 × 3.74 in
Weight1.8 kg / 4.0 lb
Water ResistanceIP67 (dust and waterproof)
ColorwaysBlack and Brass
Cream
In the Box
ContentsMiddleton Speaker
Detachable Carry Strap
User Manual
USB-A to USB-C Cable
  • The Marshall Middleton is designed for portability with a rugged, IP67-rated dust and water-resistant build, making it suitable for outdoor use.
  • The speaker supports True Stereophonic technology for immersive 360° sound and Dynamic Loudness to maintain tonal balance across volume levels.
  • The USB-C port can be used to charge the speaker or as a power bank to charge other devices.
  • The speaker lacks advanced codecs like AptX or LDAC, relying solely on SBC, which may limit audio quality for audiophiles.
  • The Marshall Bluetooth app enhances user experience with EQ adjustments and multi-speaker pairing (“Stack Mode”), though the speaker is fully functional without the app.

Unlock Your Android Phone with Ease Using Your PC

0

Are you struggling to unlock your Android phone? Fear not! This beginner’s guide will take you through the process of unlocking your device using a PC. With clear instructions and easy-to-follow steps, you’ll be accessing your phone in no time.

Most Android users do not perform regular backups unlike iPhone users. If your Android screen locks, the most effective way to unlock it without losing data is by using your Google Account password. However, you must have previously signed up and set it up on the device.

Unlock Your Android Phone
Unlock Your Android Phone – photo: Pixabay

Follow these steps to unlock your Android device without data loss:

Step 1: Navigate to the “forgot password?” function on your locked screen and tap it.

Step 2: If you remember the recovery question used to set up your Google Account, enter the answer and unlock your device. Now, you can access your data and set a new password.

Step 3: If you do not remember the recovery question, enter any password five times to trigger the “Forgotten password” function.

Step 4: Input your Google Account and password when prompted to log in and unlock your phone without losing any data.

If the above method does not work for you due to password forgetfulness, try using Android Debug Bridge to unlock your Android phone from a PC. However, this requires your device to have “USB Debugging” enabled and specific permissions granted to your computer.

Here are the steps to unlock your Android phone from a PC using Android Debug Bridge:

Step 1: Connect your device to the computer using a USB cable, then press “Windows” and “R” simultaneously. Release the keys when a box appears, type “cmd” in the space provided, and click “OK” to open a Command prompt window.

Step 2: Type the command “ADB shell rm /data/system/gesture.key” in the Command prompt window.

Step 3: Reboot your Android device, and you should now find that there is no password or pattern required to access it. And you’re done!

Here is an alternative method to unlock your phone:

If you’re an Android user struggling to unlock your phone because you’ve forgotten your pattern lock, you might benefit from using an Android Password Reset Tool like 4uKey. This software has several useful features that can help you regain access to your device without losing any data.

One of the main benefits of using 4uKey for Android is its simplicity and safety. With just a few clicks, you can initiate the unlocking process and gain access to your phone in no time. Additionally, the software supports most Android devices, so it’s a reliable option for many users.

To use 4uKey to unlock your phone’s pattern lock, follow these four steps:

  1. Download and install 4uKey on your computer and launch it. Connect your phone to your computer using a USB cable. The tool will automatically detect your device.
  2. Select the “Remove Screen Lock” feature and click the “Start” button to begin the pattern removal process. The software will prepare the data environment and send the necessary package to your phone.
  3. You’ll receive a pop-up notification that removing the screen lock will erase your device’s data. Click “OK” to continue.
  4. Follow the on-screen instructions and wait for the software to remove the pattern from your device. Once the process is complete, you should be able to access your phone without any issues.

Here are some more methods to unlock an Android phone from a PC:

  • Use Samsung Find My Mobile: If you have a Samsung phone, you can use the Find My Mobile feature to unlock your device from your PC. Go to the Samsung Find My Mobile website on your PC, sign in with your Samsung account, and select your locked device. From there, you can choose to unlock your device, erase its data, or change its lock screen PIN.
  • Use third-party software: There are various third-party software programs that can help you unlock your Android phone from your PC. One such example is the Dr.Fone toolkit for Android, which supports unlocking Android phones in a few simple steps. However, be sure to research and use trusted software to avoid potential risks to your device and data.

It’s important to note that some of these methods may require you to have previously enabled certain features or set up accounts on your device. Additionally, unlocking your device may result in the loss of some data, so be sure to back up important data before attempting any of these methods.

Experience Pro-Level Gaming with the New ROG Swift Pro PG248QP at 540Hz

1

Yes, but not yet. It will be soon! The Asus ROG Swift Pro PG248QP is a 24.1-inch monitor specifically designed for professional gamers. It offers a Full HD resolution and an overclocked refresh rate of 540 Hz, which is a groundbreaking feature that can give players a competitive edge.

This monitor is ideal for players who enjoy fast-paced competitive games such as CS:Go, Valorant, and Rainbow Six Siege. Its low latency and fast refresh rate make it an excellent choice for gamers who demand the best performance.

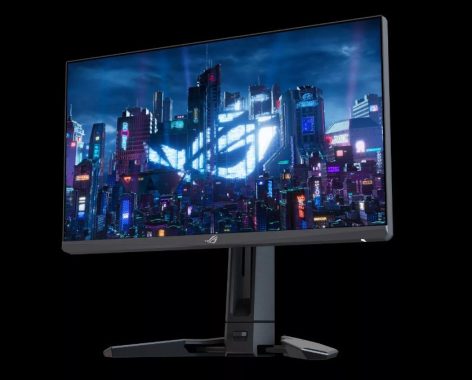
Designed with esports professionals in mind, the ROG Swift Pro esports gaming monitor series represents a groundbreaking leap in speed and responsiveness, offering an unparalleled gaming experience for pro gamers and enthusiasts alike. At the forefront of this series, the PG248QP boasts a 24.1-inch E-TN panel that delivers stunning visuals, operating at an incredibly smooth 540 Hz (OC), making it the fastest gaming monitor currently available. Its innovative design features an adjustable base with retractable claws, optimizing desktop space and providing ample room for a keyboard and mouse setup. The PG248QP also meets the demanding criteria of DisplayHDRâ„¢ 400 certification, immersing gamers in lifelike and vibrant gaming worlds.

Furthermore, the inclusion of NVIDIA G-SYNC Ultra Low Motion Blur 2 (ULMB 2) enhances motion clarity, achieving over 2000 Hz of effective motion clarity, while the NVIDIA Reflex Analyzer provides precise system latency measurements.

For an immersive audiovisual experience, the PG248QP incorporates a built-in ESS codec capable of delivering up to 32-bit 384 kHz PCM audio with minimal latency, surround sound, and an ESS DAC for lossless audio processing, heightening in-game awareness. The monitor offers an array of connectivity options, including DisplayPort™ 1.4, HDMI® 2.0, a USB hub, and an earphone jack, ensuring ultimate compatibility. Additionally, a tripod socket on top of the stand allows users to mount devices like webcams or streaming equipment for added versatility.

Additionally, the Asus ROG Swift Pro PG248QP comes equipped with an Nvidia G-Sync processor and an Nvidia Reflex Analyzer, which allows users to monitor their system latency and optimize their gaming setup for maximum performance.

Asus ROG Swift Pro PG248QP

One of the standout features of this monitor is its retractable claw base, which provides plenty of desk space for a keyboard and mouse. The Asus ROG Swift Pro PG248QP is an excellent choice for professional gamers who demand top-tier performance and functionality from their equipment. Gamers are eagerly waiting for it, at least those who can afford it. The price? Who knows?

ROG Swift Pro PG248QP monitor

Asus has made an exciting announcement regarding their latest screen update, featuring an astonishing 540Hz refresh rate achieved through an overclocking feature. This impressive display, developed in collaboration with panel manufacturer AU Optronics and NVIDIA, now has an official product name: the Asus ROG Swift Pro PG248QP. Boasting a 24.1″ size and a 1920 x 1080 resolution TN Film panel, it is being marketed as the ultimate eSports monitor, offering exceptional specifications.

The screen utilizes a TN Film technology panel, which we previously discussed as a new offering from AU Optronics. Asus refers to it as an “Esports TN (E-TN)” panel in their marketing, highlighting its ability to deliver response times 60% faster than standard TN Film panels. This enhanced responsiveness is crucial for supporting the extraordinary 540Hz refresh rate. In our recent comparison between the 360Hz BenQ Zowie XL2566K, featuring TN Film technology, and the 360Hz IPS panels available on the market, we observed the benefits of TN Film in terms of response times and motion clarity. By employing TN Film technology, Asus aims to maximize the refresh rate and cater to the demands of top-tier professional gaming and eSports.

Specifications of the ROG Swift Pro PG248QP:

Specification

Swift Pro PG248QP

Panel size (diagonal)24.1-inch screen (16:9)
PanelE-Sport TN
Display surfaceNon-glare
Resolution1920 x 1080
Brightness400 cd/m² (typical/SDR on)
Refresh rate540 Hz (OC)
Viewing angle (CR≧10)170°/160°
Display colors16.7 million
Response time0.2 ms (min.)
HDR (High Dynamic Range) supportDisplayHDR 400
Pre-color calibrationYes
G-SYNC processorYes
NVIDIA Reflex AnalyzerYes
Ultra Low Motion Blur 2Yes
ESS DACYes
Input / OutputDisplayPortâ„¢ v1.4 x 1, HDMI v2.0 x 2, USB 3.2 Gen 1 Type-A x 2, USB 2.0 Type A x 1, earphone jack
Mechanical designTilt: -5° – +20°, Swivel: -30° – +30°, Height adjustment: 0 – 110 mm, VESA mount: 100 x 100 mm

Some of the recommended headphones/earbuds

0

As someone who loves listening to music, podcasts, and movies, I know that the best headphones are a must-have. They’re not only essential for regular travelers like myself, but they’re also great for video calls, focusing while working, or staying motivated while working out. While wired headphones provide the best sound quality, wireless options offer the convenience of cable-free listening. In fact, there are so many wireless headphones and true wireless earbuds available that there are separate guides for each.

These headphones and earbuds have many common features that make them easy to recommend. They all have a comfortable design, class-leading audio performance, and useful extras like built-in voice assistants or strong wireless connectivity. Whether I’m using my smartphone, laptop, or MP3 player, I’m always satisfied with the sound quality of these headphones. However, if I’m specifically looking for gaming headphones with built-in mics, I check out the best PC gaming headset guide, as it’s focused on gaming performance, surround sound, and in-game chat.

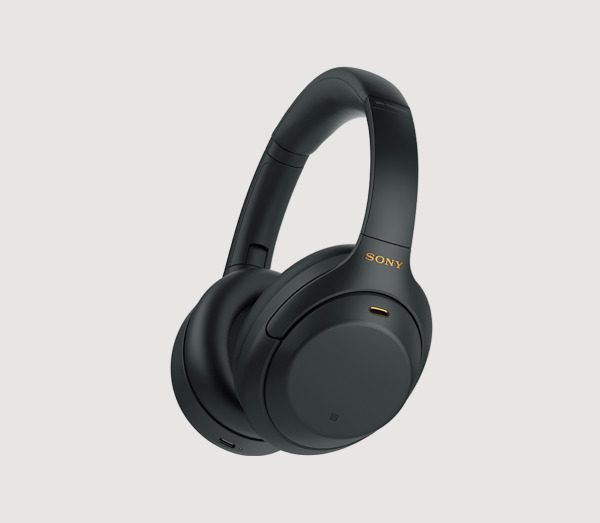
Sony WH-1000XM4 headphones
Sony WH-1000XM4 headphones – photo

The Sony WH-1000XM4 headphones are my personal favorite as they deliver excellent noise cancellation and sound quality in a comfortable and lightweight design. Although they look similar to their predecessors, the WH-1000XM3, they have many new features such as multipoint pairing, DSEE Extreme upscaling, conversational awareness, and auto-play/pause using a built-in sensor. They also support Sony’s 360 Reality Audio format, which provides spatial audio on stereo headphones, and the LDAC codec that can send a bitrate of up to 990 kbps. However, they no longer support aptX or aptX HD, so hi-res audio support may vary.

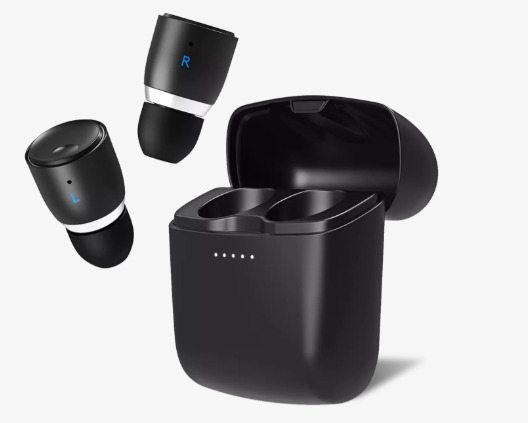
Cambridge Audio Melomania 1 Plus
Cambridge Audio Melomania 1 Plus – photo

Since the Cambridge Audio Melomania 1 Plus received a permanent price cut, I’ve been eyeing them as a great option. Their price has been cut down to more than half of the original cost, making them an even more appealing choice. Even at their original price, they received a five-star rating in our review.
Compared to their predecessors, these earbuds offer excellent audio performance, a helpful app, and easy-to-use controls. During testing, I found that the audio quality was exceptional with tons of dynamism and character, a lively presentation, high accuracy, and a lot of detail.
Although there’s no noise cancellation, the sound isolation is very good. When used in low power mode, the battery life is impressive, offering up to nine hours of playtime per earbud charge and up to 45 hours with the case.
The Cambridge Audio Melomania 1 Plus earbuds are a clear upgrade from their predecessors, and with the price cut, they are an even more attractive option. My experience with the Cambridge Melomania 1 Plus earbuds revealed that they have a battery life above average with 35 hours in High Performance mode (which is how I tested them), and an impressive 45 hours in Low Power mode. I was able to use them for a solid week and a half before needing to recharge, which I consider to be excellent. However, the standout feature of these earbuds is their audio quality. Equipped with 5.8mm dynamic drivers, the Cambridge Melomania 1 Plus deliver sound quality that surpasses what you would expect from earbuds that are priced under £100, especially when used in High Performance mode.

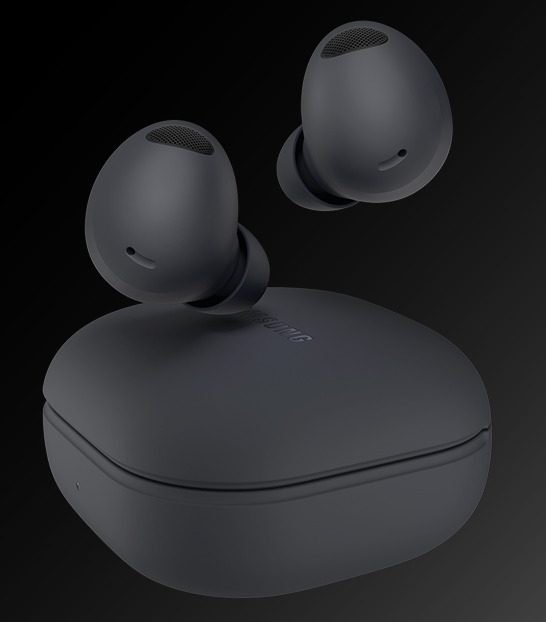
Galaxy Buds 2 Pro
Galaxy Buds 2 Pro – photo

Samsung has released its latest earbuds, the Galaxy Buds 2 Pro, which are a departure from their usual futuristic design in favor of a comfortable fit and high-quality 24-bit sound. I believe that other top manufacturers like Apple, Sony, Bose, and Sennheiser should take note of what Samsung has accomplished with these earbuds. They are simply good.
The Galaxy Buds 2 Pro are smaller, more comfortable, and less ostentatious than their rose gold, kidney-bean-shaped predecessor, the Galaxy Buds Live. These earbuds have several useful features like excellent active noise cancellation, voice detect, wearer detection, customizable on-ear controls, and IPX7 water ingress protection.
The standout feature, however, is the 360 audio with optional head-tracking, which is available if you own a Samsung Galaxy device. This allows you to use your phone as the central point to direct more of the end-to-end 24-bit high-res audio to your preferred ear. This feature alone makes the Galaxy Buds 2 Pro an attractive choice for anyone looking for high-quality earbuds.

Amp Review: Yamaha A-S1200 Excellent Integrated Amplifier

0

The Yamaha A-S1200 is an impressive integrated amplifier that delivers excellent sound quality with its 90 watts x 2 channels into 8 ohms (20-20,000 Hz) at 0.07% THD and 150 watts x 2 channels into 4 ohms power output. The 4-ohm capability of the A-S1200 allows you to use a wide range of speakers, giving you the freedom to choose the best speakers for your audio setup.

The Yamaha A-S1200’s substantial size and sturdy build offer a glimpse into its impressive audio performance. It may not immediately impress during the first few minutes of listening, as it can sound a bit conservative depending on what is connected to it. However, the longer you listen, the more you appreciate its qualities. The Yamaha’s bass delivery is particularly noteworthy, with genuine depth and impact without being bombastic or overblown.

As you move up the frequency response, the A-S1200 remains refined and believable, thanks to Yamaha’s extensive experience in crafting musical instruments. Voices are also consistently well-handled, and the longer you listen, the more the amplifier’s tone, timbre, and soundstage enchant you.

Moreover, the Yamaha can handle even large-scale material such as a full orchestra without sounding strained or congested. While it may not offer the most energetic sound at its price point, the A-S1200’s all-around abilities across various genres make for very satisfying listening. Additionally, it can tame slightly forward-sounding speakers as well.

One of the most remarkable features of the A-S1200 is its frequency response of 5-100,000 Hz (-3dB), which ensures that the sound is clear and detailed across all frequencies. The signal-to-noise ratio of 110dB (114dB balanced) is also impressive, ensuring that the sound quality is free from noise and interference.

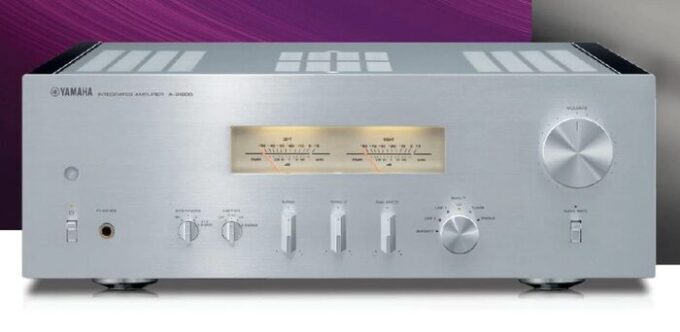
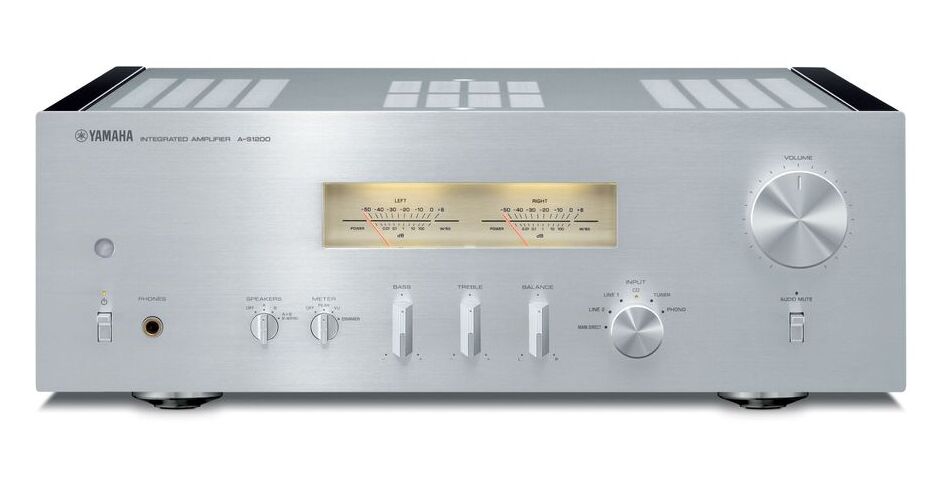
Yamaha A-S1200 integrated amplifier
Yamaha A-S1200 integrated amplifier _ photo source Yamaha

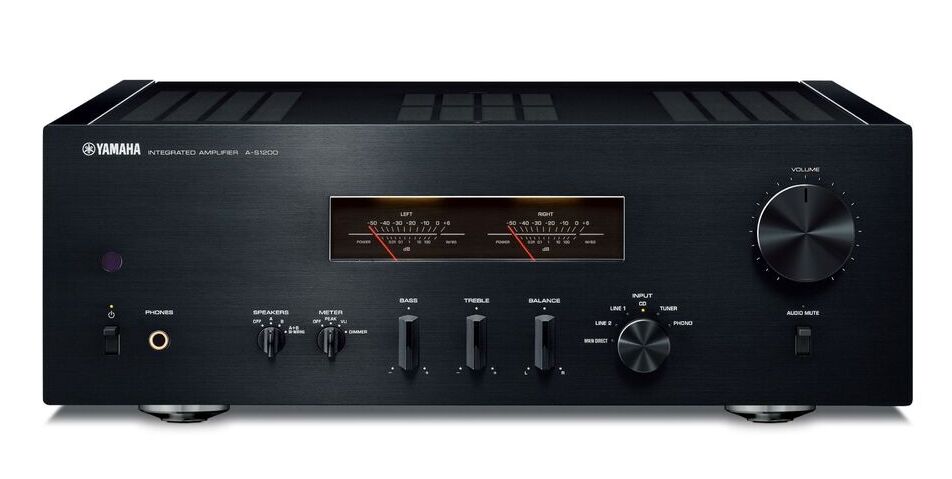
Yamaha A-S1200 integrated amplifier

With its toroidal power transformer and enormous energy, the Yamaha A-S1200 integrated amp produces a pure musical sound that is both dynamic and powerful.

The Yamaha A-S1200 boasts exceptional build quality, even at the rear. Yamaha did not compromise on the finish, and the loudspeaker terminals are large and made of metal. This attention to detail is a hallmark of a hi-fi device with roots in the past. Additionally, the A-S1200 has provisions to connect two pairs of speakers, with a button on the front panel to switch between them.

The A-S1200 features analog cinch inputs, with five pairs, as well as an additional pair of inputs for a turntable. This amplifier is ready for both MC and MM cartridges, making it an excellent choice for vinyl enthusiasts. In contrast, not every amplifier has a pre-out and a line-out, but the A-S1200 does, making it easy to connect a subwoofer. The lack of streaming or room correction may seem like a downside, but it’s a deliberate decision to maintain an old-school concept. Yamaha has MusicCast and YPAO technologies in-house, which it incorporates into other amplifiers, such as the R-N803D, which costs around 900 euros. While this amplifier is also exceptional, it is not as purist-oriented as the A-S family.

One of the most striking features of the A-S1200 is its gorgeous level meters, which convey dynamics and music pulse with a nod to the nostalgic Hi-Fi era. This attention to detail in design adds to the overall appeal of the amplifier, making it a great addition to any audio setup.

The floating balanced power amplifier of the A-S1200 ensures that the sound is clear, balanced, and free from interference, while the mechanical ground concept maximises rigidity for expressive and rhythmic bass. This feature ensures that the sound quality is clear and detailed across all frequencies, providing an immersive audio experience.

In addition to its exceptional performance, the Yamaha A-S1200 also comes with a 2+3 extended 5-year warranty via product registration, which is a testament to the confidence Yamaha has in the quality and durability of their product.

The analog level meters illuminated by soft LED light add a touch of elegance to the amplifier, while the large toroidal transformer and rugged Mechanical Ground Concept construction reduce unwanted vibration and provide a stable, noise-free performance. The chrome-plated iron feet also enhance the overall aesthetics of the amplifier. A-S1200 integrated amplifier

The Yamaha A-S1200 is a stereo amplifier that not only delivers excellent sound quality but also boasts a stylish retro design. While the visual appeal of the amplifier may be a selling point, it is important not to overlook its other qualities. The lack of streaming or digital features may be seen as a downside for some users who prioritize convenience, but for others, it is a positive as it eliminates the need for software updates and potential obsolescence.

This amplifier can handle a variety of speakers and provides an ear-friendly sound that is more suitable for a broader range of speakers than some of Yamaha’s more analytical models. It is easy to use and control typical speakers. The A-S1200 has no built-in DAC or streaming capabilities, making it an excellent choice for those looking for a high-quality stereo amplifier at a reasonable price point without unnecessary features.

The A-S1200 also features a defeatable auto-power standby, detachable power cord, and remote control, which makes it easy to operate and control. The four pairs of unbalanced RCA inputs, dedicated tuner and CD inputs, and phono stage for connecting a turntable with moving magnet or moving coil cartridge, give you a lot of flexibility when it comes to audio sources.

The RCA main direct input and no signal output to pre-out, line 2 out or phones, and RCA line out lets you use an external power amplifier, and the two pairs of pure brass binding-post speaker connectors provide a solid, secure connection to your speakers.

The Yamaha A-S1200 integrated amplifier also comes with an IR remote control in/out, 12-volt trigger input, and a front-panel 1/4″ headphone jack, which makes it a versatile amplifier that can handle all your audio needs. The A-S1200 earns the title of ‘Premium Hi-Fi’ with its adoption of the Mechanical Ground Concept, which is inherited from both the A-S2200 and A-S3200 models. This concept is implemented by directly welding the bolts of the feet to the main chassis and bolting the large heat sink, power transformer, and block capacitors directly to the chassis. As a result of this design, unwanted vibrations are prevented, which helps achieve expressive and rhythmic bass. This presents the ‘Groove’ of the music to the listener, delivering an exceptional listening experience. (price:£2,000).

Yamaha A-S1200 integrated amplifier
Maximum Power (4 ohms, 1kHz, 0.7% THD, for Europe)160 W + 160 W
High Dynamic Power/Channel (8/6/4/2 ohms)105/135/190/220 W
Damping Factor≧ 250 (1 kHz, 8 ohms)
Frequency Response+0 / -3 dB (5Hz-100kHz) , +0 / -0.3 dB(20 Hz-20 kHz)
RIAA Equalization Deviation+/-0.5 dB (PHONO (MM/MC))
Dimensions (W x H x D)435×157×463 mm; 17-1/8″ x 6-1/8″ x 18-1/4″
Weight22.0 kg; 48.5 lbs
Rated Output Power[20 Hz-20 kHz, 0.07% THD] 90 W + 90 W (8 ohms), 150 W + 150 W (4 ohms)
Total Harmonic Distortion (20Hz to 20kHz)[Input 0.5 V] PHONO MC→LINE2 OUT: 0.02% (1.2 mVrms), PHONO→LINE2 OUT: 0.005% (1.2 Vrms), CD, etc.→SP OUT: 0.035% (50 W/8 ohms)
Signal-to-Noise RatioPHONO MC: 90 db, PHONO MM: 96 dB, CD, etc.: 110 dB
Input Sensitivity[1 kHz, 100 W/8 ohms] PHONO MC: 150 uVrms/50 ohms, PHONO MM: 3.5 mVrms/47 kohms, CD, etc.: 200 mVrms/47 kohms, MAIN IN: 1 Vrms/47 kohms
Transformer625VA (Toroidal)

Add text to a photo – the best 5 FREE photo editing software

2

There are many ways to add text to a photo, depending on what tools and software you have available. Here are a few methods you can try:

  • Use a photo editing software: Open the photo in a photo editing software like Adobe Photoshop, GIMP, or Canva. Select the text tool and choose the font, size, and color of the text you want to add. Click on the photo where you want to add the text, and type it out.
  • Use a mobile app: Download a mobile app like Phonto, PicsArt, or Adobe Spark Post. Import the photo into the app, select the text tool, and type out your text. You can choose from a variety of fonts, sizes, and colors.
  • Use an online tool: Go to a website like Fotor, PicMonkey, or BeFunky. Upload your photo to the website, select the text tool, and type out your text. You can choose from a variety of fonts, sizes, and colors.
  • Print and write the text: If you don’t have access to a computer or mobile device, you can print out the photo and write the text on it by hand using a pen or marker.


The best 5 FREE photo editing software to add text to a photo

Here are five free photo editing software options that allow you to add text to photos:
  1. GIMP: GIMP (GNU Image Manipulation Program) is a free and open-source photo editing software that offers many features for adding text to photos. It has a wide range of text tools and customization options, as well as support for layers and other advanced editing features. GIMP is a powerful option for those who need more advanced photo editing capabilities and are willing to invest time in learning the software. While it may have a steeper learning curve than some other free photo editing software options, it offers a wealth of features and capabilities that can help users create professional-looking designs.

    GIMP
    photo: Gimp – Pixabay
  2. Paint.NET: Paint.NET is a free and easy-to-use photo editing software that offers a range of basic text tools and customization options. It’s a good option for simple text overlays. Paint.NET is a good option for simple text overlays and basic photo editing tasks. While it may not have all of the features of more advanced paid options, it’s a great free option for those who need to quickly and easily add text to their photos without having to learn advanced editing skills.
  3. Canva: Canva is a popular online graphic design tool that offers a range of templates, graphics, and fonts. While there is a paid version, Canva also offers a free version with a range of basic design features, including the ability to add text to photos. It’s a great option for those who want to create professional-looking designs without the need for advanced design skills or expensive software.
  4. Pixlr: Pixlr is a free online photo editor that offers a range of basic text tools and customization options. It’s easy to use and has a range of other editing features as well. It has a user-friendly interface, basic text tools, layers support, templates and presets, and is available as an online photo editor and mobile app for iOS and Android. It’s a versatile and easy-to-use photo editor that allows users to create stunning designs, whether they are beginners or advanced users.
  5. Fotor: Fotor is a free online photo editor that offers a range of basic text tools and customization options. It’s a good option for simple text overlays and basic photo editing. Fotor is a good option for basic text overlays and simple photo editing tasks. While it may not have all of the features of more advanced paid options, it’s a great free option for those who need to quickly and easily add text to their photos.

These free photo editing software options offer a range of tools and features for adding text to your photos. While they may not have all of the features of more advanced paid options, they are great for basic text overlays and simple photo editing tasks.

HDTV Antenna Buying Guide: Everything You Need to Know

0

Want to cut the cord and start watching free TV? Our HDTV antenna buying guide covers everything from types of antennas to installation tips and factors that impact signal strength. Learn how to choose the best antenna for your needs and start enjoying your favorite local channels for free!

If you are considering buying an HDTV antenna to receive over-the-air (OTA) television signals, here are some important factors to consider:

  • Signal strength: Check the signal strength in your area using online tools like AntennaWeb.org or TVFool.com. This will help you determine the type and range of antenna you need.
  • Type of antenna: There are different types of HDTV antennas available, such as indoor antennas, outdoor antennas, and attic antennas. Choose the type that suits your needs and budget.
  • Range: Choose an antenna with a range that matches the distance between your location and the broadcast towers. This will ensure that you receive clear and strong signals.
  • Multi-directional vs. directional: Multi-directional antennas can receive signals from different directions, while directional antennas receive signals from a specific direction. Choose the type that suits your location and signal strength.
  • Amplifier: If you are located far from broadcast towers or live in an area with weak signals, consider buying an antenna with an amplifier to boost the signal.
  • Installation: Consider the ease of installation of the antenna. Indoor antennas are usually easy to install, while outdoor antennas require more effort and expertise.
  • Price: HDTV antennas are available in different price ranges. Consider your budget and choose an antenna that offers good value for money.
  • Reviews: Read reviews of different HDTV antennas online to get an idea of their performance, reliability, and user satisfaction.

By considering these factors, you can choose an HDTV antenna that meets your needs and helps you enjoy high-quality OTA television signals.

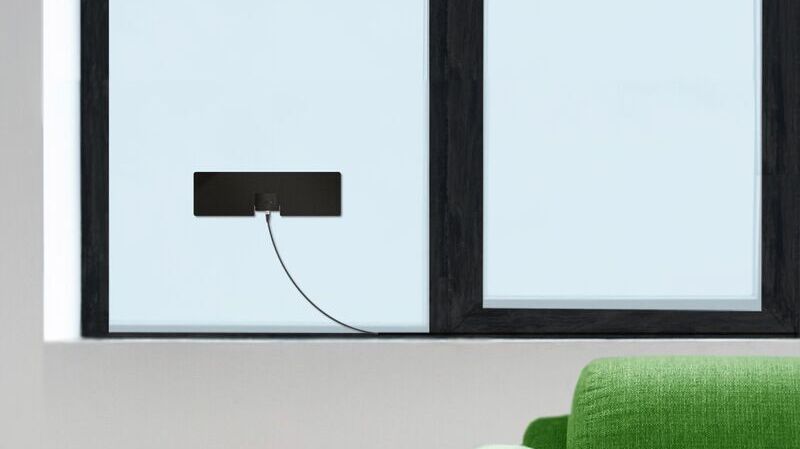
INDOOR HDTV ANTENNA
MOHU LEAF METRO INDOOR HDTV ANTENNA _ photo source

HDTV antenna – UHF and VHF

An HDTV antenna can receive digital TV signals in two frequency ranges: VHF (Very High Frequency) and UHF (Ultra High Frequency), which are similar to the frequency ranges used for analog signals. VHF channels include low-band VHF (channels 2-6) and high-band VHF (channels 7-13), while UHF channels range from 14-51. In the US, there are over 1,800 full-power TV stations, with around 450 high-band VHF, fewer than 50 low-band VHF, and more than 1300 UHF stations. If you want to receive local stations that are below channel 14, especially channels 2-6, you’ll need a VHF/UHF antenna that covers channels 2-51. The difference between UHF and VHF antennas is mainly size. Antenna elements are designed to receive waves of a particular size, and VHF frequencies have longer waves that require a larger antenna surface to receive them.


Indoor vs. outdoor HD antennas

Indoor and outdoor HD antennas are two options for receiving over-the-air television signals. Here are some differences between the two:
  • Range: Outdoor antennas generally have a longer range than indoor antennas. This means that they can receive signals from farther away, which can be helpful if you live in a rural area or if the broadcast towers are far away.
  • Signal quality: Outdoor antennas can often provide a stronger and more consistent signal than indoor antennas, especially if there are obstacles like buildings or trees blocking the signal.
  • Installation: Outdoor antennas are more difficult to install than indoor antennas. They usually require mounting on a roof or other high location and may require professional installation. Indoor antennas, on the other hand, can be placed anywhere in your home and are easy to set up.
  • Cost: Outdoor antennas are generally more expensive than indoor antennas due to their larger size and higher range.
  • Aesthetics: Outdoor antennas can be larger and more noticeable, which may not be desirable if you are concerned about the appearance of your home. Indoor antennas, on the other hand, are usually small and unobtrusive.

Outdoor antennas are generally better if you live far from the broadcast towers or if you need a stronger signal due to obstacles. However, if you live in an urban area with good signal strength, an indoor antenna may be a more practical and cost-effective option.

HDTV antenna
Mohu HDTV antenna

To improve reception or overcome size or height limitations, HDTV antennas can be amplified. Amplification can be achieved through a built-in amplifier in many indoor antennas or a separate device. However, amplifiers can amplify noise along with the signal, which can degrade the signal quality. Additionally, strong signals can cause amplifiers to be overdriven, resulting in a worse reception. Therefore, while amplified antennas can be beneficial in certain situations, they should be used with caution and only when necessary. Non-amplified antennas are a reliable option for areas with good signal strength and can provide clear and consistent reception without the potential drawbacks of amplification.

Adding a TV HD antenna can provide several benefits, even if you have never used one before. Here are some reasons to consider adding one to your TV signal sources:

OTA signals are free: Once you purchase and install an HD antenna, receiving over-the-air TV is free. This can save you money on monthly cable or satellite bills.

Local TV broadcasts are widespread: Over 99% of U.S. TV households can receive at least one local station, and 89% can get five or more stations. This means that even if you live in a rural area, you may still be able to receive local channels.

Excellent picture quality: Cable and satellite providers offer hundreds of channels, but they often use data compression or other techniques that can compromise picture quality. Over-the-air TV signals provide excellent picture quality without any loss due to data compression.

Supplemental content: Over-the-air TV often includes supplemental content, such as sports or news programming, that may not be available through cable or satellite providers.

Emergency preparedness: In the event of a power outage or other emergency, over-the-air TV signals can still be received with a battery-powered TV and an HD antenna, providing access to important news and emergency information.

Adding a TV HD antenna can provide free local channels with excellent picture quality, and also offer supplemental content and emergency preparedness benefits.

Do you need an HD antenna for a smart TV?

Many smart TVs come with an OTA tuner onboard, even though most people do not use it. The primary difference between a television and a monitor is this onboard tuner. With the rise of smart TVs, cord-cutters can now directly connect to the internet for on-demand streaming and live TV. Streaming services typically require a subscription fee, while an antenna can receive free signals without the need for an internet connection. While it is not necessary to have an antenna to use a smart TV, the two can complement each other well.

An HDTV antenna is a device that receives free over-the-air TV signals from broadcast towers in your area. These signals can provide excellent picture quality, as cable and satellite providers often use data compression that can compromise picture quality. HDTV antennas come in indoor and outdoor varieties, with amplified and non-amplified options available. Factors that impact signal strength include terrain, the frequency coming from the broadcast tower, where you install the antenna, and obstacles between your home and the TV towers. With a range of channels available from major networks like ABC, CBS, NBC, Fox, PBS, and more, an HDTV antenna can be a great addition to your home entertainment setup.

Effective SEO Services for Improving Website Visibility & Rankings

0

Discover some of the most effective SEO services that can help improve your website’s visibility and search engine rankings. From keyword research and on-page optimization to link building and content marketing, we’ll show you the essential strategies for success.

There are many effective SEO services that can help improve website visibility and search engine rankings. Here are some of the most popular ones:

– Keyword Research: Conducting thorough research to find the right keywords to target for your website content, so that it can be easily found by your target audience.

the most effective SEO services
photo: Pixabay

– On-page Optimization: This includes optimizing website content, meta tags, header tags, and internal linking to improve the relevance and quality of your website’s pages.

– Link Building: Creating high-quality backlinks from other authoritative websites, which helps search engines recognize the credibility of your site and improves your search engine rankings.

– Content Marketing: Creating engaging and informative content that people want to share, which can drive traffic to your website and increase its visibility.

– Technical SEO: This includes optimizing website speed, mobile-friendliness, and other technical aspects of your website to improve its performance and user experience.

– Local SEO: For businesses that operate in specific geographic locations, optimizing their website for local search engine rankings, including Google Maps and local business directories.

– Social Media Marketing: Promoting your website on social media platforms to drive traffic and improve its visibility and authority.

Keyword Research – how?

Keyword research involves finding and analyzing the search terms people use to find information related to your business or website. Here are the steps to conduct keyword research:

Brainstorm initial keywords: Start by brainstorming a list of potential keywords that you think your target audience might search for. These keywords can be related to your products or services, industry, or other relevant topics.

Use a keyword research tool: Use a keyword research tool like Google Keyword Planner, SEMrush, Ahrefs, or Moz Keyword Explorer to generate a list of related keywords, their search volume, and competition level. These tools will also provide suggestions for related keywords and phrases.

Analyze keyword metrics: Look at metrics such as search volume, competition, and relevance to evaluate the potential of each keyword. Focus on keywords with high search volume and low competition that are most relevant to your business.
Consider long-tail keywords: Long-tail keywords are longer and more specific keyword phrases that have lower search volume but higher conversion rates. Consider using long-tail keywords that are highly relevant to your business and its offerings.

Prioritize and group keywords: Prioritize keywords based on their potential to drive traffic and conversions to your website. Group similar keywords into clusters to create a content strategy that targets multiple related keywords.

By conducting keyword research, you can optimize your website content and improve its visibility in search engine results pages (SERPs) for the keywords that your target audience is searching for.

Effective SEO services are essential for improving website visibility and search engine rankings. Some of the most effective SEO services include keyword research to find the right keywords to target, on-page optimization to improve the quality and relevance of your website’s pages, link building to establish credibility and authority, content marketing to create engaging and informative content, technical SEO to optimize website performance and user experience, local SEO to target specific geographic locations, and social media marketing to promote your website on social platforms. By implementing these strategies, businesses can improve their website’s visibility, drive traffic, and boost their search engine rankings.

How to Download Google Play Apps on a Mac Device: Step-by-Step Guide

0

Wondering if you can download Google Play apps on your Mac device? Learn how to use an Android emulator to run Android apps on your Mac with this easy step-by-step guide.

Unfortunately, it is not possible to download Google Play apps directly onto a Mac device, as Google Play is designed specifically for Android operating systems.

But… you can use an Android emulator such as Bluestacks or NoxPlayer to run Android apps on your Mac device. These emulators essentially simulate an Android environment on your Mac, allowing you to download and run Android apps.

To do this, you will need to download and install the Android emulator of your choice on your Mac, and then use it to access the Google Play Store and download the app you want. Keep in mind that some apps may not run smoothly or may not be optimized for use on a Mac device.

Why Android emulator and how they works?

An Android emulator is a software program that simulates the Android operating system on a computer. It allows you to run Android applications on your computer, which is useful when you want to test an app before downloading it to your Android device or if you do not have access to an Android device.

Emulators work by creating a virtual environment that mimics the hardware and software components of an Android device. They simulate the behavior of an Android device, including the touch screen, GPS, camera, and other sensors. When you run an app on an emulator, the emulator intercepts the app’s instructions and translates them into instructions that the computer can understand.

Android emulators work by using a combination of virtualization and emulation technologies. They use virtualization to create a virtual machine that runs the Android operating system, and emulation to simulate the hardware components of an Android device.

Android emulators are a useful tool for developers and users who want to run Android apps on their computer, but they may not always provide a perfect simulation of an Android device, and some apps may not run as smoothly as they would on a physical device.

Android apps on Mac device – install app, step-by-step

Here are the general steps to install Android apps on a Mac device:
  1. Download and install an Android emulator: You can use an emulator such as Bluestacks or NoxPlayer. Go to the respective website of the emulator and download the installer for your Mac.
  2. Install the emulator: Once the installer has been downloaded, double-click on the file and follow the on-screen instructions to install the emulator on your Mac.
  3. Set up the emulator: After the emulator has been installed, launch it from the Applications folder. Follow the setup process, including logging into your Google account and syncing your apps.
  4. Access the Google Play Store: Once the emulator is set up, you should be able to access the Google Play Store within the emulator. Open the Play Store and log in with your Google account details.
  5. Download the app: Search for the app you want to download within the Google Play Store. Once you’ve found the app, click on the “Install” button and wait for the app to download and install on the emulator.
  6. Run the app: After the app has been installed, you can launch it from the emulator’s home screen or from within the Google Play Store.

Keep in mind that some apps may not work as well on an emulator as they would on a physical Android device, and some apps may not be available for download on the Google Play Store in certain regions or countries.

Some of the best free Android emulators

Android Studio, an IDE that comes with an emulator via the Android Virtual Device function, is a solid option for app developers and regular users alike. While the set-up process can be complicated, it offers users the ability to create and test their apps on various devices. However, it lacks the additional support for keyboards found in gaming-focused emulators.

BlueStacks is known as the most comprehensive Android app player in the market, with a plethora of features to enhance the gaming experience. The latest version, BlueStacks 5, delivers high-performance gaming even on low-end devices and addresses previous complaints about feeling bloated on inferior hardware.

BlueStacks
Image source BlueStacks 

Bliss OS has also come a long way and is considered one of the better emulators. It offers three ways to use it, including a live boot option, installing it as a partition on your PC, and installing it via a virtual machine.

LDPlayer is a gamer-focused emulator that offers additional features, such as a toolbar for taking screenshots, recording videos, and setting up keyboard mapping. The installation process is similar in ease to GameLoop, and it worked smoothly on an AMD-powered PC with an ultrawide monitor.

NoxPlayer was one of the original Android emulators and is still popular today. It runs Android 9 and includes features like keyboard mapping and a toolbar along the right side of the window for taking screenshots, recording videos, and more. It handled test games without much complaint.

Finally, PrimeOS is similar to Bliss OS in that it is installed as a partition on your hard drive and offers a full Android-powered desktop with Google Play support. It includes extra features for gamers, such as keyboard and gamepad support and script recording. While it played test games with a few issues, this may have been related to older hardware.