Home Blog Page 63

Should I buy Sony TV or LG TV?

0

Trying to decide between Sony TV or LG TV? Both brands offer a wide range of high-quality TVs with unique features and advantages. Sony TVs are known for their superior image processing technology, while LG TVs are often praised for their user-friendly interface and smart TV features. Ultimately, the best choice for you will depend on your specific needs and preferences. In this article, we’ve highlighted some of the key advantages of each brand to help you make an informed decision.

Both Sony and LG offer high-quality TVs with different features and price ranges. Ultimately, the decision between Sony and LG TVs will depend on your personal preferences and budget. Here are some factors you may want to consider when making your decision:

  • Picture quality: Both Sony and LG TVs offer excellent picture quality. Sony TVs are known for their excellent color accuracy, contrast, and black levels, while LG TVs are known for their excellent viewing angles and HDR performance.
  • Smart TV features: Both Sony and LG offer smart TVs that allow you to stream content from popular services like Netflix, Hulu, and Amazon Prime Video. However, the user interface and available apps may differ between the two brands, so it’s worth checking which one offers the apps and features you want.
  • Price: Sony TVs tend to be more expensive than LG TVs, although this varies depending on the model and features. If you’re on a budget, LG may be the better choice.
  • Design: Sony and LG TVs have different design aesthetics, so it’s worth checking which one you prefer.

Sony TVs have several advantages over LG TVs, including:

  1. Picture quality: Sony is known for its superior picture quality, particularly in terms of color accuracy, contrast, and black levels. Sony TVs often use advanced technologies like OLED and TRILUMINOS to deliver stunning visuals.
  2. Motion handling: Sony TVs are also known for their excellent motion handling, which is particularly important when watching sports or action movies. Sony TVs are less likely to suffer from motion blur or judder than LG TVs.
  3. Upscaling: Sony TVs are known for their excellent upscaling capabilities, which means they can take lower-resolution content and make it look better on a higher-resolution screen. This is particularly useful if you’re watching older movies or TV shows.
  4. Gaming: If you’re a gamer, Sony TVs may be a better choice, as they often have lower input lag and better support for gaming features like variable refresh rate (VRR) and auto low latency mode (ALLM).
  5. Build quality: Sony TVs are typically well-built and sturdy, with a sleek and modern design that looks great in any room.

Sony TVs are a great choice for anyone who values picture quality, motion handling, and upscaling capabilities. They also offer excellent gaming features and build quality, making them a good option for anyone who wants a premium TV experience.

LG TVs have several advantages over Sony TVs, for example:

LG Tv
LG NanoCell technology for pure colours in 4K_photo
  1. Viewing angles: LG is known for its excellent viewing angles, which means that you can watch the TV from almost any angle without experiencing a loss in picture quality or color accuracy. This is particularly useful if you’re watching TV with a group of people.
  2. Smart TV features: LG TVs offer a user-friendly smart TV platform called WebOS, which makes it easy to access streaming services like Netflix, Hulu, and Amazon Prime Video. The platform also supports voice control and can be integrated with other smart home devices.
  3. Price: LG TVs are often less expensive than Sony TVs, making them a great choice for anyone on a budget.
  4. Sound quality: LG TVs often have better built-in speakers than Sony TVs, which means you may not need to purchase a separate soundbar or home theater system to get great audio quality.
  5. Gaming: LG TVs also offer excellent gaming features, including support for NVIDIA G-Sync and AMD FreeSync, which can eliminate screen tearing and other visual artifacts when playing games.

LG TVs are a great choice for anyone who values viewing angles, smart TV features, and sound quality. They also offer excellent gaming features and are often more affordable than Sony TVs.

Sony TV panels quality

Sony uses a variety of panel technologies in their TVs, including LCD, OLED, and Crystal LED. Here’s a breakdown of the quality of each technology:
  1. LCD: Sony uses high-quality LCD panels in its TVs, with features like 4K resolution and HDR support. Sony’s X1 Ultimate processor helps to enhance picture quality by improving color, contrast, and clarity. However, LCD panels are not as good as OLED panels when it comes to contrast and black levels.
  2. OLED: Sony’s OLED TVs are widely regarded as some of the best on the market. OLED technology allows for perfect black levels and excellent contrast, as each pixel can be turned off individually. Sony’s OLED TVs also use the X1 Ultimate processor to enhance picture quality, and they support HDR and Dolby Vision.
  3. Crystal LED: Sony’s Crystal LED TVs are their flagship models, featuring a modular, micro-LED display that can be customized to fit a range of sizes and resolutions. The technology offers incredibly bright images, perfect black levels, and excellent color accuracy, but it is also extremely expensive and mainly intended for professional use.

Overall, Sony’s TV panels are of high quality, with the company’s OLED TVs particularly well-regarded for their contrast and black levels. Sony also uses advanced processors to enhance picture quality, regardless of the panel technology used.

LG TV panels quality

LG uses several panel technologies in their TVs, including LCD, OLED, and Nanocell. Here’s a breakdown of the quality of each technology:
  1. LCD: LG’s LCD panels offer features like 4K resolution and HDR support, as well as local dimming to improve contrast. However, they are not as good as OLED panels when it comes to black levels and contrast.
  2. OLED: LG’s OLED TVs are widely regarded as some of the best on the market. OLED technology allows for perfect black levels and excellent contrast, as each pixel can be turned off individually. LG’s OLED TVs also support HDR and Dolby Vision, and they use the company’s Alpha 9 processor to enhance picture quality.
  3. Nanocell: LG’s Nanocell technology is a variation of LCD that uses tiny particles called quantum dots to enhance color accuracy and improve contrast. Nanocell TVs offer excellent color reproduction, but they still can’t match OLED panels for black levels.

LG’s TV panels are of high quality, particularly their OLED TVs. The company also offers Nanocell technology for those who want improved color accuracy and contrast, but it still can’t match OLED panels for black levels. LG uses advanced processors to enhance picture quality, and their TVs support a wide range of HDR formats.

Sony TV vs LG Tv durability

Both Sony and LG TVs are generally considered to be durable and reliable, and they come with a manufacturer’s warranty to cover any defects or malfunctions. However, there are some factors to consider when comparing the durability of Sony and LG TVs:
  • Build quality: Both Sony and LG TVs are generally well-built, but Sony is known for its sleek and modern design, while LG is known for its more minimalist style. Sony TVs often have a premium look and feel, with sturdy materials and a more solid construction.
  • Components: The durability of a TV can also depend on the quality of the components used. Both Sony and LG use high-quality components in their TVs, but Sony is known for using premium materials and components, which may make their TVs more durable in the long run.
  • Environmental factors: The durability of a TV can also depend on the environment in which it is used. TVs exposed to high levels of heat, humidity, or dust may not last as long as those used in more moderate conditions.
  • Customer service: Both Sony and LG offer customer support for their TVs, but the quality of their support can vary depending on the region and country. In general, Sony has a reputation for offering good customer service, but LG is also known for its helpful support team.

Overall, both Sony and LG TVs are generally durable and reliable, but Sony is often seen as the more premium brand with a more solid construction and higher-quality components. However, both companies offer good customer support to ensure that their customers are satisfied with their products.

The Sony X1 Ultimate processor is a powerful image processing chip that is used in some of Sony’s high-end TV models, including its OLED TVs. The X1 Ultimate is designed to enhance the picture quality of the TV by analyzing and improving different aspects of the image, including color, contrast, and clarity.
Sony X1 Ultimate processor
Sony X1 Ultimate processor _ photo

Some of the key features of the X1 Ultimate processor include:

  • Object-based HDR remastering: This feature analyzes individual objects in a scene and applies HDR (High Dynamic Range) processing to them to improve the contrast and color accuracy of the image.
  • Dual database processing: The X1 Ultimate uses two separate image databases to analyze and process the image, one for noise reduction and another for upscaling. This helps to reduce visual artifacts and improve image clarity.
  • Super bit mapping HDR: This feature analyzes the color of each pixel and applies a unique mapping algorithm to prevent color banding and improve color accuracy in HDR content.
  • Precision color mapping: This feature analyzes the color of each pixel and adjusts it to its ideal hue, saturation, and brightness level to create a more accurate and lifelike image.

The X1 Ultimate processor is designed to provide the best possible picture quality for Sony’s high-end TVs, and it is often praised by reviewers and consumers for its ability to produce stunning images with excellent color accuracy, contrast, and clarity.

About Sony Cognitive Processor XR

The Sony Cognitive Processor XR is a cutting-edge image processing chip that is used in some of Sony’s latest high-end TVs, including its 4K and 8K LED and OLED models. The processor is designed to provide the best possible picture quality by analyzing and improving various aspects of the image, including color, contrast, and detail.

Some of the key features of the Sony Cognitive Processor XR include:

  • Cognitive intelligence: The processor uses a unique cognitive intelligence system that can analyze and understand the elements of the scene, including objects, textures, and colors, to optimize the picture quality in real time.
  • XR Contrast Booster: This feature enhances the contrast of the image by analyzing and optimizing the brightness and darkness levels in different parts of the screen, resulting in more dynamic and lifelike images.
  • XR Triluminos Pro: This feature enhances the color accuracy and saturation by analyzing and adjusting the color of each individual pixel, resulting in more vibrant and lifelike colors.
  • XR Motion Clarity: This feature analyzes and reduces motion blur and judder to produce smoother and more fluid motion, particularly in fast-paced scenes like sports or action movies.

The Sony Cognitive Processor XR is an advanced image processing chip that uses advanced cognitive intelligence algorithms to provide the best possible picture quality. Its unique approach to analyzing and understanding the scene allows it to optimize the picture quality in real time, resulting in stunning and lifelike images.

About LG α5 Gen5 AI Processor 4K

The LG α5 Gen5 AI Processor 4K is a high-performance image processing chip that is used in many of LG’s latest 4K TVs, including its OLED and NanoCell models. The processor is designed to enhance the image quality of the TV by analyzing and improving various aspects of the image, including color, contrast, and clarity.

Some of the key features of the LG α5 Gen5 AI Processor 4K include:

  • AI-enhanced upscaling: The processor uses artificial intelligence to upscale lower-resolution content to 4K resolution, resulting in sharper, more detailed images.
  • AI picture and sound enhancement: The processor analyzes the image and sound data to enhance the brightness, contrast, color, and clarity of the picture, as well as the quality of the sound.
  • Auto genre selection: The processor can automatically recognize the type of content being played (e.g. sports, movies, or news) and adjust the picture and sound settings accordingly for the best viewing experience.
  • HDMI 2.1 support: The processor supports HDMI 2.1, which allows for higher frame rates, faster refresh rates, and lower input lag, making it ideal for gaming and other high-performance applications.

The LG α5 Gen5 AI Processor 4K is a powerful and advanced image processing chip that helps to deliver stunning picture quality and immersive sound for LG’s latest 4K TVs. Its AI-enhanced upscaling and automatic genre selection features are particularly noteworthy, as they help to ensure that every type of content is displayed in the best possible way.

When it comes to choosing between Sony TV or LG TV, both brands offer a variety of high-quality TVs with unique features and advantages. Sony TVs are known for their superior image processing technology, with advanced processors like the X1 Ultimate and Cognitive Processor XR. Sony also offers a wide range of OLED TVs, which are considered by many to be the gold standard for picture quality. On the other hand, LG TVs are often praised for their user-friendly interface and smart TV features, with models like the LG NanoCell and OLED TVs featuring the powerful α5 Gen5 AI Processor 4K. Ultimately, the best choice for you will depend on your specific needs and preferences, but both brands are considered to be among the best in the market.
Monitor Refresh Rate Explained: How to Change it for a Better Viewing Experience

0

Learn about monitor refresh rate, its significance, and how it impacts your viewing experience. This guide will provide you with simple steps on how to change the refresh rate on your monitor, including instructions for Windows, Nvidia, and AMD graphics cards. Improve your display performance with higher refresh rates today.

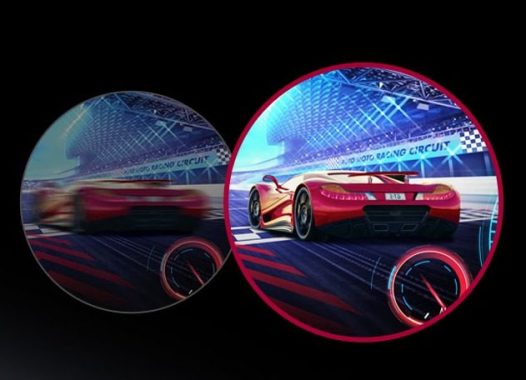
A monitor’s refresh rate refers to the number of times per second that the screen updates its display. The refresh rate is measured in Hertz (Hz), and a higher refresh rate means that the screen can display more images per second, resulting in smoother motion and a more responsive display.

Most monitors have a default refresh rate of 60Hz, which is suitable for general use. However, some monitors have higher refresh rates of 120Hz, 144Hz, or even 240Hz, which are more suitable for gaming or other applications that require fast, responsive displays.

To change the refresh rate of your monitor, follow these steps:

  • Open the Settings app on your Windows computer.
  • Click on System, and then click on Display.
  • Scroll down to the “Advanced display settings” section and click on “Display adapter properties.”
  • Click on the “Monitor” tab.
  • Under “Monitor Settings,” you should see a drop-down menu for “Screen refresh rate.” Click on the drop-down menu to see the available refresh rate options for your monitor.
  • Select the desired refresh rate from the list, and then click on “Apply” to save the changes.

    Refresh Rate
    Comparison of 60Hz Refresh Rate and 160Hz Refresh Rate – photo: LG

Note: Not all monitors support higher refresh rates, so make sure to check your monitor’s specifications before attempting to change the refresh rate. Additionally, changing the refresh rate may affect the performance of certain applications or games, so make sure to test the display after making changes to ensure that everything is working as expected.

  • If you don’t see any higher refresh rates in the drop-down menu, it’s possible that your graphics card or cable may not support higher refresh rates. Make sure that your graphics card and cable are capable of supporting the desired refresh rate before attempting to change it.
  • If you’re using a Nvidia graphics card, you can also change the refresh rate using the Nvidia Control Panel. Right-click on your desktop and select “Nvidia Control Panel.” Then, click on “Change resolution” under the “Display” section. From there, you should see a drop-down menu for “Refresh rate.” Select the desired refresh rate and click on “Apply” to save the changes.
  • If you’re using an AMD graphics card, you can change the refresh rate using the AMD Radeon Settings app. Right-click on your desktop and select “AMD Radeon Settings.” Then, click on “Display” and select the monitor you want to change the refresh rate for. From there, you should see a drop-down menu for “Refresh rate.” Select the desired refresh rate and click on “Apply” to save the changes.
  • After changing the refresh rate, make sure to test the display to ensure that everything is working as expected. If you notice any issues or performance problems, you may need to adjust the refresh rate or other display settings to optimize the display for your needs.
  • Some monitors may have their own built-in refresh rate settings that you can adjust using the monitor’s OSD (on-screen display) menu. Check your monitor’s manual or manufacturer’s website for instructions on how to access and adjust the refresh rate settings.
  • It’s also important to note that changing the refresh rate can affect your monitor’s power consumption and may cause the display to flicker or become unstable if not set up correctly. If you experience any issues after changing the refresh rate, you may need to adjust other settings or consult your monitor’s manual or manufacturer’s support for further assistance.
  • Finally, keep in mind that a higher refresh rate may not always result in a better visual experience. If you’re not sure whether a higher monitor refresh rate is necessary for your needs, it’s best to do some research and consider factors such as the type of content you’ll be viewing, the performance of your graphics card and other hardware, and your budget before making any changes to your monitor’s refresh rate.

The Best 4 Free Tools to Convert Files

0

Looking for free tools to convert files? Check out our top picks including Handbrake, CloudConvert, Convertio, and Zamzar. Learn about their features, supported formats, and ease of use.

There are many tools available to convert files, but here are four of the best ones:

  1. Handbrake: Handbrake is a free and open-source video transcoder that allows you to convert video files from one format to another. It supports a wide range of video formats, including MP4, MKV, and AVI, and offers a range of advanced features for adjusting the quality and size of the output file.
  2. CloudConvert: CloudConvert is a web-based file conversion service that allows you to convert files from one format to another. It supports a wide range of file formats, including video, audio, image, document, and eBook formats. You can upload files from your computer or import them from cloud storage services such as Dropbox and Google Drive.
  3. Convertio: Convertio is another web-based file conversion service that supports a wide range of file formats. It allows you to convert files up to 100 MB in size for free and offers a range of advanced features for adjusting the quality and size of the output file.
  4. Zamzar: Zamzar is a web-based file conversion service that supports over 1,200 file formats, including video, audio, image, document, and eBook formats. It allows you to convert files from one format to another, as well as adjust the quality and size of the output file. It also offers various conversion options, including email notifications and file downloading.

The best tool to use depends on the specific file formats you need to convert and the features you require.

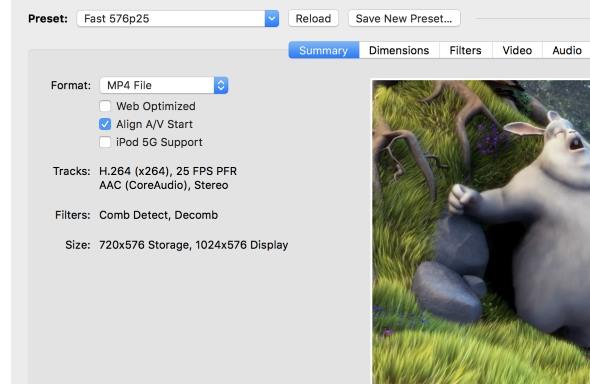
Handbrake is a free and open-source video transcoder that allows you to convert video files from one format to another. It was originally developed for the macOS operating system, but it is now available for Windows and Linux as well. Here are some more details about Handbrake:

Supported Formats: Handbrake supports a wide range of input and output file formats, including popular video formats such as MP4, MKV, AVI, and MPEG, as well as audio formats such as AAC, MP3, and FLAC. It also supports subtitles in various formats such as SRT, SSA, and VobSub.

Handbrake
Handbrake

Advanced Features: Handbrake offers a range of advanced features for adjusting the quality and size of the output file. You can adjust the bitrate, frame rate, and resolution of the output file, as well as apply filters for noise reduction and deblocking. You can also choose from various presets for optimizing the output file for different devices, such as iPhones, iPads, and Android phones.

Ease of Use: Handbrake has a simple and user-friendly interface that makes it easy to use for beginners. It offers a range of presets that allow you to quickly select the desired output format and quality. It also allows you to preview the output file before converting it, which is helpful for checking the quality and making any necessary adjustments.

Overall, Handbrake is a powerful video transcoder that is suitable for both beginners and advanced users. Its wide range of supported formats and advanced features make it a popular choice for video conversion tasks.

CloudConvert is a web-based file conversion service that allows you to convert files from one format to another. It supports a wide range of file formats, including video, audio, image, document, and eBook formats. Here are some more details about CloudConvert:

Supported Formats: CloudConvert supports over 200 file formats, including popular video formats such as MP4, AVI, and MOV, as well as audio formats such as MP3, WAV, and FLAC. It also supports image formats such as JPEG, PNG, and GIF, and document formats such as PDF, DOCX, and ODT. In addition, it supports various eBook formats such as EPUB, MOBI, and AZW3.

Integration with Cloud Storage Services: CloudConvert allows you to upload files from your computer or import them from cloud storage services such as Dropbox, Google Drive, and OneDrive. This makes it easy to convert files that are stored in the cloud without having to download them to your computer first.

Advanced Features: CloudConvert offers a range of advanced features for adjusting the quality and size of the output file. You can adjust the bitrate, frame rate, and resolution of video files, as well as apply filters for noise reduction and color correction. You can also choose from various presets for optimizing the output file for different devices, such as iPhones, iPads, and Android phones.

Ease of Use: CloudConvert has a simple and user-friendly interface that makes it easy to use for beginners. It allows you to select the input and output file formats, adjust the conversion settings, and start the conversion process with just a few clicks. It also allows you to track the progress of the conversion and receive an email notification when it is complete.

CloudConvert is a powerful and versatile file conversion service that is suitable for both personal and professional use. Its wide range of supported formats, integration with cloud storage services, and advanced features make it a popular choice for file conversion tasks.

Convertio is a web-based file conversion service that allows you to convert files from one format to another. It supports a wide range of file formats, including video, audio, image, document, and eBook formats. Here are some more details about Convertio:

Supported Formats: Convertio supports over 300 file formats, including popular video formats such as MP4, AVI, and MOV, as well as audio formats such as MP3, WAV, and FLAC. It also supports image formats such as JPEG, PNG, and GIF, and document formats such as PDF, DOCX, and ODT. In addition, it supports various eBook formats such as EPUB, MOBI, and AZW3.

Ease of Use: Convertio has a simple and user-friendly interface that makes it easy to use for beginners. It allows you to select the input and output file formats, adjust the conversion settings, and start the conversion process with just a few clicks. It also allows you to upload files from your computer, cloud storage services such as Dropbox and Google Drive, or even via URL.

Advanced Features: Convertio offers a range of advanced features for adjusting the quality and size of the output file. You can adjust the bitrate, frame rate, and resolution of video files, as well as apply filters for noise reduction and color correction. You can also choose from various presets for optimizing the output file for different devices, such as iPhones, iPads, and Android phones.

Free and Paid Options: Convertio offers both free and paid plans. The free plan allows you to convert files up to 100 MB in size and up to 2 conversions per day. The paid plans offer more advanced features, including higher conversion limits, faster processing times, and support for batch processing.

Convertio is a strong and versatile file conversion service that is suitable for both personal and professional use. Its wide range of supported formats, ease of use, and advanced features make it a popular choice for file conversion tasks.

Zamzar is a web-based file conversion service that allows you to convert files from one format to another. Here are some more details about Zamzar:

Supported Formats: Zamzar supports over 1,200 file formats, including popular video formats such as MP4, AVI, and MOV, as well as audio formats such as MP3, WAV, and FLAC. It also supports image formats such as JPEG, PNG, and GIF, and document formats such as PDF, DOCX, and ODT. In addition, it supports various eBook formats such as EPUB, MOBI, and AZW3.

file conversion
photo: Pixabay

Ease of Use: Zamzar has a user-friendly interface that makes it easy to use for beginners. It allows you to upload files from your computer or via URL, select the output format, and start the conversion process with just a few clicks. You can also choose to receive email notifications when your file is ready for download.

Advanced Features: Zamzar offers a range of advanced features for adjusting the quality and size of the output file. You can adjust the bitrate, frame rate, and resolution of video files, as well as apply filters for noise reduction and color correction. You can also choose from various presets for optimizing the output file for different devices, such as iPhones, iPads, and Android phones.

Free and Paid Options: Zamzar offers both free and paid plans. The free plan allows you to convert files up to 50 MB in size and up to 2 conversions per day. The paid plans offer more advanced features, including higher conversion limits, faster processing times, and support for batch processing.

Zamzar is a is a good tool, easy to use file conversion service that is suitable for both personal and professional use. Its wide range of supported formats, ease of use, and advanced features make it a popular solution for file conversion tasks.

Sennheiser Ambeo 3D Soundbar – Impressive!

0

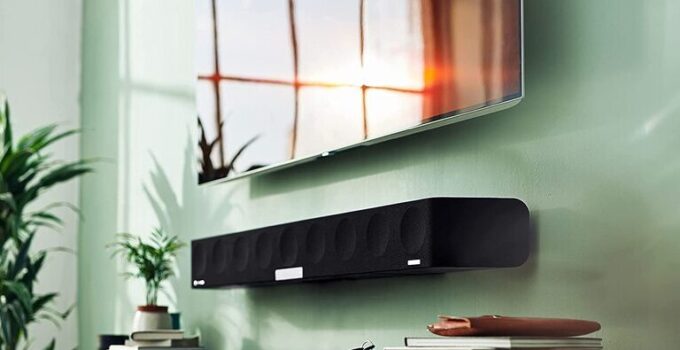
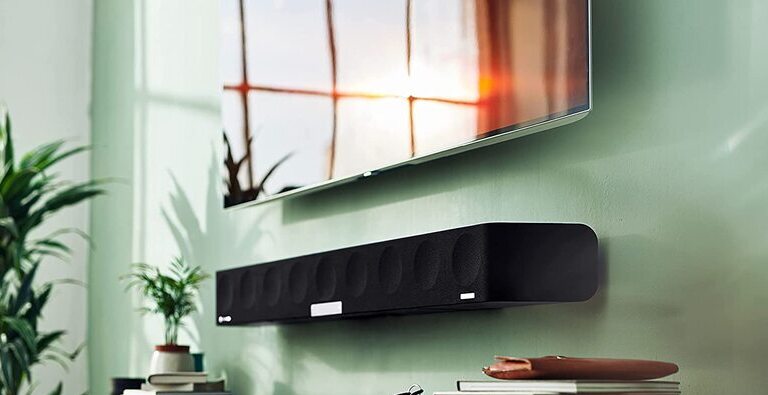
The Sennheiser Ambeo 3D soundbar is a high-end soundbar system designed to provide immersive and lifelike 3D sound for home theater and music applications. It uses advanced signal processing algorithms, specialized drivers, and multiple speakers to create a three-dimensional soundstage that places sounds precisely around the listener.

The Sennheiser Ambeo 3D soundbar supports a variety of audio formats, including Dolby Atmos, DTS:X, and MPEG-H, and is compatible with a wide range of devices, including TVs, Blu-ray players, and gaming consoles. It also features a range of connectivity options, including HDMI, Ethernet, Wi-Fi, and Bluetooth.

Sennheiser Ambeo 3D soundbar
Sennheiser Ambeo 3D soundbar – photo

The soundbar itself features a sleek and modern design, with a brushed aluminum finish and a minimalist appearance that blends in well with most home theater setups. It also includes a remote control and a smartphone app that allows users to adjust various settings, such as volume and sound profile, from their mobile devices.

Overall, the Sennheiser Ambeo 3D soundbar is a high-end audio product that provides exceptional sound quality and a highly immersive listening experience. It is designed for audiophiles and home theater enthusiasts who demand the highest quality sound and advanced features from their audio equipment. However, due to its high cost and advanced features, it may not be suitable for all users or budgets.

The Sennheiser Ambeo 3D soundbar features a variety of inputs that allow it to be connected to a wide range of audio and video devices. It has a total of four HDMI inputs and one HDMI output, which support the latest 4K and HDR video formats, as well as audio formats such as Dolby Atmos and DTS:X. In addition to HDMI, it also has an optical audio input and an analog audio input, which can be used to connect other audio sources such as CD players, turntables, or older audio devices. Finally, the Sennheiser Ambeo 3D soundbar also features Wi-Fi and Bluetooth connectivity, which allow for wireless audio streaming from smartphones, tablets, and computers. Overall, the Sennheiser Ambeo 3D soundbar offers a wide range of inputs and connectivity options, making it a versatile and flexible audio solution for home theater and music applications.Sennheiser Ambeo 3D soundbar

The Sennheiser Ambeo 3D soundbar supports both Dolby Atmos and DTS:X, which are two of the most advanced surround sound technologies available today. These formats allow for a highly immersive listening experience, with sound objects placed accurately around the listener, creating a sense of three-dimensional space.

Dolby Atmos uses a unique object-based audio technology that enables sounds to be placed and moved around the listener in a three-dimensional space. This provides a highly realistic and immersive listening experience, with sound effects and music coming from all around the listener. The Sennheiser Ambeo 3D soundbar is capable of reproducing Dolby Atmos content through its advanced signal processing algorithms and specialized drivers.

DTS:X is another object-based audio technology that allows for immersive sound experiences, with sounds placed and moved around the listener in a three-dimensional space. The Sennheiser Ambeo 3D soundbar is also capable of reproducing DTS:X content through its advanced signal processing and specialized drivers.

Overall, the support for both Dolby Atmos and DTS:X in the Sennheiser Ambeo 3D soundbar ensures that users can enjoy a highly immersive and lifelike listening experience, with sound objects placed precisely around them, creating a sense of depth and realism that traditional surround sound systems cannot match.

Sennheiser Ambeo 3D soundbar Specifications:

Amplifier
13x class D Amplifiers
Total audio power
500 W (peak)
Total number of speakers
13
Audio processing
DualCore 1,2 GhZ ARM Cortex A7, 2x Dual Core 500 MHz SHARC DSP
Voltage range
100-240V ~ 50/60Hz
Woofers
6x 4″ Cellulose Sandwich Cones
Tweeters
5x 1″ Tweeters Aluminium Cones
Full range
2x 3,5″ Top Facing Full Range
Frequency response
30 Hz – 20kHz (-3dB)
HDMI TV (eARC) OUT
eARC (HDMI 2.1)
HDMI settings
control: CEC
HDMI video formats
up to 4K (60 Hz), Full HD, MHL 2.1
HDMI encoding
HDCP 1.4
HDMI power supply
for accessories (external devices): 5 V ⎓, 1 A
OPT IN
1x S/PDIF, sampling rates: up to 192 kHz
AUX IN
1x Stereo RCA sockets
USB
USB socket (type A), for power supply for accessories (external devices): 5 V ⎓, 1 A;
Subwoofer SW Pre-OUT
1x Mono RCA, max. 2 V
Microphone input for room calibration
1 x 2.5 mm jack socket, mono
Services
Google Chromecast built-in, UPnP, AirPlay 2, Spotify Connect, TIDAL Connect
Max power
250W
Eco standby
1,9W (Default)
Smart standby
5,5W
Setup consumption
2,3W
Temperature range (operation)
operation: 0 °C to +45 °C, storage: -20 °C to +70 °C
Relative humidity (operation)
operation: 20 to 85 %, storage: 10 to 95 %
Display
status LED, AMBEO LED, Graphic OLED with brightness sensor
Dimensions (with feet)
approx. 1.26 x 13.5 x 17.1 mm incl. feet
Dimensions (without feet)
approx. 1.26 x 13.5 x 17.1 mm without feet
Weight
approx. 18.5 kg
WiFi
WiFi Standard IEEE 802.11 a/b/g/n/ac
WiFi transmission system
2 x 2 MIMO
WiFi transmission frequency
2,400 MHz to 2,483.5 MHz / 5,170 MHz to 5,835 MHz
WiFi modulation 2.4 GHz
CCK, DQPSK, DBPSK für DSSS / 64QAM, 16QAM, QPSK, BPSK for OFDM
WiFi modulation
Modulation 5 GHz band: 64QAM, 16QAM, QPSK, BPSK
Bluetooth output power
100 mW (max)
Bluetooth version
4.2, class 1, BR/EDR, BLE
Bluetooth transmission frequency
2,400 MHz to 2,483.5 MHz
Bluetooth modulation
GFSK, π/4 DQPSK, 8DPSK
Bluetooth profiles
A2DP, AVRCP, GATT
Bluetooth output power
10 mW (max)
Bluetooth Audio Codec
AAC, SBC
Bluetooth pairing option
Near Field Communication (NFC)
ETHERNET
1x RJ-45 socket, 100/10 MBit
Audio format / Codec
DSD, MP3, AAC/HE-AAC, LPCM, FLAC, AIFF, ALAC, Vorbis, Dolby Atmos Music, Sony 360 Reality Audio / .mp3, .m4a, .aac, .mp4, .3gp, .wav, .flac, .aiff, .aif, .m4a, .ogg

LG webOS vs Tizen OS vs VIDAA OS – Which TV OS?

0

Discover the top smart TV OS in the market today. Read about the features and benefits of popular OS such as Android TV, WebOS, Tizen, and more. Choose the perfect TV OS for your viewing preferences and access your favorite apps and content seamlessly.

LG webOS, Tizen OS, and VIDAA OS are three popular operating systems for smart TVs. Here is a comparison of these three operating systems:

User Interface:

  • LG webOS has a sleek and user-friendly interface that offers easy navigation with its Magic Remote.
  • Tizen OS is also known for its simple and intuitive interface, with its Smart Hub providing quick access to apps and content.
  • VIDAA OS offers a customizable home screen that allows users to easily access their favorite apps and content.

App Store:

  • LG webOS has its own app store, which includes a wide range of popular apps and services.
  • Tizen OS has a large app store with access to various apps and services from major providers, including Netflix, Amazon Prime Video, and Hulu.
  • VIDAA OS has a good app store, it includes popular apps such as Netflix, Prime Video, Rakuten TV, Freeview Play, YouTube, ITV Hub, BBC iPlayer and more.

Voice Assistant:

  • LG webOS uses the LG ThinQ AI voice assistant, which allows users to control their TV and other compatible devices using voice commands.
  • Tizen OS uses Samsung’s Bixby voice assistant, which offers similar functionality to LG ThinQ AI.
  • VIDAA OS offers limited voice control, with only basic commands available.

Smart Home Integration:

  • LG webOS allows users to connect their TV to compatible smart home devices and control them through the TV’s interface.
  • Tizen OS offers similar functionality, with the ability to control devices such as lights, thermostats, and security cameras.
  • VIDAA OS has limited smart home integration, with only basic features available.

Performance:

  • LG webOS and Tizen OS are both known for their smooth performance and fast loading times.
  • VIDAA OS may not be as fast as the other two, but it is still responsive and performs well overall.

Connectivity:

  • LG webOS and Tizen OS both offer a wide range of connectivity options, including Wi-Fi, Bluetooth, HDMI, USB, and Ethernet.
  • VIDAA OS also supports Wi-Fi, HDMI, USB, and Ethernet, but may not have as many connectivity options as the other two.

Updates:

  • LG webOS and Tizen OS both receive regular updates from their respective manufacturers, with new features and improvements added over time.
  • VIDAA OS may receive updates less frequently, but it is still supported by its manufacturer.

Compatibility:

  • LG webOS is available on LG Smart TVs, while Tizen OS is used on Samsung Smart TVs.
  • VIDAA OS is used on Hisense Smart TVs, and also on some Toshiba and Sharp models.

Customization:

  • LG webOS allows users to customize the interface by changing the background, selecting their preferred apps, and organizing the menus.
  • Tizen OS also offers customization options, such as changing the wallpaper and adding widgets.
  • VIDAA OS allows users to customize the home screen by adding and removing apps and content.

In summary, all three TV OS offer a variety of features and functions that make them appealing to different users. LG webOS and Tizen OS are both well-established and offer a wide range of apps and smart home integrations, while VIDAA OS is newer but offers a customizable interface and good performance. Ultimately, the best choice will depend on the user’s preferences and the specific features they are looking for.

LG webOS

Access your favorite content from YouTube, Amazon Prime Video, Hulu, Netflix, Newsy, Spotify, and ifood.tv on LG’s latest generation Smart TV platform, webOS. Enjoy entertainment, news, sports, games, and more with an elegant interface, simple setup, and content discovery. webOS is also compatible with 4K Ultra HD programming and High Dynamic Range (HDR) movies and TV shows. LG’s Magic Remote makes navigation easy with its point-and-click functionality, unlike the arrow keys on remotes for Android TVs.

Starting with its 2021 TVs, LG revamped the look of webOS entirely. Version 6.0 of the software replaces the bottom launch bar with an entire home screen with rows of large banners, app lists, content recommendations, and a home dashboard. webOS TVs come pre-installed with many popular streaming apps, including YouTube, Netflix, Amazon Prime Video, Disney Plus, and Google Play Movies and TV, with additional apps and games available for download from the LG Content Store.

LG Electronics announced the availability of the Apple TV app, Apple Music, AirPlay, and HomeKit on its webOS Hub in over 100 countries and regions, expanding its accessibility and convenience to customers. By giving more customization options to smart TV manufacturers and more content choices to consumers, LG is now working with 200 partners, including Seiki, Eko, Stream System, Konka, Aiwa, and Hyundai.

LG webOS
LG webOS – photo LG

The Apple TV app offers access to award-winning Apple Originals and over 100,000 films and shows for purchase or rental. Apple Music subscribers can enjoy a vast, ad-free library of over 100 million songs, 30,000 expertly-curated playlists, countless 4K music videos, and Apple Music Radio, which streams hits and classics from all genres. webOS Hub is also compatible with AirPlay, allowing users to stream movies, music, games, and photos from their iPhone, iPad, or Mac. Additionally, webOS Hub-powered TVs are Apple Home-enabled, enabling users to control their TV in the Apple Home app and Siri using Apple HomeKit technology.

WebOS boasts a unique and recognizable interface, with a smart menu that appears as a row of colored tiles at the bottom of the screen, keeping most of the content you watch visible. Each tile represents a distinct app or feature, and selecting an app like YouTube displays an additional bar of recommendations above the menu. The menu also includes a Gallery mode for displaying various works of art and photos on the screen. Users can adjust the order of each app manually or with the Intelligent mode, which prioritizes the most frequently used apps. A new feature allows users to add YouTube channels to the menu, which is useful for following several vloggers. Unwanted apps can easily be removed from the menu with just a few presses of a button. The left-hand side of the menu provides access to recently used apps, the search function, TV function, and the home dashboard. The LG TV Plus app allows users to stream photos or videos from their smartphone or tablet to the TV, while some apps like YouTube have a casting option that sends a link to the TV instead of the content itself. This results in perfect aspect ratio and the ability to use your smartphone for other tasks. AirPlay is available on OLED and NanoCell TVs from 2019, allowing users to stream images and music via an iPhone or iPad. WebOS is a user-friendly platform that can be customized to suit individual preferences, and combined with the Magic Remote, allows for easy switching between all functions. The LG Content Store is also noteworthy as it does not require an account, reducing the number of accounts users need to create.

Tizen OS

Tizen OS is the proprietary operating system that comes pre-installed on Samsung smart TVs. The sleek design of the interface is intended to complement the TV’s aesthetics, and the OS boasts an array of intuitive features.

The Smart Hub is a hub of entertainment, where users can access all the content they want to watch on their TV in one place. The latest series of Samsung TVs feature a revamped Smart Hub that offers more relevant features and services to users. Netflix and Amazon Prime are among the streaming services that are pre-installed for convenience. Simply pressing the Smart Hub button brings up a band of cards at the bottom of the screen, where users can find devices connected to the TV, streaming services, apps, and the settings menu. Hovering over an app like Netflix automatically displays the TV show that is being watched, so users can hit play and start watching with ease.

Tizen OS is also intuitive, learning what users like to watch and recommending TV shows and other content based on their preferences. This feature ensures that there is always something to watch on the TV. Additionally, Tizen OS simplifies the process of figuring out which device is connected to which port, as it automatically detects all the sources connected to it and identifies them on the Smart Hub.

Tizen OS
Tizen OS – photo Samsung

The One Remote is another helpful feature that automatically controls all the devices connected to the TV, eliminating the need for multiple remotes. The ultra-minimalistic design of the One Remote makes it easy and convenient to use. The main menu runs along the bottom of the screen, with another row of contextual options above it. Users can configure a favorites row for all their most frequently used apps and switch between recently used apps with ease.

Tizen TV also includes Samsung TV Plus, an app that aggregates over 1,000 free streaming channels, including movies, sports, and national news. Overall, Tizen TV is streamlined for TV use and makes it easy for users to access their favorite content in one place.

VIDAA OS

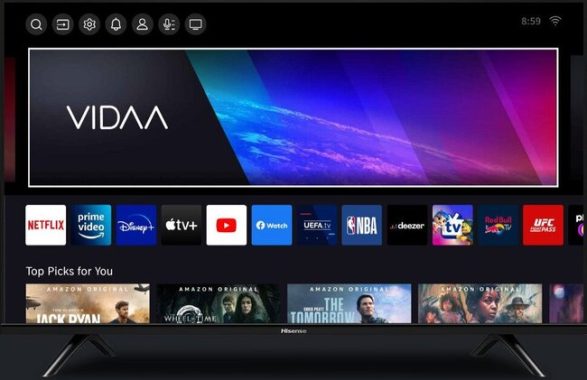
VIDAA OS is known for its customizable navigation bar located at the top of the screen. Unlike other operating systems, this bar can be summoned without exiting the current setup and can switch seamlessly between apps that remain active in the background. The navigation bar includes Smart TV apps and features, such as Input, All Apps, Anyview Cast, Games, Media, YouTube, Netflix, and more. Users can fully customize the order of these apps to their liking. Video: VIDAA/YouTube

While some Smart TV platforms have become more like computers than TVs with overwhelming options, VIDAA OS stands out with its simplistic and intuitive design. It satisfies the brief with its fast and responsive performance, allowing users to easily navigate through apps without closing them in the background. The app store has also successfully enticed big-name apps, such as Apple TV and Disney+, to consolidate the user’s viewing experience.

VIDAA OS
VIDAA OS

The standout feature of VIDAA OS lies in its customizable navigation bar positioned at the top of the screen. This unique bar can be summoned effortlessly without exiting the current setup, smoothly switching between active apps running in the background.

Within VIDAA’s navigation bar, users can access Smart TV apps and various features such as Input, All apps, Anyview Cast, Games, Media, YouTube, Netflix, and more. The arrangement of these apps is entirely customizable, allowing users to add and rearrange them according to their preferences.

As I delved into VIDAA OS, I appreciated its simplicity—a platform designed for those who prefer a straightforward TV experience. However, as one explores further, distinctions from the conventional become apparent. A notable drawback is the less-than-ideal experience when casting screens from laptops or smartphones. Unlike the seamless connection typically associated with Miracast technology, VIDAA requires users to open the Anyview Cast app before making the TV visible, introducing an element of inconvenience. This seems counterintuitive for a platform emphasizing user-friendliness. In contrast, most Smart TV platforms seamlessly run Miracast in the background, transforming the TV display into an extension of the device screen.

Chromecast stands out as an exception, enabling hassle-free casting as long as the TV is connected to the same WiFi network, supporting applications like Google Photos, YouTube, VLC, and other Chromecast-enabled services.

In contrast, Android TV boasts an extensive repository of over 5000 apps and games. While the initial excitement may wane upon closer inspection, as users typically download a handful of preferred apps, it remains a versatile ecosystem. On my Android TV, I gravitate towards Netflix, YouTube, DStv, and VLC, occasionally utilizing a VPN. I suspect VIDAA OS shares a similar scenario.

The pivotal consideration is whether VIDAA OS supports your essential apps. The platform, especially after the latest update, impressively caters to users of Disney+, Apple TV, Amazon Prime, and other international streaming apps. Netflix and DStv are also supported, covering essential bases.

VIDAA OS may not overwhelm users with an extensive app library, as seen in Roku TV and Android TV experiences. However, for those with straightforward needs like mine, the platform provides a satisfactory and functional experience.

However, there are some areas where VIDAA OS falls short, such as poor design choices when it comes to casting. As someone used to DLNA and Chromecast, the need to constantly tinker with settings to cast to the Smart TV was disappointing.

Ultimate Guide to PS5 Controller: Troubleshooting, Updates, and More

0

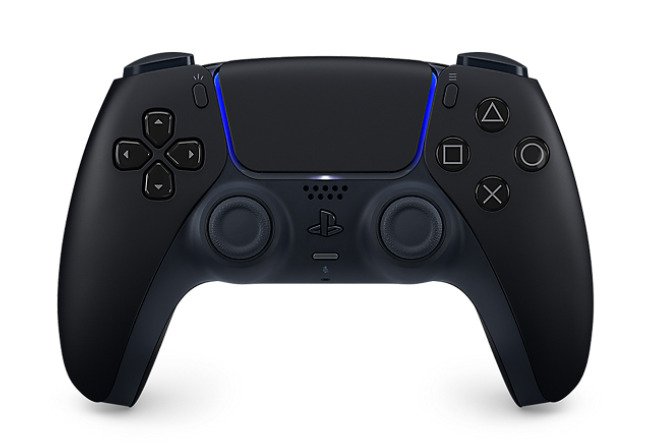
The PS5 DualSense controller is generally considered to be of high quality and an improvement over its predecessor, the DualShock 4 controller. Here are some of the features and improvements of the DualSense controller:

  • Haptic feedback: The DualSense controller includes advanced haptic feedback technology, which provides more precise and realistic vibration feedback to the user.
  • Adaptive triggers: The DualSense controller includes adaptive trigger buttons that can provide varying levels of resistance depending on the action in the game.
  • Improved battery life: The DualSense controller has an improved battery life compared to the DualShock 4 controller, lasting up to 10 hours on a single charge.
  • Built-in microphone and speaker: The DualSense controller includes a built-in microphone and speaker, allowing for easy voice chat and game audio.
  • Ergonomic design: The DualSense controller has a comfortable and ergonomic design, with improved grip and more intuitive button placement.

The PS5 DualSense controller is a high-quality and innovative controller that provides a more immersive gaming experience for users.

PS5 Controller Not Charging? How to fix?

If your PS5 controller is not charging, there could be several reasons why. Here are some troubleshooting steps you can take to try and fix the issue:

  1. Check the USB cable: Make sure that the USB cable you are using to charge the controller is in good condition and is firmly connected to both the controller and the power source.
  2. Check the power source: Make sure that the power source you are using to charge the controller is working properly. You can try plugging the USB cable into a different power source to see if that resolves the issue.
  3. Reset the controller: Use a small object like a paper clip to press the reset button on the back of the controller for a few seconds. Then, try charging the controller again.
  4. Use a different USB port: Try using a different USB port on your console or computer to charge the controller.
  5. Replace the battery: If none of the above steps work, the battery in the controller may need to be replaced. You can purchase a replacement battery online and follow a guide to replace it.

If none of these steps work, you may need to contact Sony customer support for further assistance.

PS5 Controller
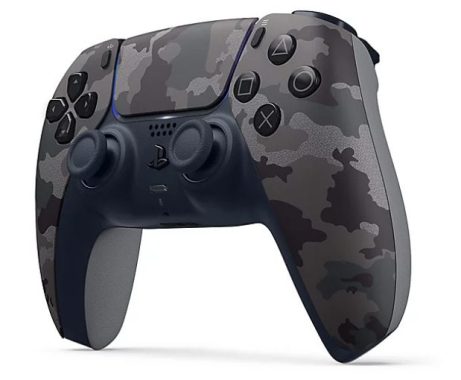
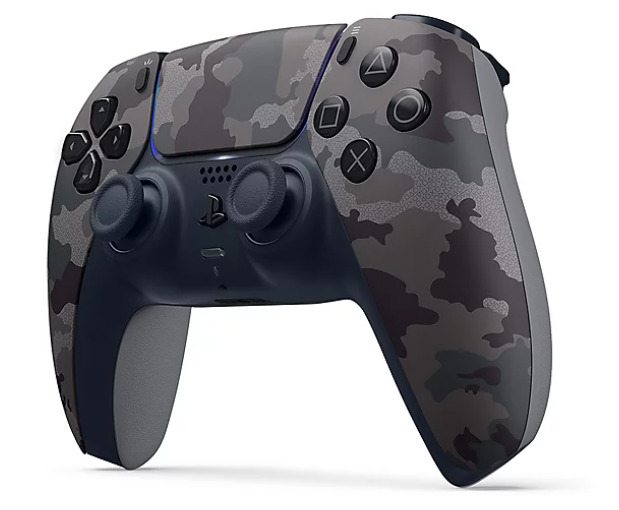
PS5 DualSenseâ„¢ Wireless Controller – Gray Camouflage – photo: playstation

How to Update Your PS5 Controller?

Updating your PS5 controller is a simple process that can be done in a few steps:

  1. Turn on your PS5 console and make sure it’s connected to the internet.
  2. Connect your PS5 controller to the console using a USB cable.
  3. Press the PS button on your controller to turn it on.
  4. On the PS5 home screen, go to Settings.
  5. Select Accessories.
  6. Select Controllers.
  7. Select Update Controller.
  8. If an update is available, you will see a message prompting you to update your controller. Select Update Now.
  9. Wait for the update to download and install. This process may take a few minutes.
  10. Once the update is complete, disconnect your controller from the USB cable and it’s ready to use.

Note: If you experience any issues during the update process, make sure your console and controller are fully charged and try again. You can also try restarting your console and controller before attempting the update again.

PS5 Controller Not Connecting to Console?

If your PS5 controller is not connecting to the console, there are several steps you can take to troubleshoot and fix the issue:

  1. Make sure your controller is turned on: Press the PS button on your controller to turn it on. If the controller is turned off or out of battery, it will not connect to the console.
  2. Check the connection: Make sure your controller is within range of the console and that the USB cable is connected properly to both the controller and the console. Try connecting the controller to a different USB port on the console.
  3. Reset the controller: Use a small object like a paper clip to press the reset button on the back of the controller for a few seconds. Then, try connecting the controller to the console again.
  4. Restart the console: Try restarting your PS5 console by selecting “Restart PS5” from the power options menu in the Control Center.
  5. Boot the console in safe mode: Booting the console in safe mode can help resolve any software-related issues that may be causing the controller to not connect. To do this, turn off the console, then press and hold the power button until you hear a second beep. From there, select “Restart PS5” in Safe Mode and follow the on-screen instructions.
  6. Update the controller: Make sure your controller is updated to the latest firmware version. You can do this by connecting the controller to the console with a USB cable and following the steps in the “How to Update Your PS5 Controller” section.PS5 Controller

How to Update Your PlayStation 5?

To update your PlayStation 5, follow these steps:

  1. Turn on your PlayStation 5 console and connect it to the internet.
  2. From the home screen, navigate to the Settings menu.
  3. Scroll down and select System.
  4. Select System Software.
  5. Select Update System Software.
  6. If there is an update available, your console will automatically download it. If there is no update available, you will see a message saying that your system is up to date.
  7. Once the download is complete, follow the on-screen instructions to install the update.
  8. Your console will restart once the update is installed.

Note: It’s important to keep your PlayStation 5 updated to ensure that you have the latest features and security patches. Make sure to save any unsaved data before updating your console, and do not turn off your console during the update process. The update process may take some time, so be patient and avoid interrupting it.

How to Reset Your PS5 DualSense Controller?

To reset your PS5 DualSense controller, you can follow these steps:

  1. Locate the reset button on the back of your DualSense controller. It is a small hole near the screw near the L2 button.
  2. Use a small object such as a paper clip or toothpick to press and hold the reset button for about 5 seconds.
  3. Release the reset button.
  4. Connect the controller to your PS5 console using a USB cable.
  5. Press the PlayStation button on the controller to turn it on.
  6. The controller should now be reset and ready to use with your PS5 console.

Note: Resetting your controller will clear any stored settings or connections. If you are experiencing issues with your controller, such as connectivity or calibration issues, resetting it may help resolve the issue. However, if the issue persists, you may need to contact Sony customer support or consider having your controller repaired or replaced.

How to Connect Bluetooth Headphones to Your PS5?

To connect Bluetooth headphones to your PS5, follow these steps:

  1. Turn on your Bluetooth headphones and put them in pairing mode. Refer to your headphone’s manual for instructions on how to do this.
  2. On your PS5 console, go to Settings from the home screen.
  3. Select Sound.
  4. Select Audio Output.
  5. Select Output Device.
  6. Choose “Bluetooth Headphones” from the list of available devices.
  7. Once your headphones are connected, adjust the volume and other settings as desired.

Note: Some Bluetooth headphones may have latency or other audio quality issues when used with gaming consoles. If you experience these issues, consider using wired headphones or purchasing a gaming headset designed for use with consoles. Additionally, some games may not support Bluetooth audio, so you may need to use wired headphones for those games.

How to Turn Off Your PS5 Controller When Paired?

To turn off your PS5 controller when paired, you can use one of the following methods:

Method 1: Using the PS5 console

  1. Press and hold the PS button on your controller until the Quick Menu appears.
  2. Select “Sound/Devices”.
  3. Select “Turn Off Device”.
  4. Choose “DualSense Wireless Controller”.
  5. Your controller should now turn off.

Method 2: Using the controller

  1. Press and hold the PS button on your controller until the Quick Menu appears.
  2. Select “Turn Off Controller”.
  3. Your controller should now turn off.

If your controller remains inactive for a period of time, it will automatically turn off to conserve battery life. Additionally, if your controller is not paired with the console, it may turn off after a few minutes of inactivity.

Can You Use a PS5 Controller on a PS4?

No, the PS5 controller (DualSense) is not officially compatible with the PS4 console. The PS4 console is designed to work with the DualShock 4 controller, and the PS5 console is designed to work with the DualSense controller.

While some users have reported limited success in getting the DualSense controller to work with the PS4 console via USB cable, it is not recommended as it may cause compatibility issues or damage to the controller or console. Additionally, certain features of the DualSense controller, such as haptic feedback and adaptive triggers, may not work properly or at all when used with a PS4 console. If you need a controller for your PS4 console, it’s recommended to use the DualShock 4 controller, which is designed to work with the PS4 console.

Does Windows 11 support PS5 controller?

Yes, Windows 11 supports the PS5 DualSense controller. Microsoft added support for the controller in the Windows 10 May 2020 update (version 2004) and has continued to support it in Windows 11.

To use the PS5 DualSense controller with Windows 11, you need to connect it to your PC using a USB cable or via Bluetooth. If you are using Bluetooth, make sure that your PC has a Bluetooth adapter and that it is enabled. You may need to update the firmware on your DualSense controller to ensure full compatibility with Windows 11.

Once connected, Windows 11 should automatically recognize the DualSense controller and install the necessary drivers. You can then use the controller to play games on your PC, either by mapping the buttons manually or using third-party software such as Steam or DS4Windows.

34” Curved Nano IPS LG 34GP83A-B UltraGear monitor – high-tech!

0

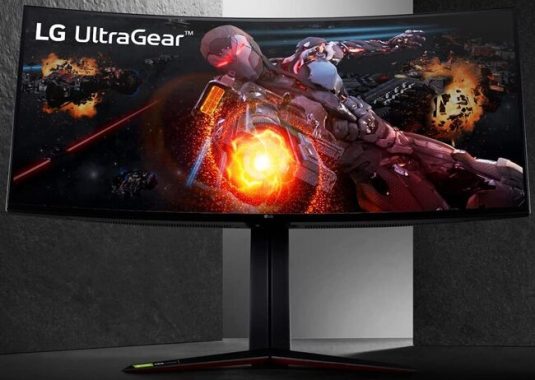
The LG 34GP83A-B UltraGear monitor is a high-performance gaming monitor with a 34-inch curved display. Here are some key specifications:

  • Display: The monitor features a 34-inch IPS panel with a resolution of 3440 x 1440 pixels (UWQHD) and a 21:9 aspect ratio. The display also has a 1ms response time and a 144Hz refresh rate, which is great for gaming.
  • Design: The LG 34GP83A-B has a curved screen with a 1900R curvature, which is designed to offer an immersive gaming experience. The monitor also has a sleek and modern design with slim bezels and a matte black finish.
  • Features: The monitor comes with a variety of features to enhance the gaming experience. It has G-Sync and FreeSync compatibility, which reduces screen tearing and stuttering. It also has a Black Stabilizer feature, which enhances visibility in dark scenes, and a Crosshair feature, which helps with aiming in first-person shooter games.
  • Connectivity: The LG 34GP83A-B curved monitor has a variety of connectivity options, including two HDMI ports, a DisplayPort, a headphone jack, and two USB 3.0 ports.

The LG 34GP83A-B is a high-performance gaming monitor with a large and immersive curved display, a fast response time, and a high refresh rate. It also comes with a variety of features to enhance the gaming experience and has multiple connectivity options.

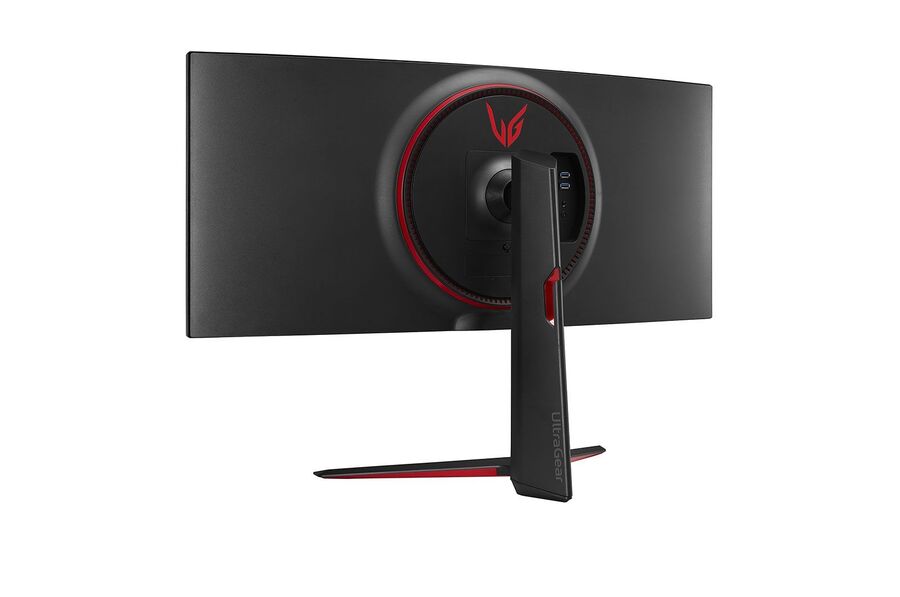
LG 34GP83A-B UltraGear monitor
LG 34GP83A-B UltraGear _ photo

The LG 34GP83A-B is built with high-quality materials and feels sturdy and well-made. The monitor has a sleek and modern design with slim bezels and a matte black finish, which gives it a premium look and feel. The stand is also well-built and provides a stable base for the monitor. The monitor’s body is primarily made of plastic, but it does not feel cheap or flimsy. The plastic has a matte finish that resists fingerprints and smudges, which makes the monitor easy to maintain.

The LG 34GP83A-B has a VESA mount compatible with 100mm x 100mm, which allows you to mount it on a wall or use a third-party stand. The monitor also has a tilt and height adjustment feature, which allows you to adjust the screen to your preferred viewing angle.

Overall, the LG 34GP83A-B UltraGear monitor has a solid build quality that is commensurate with its premium price point. The monitor is well-designed, well-built, and easy to maintain, making it a great choice for gamers or anyone in need of a high-quality display.

The LG 34GP83A-B is ideal for use in offices. It has a big screen with plenty of space for multitasking and a high resolution for text clarity. Although there is some picture precision loss when seen from the side, it should be acceptable for sharing spreadsheets or documents that don’t require complete image accuracy. It manages reflections ok, but it becomes bright enough to prevent glare. Unfortunately, the stand can only be adjusted for tilt and height.

The LG 34GP83A-B has an IPS panel, which is known for its excellent viewing angles. With an IPS panel, the colors and brightness remain consistent even when viewed from different angles, making it an excellent choice for group settings or multi-person gaming.

The monitor has a 178-degree viewing angle both horizontally and vertically, which means that you can view the screen from almost any angle without experiencing any distortion or color shifting. This is particularly beneficial when you’re working collaboratively, playing games with friends, or need to see the screen from an off-center position. The LG 34GP83A-B also has a curved display with a 1900R curvature, which is designed to provide an immersive gaming experience. The curve helps to reduce the distance between your eyes and the edges of the screen, making it easier to take in the entire display without having to move your head too much.--LG 34GP83A-B UltraGear monitor

The LG 34GP83A-B UltraGear monitor has excellent viewing angles that are ideal for group settings, multi-person gaming, or anyone who needs to view the screen from an off-center position. The curved display also adds to the immersive experience, making it an excellent choice for gamers or anyone who wants a high-quality display.

The LG 34GP83A-B monitor does not have full HDR (High Dynamic Range) support, although it does have some HDR features. It has a peak brightness of 400 nits, which is sufficient to meet the minimum requirements for HDR. However, the monitor’s color gamut is not wide enough to fully display the wider range of colors that HDR content can offer. The monitor has a color gamut of 99% sRGB, which means it can display a large range of colors within the sRGB color space, but it falls short when it comes to wider color gamuts like DCI-P3 or Adobe RGB.

Although the LG 34GP83A-B does not offer full HDR support, it does have some features that can enhance the visual quality of HDR content, such as HDR10 support and a feature called “HDR Effect.” The HDR Effect feature can simulate HDR-like effects by adjusting the monitor’s brightness and color settings to increase the contrast and color gamut, providing a better visual experience for non-HDR content. While the LG 34GP83A-B does not have full HDR support, it still provides good color performance for its intended use as a gaming monitor. The wide sRGB color gamut, combined with the high refresh rate and low input lag, makes it an excellent choice for gaming, but it may not be the best option for professional color work or HDR content creation.

The LG 34GP83A-B UltraGear monitor supports AMD FreeSync technology, which is designed to synchronize the monitor’s refresh rate with the output of your graphics card, reducing screen tearing and stuttering for a smoother and more responsive gaming experience. The monitor is also G-SYNC compatible, which means it has been certified by NVIDIA to work with their G-SYNC technology, which offers similar benefits for NVIDIA graphics card users.

In order to use FreeSync or G-SYNC on thecurved, you will need to connect the monitor to a compatible graphics card using a DisplayPort cable. Once the connection is established, you can enable FreeSync or G-SYNC in your graphics card’s control panel settings. It is worth noting that FreeSync and G-SYNC have different requirements, so you will need to make sure that your graphics card is compatible with the technology you plan to use. FreeSync is an open standard and works with most AMD graphics cards, while G-SYNC is a proprietary technology that requires an NVIDIA graphics card.

The LG 34GP83A-B is a versatile monitor that can work with both FreeSync and G-SYNC technologies, providing a smooth and responsive gaming experience for users with compatible graphics cards.1_LG 34GP83A-B UltraGear monitor

About LG UltraGear lineup quality

LG’s UltraGear lineup is generally regarded as one of the best gaming monitor lineups on the market, known for their high-quality build, performance, and features. The monitors in this lineup are designed to provide an immersive gaming experience, with fast response times, high refresh rates, and a range of advanced gaming features.

Some of the key features that are commonly found in the LG UltraGear lineup include:

  • High refresh rates: Many of the monitors in the UltraGear lineup have a refresh rate of 144Hz or higher, which provides a smooth and responsive gaming experience.
  • Fast response times: The UltraGear monitors often have a response time of 1ms or lower, which reduces motion blur and ghosting, resulting in a clearer and more detailed image.
  • Adaptive Sync: Many UltraGear monitors are compatible with both AMD FreeSync and NVIDIA G-Sync technologies, which help to reduce screen tearing and stuttering, resulting in smoother and more fluid gameplay.
  • High resolution and color accuracy: The UltraGear lineup offers a range of high-resolution monitors, including those with 4K displays, and many of them have excellent color accuracy, making them suitable for professional content creation as well as gaming.
  • Sleek design: The UltraGear monitors often have a sleek and modern design, with slim bezels and a premium build quality.

The LG UltraGear lineup is known for its high-quality build, performance, and features, making it a popular choice among gamers and professionals alike. Whether you are looking for a high refresh rate, fast response time, or a high-resolution display, there is likely an UltraGear monitor that can meet your needs.

LG 34GP83A-B UltraGear monitor specs:

    • Size:    34″
    • Response Time    1ms (GtG at Faster)
    • Color Gamut (Typ.)      DCI-P3 98% (CIE1976)
    • Pixel Pitch (mm)       0.2325 x 0.2325 mm
    • Resolution         3440 x 1440
    • Contrast Ratio        1000:1
    • Surface Treatment        Hard coating (3H)
      • HDMI          Yes x 2
      • Headphone Out     Yes
      • USB Down-stream      Yes x 2
    • NVIDIA G-Sync™           Yes (Compatible)
    • Adaptive Sync           AMD FreeSyncâ„¢ (Premium)
    • Black Stabilizer®          Yes
    • Dynamic Action Sync®          Yes
    • Crosshair:         Yes
    • Flicker Safe            Yes
    • Smart Energy Saving           Yes
    • Reader Mode                Yes
    • Color Calibrated                Yes
    • OnScreen Control (OSC)          Yes
    • HDR (High Dynamic Range)             Yes (HDR10)
    • VESA DisplayHDR™          DisplayHDRâ„¢ 400
    • HDR Effect            Yes
    • 1ms Motion Blur Reduction       Yes
    • Curved        Yes
    • FreeSync (Low Frame Compensation)        YesNano IPS LG 34GP83A-B UltraGear

PSU dilemma: 1000+ Watts vs 600-800 Watts

0

When it comes to power supply units (PSUs), the wattage you need depends on the specific components of your system and how much power they require. Generally, a higher wattage PSU will be able to provide more power to your system and may allow for some additional headroom for upgrades or overclocking. However, a higher wattage PSU may also be more expensive and less efficient, especially if you are not using all of the power it provides. Who wins the race between 1000+ Watts vs 600-800 Watts PSU?

Here are a few things to consider when deciding between a 1000+ watts PSU and a 600-800 watts PSU:

  1. Your system’s power requirements: The first thing to consider is how much power your system actually needs. You can use an online PSU calculator or a power meter to estimate your system’s power draw, which will give you an idea of what wattage PSU you need.
  2. Your future upgrade plans: If you plan on adding more components to your system in the future, you may want to opt for a higher wattage PSU to allow for additional headroom. However, keep in mind that you don’t want to overspend on a PSU that provides more power than you’ll realistically need.
  3. Efficiency and cost: Higher wattage PSUs are often less efficient at lower loads, which means they may draw more power from the wall and generate more heat than a lower wattage PSU. They may also be more expensive upfront, so you’ll need to weigh the cost against the benefits of having additional power.

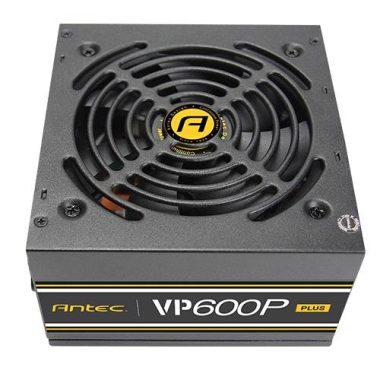
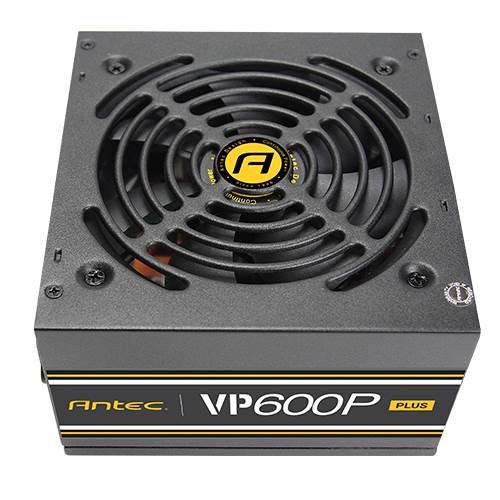
    VP600P PLUS
    Photo: Antec VP600P PLUS

Overall, the wattage of PSU you need will depend on your specific system and usage needs. It’s important to research your components and estimate your power requirements before making a decision, and to choose a PSU that provides enough power without overspending on unnecessary wattage.

When do I need a PSU of a 1000+ watts?

A PSU with a 1000+ wattage rating is typically required in high-end gaming PCs or workstations with multiple high-performance graphics cards, high-end CPUs, and other power-hungry components. These components can draw a lot of power, and a high wattage PSU is necessary to provide enough power to the entire system.

In general, you may need a 1000+ watt PSU if you have:

  1. Multiple high-performance graphics cards: High-end gaming or workstation PCs with multiple graphics cards (such as Nvidia’s SLI or AMD’s Crossfire) require a lot of power. A 1000+ watt PSU is usually needed to provide enough power to multiple graphics cards, as well as the rest of the system.

    HX1200i
    Photo: Corsair HX1200i
  2. High-end CPU: Some high-end CPUs, such as the Intel Core i9 or AMD Ryzen Threadripper, can draw a lot of power, especially when overclocked. A 1000+ watt PSU may be necessary to provide enough power for the CPU and the rest of the system.
  3. High-performance storage: If you have multiple high-performance storage drives, such as NVMe SSDs, they can also draw a significant amount of power. A high wattage PSU can provide enough power to run the drives, as well as the rest of the system.
  4. Overclocking: Overclocking your components can increase their power draw significantly. If you plan to overclock your components, a higher wattage PSU may be necessary to provide enough power for the overclocked components.

A 1000+ watt PSU is not necessary for most PC builds, but it can be useful in high-end gaming or workstation builds with multiple high-performance components. It’s important to research your components and estimate your power requirements before choosing a PSU, and to choose a PSU that provides enough power without overspending on unnecessary wattage.

How much electricity does a 1000W PSU use?

The amount of electricity that a 1000W PSU uses depends on the efficiency of the power supply and the amount of power that the computer system draws from it.

A power supply’s efficiency rating indicates how much power it can convert from AC power from the wall into usable DC power for your computer components. Higher efficiency ratings mean that the power supply will use less electricity from the wall to provide the same amount of power to your components. A typical high-quality 1000W power supply has an efficiency rating of around 80% to 90%.

To estimate the amount of electricity that a 1000W power supply uses, you can use the following formula:

Power consumption (in watts) = Rated PSU wattage / Efficiency rating

For example, if you have a 1000W power supply with an efficiency rating of 85%, its power consumption can be estimated as follows:

Power consumption = 1000W / 0.85 = 1176W

This means that the power supply will draw about 1176 watts of power from the wall to provide 1000 watts of power to the computer components.

It’s important to note that the actual power consumption of a computer system depends on the specific components and their power draw. It’s also important to choose a power supply with an appropriate wattage for your components to ensure stable and reliable power delivery.

Is a 600W to 800W PSU sufficient for the vast majority of PC configurations?

Yes, a 600-800W power supply is sufficient for the vast majority of PC configurations, including most mid-range and high-end gaming PCs. In fact, many popular gaming builds can be powered by a 600-800W PSU, even with a high-end CPU and graphics card.

Most computer components have become more power-efficient in recent years, so the power requirements for a typical PC build have decreased. For example, mid-range graphics cards like the NVIDIA GeForce GTX 1660 Ti or AMD Radeon RX 5600 XT have a TDP of around 120-130 watts, while high-end graphics cards like the NVIDIA GeForce RTX 3080 have a TDP of around 320 watts. CPUs have also become more power-efficient, with many mid-range and high-end CPUs having a TDP of around 65-125 watts.

It’s important to note that the actual power requirements of a computer system depend on the specific components and their power draw, as well as any overclocking or other modifications you make. It’s always a good idea to research your components and estimate your power requirements before choosing a power supply.

In general, a 600-800W power supply is sufficient for most mid-range and high-end gaming builds, as well as many workstation and content creation builds. However, if you have multiple high-performance graphics cards, a high-end CPU, or other power-hungry components, you may need a higher wattage power supply to provide enough power to the entire system.

Advantages and Disadvantages of HHDs & SSDs?

0

Hard Disk Drives (HDDs) have been the primary storage device for computers for several decades. Here are some advantages and disadvantages of using HDDs:

Advantages of HDDs:

  1. Cost-effective: HDDs are typically more affordable per unit of storage compared to other storage devices like SSDs.
  2. High capacity: HDDs can offer high storage capacities of several terabytes or more, making them suitable for users who need a lot of storage space.
  3. Wide compatibility: HDDs use a standard interface (SATA) and are compatible with most computer systems.
  4. Reliable for long-term storage: HDDs can retain data even when not in use, making them suitable for long-term storage.

Disadvantages of HDDs:

  1. Slower performance: HDDs are slower than SSDs in terms of read and write speeds, which can affect overall system performance.
  2. Prone to mechanical failure: HDDs have moving parts, making them more prone to mechanical failure and data loss than SSDs.
  3. Vulnerable to physical damage: HDDs can be easily damaged if dropped or bumped while in use, which can lead to data loss.
  4. Consumes more power: HDDs require more power to operate compared to SSDs, which can impact battery life on laptops and other mobile devices.

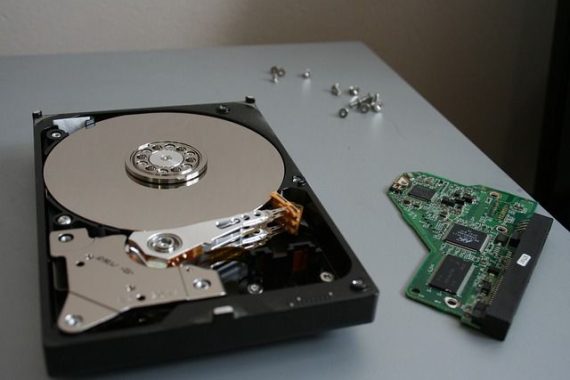
    HDD
    photo: Pixabay

In summary, HDDs are a cost-effective storage solution that offer high storage capacity and are compatible with most computer systems. However, they are slower and less durable than SSDs, making them more prone to mechanical failure and data loss.

Solid State Drives (SSDs) are a newer type of storage device that are becoming increasingly popular. Here are some advantages and disadvantages of using SSDs:

Advantages of SSDs:

  1. Faster performance: SSDs are significantly faster than HDDs, offering faster boot and load times for applications, games and files, leading to improved overall system performance.
  2. More durable: SSDs have no moving parts, which means they are less susceptible to mechanical failure than HDDs. This makes them more durable and reliable.
  3. Lower power consumption: SSDs consume less power than HDDs, which is particularly beneficial for laptop and mobile devices, as it leads to better battery life.
  4. Quieter operation: Since SSDs don’t have any moving parts, they don’t generate any noise during operation.

    SATA SSD
    photo: Pixabay

Disadvantages of SSDs:

  1. Higher cost: SSDs are more expensive than HDDs, making them less affordable for users who need a lot of storage space.
  2. Limited storage capacity: SSDs typically have lower storage capacities compared to HDDs, making them less suitable for users who need a lot of storage space.
  3. Limited lifespan: Although SSDs are more durable than HDDs, they have a limited lifespan, as they can only withstand a certain number of write cycles before they begin to fail.
  4. Noisier failure: When an SSD fails, it can fail suddenly and catastrophically, resulting in complete data loss.

The SSDs offer faster performance, greater durability, lower power consumption, and quieter operation compared to HDDs. However, they are more expensive and have a lower storage capacity. Furthermore, SSDs have a limited lifespan and can fail suddenly without warning, which could lead to data loss.

Is a 256gb SSD better than a 1TB HDD?

In general, a 256GB SSD is faster and more efficient than a 1TB hard drive.

Solid State Drives (SSDs) use flash memory to store data and have no moving parts, which makes them faster than Hard Disk Drives (HDDs), which have spinning disks to read and write data. Because of this, SSDs offer faster data access and transfer rates, resulting in faster system boot times, application load times, and overall system responsiveness.

On the other hand, a 1TB hard drive can store more data than a 256GB SSD, so it may be more suitable for those who need to store large amounts of data such as multimedia files or large programs. Hard drives are also generally cheaper per gigabyte than SSDs.

Ultimately, which one is better for you depends on your needs. If you need a lot of storage space and don’t mind slower read and write speeds, a 1TB hard drive may be a better option. But if you prioritize speed and performance over storage space, then a 256GB SSD may be the better choice.

What are the 3 main types of SSD?

The three main types of SSD are:

  • SATA SSD: SATA (Serial Advanced Technology Attachment) SSDs are the most common type of SSD in use today. They use the same interface as traditional hard drives and are therefore compatible with most computer systems. SATA SSDs are affordable and offer significant performance improvements over hard drives, with read and write speeds of up to 550MB/s.
  • NVMe SSD: NVMe (Non-Volatile Memory Express) SSDs are the fastest type of SSD currently available. They use a new type of interface that is designed specifically for SSDs and can achieve read and write speeds of up to 3,500MB/s or more. NVMe SSDs are typically more expensive than SATA SSDs, but they offer significant performance improvements, especially for tasks that involve a lot of data transfer.
  • PCIe SSD: PCIe (Peripheral Component Interconnect Express) SSDs are similar to NVMe SSDs in that they use a PCIe interface for high-speed data transfer. They are typically used in high-end workstations and servers, where the highest possible performance is required. PCIe SSDs can achieve read and write speeds of up to 7,000MB/s or more, making them the fastest type of SSD available. However, they are also the most expensive.

Why does power button on my PC does not work properly?

0

There could be a variety of reasons why power button on your PC is not working properly. Some possible causes include:

  1. Hardware issues: The power button itself may be malfunctioning due to wear and tear or damage, or there may be a problem with the wiring or circuitry that connects the button to the computer’s motherboard.

    Hardware issues can indeed cause problems with the power button on a computer. Here are a few possible hardware issues that could be affecting the power button:

    • Button malfunction: The power button itself may be malfunctioning due to wear and tear or damage. For example, if the button is stuck or not making proper contact with the circuitry, it may not register when pressed.
    • Wiring or circuitry problems: There may be an issue with the wiring or circuitry that connects the power button to the computer’s motherboard. If there is a break or short in the wiring or a faulty connection between the power button and the motherboard, it may cause the power button to malfunction.
    • Motherboard issues: If there is a problem with the computer’s motherboard, it may affect the power button’s functionality. For example, if the motherboard has a faulty power circuit, it may not be able to properly detect when the power button is pressed.
  2. Software issues: There could be a software or driver problem that is preventing the power button from functioning correctly. This can happen if the computer’s operating system is not configured properly or if there is a problem with the device driver for the power button.
  3. Power supply issues: A faulty power supply can cause all kinds of issues, including problems with the power button. If the power supply is not providing enough power to the system, it may not be able to properly detect when the power button is pressed.
  4. System settings: It’s possible that the power button is working correctly, but the system settings are not configured to respond to it properly. For example, the system may be set to hibernate or sleep when the power button is pressed, rather than shutting down.

    power button on my PC does not work properly
    photo: Pixabay

The BIOS (Basic Input/Output System) is a firmware that is built into your computer’s motherboard. It provides the computer with the basic instructions and settings needed to boot up and operate hardware. The power button settings can also be configured in the BIOS. Here’s a brief overview of what these settings do:

  1. Power Button Action: This setting determines what happens when you press the power button on your computer. You can choose to have the computer shut down, go into sleep mode, hibernate, or do nothing.
  2. Wake-on-LAN: This setting enables your computer to wake up from sleep or hibernation when it receives a Wake-on-LAN signal from another device on the network. This can be useful if you need to access your computer remotely.
  3. Power-On Self-Test (POST): This setting controls the diagnostic tests that your computer performs when it first boots up. You can choose to have the computer perform a quick POST, which only checks essential hardware components, or a more thorough POST, which checks all hardware components.
  4. Boot Order: This setting determines the order in which your computer looks for an operating system when it starts up. You can choose to boot from a hard drive, a CD/DVD, a USB drive, or other devices.

Accessing the BIOS settings can vary depending on the computer manufacturer and model, but usually, you can access it by pressing a specific key during startup. Common keys include F2, F10, Del, or Esc. Check your computer’s manual or manufacturer’s website for specific instructions. Before changing any settings in the BIOS, make sure you understand what they do and the potential consequences of changing them.

If you are having trouble with your power button, the first thing you should do is try to identify the cause of the problem. If you are not comfortable troubleshooting the issue yourself, you may want to seek the help of a professional technician. They can diagnose the problem and suggest the best course of action to get your power button working correctly again.