Home Blog Page 61

iPhone problems with Face ID, volume goes down, getting notifications from muted conversations

0

Face ID won’t unlock your iphone

If Face ID isn’t unlocking your iPhone, there are several possible reasons why this could be happening. Here are some troubleshooting steps that you can try:

  1. Make sure your face is positioned correctly: Hold your iPhone at eye level and make sure that your face is fully visible to the front-facing camera. Avoid wearing sunglasses, hats or scarves that cover your face.
  2. Check if Face ID is turned on: Go to Settings > Face ID & Passcode and make sure that the feature is turned on. If it’s off, turn it on and try again.
  3. Reset Face ID: Go to Settings > Face ID & Passcode and tap on “Reset Face ID.” Then set up Face ID again by following the on-screen instructions.
  4. Clean the TrueDepth camera and sensors: Use a clean, dry cloth to wipe the TrueDepth camera and sensors at the top of your iPhone. Make sure that there is no dirt, debris or smudges on them.
  5. Check for software updates: Make sure that your iPhone is running the latest version of iOS by going to Settings > General > Software Update. If an update is available, install it and try again.
  6. Try entering your passcode: If Face ID still isn’t working, try entering your passcode to unlock your iPhone. This may indicate that there is a problem with the TrueDepth camera or sensors, and you may need to contact Apple support for assistance.
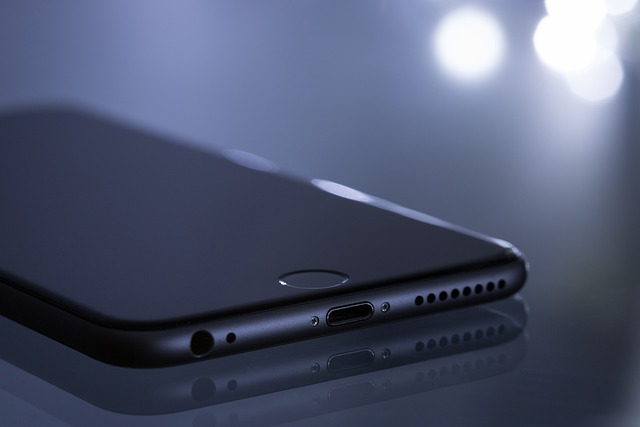
    iPhone
    photo: Pixabay

Your iPhone microphone volume goes down during calls

If your iPhone microphone volume goes down during calls, there are a few possible reasons why this could be happening. Here are some troubleshooting steps that you can try:
  1. Check the microphone port: Ensure that the microphone port on your iPhone is clean and clear of any dust or debris that might be interfering with the sound. You can use a small brush or compressed air to clean the port.
  2. Restart your iPhone: Sometimes simply restarting your iPhone can fix the issue. Press and hold the power button until the “Slide to power off” slider appears. Slide it to turn off your iPhone, then press and hold the power button again to turn it back on.
  3. Disable noise cancellation: Noise cancellation can sometimes affect the volume of your microphone during calls. Go to Settings > General > Accessibility > Audio/Visual and turn off the “Phone Noise Cancellation” option.
  4. Turn off Bluetooth: If your iPhone is connected to a Bluetooth device, try turning off Bluetooth to see if that fixes the issue.
  5. Check for updates: Make sure that your iPhone is running the latest version of iOS by going to Settings > General > Software Update. If an update is available, install it and try again.
  6. Reset all settings: Go to Settings > General > Reset > Reset All Settings. This will reset all of your iPhone’s settings to their defaults, but won’t delete any data. Then try making a call again.
  7. Contact Apple Support: If none of these steps fix the issue, you may need to contact Apple Support for further assistance. There could be a hardware issue with your iPhone that requires repair or replacement.

You get notifications from muted conversations

If you’re getting notifications from muted conversations on your iPhone, there are a few possible reasons why this could be happening. Here are some troubleshooting steps that you can try:
  1. Check if the conversation is truly muted: Make sure that the conversation you’re getting notifications from is actually muted. To check this, go to the Messages app, swipe left on the conversation and tap “Hide Alerts.” If the toggle next to “Hide Alerts” is turned on, the conversation is muted. If not, tap it to turn it on and see if this resolves the issue.
  2. Turn off notifications for the Messages app: If the conversation is muted but you’re still getting notifications, try turning off notifications for the Messages app altogether. Go to Settings > Notifications > Messages and turn off “Allow Notifications.” This will disable all notifications for the Messages app, including those from muted conversations.
  3. Restart your iPhone: Sometimes simply restarting your iPhone can fix issues with notifications. Press and hold the power button until the “Slide to power off” slider appears. Slide it to turn off your iPhone, then press and hold the power button again to turn it back on.
  4. Update your iPhone: Make sure that your iPhone is running the latest version of iOS by going to Settings > General > Software Update. If an update is available, install it and see if this resolves the issue.
  5. Reset all settings: Go to Settings > General > Reset > Reset All Settings. This will reset all of your iPhone’s settings to their defaults, but won’t delete any data. Then check if you’re still getting notifications from muted conversations.
  6. Contact Apple Support: If none of these steps fix the issue, you may need to contact Apple Support for further assistance. There could be a software or hardware issue with your iPhone that requires repair or replacement.

How to password protect files and folders in Windows?

0

There are several ways to password protect files and folders in Windows. Here are three methods you can use:

Method 1: Use Windows built-in encryption feature

Windows has a built-in encryption feature called BitLocker that allows you to encrypt your entire drive or individual files and folders. Here’s how to use it to password protect a folder:

  1. Right-click on the folder you want to encrypt and select “Properties”.
  2. Click the “Advanced” button under the “General” tab.
  3. Check the box next to “Encrypt contents to secure data” and click OK.
  4. Click OK again to close the folder properties window.

    password protect files and folders
    photo: Pixabay

Note: BitLocker is only available in Windows editions that support it, such as Windows 10 Pro, Enterprise, and Education.

Method 2: Use a third-party file/folder encryption tool

There are many third-party encryption tools available that allow you to password protect files and folders. Here are some examples:

  • VeraCrypt: a free and open-source encryption tool that can encrypt/password protect files files, folders, and entire drives.

    VeraCrypt is a free and open-source encryption tool that allows you to encrypt files, folders, and entire drives to keep your data secure and protected from unauthorized access. It is a successor to the TrueCrypt encryption software, which was discontinued in 2014. VeraCrypt is compatible with Windows, macOS, and Linux operating systems.

    One of the main features of VeraCrypt is its ability to create encrypted containers, which are essentially files that act as virtual encrypted drives. You can store your sensitive data in these containers and access them with a password or keyfile. VeraCrypt also supports various encryption algorithms, including AES, Serpent, and Twofish, which provide strong encryption for your data.

    In addition, VeraCrypt offers several security features, such as hidden volumes, which allow you to create an encrypted volume within another encrypted volume. This feature provides an additional layer of protection against attackers who may try to force you to reveal your password.

    Overall, VeraCrypt is a reliable and powerful encryption tool that can help you keep your data safe and secure. However, like any encryption software, it is important to use it properly and follow best practices to ensure maximum security.

  • AxCrypt: a free encryption tool that can encrypt individual files and folders.

    AxCrypt is a free and easy-to-use encryption tool that allows you to password protect files and folders in Windows. It uses AES-256 encryption, which is a strong encryption algorithm that is widely used and trusted. AxCrypt is compatible with Windows, macOS, Android, and iOS operating systems.

    To use AxCrypt, you simply right-click on the file or folder you want to encrypt and select “AxCrypt” from the context menu. You can then choose a password to encrypt the file or folder. Once encrypted, the file or folder can only be accessed with the correct password.

    AxCrypt also offers a feature called “Secure Delete,” which allows you to securely delete files by overwriting them multiple times to prevent data recovery. This is a useful feature if you want to permanently delete sensitive files from your computer.

    Overall, AxCrypt is a user-friendly encryption tool that provides a simple and effective way to protect your files and folders from unauthorized access. However, it is important to remember that no encryption software is 100% foolproof, and it is important to use additional security measures, such as strong passwords and two-factor authentication, to ensure maximum security.

  • Folder Lock: a tool that can encrypt files, folders, and drives, and also has other security features such as file shredding and stealth mode.

    Folder Lock is a commercial encryption software that allows you to password-protect your files, folders, and drives on Windows. It uses 256-bit AES encryption, which is a strong encryption algorithm that is widely used and trusted. In addition to encryption, Folder Lock offers various security features, such as file shredding, stealth mode, and hacker attempt monitoring.

    To use Folder Lock, you simply drag and drop the files or folders you want to encrypt into the Folder Lock interface and set a password. You can also create encrypted lockers, which are essentially encrypted containers that act as virtual drives. Once encrypted, the files, folders, or lockers can only be accessed with the correct password.

    Folder Lock also offers a feature called “Auto Lock,” which allows you to automatically lock your encrypted files, folders, or drives after a certain period of inactivity. This is useful if you want to ensure that your sensitive data is always protected, even if you forget to lock it manually.

    Overall, Folder Lock is a powerful encryption software that provides advanced security features to protect your data from unauthorized access. However, it is a commercial software that requires a purchase, and it is important to use it properly and follow best practices to ensure maximum security.

Method 3: Use a compressed folder

Another way to password protect a folder is to create a compressed folder (also known as a ZIP file) and password-protect it. Here’s how to do it:

  1. Right-click on the folder you want to password-protect and select “Send to” > “Compressed (zipped) folder”.
  2. Double-click on the compressed folder to open it.
  3. Click on the “File” menu and select “Add a password”.
  4. Enter your password twice and click “OK”.

Note: This method only password protects the compressed folder, not the original folder. If you want to delete the original folder, make sure to do it after creating the compressed folder.

Genesis GV60 2023 – Unique style, lots of safety, ultra fast charging

0

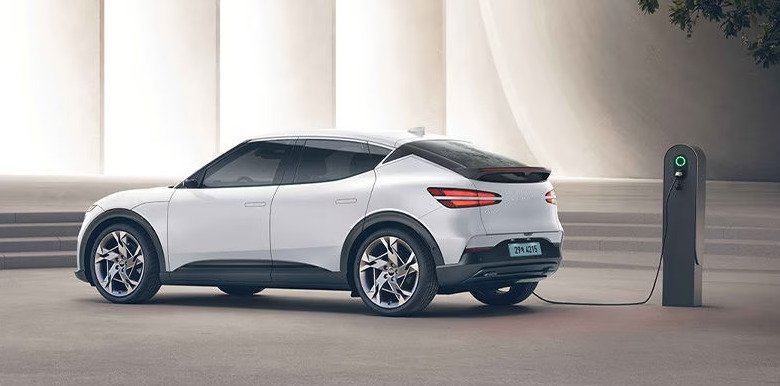
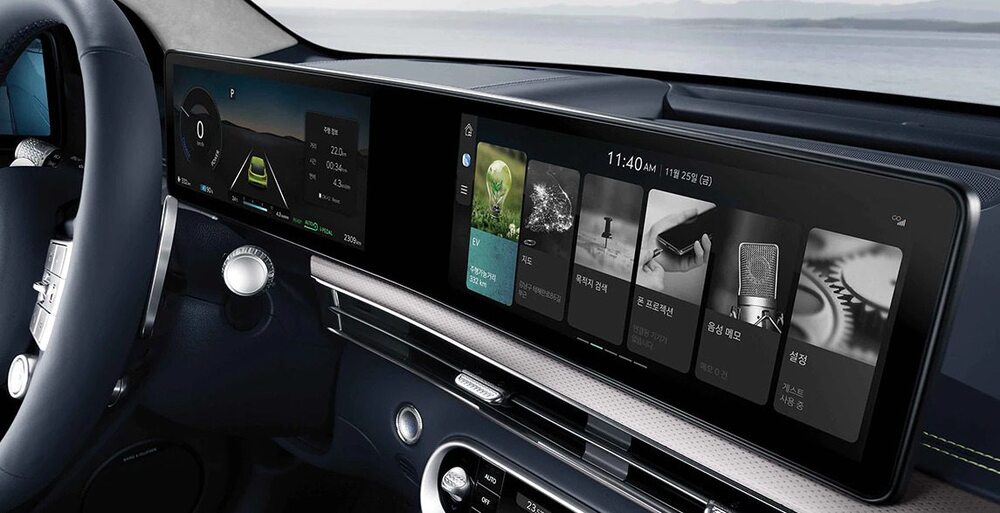
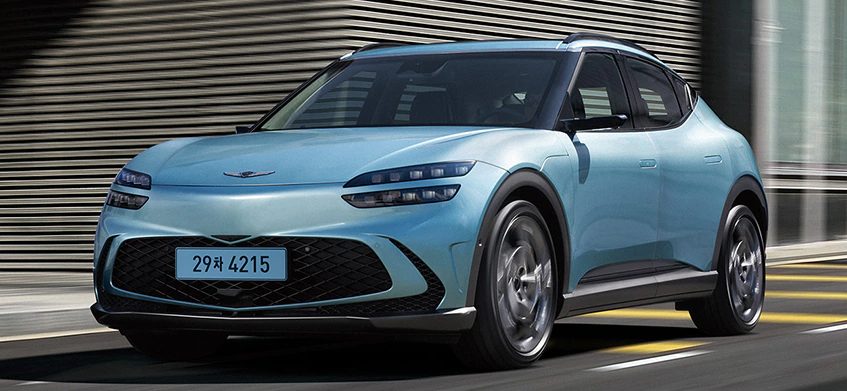
The Genesis GV60 2023 comes packed with an impressive range of standard features, including 20-inch alloy wheels, dual 12.3-inch widescreens, glass roof with power sunshade, augmented reality satellite navigation, head-up display, 18-way electrically adjustable driver’s seat with massage function, 17-speaker Bang & Olufsen sound system, Apple CarPlay and Android Auto, wireless phone charger, dual-zone climate control, digital side mirrors, and a full safety suite, including blind-spot cameras and adaptive headlights.

Flagship models of the Genesis GV60 Performance AWD come with 21-inch alloys, Boost mode, adaptive ‘road preview’ suspension, electromechanical LSD, black monobloc front brake calipers, and alloy pedals.

Genesis offers several additional ownership benefits for new GV60 buyers, including a five-year subscription to the Chargefox public charging network or the complimentary supply and installation of a wallbox charger at home, as well as a five-year subscription to the ‘Genesis To You’ concierge program. The GV60 Performance claims to clock the 0-100km/h sprint in 4.0 seconds compared to the standard model’s 5.5-second claim.

Genesis GV60 2023
Genesis GV60 2023 – photo

With the same 800-volt electrical architecture as the Hyundai Ioniq 5 and Kia EV6, the GV60 can ingest a maximum of 350kW, replenishing the battery from 10 to 80 per cent in just 18 minutes when using the appropriate DC charger in ideal conditions. Using a more common 50kW charger, the same 10-80 per cent refill will take a little over an hour. The Genesis GV60 is also capable of V2L (vehicle-to-load) energy sharing.

The cabin design of the GV60 is striking and features deep blue leather accented with lime green piping. The standard equipment and features are virtually identical between the two GV60 variants, and Genesis also includes facial recognition and fingerprint scanning technology, enabling certain people to unlock and start the vehicle without a key.

Despite its plush and luxurious interior, the GV60 does not deliver the ride comfort to match. While it offers ample outputs, its dynamic abilities are not fully exploited. However, the GV60 stands out as a unique and distinct style-driven offering, perfect for fashion-forward inner-city commuters looking to make the switch to an electric vehicle. The Genesis GV60 was awarded a five-star safety rating by ANCAP in 2022, and its active safety features include blind-spot monitoring with collision avoidance assist, driver attention warning, lead vehicle warning, autonomous emergency braking with car, pedestrian, cyclist detection and junction assist, evasive steering assist, lane change assist, lane-keep assist, high-beam assist, adaptive lighting, adaptive speed limit assist, reverse AEB, rear cross-traffic collision avoidance assist, rear occupant warning, safe exit assist, adaptive cruise control, 3D camera view, and more.Genesis GV60 2023

The multi-charging system is a highly versatile technology that allows for rapid and stable charging across various charging infrastructures. With its ultra-speed charging function, the system can charge a battery from 10 percent to 80 percent in just 18 minutes when charging at 350kW. The multi charging system is compatible with standard, rapid, and super rapid chargers, providing drivers with a seamless and convenient charging experience regardless of the infrastructure available.

Battery conditioning is an essential feature of the multi-charging system. It not only preheats the battery to improve its performance in low-temperature conditions, but it also shortens the charging time by adjusting the battery’s temperature. This feature can be easily controlled through the infotainment system, allowing drivers to optimize battery conditions while locating fast-charging stations using the navigation system.

The multi-charging system is a highly sophisticated technology that delivers a seamless charging experience, enabling rapid charging and convenient charging with different types of charging infrastructure. The battery conditioning feature further enhances the system’s functionality, ensuring that the battery performs optimally in various environmental conditions, making it a game-changer for electric vehicles.

The new Genesis GV60 features digital side mirrors that are connected to a camera and OLED monitor system, providing a clear and wide viewing angle of the rear of the vehicle. Additionally, the system offers advanced convenient services such as ‘Lane Change Assist Line Display’ and ‘Reverse Parking Screen Magnification’.Genesis GV60 2023

The Forward Collision-Avoidance Assist system is designed to detect obstacles such as pedestrians, cyclists, and vehicles and assists the driver’s steering in the event of a potential collision. It can also automatically control the vehicle’s brake to avoid a collision when necessary. The system can detect an imminent collision from the left or right side at an intersection and apply the brakes automatically.

The Genesis GV60 is equipped with a function that allows drivers to use high beams without the risk of blinding oncoming traffic or any preceding vehicle. The system uses LEDs with individual electronic controls that can be brightened or dimmed as required.

Furthermore, the Highway Driving Assist system monitors the distance between the vehicle and the car in front, automatically maintaining a safe speed and distance. When driving over a certain speed, the driver can hold the steering wheel and move the turn signal switch in the direction of the desired lane to change lanes automatically.

NEW Genesis GV60:

Powertrain / PE System

  • · Next Generation PE System (Rear wheel 168kW Motor, Reducer, Inverter)
    · 77.4kWh Lithium-Ion Battery
    · 400V/800V Multi charging system
    · Regenerative braking system
    · Heat Pump System
    · Battery Heating System
    · Drive Mode Control System

Exterior

  • · Full LED Headlamps
    · Full LED Rear Combination Lamps
    · 235/55R19 Michelin Tires & Wheels
    · Double-glazed Soundproof Glass (front glass, all doors)
    · Solar Glass (front)
    · Dynamic Welcome Lights

Interior

  • · 12.3-inch TFT LCD Cluster
    · Crystal Sphere (SBW)
    · Genesis Integrated Controller
    · Regenerative Control Paddle Shifters
    · Hi-pass System
    · Frameless ECM Rear View Mirror
    · Touch-type Air Conditioning Panel
    · Ambient Mood Lighting
    · Foot lamp (synced with ambient mood lighting)
    · Front Seat LED Foot Lamp
    · Metal Door Scuff

Safety

  • · 10 Airbag System (advanced airbags for front seats, driver’s knee airbag, front center side airbag, front side airbags, rear side airbags, and rollover-resistant curtain airbags)
    · Emergency Stop Signal
    · Lane Keeping Assist
    · Vibration Warning Steering Wheel
    · High Beam Assist
    · Driver Attention Warning
    · Forward Collision-avoidance Assist (Car, Pedestrian, Cyclist, Junction turning)
    · Blind-Spot Collision-Avoidance Assist
    · Rear Cross-Traffic Collision-Avoidance Assist
    · Rear Guide Lamp
    · Safe Exit Assist
    · Intelligent Speed Limit Assist
    · Advanced Rear Occupant Alert
    · Multi-collision Braking System

Convenience

  • · Face Connect
    · Wireless Phone Charger for the Front Seat
    · Auto-Flush Door Handles
    · Electronic Power Child lock
    · Rain Sensor
    · Heated Steering Wheel
    · Fingerprint Authentication System
    · Independent Full Automatic Air Conditioning (including Dual temperature control for the front, Auto defog system, Air intake control, After blow)
    · Genesis Air Purification System (Micro-dust sensor, Antibacterial high-performance combination filter)
    · Highway Driving Assist
    · Smart Cruise Control with Stop & Go
    · Navigation-based Smart Cruise Control (safe, curve)
    · Lane Following Assist
    · Rear View Monitor (with parking guide)
    · Electronic Parking Brake (with auto hold)
    · Power Safety Windows (Front/Rear seat)
    · Forward/Reverse Parking Distance Warning
    · Smart Power Tailgate
    · Outdoor V2L(Vehicle to Load) Connector
    · Electric Active Sound Design (e-ASD)
    · Front Passenger Door Trim Diffuser (Removable)
    · Indoor V2L

Seats

  • · Artificial Leather Seat
    · Power-adjustable Driver’s Seat (12 way, with lumbar support)
    · Power-adjustable Front Passenger Seat (8 way, with height adjustable)
    · Ventilated & Heated Front Seat
    · Heated Rear Seat
    · 2nd row 6:4 Folding

Infotainment

  • · Genesis infotainment system(next-generation infotainment system(ccIC), 12.3-inch display, Genesis Connected Services, Damaged/Slippery road notification, Genesis Car Pay, Valet Mode, Music Streaming Service)
    · OTA Software Update (Over The Air Update)
    · Reference Sound System (8 Speakers)

Heritage Editions – 2023 Ford Bronco Sport specs

0

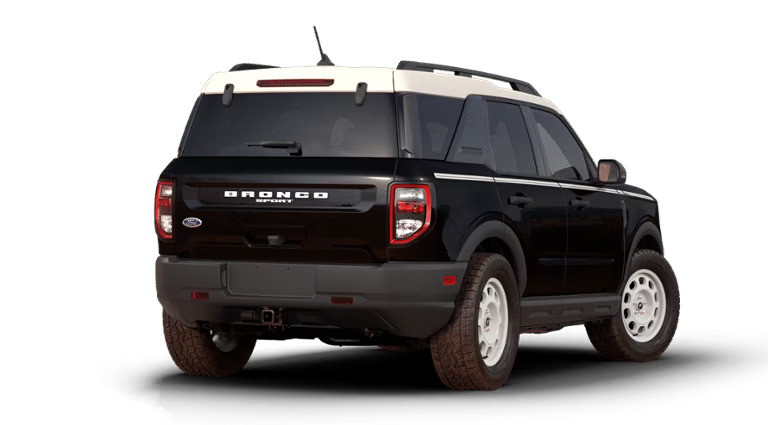
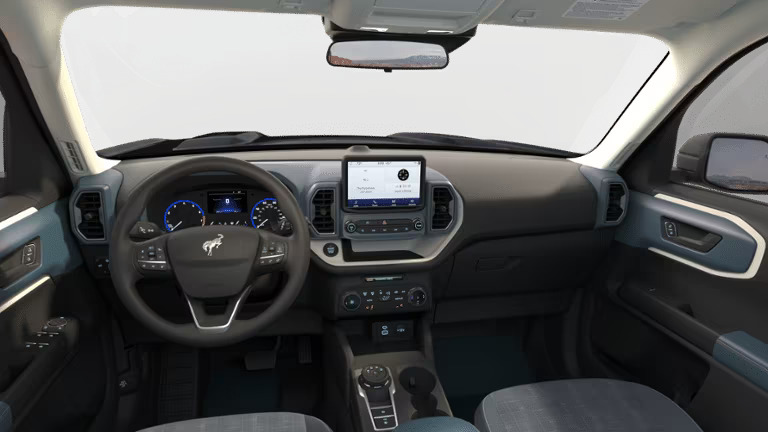
The 2023 Bronco Sport Heritage Edition and Bronco Sport Heritage Limited Edition pay tribute to the original 1966 truck by incorporating classic design elements. Both models feature a white roof, white rear badging, white 17-inch aluminum wheels, and a white grille with red BRONCO lettering.

The Bronco Sport Heritage Edition is built on the Big Bend trim level and is powered by Ford’s 181-hp turbocharged 1.5-liter inline-three engine, paired with an eight-speed automatic transmission and all-wheel drive. Its suspension includes hydraulic front bump stops and specially tuned springs, part of Ford’s High-Performance Off-Road Stability Suspension (HOSS) system package, and offers five user-selectable “G.O.A.T.” terrain modes for off-road driving. Inside, the Heritage Edition boasts white trim accents, plaid cloth seats, blue-and-red accent stitching, a microsuede center console armrest, and Navy Pier Blue accents on the door panels and dash. Buyers can choose from seven paint options, including a throwback color based on one that was available on the original Bronco.

2023 Bronco Sport Heritage Edition

Despite the availability of various off-road driving modes, it is the suspension that makes the Bronco Sport a capable SUV even on soft trails in its standard drive mode. While the Badlands model offers similar features, the Heritage Limited Edition, priced at $46,250, comes fully equipped with nearly $5000 worth of optional features. The retro-inspired design of the Heritage Edition carries a premium of around $2000 over the equivalent Big Bend model, while the Heritage Edition itself costs approximately $1500 more than the Big Bend. photo: Ford

For off-road enthusiasts, the appeal of classic Broncos, the reborn Bronco, and the Bronco Sport is a combination of capability and aesthetics. The Heritage Editions lean more heavily on the latter, but this does not detract from their off-road performance. Classic Broncos, both stock and modified, can be seen in the viewing areas of off-road races such as the King of the Hammers, a testament to the enduring appeal of the Bronco brand.--2023 Bronco Sport Heritage Edition2023 Bronco Sport Heritage Edition

2023 Ford Bronco Sport Heritage Editions

Engine Specifications

1.5L EcoBoost®2.0L EcoBoost®
Engine type1.5L Ti-VCT GTDI I-32.0L Ti-VCT GTDI I-4
Drive type4×4Advanced 4×4 with Twin-Clutch Rear Drive Unit
ExhaustDual ExhaustDual Exhaust
Transmission type8-speed Automatic Transmission8-speed Automatic Transmission; SelectShift® with Paddle shifters
Horsepower* (SAE net@rpm)181 @ 6,000 rpm250 @ 5,500 rpm
Torque* (lb.-ft.@rpm)190 @ 3,000 rpm277 @ 3,000 rpm
Compression ratio11.0:110.0:1
Valve liftersRoller Finger Follower with Hydraulic Latch AdjustorDirect acting mechanical bucket
Engine block materialAluminumAluminum
Cylinder head materialAluminumAluminum
Induction systemTurbochargedTurbocharged
Fuel deliveryDirect Injection and Port Fuel InjectionDirect injection
Fuel (minimum)Regular unleadedRegular unleaded (Premium recommended)
EPA-Estimated Ratings Four Wheel Drive (Actual mileage will vary)25 City/28 Highway/26 Combined21 City/26 Highway/23 Combined
Chassis Specifications
Front suspensionIndependent MacPherson strut-type with stabilizer bar, twin-tube hydraulic gas-pressurized shocks
Rear suspensionIndependent double lateral link semi-trailing arms with stabilizer bar, springs and hydraulic gas-pressurized shocks
Traction assistAdvanceTrac® with RSC® (Roll Stability Control™)
BrakesPower 4-wheel disc with Anti-Lock Brake System (ABS)
SteeringElectric power-assisted steering (EPAS)

Chromebook issues: restart, charging, Powerwash…

0
How do I Powerwash my Chromebook? Powerwashing your Chromebook is a process that erases all the data on your device and restores it to its original factory settings. Here’s how to do it:
  1. Backup your data: Before powerwashing your Chromebook, it’s important to back up any important data or files that you want to keep. You can save your data to an external hard drive or to the cloud using a service like Google Drive.
  2. Open the settings menu: Click on the status area (the area in the bottom right corner of the screen that displays the time and battery status), and then click on the gear icon to access the Settings menu.
  3. Click “Advanced”: Scroll down to the bottom of the Settings menu and click on the “Advanced” section.
  4. Click “Reset Settings”: Under the “Powerwash” section, click on “Reset Settings.”
  5. Confirm the reset: A pop-up window will appear asking you to confirm that you want to reset your Chromebook. Click on the “Reset” button to confirm.
  6. Sign in to your Google account: After your Chromebook restarts, you’ll be prompted to sign in to your Google account and set up your device as if it were new.

Note that powerwashing your Chromebook will erase all local data, so make sure to backup any important files before proceeding.

restart a Chromebook without a power button
Photo: Pixabay
How do I restart a Chromebook without a power button? If your Chromebook doesn’t have a physical power button or if the button isn’t working, you can still restart it using the following steps:

  1. Press and hold the “Refresh” key: On most Chromebooks, the “Refresh” key is located above the number 3 key and looks like a circular arrow. Press and hold the “Refresh” key.
  2. Press and hold the “Power” button: On many Chromebooks, the power button is located on the side or at the top of the device. Press and hold the “Power” button while still holding the “Refresh” key.
  3. Release both keys: After a few seconds, release both the “Refresh” and “Power” keys.

Your Chromebook should now restart. If this method doesn’t work, you can try holding down the “Refresh” key and then connecting the Chromebook to a power source, such as a charger. This should also force the Chromebook to restart.

Why won’t my Chromebook charge? There are several reasons why your Chromebook may not be charging. Here are some steps you can take to troubleshoot the issue:
  1. Check the charger: Make sure that the charger is plugged in correctly and that the charging cable is securely connected to the Chromebook. Check the charger for any signs of damage, such as frayed wires or a bent connector.
  2. Check the power outlet: Make sure that the power outlet you are using is working properly. Try plugging in another device to see if it charges.
  3. Restart the Chromebook: Sometimes restarting the Chromebook can fix charging issues. Press and hold the power button for 10 seconds to force the Chromebook to shut down, then press the power button again to turn it back on.
  4. Check the battery: If the battery is completely drained, it may take some time for it to start charging. Leave the Chromebook plugged in for at least 30 minutes before checking if it is charging.
  5. Check for software updates: Make sure that your Chromebook is up-to-date with the latest software updates. Go to “Settings” > “About Chrome OS” > “Check for updates” to see if there are any available updates.
  6. Check the charging port: Inspect the charging port on the Chromebook for any debris or damage. If the port is damaged, it may need to be repaired or replaced.

If none of these steps fix the issue, you may need to contact the manufacturer or a technician for further assistance.

Anthem MRX 720 review: Powerful multi-channel AV receiver

0

The Anthem MRX 720 is a high-end audio-video receiver designed for home theater systems. It offers seven channels of amplification and supports a variety of audio and video formats, including Dolby Atmos and DTS:X surround sound.

The MRX 720 has a power output of 140 watts per channel into 8 ohms, which is more than enough to drive most speakers. It also features Anthem’s proprietary ARC (Anthem Room Correction) technology, which helps to optimize the sound quality in any room by taking measurements and making adjustments to the frequency response.

In terms of connectivity, the MRX 720 has six HDMI inputs and two HDMI outputs, which supports 4K and HDR video signals. It also has a variety of analog and digital audio inputs, including XLR inputs for balanced audio.

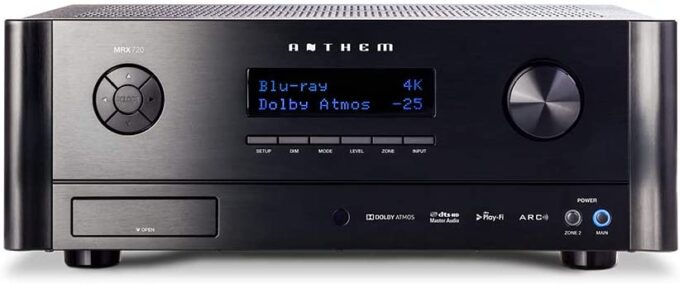
Anthem MRX 720
Anthem MRX 720 AV Receiver – photo

The MRX 720 can be controlled via Anthem’s own mobile app or through third-party control systems such as Control4 or Crestron. It also has built-in Bluetooth and Wi-Fi, allowing for wireless streaming from mobile devices and music streaming services.

About Anthem MRX 720 mobile app

The Anthem MRX 720 mobile app is a companion app designed to work with the Anthem MRX 720 audio-video receiver. The app is available for both iOS and Android devices and can be downloaded for free from the respective app stores.

The app allows users to control various functions of the MRX 720, such as selecting audio sources, adjusting volume levels, and tweaking audio settings. It also provides access to advanced features such as the ARC (Anthem Room Correction) system, which allows users to optimize the audio performance of their home theater system to the specific characteristics of their listening room. In addition, the app provides a convenient way to access and stream music from popular streaming services such as Tidal, Deezer, and TuneIn Radio. Users can also access their own music libraries stored on a networked computer or NAS drive.

The Anthem MRX 720 mobile app features a user-friendly interface that is easy to navigate and provides access to all the key functions of the MRX 720. It also provides a way for users to save and recall custom audio settings, making it easy to switch between different listening scenarios.

The Anthem MRX 720 mobile app is a valuable tool for users who want to get the most out of their MRX 720 receiver and enjoy a seamless and convenient home theater experience.

Anthem Room Correction stands out as one of the most advanced room equalization software options available for home theater receivers. Utilizing a laptop, ARC accurately measures, analyzes, and adjusts the interaction of speakers with the acoustic properties of your room. Unlike many receivers, it includes a uniquely calibrated microphone that connects to your computer’s USB port, which then wirelessly syncs with the MRX 720. Additionally, the introduction of ARC Mobile in 2016 offers iOS users the convenience of using their iPhone’s built-in microphone for system calibration.

DTS Play-Fi enables seamless music streaming from various sources such as NAS devices, Spotify, and Amazon Music to the MRX 720 via control apps available on Android, iOS, or Windows platforms. Supporting a range of file formats including MP3, MP4, AAC, FLAC, and WAV, Play-Fi ensures bit-perfect streaming of files up to 24/96 resolution, while efficiently downsampling 24/192 files to 16/48 for reliable wireless transmission. Its versatility is underscored by its integration into numerous products from various manufacturers, facilitating the setup of a comprehensive whole-house music streaming system without vendor lock-in.

In addition to its exceptional sound quality, the Anthem MRX 720 boasts a plethora of connectivity options, including WiFi connectivity, voice command capability, 8 HDMI ports, 2 subwoofer outputs, 2 coaxial ports, 3 optical inputs, 5 stereo analog RCA inputs, HDMI on-screen display, and MHL-supported inputs. Notably, it features 7 regular amplifier channels alongside an 11.2 channel pre-amplifier, expanding connectivity possibilities. Furthermore, it incorporates a premium digital-to-analog converter to support high-quality audio playback from CDs and Blu-ray discs. Altogether, these features provide a comprehensive solution for creating an immersive entertainment experience at home.

Anthem MRX 720 pros and cons

Here are some pros and cons of the Anthem MRX 720 audio-video receiver:

Pros:

  • High-quality audio performance with plenty of power output
  • Supports a variety of audio and video formats, including Dolby Atmos and DTS:X
  • Proprietary ARC (Anthem Room Correction) technology helps optimize audio performance in any room
  • Plenty of connectivity options, including six HDMI inputs and XLR inputs for balanced audio
  • Convenient mobile app for controlling the receiver and streaming music from popular services
  • Built-in Bluetooth and Wi-Fi for wireless connectivity

Cons:

  • Relatively expensive compared to some other AV receivers on the market
  • Limited to seven channels of amplification, which may not be enough for larger home theater systems
  • No support for some advanced audio formats such as Auro-3D
  • Some users have reported issues with firmware updates causing problems with the receiver’s functionality

The Anthem MRX 720 is a high-quality AV receiver with a lot of features and capabilities. While it may be on the pricier side, its audio performance and proprietary ARC technology make it a strong contender for those looking to create a top-of-the-line home theater system. However, its limited number of channels and lack of support for certain audio formats may be a drawback for some users.Anthem MRX 720 audio-video receiver

What is ARC – Anthem Room Correction

ARC (Anthem Room Correction) is a proprietary technology developed by Anthem, a high-end audio equipment manufacturer, that is designed to optimize the audio performance of its receivers and processors in any room.
ARC works by taking acoustic measurements of a room using a calibrated microphone and specialized software, which analyzes the frequency response and identifies any anomalies or resonances caused by the room’s unique acoustics.
Based on the measurements, the ARC system generates a set of custom correction filters that are designed to compensate for the acoustic anomalies and improve the accuracy and balance of the sound. These filters are then applied to the audio signal in real-time, resulting in a more natural and realistic sound that is better suited to the listening environment.

ARC is designed to be easy to use and requires no special training or expertise. The process typically takes only a few minutes to complete and can be performed by anyone with a basic understanding of audio equipment.

ARC is a powerful tool that helps to optimize the audio performance of Anthem’s receivers and processors in any room, resulting in a more accurate and natural sound that is better suited to the listener’s preferences and the listening environment.

Anthem MRX 720 tech specs:

PREAMPLIFIER
Maximum Output (<0.1% THD)4.2 Vrms, subwoofer channel 5.2 Vrms
Frequency Response (2 Vrms output)10 Hz — 31 kHz (+0, -0.25 dB)
Frequency Response, Analog-Direct (2 Vrms output)10 Hz — 48 kHz (+0, -0.25 dB)
THD+N (2 Vrms output)-95 dB
S/N Ratio (2 Vrms output, IEC-A filter)110 dB
PREAMPLIFIER + AMPLIFIER (1 W OUTPUT)
MRX 1120 / MRX 720-88 dB channels 1-5, -75 db back/height
MRX 520-88 dB
SPEAKER IMPEDANCE
Compatible with 4 Ohms or higher impedance.
MAXIMUM CONTINUOUS OUTPUT (1% THD)
MRX 1120MRX 720MRX 520
Channels 1-5, Two Driven into 8 Ohms140 W140 W100 W
Channels 1-5, Two Driven into 6 Ohms170 W170 W130 W
Remaining Channels, Two Driven into 8 Ohms60 W60 Wn/a
Remaining Channels, Two Driven into 6 Ohms75 W75 Wn/a
POWER CONSUMPTION
MRX 1120MRX 720MRX 520
Typical Load570 W485 W365 W
Standby0.3 W0.3 W0.3 W
Standby IP Control Enabled4.7 W4.7 W2.4 W
Standby HDMI Bypass Enabled8.2 W8.2 W5.8 W
DIMENSIONS
Height6-1/2″ (16.5 cm)
Height with Rackmount Kit4U
Width17-1/4″ (43.9 cm)
Depth (not including power cord)14-3/4″ (37.5 cm)
WEIGHT
MRX 112032 lb (14.5 kg)
MRX 72031 lb (14 kg)
MRX 52028.2 lb (12.8 kg)
POWER REQUIREMENT
120 V version:In countries where the line voltage is 120 V, this product operates from a single phase AC power source that supplies between 108 V and 132 V at a frequency of 60 Hz.
220-240 V version:In countries where the line voltage is 220, 230, or 240 V, this product operates from a single phase AC power source that supplies between 198 V and 264 V at a frequency of 50 Hz.

Info: What You Should Know about HEVC (High-Efficiency Video Coding)

0

HEVC (High-Efficiency Video Coding), also known as H.265, is a video compression standard that was first released in 2013 by the ITU-T Video Coding Experts Group and the ISO/IEC Moving Picture Experts Group. It is the successor to the widely used H.264/MPEG-4 AVC standard and offers significant improvements in compression efficiency, allowing for higher quality video at lower bitrates.

Here are some key facts about HEVC:

  • HEVC is designed to support resolutions up to 8K (7680×4320) and frame rates up to 120 frames per second.
  • HEVC achieves higher compression efficiency by using more advanced coding techniques such as larger block sizes, improved motion compensation, and better intra-prediction.
  • HEVC can achieve up to 50% bitrate savings compared to H.264 while maintaining the same level of video quality.
  • HEVC is used for a variety of applications, including video streaming, broadcasting, surveillance, and video conferencing.
  • HEVC is supported by a wide range of devices, including smartphones, tablets, computers, TVs, and media players. However, older devices may not support HEVC due to hardware limitations.

    about HEVC (High-Efficiency Video Coding)
    – about HEVC (High-Efficiency Video Coding) –
  • HEVC is subject to patents, which can make it more expensive to use than some other video codecs. However, there are open-source implementations available as well.
  • HEVC is often used in conjunction with other technologies such as HDR (High Dynamic Range) and WCG (Wide Color Gamut) to provide a more immersive viewing experience.

HEVC is an important technology that has the potential to significantly improve the quality of video content while reducing the bandwidth required for transmission and storage.

What are the differences between HEVC and H.264/AVC?

  1. Compression Efficiency: HEVC is significantly more efficient than H.264/AVC. HEVC can achieve up to 50% bitrate savings compared to H.264 while maintaining the same level of video quality. This means that HEVC can provide higher quality video at lower bitrates, which is important for streaming and other applications where bandwidth is limited.
  2. Encoding Complexity: HEVC is more complex to encode than H.264/AVC, which requires more processing power and time. This can make it more difficult to implement in certain applications.
  3. Resolutions and Frame Rates: HEVC is designed to support higher resolutions and frame rates than H.264/AVC. HEVC can support resolutions up to 8K (7680×4320) and frame rates up to 120 frames per second.
  4. Patents: HEVC is subject to patents, which can make it more expensive to use than H.264/AVC. This can be a barrier to adoption for some applications.
  5. Compatibility: While HEVC is supported by a wide range of devices, including smartphones, tablets, computers, TVs, and media players, older devices may not support HEVC due to hardware limitations. In contrast, H.264/AVC is more widely supported across a range of devices, including older devices.

HEVC is a more advanced and efficient video compression standard than H.264/AVC, but it is also more complex and may require more processing power to encode. It is particularly useful for applications where bandwidth is limited or where higher resolutions and frame rates are required.

How to Download HEVC Codec for Windows 10?
Here are the steps to download and install HEVC codec for Windows 10:
  1. Open your web browser and go to the Microsoft Store website.
  2. Search for “HEVC Video Extensions” in the search bar on the top right corner.
  3. Click on the “Get” button next to the “HEVC Video Extensions” app.
  4. Click on the “Install” button to start the installation process.
  5. Wait for the installation process to complete. This may take a few minutes.
  6. Once the installation is complete, you should be able to play HEVC-encoded videos using any media player that supports HEVC.

Note: The HEVC Video Extensions app is not a free app, and it requires a one-time payment of $0.99. However, some versions of Windows 10 may already have the HEVC codec pre-installed. If you are unsure whether you already have the codec, you can try playing an HEVC-encoded video using a media player like VLC or Windows Media Player. If the video does not play, you may need to download and install the codec using the above steps.

How to get the HEVC codec for free?
HEVC codec is subject to patents, which means that it may not be available for free in all cases. However, there are some free and open-source implementations of HEVC codec available that you can use. Here are the steps to download and install the free HEVC codec:
  1. Open your web browser and go to the x265 website (https://www.videolan.org/developers/x265.html).
  2. Click on the “Download” button to download the latest version of the x265 codec.
  3. Install the x265 codec on your computer by following the installation instructions provided on the website.
  4. Once the installation is complete, you should be able to play HEVC-encoded videos using any media player that supports the x265 codec.

Note: While the x265 codec is free and open-source, it may not be as efficient as some commercial HEVC codecs. Additionally, some media players may not support the x265 codec by default, so you may need to configure your media player to use the x265 codec for HEVC-encoded videos.

K-Lite Codec Pack and HEVC

To get HEVC support in K-Lite Codec Pack, follow these steps:

  1. Download and install the K-Lite Codec Pack from the official website (https://codecguide.com/).
  2. During the installation process, select the “Advanced” installation mode.
  3. In the “Select Components” window, make sure that the “HEVC/H.265” checkbox is selected.
  4. Complete the installation process by following the prompts.

After installation, you should be able to play HEVC-encoded videos using any media player that uses the codecs included in the K-Lite Codec Pack.

View a Video Frame by Frame in VLC Player

0

Learn how to view a video frame by frame in VLC Player using the Advanced Controls feature. Follow our step-by-step guide to advance or go back one frame at a time for your research or production needs.

In VLC Player, you can view a video frame by frame using the Advanced Controls. Here’s how:

  • Open the video you want to view in VLC Player.
  • Go to the “View” menu and select “Advanced Controls” to turn on the Advanced Controls.
  • Pause the video at the point where you want to start going frame by frame.
  • Click on the “Frame by Frame” button in the Advanced Controls, which looks like two arrows pointing left and right.
  • Click the “Forward Frame by Frame” button (the arrow pointing right) to advance one frame at a time, or click the “Backward Frame by Frame” button (the arrow pointing left) to go back one frame at a time.
  • To turn off the Advanced Controls, go to the “View” menu and uncheck “Advanced Controls”.

    VLC
    photo: VLC

Note: The Advanced Controls can also be turned on and off by pressing the hotkey combination of “Ctrl + Shift + P” on your keyboard. Depending on your version of VLC Player, the appearance of the Advanced Controls may differ slightly.

How to Go Frame by Frame in VLC Player via Shortcut Key?

To go frame by frame in VLC Player, you can follow these steps:

  • Open the video you want to view in VLC Player.
  • Pause the video at the point where you want to start going frame by frame.
  • Press the “E” key on your keyboard to go forward one frame at a time.
  • Press the “D” key on your keyboard to go backward one frame at a time.
  • If you want to increase or decrease the speed at which you go frame by frame, you can use the “[” and “]” keys on your keyboard to decrease or increase the speed respectively.

What is a frame capturing?

Frame capturing, also known as frame grabbing or screen capture, is the process of capturing individual frames from a video or animation as still images. This is typically done using software or hardware tools that allow users to capture frames from a video or animation in real-time or in a playback mode.

The captured frames can be saved in a variety of formats, such as JPEG, PNG, or BMP, and can be used for a variety of purposes, such as creating still images from a video for promotional materials or analyzing individual frames of a video for research purposes.

Frame capturing can be done manually or automatically. Manual frame capturing involves selecting the frame to be captured at a particular point in the video, while automatic frame capturing involves capturing frames at set intervals or based on certain triggers or criteria, such as changes in image color or motion.

Frame capturing is a useful tool in various industries, including film and video production, video game development, and research. It can help to create visual materials and analyze individual frames of a video or animation in detail.

VLC Media Player frame capturing using VLC Keyboard shortcuts
VLC Media Player allows users to capture frames using keyboard shortcuts. Here are the steps to capture frames using VLC keyboard shortcuts:
  1. Open the video file you want to capture frames from in VLC Media Player.
  2. Pause the video at the frame you want to capture.
  3. Press the “Shift” and “S” keys together on your keyboard to capture the current frame. By default, the captured frame will be saved as a PNG file in your Pictures folder.
  4. If you want to change the location where the captured frame is saved, you can do so by going to “Tools” > “Preferences” in VLC, clicking on the “Video” tab, and changing the “Snapshot directory” setting to your desired location.
  5. If you want to change the format in which the captured frame is saved, you can do so by going to “Tools” > “Preferences” in VLC, clicking on the “Video” tab, and changing the “Snapshot format” setting to your desired format (e.g., JPEG, BMP, etc.).

Note: Depending on your version of VLC Media Player, the keyboard shortcuts for capturing frames may be different or may need to be customized. Additionally, some video files may have copy protection that prevents frame capturing.

The Different Types of Motherboards: A Guide for PC Builders

0

This guide provides an overview of the different types of motherboards available for PC builders, including ATX, Micro-ATX, Mini-ITX, E-ATX, and BTX motherboards.

Motherboards are a crucial component of any PC build, and there are several types available, each with its own set of features and capabilities. This guide explores the different types of motherboards, including their sizes, expansion slots, and other key features, to help you choose the right motherboard for your build. Whether you’re building a compact HTPC or a high-performance gaming rig, this guide will help you understand the different options available and make an informed decision.

There are several different types of motherboards, each with different features and capabilities. Some common types include:

  • ATX (Advanced Technology eXtended): This is the most common type of motherboard used in desktop computers. It has a standard size of 12 inches by 9.6 inches and typically has four to six expansion slots.
  • Micro-ATX: This is a smaller version of the ATX motherboard, measuring 9.6 inches by 9.6 inches. It usually has fewer expansion slots than an ATX motherboard.
  • Mini-ITX: This is the smallest type of motherboard, measuring just 6.7 inches by 6.7 inches. It is commonly used in small form factor (SFF) or mini PC builds.
  • E-ATX (Extended ATX): This is a larger version of the ATX motherboard, measuring 12 inches by 13 inches. It is commonly used in high-end gaming and workstation builds.
  • BTX (Balanced Technology eXtended): This was a type of motherboard developed by Intel in the early 2000s, but it never became widely adopted.

Each of these motherboard types has its own advantages and disadvantages, and the choice of motherboard will depend on the intended use case and the specific features required.

ATX Motherboards

ATX (Advanced Technology eXtended) motherboards are the most common type of motherboard used in desktop computers. They have a standard size of 12 inches by 9.6 inches and typically have four to six expansion slots.
ATX motherboards usually have a range of connectors for peripheral devices such as USB, Ethernet, audio, and video, as well as slots for expansion cards such as graphics cards, sound cards, and network adapters. They also typically have multiple RAM slots and support for multiple CPUs.
ATX motherboards are commonly used in gaming PCs, workstations, and high-end desktops, as they provide a high level of expandability and compatibility with a wide range of components. However, their larger size can make them unsuitable for small form factor builds.

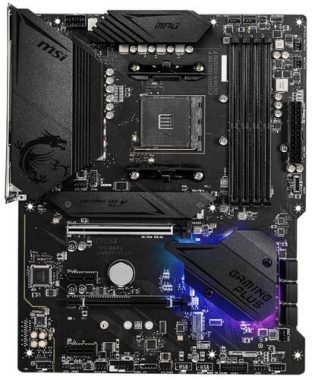
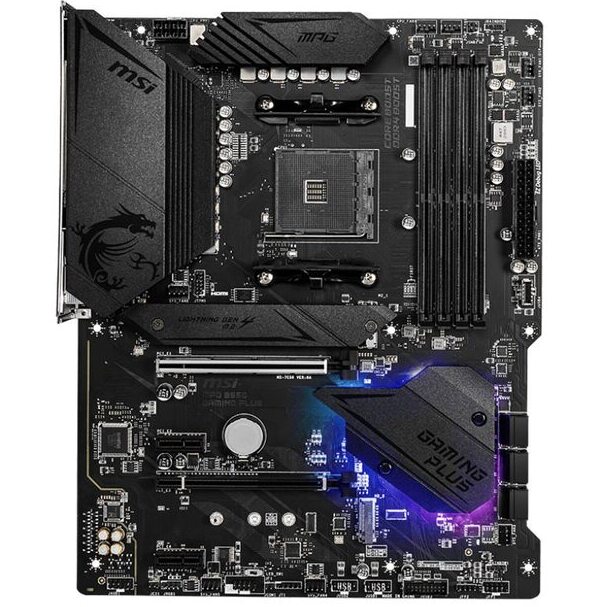
ATX Motherboard
ATX MPG B550 GAMING PLUS – MSI

Some features to look for when choosing an ATX motherboard include the number of RAM slots, the number and type of expansion slots, the availability of USB and other peripheral connectors, and the quality of the audio and networking components. Additionally, consider factors such as overclocking support and the overall build quality and reliability of the motherboard.

Micro-ATX motherboards

Micro-ATX (mATX) motherboards are a smaller version of the standard ATX motherboard. They typically measure 9.6 inches by 9.6 inches and have fewer expansion slots than an ATX motherboard, usually between two to four.
Despite their smaller size, Micro-ATX motherboards usually offer a similar range of features as ATX motherboards, including support for multiple CPUs, multiple RAM slots, and a range of peripheral connectors such as USB, Ethernet, and audio. However, due to their smaller size, they may have a more cramped layout that can make it more difficult to install or remove components.
Micro-ATX motherboards are a good choice for compact builds, such as home theater PCs (HTPCs) or small form factor (SFF) desktops, where space is at a premium. They are also a good choice for budget builds, as they are often less expensive than full-sized ATX motherboards.

Micro ATX
Micro ATX H670M Pro RS ASRock

When choosing a Micro-ATX motherboard, consider factors such as the number and type of expansion slots, the availability of peripheral connectors, and the quality of the audio and networking components. Additionally, consider the layout and spacing of the motherboard, as this can affect how easy it is to install and remove components.

Mini-ITX motherboards

Mini-ITX motherboards are the smallest type of motherboard, measuring just 6.7 inches by 6.7 inches. They are commonly used in small form factor (SFF) or mini PC builds, where space is at a premium.
Despite their small size, Mini-ITX motherboards typically offer a similar range of features as larger motherboards, including support for multiple CPUs, multiple RAM slots, and a range of peripheral connectors such as USB, Ethernet, and audio. However, due to their small size, they may have fewer expansion slots than larger motherboards, typically one or two.
Mini-ITX motherboards are a good choice for compact builds, such as HTPCs, home servers, or portable gaming machines. They are also a good choice for users who want a quiet and energy-efficient PC, as they often require less power and generate less heat than larger motherboards.
When choosing a Mini-ITX motherboard, consider factors such as the number and type of expansion slots, the availability of peripheral connectors, and the quality of the audio and networking components. Additionally, consider the layout and spacing of the motherboard, as this can affect how easy it is to install and remove components. Finally, ensure that the motherboard is compatible with the other components you plan to use, such as the CPU and RAM.

E-ATX motherboards

E-ATX (Extended ATX) motherboards are a larger version of the standard ATX motherboard. They typically measure 12 inches by 13 inches, which is wider than the standard ATX size of 12 inches by 9.6 inches. E-ATX motherboards are commonly used in high-end gaming and workstation builds, where expandability and high performance are a priority.
Due to their larger size, E-ATX motherboards can accommodate more expansion slots than standard ATX motherboards, typically ranging from four to seven. They also often have more RAM slots, which can be important for high-performance applications that require a large amount of memory.
E-ATX motherboards are a good choice for users who need a high level of performance and expandability, such as gamers or content creators. However, due to their larger size, they may not be suitable for compact builds or cases that are designed for standard ATX motherboards.

BTX motherboards

BTX (Balanced Technology eXtended) motherboards are a type of motherboard that was developed by Intel in the mid-2000s as an alternative to the ATX standard. The goal of BTX was to provide improved thermal performance and better overall system balance by repositioning the CPU and other components on the motherboard.
BTX motherboards have a layout that is similar to ATX motherboards, but with some key differences. The CPU is moved to the front of the motherboard, closer to the front of the computer case, which allows for better cooling and more efficient airflow. The expansion slots are also repositioned, with the PCI Express slots located closer to the front of the motherboard and the legacy PCI slots located towards the rear.
Despite its potential benefits, the BTX standard did not gain widespread adoption and has largely been replaced by other standards such as ATX, Micro-ATX, and Mini-ITX. This is due to a number of factors, including the higher cost of BTX motherboards and the lack of compatibility with existing computer cases.
Today, BTX motherboards are generally considered to be obsolete and are not commonly used in modern computer builds. If you are building a new computer, it is unlikely that you will need to consider a BTX motherboard.

NETGEAR EAX20 WiFi 6 Range Extender: Extend Your WiFi Coverage with the Latest Technology

0

Boost your home or office WiFi coverage with the NETGEAR EAX20 WiFi 6 range extender – supporting the latest WiFi 6 standard for faster speeds and better performance.

A WiFi 6 range extender is a device that is designed to extend the coverage of an existing WiFi network by receiving the wireless signal from a router or access point and re-broadcasting it to other areas of a home or office.

WiFi 6 range extenders are specifically designed to support the latest WiFi 6 standard, which provides faster speeds, better efficiency, and improved performance compared to previous WiFi standards. WiFi 6 range extenders typically operate on both the 2.4GHz and 5GHz frequency bands and use advanced technologies such as MU-MIMO and OFDMA to improve the overall wireless experience.

One of the key benefits of WiFi 6 range extenders is that they can provide improved coverage and performance in areas where the wireless signal from the router or access point may be weak or non-existent. This can be especially useful in larger homes or offices where there are multiple floors, walls, or obstacles that can interfere with the wireless signal.

When choosing a WiFi 6 range extender, it’s important to consider factors such as the coverage area, the number of devices it can support, the setup process, and the compatibility with your existing router or access point. It’s also important to note that while a WiFi 6 range extender can improve the overall wireless experience, it may not be able to provide the same level of performance and reliability as a wired connection.

The NETGEAR EAX20 is a WiFi 6 range extender that is designed to extend the coverage of your existing WiFi network. WiFi 6, also known as 802.11ax, is the latest wireless standard that provides faster speeds, improved reliability, and better efficiency compared to previous WiFi standards.

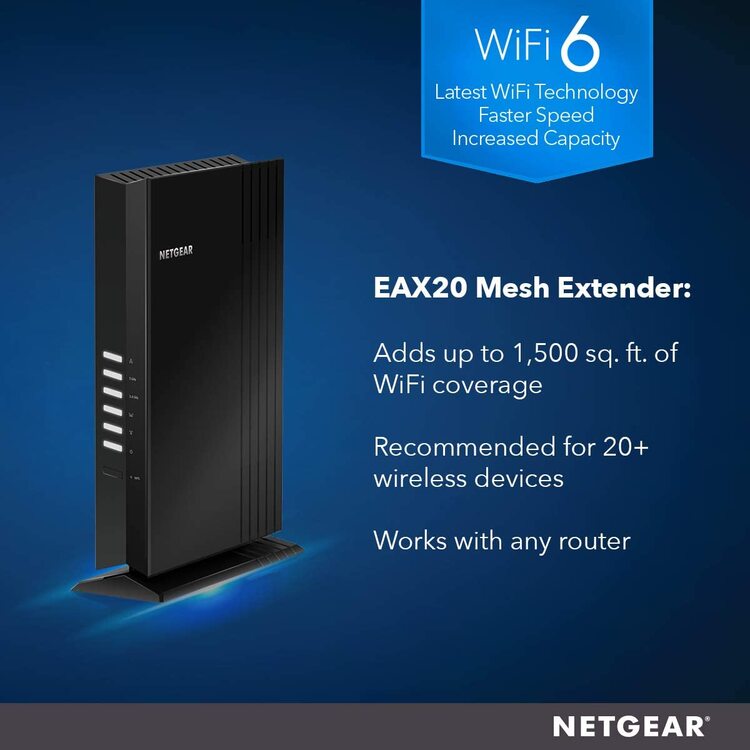
NETGEAR EAX20 WiFi 6 range extender

The NETGEAR EAX20 can provide up to 1.8Gbps of wireless speed and can extend the coverage of your existing WiFi network by up to 1500 square feet. It supports both the 2.4GHz and 5GHz frequency bands and comes with two external antennas for better coverage and performance. photo: NETGEAR

The setup process for the NETGEAR EAX20 is straightforward and can be done using the NETGEAR Nighthawk app or through a web browser. It also supports WPA2/WPA3 wireless security protocols to ensure the safety and privacy of your network. Setting up using the Nighthawk app only takes a few minutes, allowing you to enjoy better WiFi more quickly. From the palm of your hand, you can manage your NETGEAR service subscriptions, view your connected devices, test your internet speed, and more.

NETGEAR EAX20: pros and cons

Here are some potential pros and cons of the NETGEAR EAX20 WiFi 6 range extender:

Pros:

  • Supports the latest WiFi 6 standard for faster speeds, improved reliability, and better efficiency compared to previous WiFi standards.
  • Can extend the coverage of your existing WiFi network by up to 1500 square feet, making it a great choice for larger homes or offices.
  • Supports both the 2.4GHz and 5GHz frequency bands, providing flexibility for different devices.
  • Comes with two external antennas for better coverage and performance.
  • Easy setup process using the NETGEAR Nighthawk app or through a web browser.
  • Supports WPA2/WPA3 wireless security protocols to ensure the safety and privacy of your network.

Cons:

  • May be more expensive than some other WiFi range extenders on the market.
  • May not be compatible with all routers or mesh networks.
  • While it can provide improved coverage and speed, the actual performance may depend on various factors such as the location of the extender, the number of devices connected, and the quality of the existing WiFi network.
  • May not support all of the latest WiFi 6 features and specifications, depending on the router or mesh network it is connected to.

    NETGEAR EAX20 WiFi 6 range extender
    NETGEAR EAX20
NETGEAR EAX20 WiFi 6 range extender: Connect with WPS
Yes, the NETGEAR EAX20 WiFi 6 range extender can be connected using WPS (Wi-Fi Protected Setup). WPS is a quick and easy way to connect your range extender to your existing WiFi network without having to manually enter the network name and password.

To connect the NETGEAR EAX20 using WPS, follow these steps:

  1. Press and hold the WPS button on the range extender until the WPS LED starts blinking.
  2. Within two minutes, press the WPS button on your router or access point.
  3. Wait for the WPS LED on the range extender to turn solid green, indicating that it has successfully connected to your WiFi network.
  4. Move the range extender to a new location that is within the range of your existing WiFi network. You can use the LED indicators on the range extender to find the optimal location.

Once the NETGEAR EAX20 is connected to your WiFi network, you can use the NETGEAR Nighthawk app or a web browser to configure and customize the settings of the range extender. It’s important to note that some routers or access points may not support WPS, so it’s always a good idea to check your device’s manual or settings to confirm whether WPS is an available option.

The NETGEAR EAX20 WiFi 6 range extender is a great choice for those who need to extend their WiFi coverage at home or in the office and want to take advantage of the latest WiFi 6 technology.

NETGEAR EAX20 WiFi 6 range extender specs:

  • WiFi Technology : 802.11ax
  • WiFi Performance : AX1800
  • WiFi Band : Band 1: 0.6Gbps @2.4GHz – 1024QAM
  • Band 2: 1.2Gbps @5GHz – 1024QAM
  • Number of Ethernet Ports : Four (4) 10/100/1000 Ethernet ports with auto-sensing technology
  • Key Features : Gigabit Internet speeds throughout the home
  • 1.5 X Better Performance than a Wi-Fi 5 (802.11ac) Extender—4 Stream WiFi with up to 0.6+1.2 Gbps† for fast wireless speeds
  • More WiFi for More Devices— OFDMA allows efficient data transmission up to 4 devices at the same time. Uplink OFDMA improves scheduling during high volumes of upload traffic.§
  • Up to 4 Simultaneous WiFi Streams—4-stream MU-MIMO‡ enables up to four (4) 1×1 devices to stream content at the same time
  • 160MHz Channel Support—Gigabit speeds for compatible mobile devices & laptops
  • Powerful Processor—64bit 1.5GHz dual-core processor ensures smooth 4K UHD streaming & gaming
  • Four (4) 10/100/1000 Ethernet ports with auto-sensing technology
  • Security : Standards-based WiFi Security (802.11i, 128-bit AES encryption with PSK)
  • EASE OF USE : Nighthawk App—Easily set up your extender and get more out of your WiFi
  • Wi-Fi 6 Supports All Current WiFi Devices—Backward compatible with Wi-Fi 5, Wi-Fi 4 and earlier generation WiFi devices
  • Push & Connect using WPS