Home Blog Page 64

7 Tips and Tricks for Diagnosing Hardware Related Issues on a Desktop PC

0

Yes, there are several tips and tricks that you can use to diagnose hardware-related issues on a desktop PC:

  1. Check for physical damage: First, check for any physical damage to the computer, such as bent or broken components, loose cables or connections, or signs of overheating. This can help identify issues that may be causing the problem.
  2. Check the power supply: The power supply is a common cause of hardware issues, so make sure that it is properly connected and functioning correctly. You can use a power supply tester to check the voltage output of the power supply.

How to check the power supply?

There are a few ways to check the power supply of a desktop PC. Here are some steps you can follow:

  • First, make sure the computer is unplugged and that you are grounded to avoid any static discharge.
  • Open the computer case and locate the power supply unit (PSU). The PSU is usually a rectangular metal box with a fan on one side and power cables coming out of the other side.
  • Check the power cables that are connected to the PSU and the motherboard to ensure that they are properly connected and secured.
  • Check the power switch on the back of the PSU. Make sure that it is turned on and in the “I” position.
  • Use a multimeter to check the voltage output of the PSU. Set the multimeter to DC voltage and select the 20V range. Connect the red probe to the PSU’s 12V connector and the black probe to the PSU’s ground connector.
  • Turn on the computer and check the voltage reading on the multimeter. The voltage reading should be within 5% of the rated voltage for the PSU.
  • If the voltage reading is significantly lower than the rated voltage, the PSU may be faulty and need to be replaced.
  • You can also use a power supply tester to check the voltage output of the PSU. A power supply tester is a device that connects to the PSU’s power cables and displays the voltage readings on an LCD display.

By following these steps, you can check the power supply of your desktop PC and determine if it is functioning correctly. If you suspect that the power supply is faulty, it’s best to replace it with a new one to avoid any further damage to your computer.
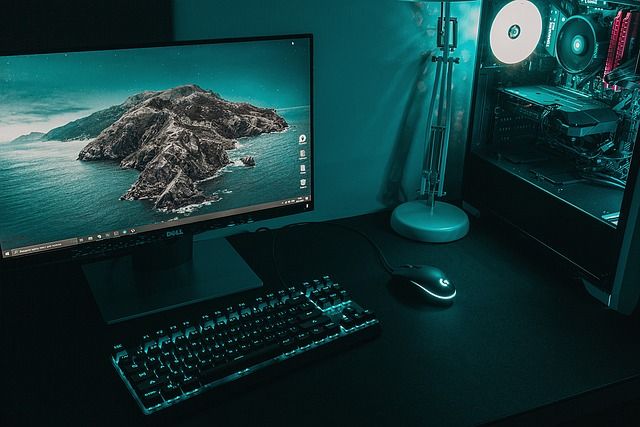
Tricks for Diagnosing Hardware Related Issues on a Desktop PC
photo: Pixabay

    3. Check the RAM: The RAM is another common cause of hardware issues, so make sure that it is properly seated and functioning correctly. You can use a memory diagnostic tool to check for any errors in the RAM.

How to check the RAM?

There are several ways to check the RAM on your desktop PC:

  • Use the built-in Windows Memory Diagnostic tool: Windows has a built-in Memory Diagnostic tool that can check your RAM for errors. To access this tool, go to the Start menu and type “Windows Memory Diagnostic” in the search box. Select the “Windows Memory Diagnostic” application from the search results, and then choose to restart the computer and run the test.
  • Use a third-party memory diagnostic tool: There are many third-party memory diagnostic tools available that can check your RAM for errors. Some popular options include Memtest86, MemTest, and HCI MemTest. These tools can be downloaded and installed on a USB drive or CD, and then booted from to run the memory test.
  • Physically check the RAM: You can also physically check the RAM to ensure that it is properly seated and functioning correctly. Turn off your computer and unplug it, then open the computer case and locate the RAM modules. Carefully remove the RAM modules and then reinsert them into the RAM slots, making sure that they are properly seated. You can also try switching the RAM modules between different slots to test if the issue is with a particular slot.
  • Monitor the RAM usage: You can also monitor the RAM usage of your computer to see if any particular program or process is using a lot of RAM. To do this, open the Task Manager in Windows (press “Ctrl+Shift+Esc” or “Ctrl+Alt+Delete” and choose Task Manager), and go to the “Performance” tab. Here you can see how much RAM is being used and by which programs.

By following these steps, you can check your RAM and identify any issues that may be causing problems with your computer. If the RAM is faulty, it may need to be replaced with new RAM modules.

      4. Test the hard drive:

The hard drive can also cause hardware issues, so make sure that it is properly connected and functioning correctly. You can use a hard drive diagnostic tool to check for any errors in the hard drive.

How to Test the hard drive?

You can test your desktop PC’s hard drive using a variety of methods. Here are a few ways to test your hard drive:

  • Check for errors using the built-in Windows utility: Windows has a built-in utility called “Error Checking” that can scan your hard drive for errors and bad sectors. To access this tool, right-click on the drive you want to check and select “Properties.” Then, go to the “Tools” tab and click on “Check” under the “Error checking” section. Follow the on-screen instructions to complete the scan.
  • Use a third-party hard drive diagnostic tool: Many third-party tools can be used to diagnose hard drive issues. Some popular options include CrystalDiskInfo, HD Tune, and Western Digital Data Lifeguard Diagnostics. These tools can be downloaded from their respective websites, installed on your computer, and used to perform a scan of your hard drive.
  • Monitor the hard drive’s performance: You can also monitor the performance of your hard drive using a built-in Windows utility called “Performance Monitor.” To access this tool, type “perfmon” in the Windows search bar and open the “Performance Monitor” application. Here, you can monitor the performance of your hard drive in real-time and identify any issues that may be causing problems.
  • Listen for unusual sounds: If your hard drive is making unusual sounds such as clicking, grinding, or buzzing, this could be a sign of a physical issue with the drive. In this case, it’s best to back up your data immediately and consider replacing the hard drive.

By following these steps, you can test your hard drive and identify any issues on a desktop PC that may be causing serious problems with your computer. If the hard drive is faulty, it may need to be replaced with a new one.

       5. Check the graphics card: If you are experiencing issues with graphics, such as display artifacts or crashes, check the graphics card. Make sure that it is properly seated and functioning correctly. You can use a graphics card diagnostic tool to check for any errors in the graphics card.

You can check your desktop PC’s graphics card using several methods. Here are a few ways to do it:

  • Check the Device Manager: The Device Manager is a built-in utility in Windows that can show you the hardware devices installed on your PC. To access it, press the Windows key + X and select “Device Manager.” Under the “Display adapters” section, you should see the name of your graphics card. If it’s not listed, there may be a problem with the graphics card, or it may not be installed correctly.
  • Check the graphics card software: If you have installed software for your graphics card, you can open it to see if there are any issues. For example, if you have an NVIDIA graphics card, you can open the NVIDIA Control Panel and check if there are any errors or warnings.
  • Run a benchmarking test: A benchmarking test can help you determine the performance of your graphics card. There are several benchmarking tools available, such as FurMark, 3DMark, and Unigine Heaven. These tools can be downloaded and installed on your PC, and then run to test the graphics card’s performance. You can compare the results with the specifications of your graphics card to see if it’s performing as it should be.
  • Check for overheating: Overheating can cause performance issues with the graphics card. You can check the temperature of the graphics card using software like HWMonitor or MSI Afterburner. If the temperature is too high, you may need to clean the graphics card or adjust the fan settings.

By following these steps, you can check your graphics card and identify any issues that may be causing problems with your computer’s performance. If the graphics card is faulty, it may need to be replaced with a new one.

        6. Check the CPU: If you are experiencing issues with the computer freezing or shutting down unexpectedly, check the CPU. Make sure that it is properly seated and functioning correctly. You can use a CPU diagnostic tool to check for any errors in the CPU.

How to test your CPU?

You can test your desktop PC’s CPU using several methods. Here are a few ways to do it:

  • Use built-in Windows tools: Windows has several built-in tools that can help you test your CPU’s performance. One such tool is the Task Manager. To access it, right-click on the taskbar and select “Task Manager.” Click on the “Performance” tab and you’ll see your CPU usage. If your CPU usage is high when you’re not running any programs, there may be a problem.

Another tool is the Resource Monitor. To access it, open the Task Manager and click on the “Resource Monitor” button. Click on the “CPU” tab and you’ll see a list of running processes and their CPU usage. You can identify any processes that are using too much CPU and take action accordingly.

  • Use a third-party CPU benchmarking tool: There are many third-party CPU benchmarking tools available that can test your CPU’s performance. These tools can give you a better understanding of your CPU’s capabilities and identify any issues that may be affecting its performance. Popular CPU benchmarking tools include Cinebench, Geekbench, and AIDA64.
  • Stress test your CPU: A stress test can help you determine if your CPU is stable and performing correctly under heavy loads. There are several stress testing tools available, such as Prime95 and IntelBurnTest. These tools can be downloaded and run to put your CPU under heavy load for an extended period. If the CPU is unstable, the stress test may cause it to crash or overheat.

By following these steps, you can test your CPU and identify any issues issues on a desktop PC that may be causing problems with your computer’s performance.

         7. Use a hardware monitoring tool: You can use a hardware monitoring tool to check the temperature and performance of your hardware components. This can help identify any components that may be overheating or underperforming.

How to test PC with hardware monitoring tool?

You can test your desktop PC with a hardware monitoring tool by using software that monitors the performance of your PC’s hardware components. These tools can help you identify any issues that may be affecting your PC’s performance, such as high CPU or GPU temperatures, low memory, or a failing hard drive.

Here are the steps to test your PC with a hardware monitoring tool:

  • Download and install a hardware monitoring tool: There are many hardware monitoring tools available, such as HWMonitor, CPU-Z, and Open Hardware Monitor. Choose a tool that supports the components you want to monitor and that is compatible with your operating system.
  • Run the hardware monitoring tool: Once you have installed the tool, run it to start monitoring your PC’s hardware components. The tool should display information about your CPU, GPU, memory, and other hardware components.
  • Monitor your PC’s hardware performance: Watch the performance of your PC’s hardware components over time. If you notice any spikes in temperature, low memory or storage space, or other issues, take note of them. You can also use the tool to view graphs of your PC’s performance over time.
  • Address any issues: If the hardware monitoring tool identifies any issues, such as high temperatures or low memory, take action to address them. For example, you can clean the dust from your PC’s fans or upgrade your memory or hard drive.

Using a hardware monitoring tool can help you keep your PC running smoothly and identify any issues before they become more serious problems. By monitoring your PC’s hardware performance, you can take steps to keep your PC running optimally and prevent hardware failures.

By following these tips and tricks, you can diagnose hardware-related issues on a desktop PC and identify the components that may be causing the problem.
Dynalink Android TV Box – Powerful little 4K HDR Streaming Media Player

0

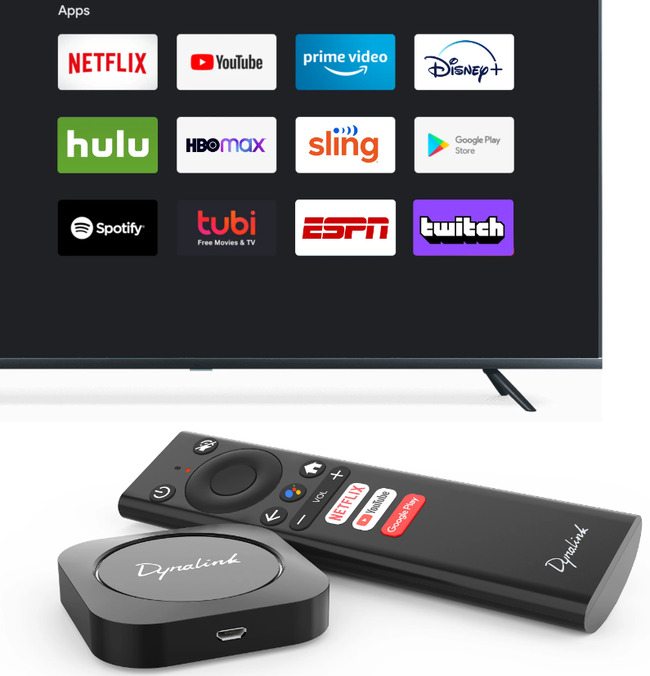
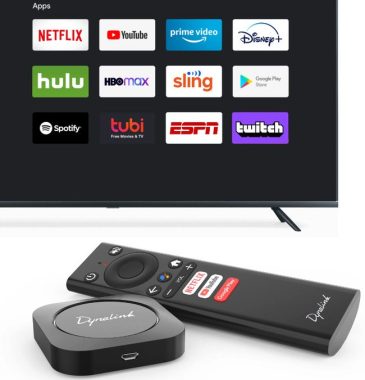
Dynalink Android TV Box (runs the latest version Android TV 10.0 OS) is a product from Dynalink, a company that specializes in telecommunications equipment and devices. The Dynalink Android TV is a set-top box that runs on the Android operating system and can be connected to a television set to provide access to streaming services and other online content.

With the Dynalink Android TV, users can access a wide range of streaming services, such as Netflix, YouTube, VUDU, Sling TV, Prime video,Disney+, Hulu, Tubi, Spotify, as well as live television channels and other online content. The device comes with a remote control that is easy to use and allows users to navigate the interface and control playback of content.

The device has built-in Wi-Fi connectivity and supports Bluetooth, allowing users to connect other devices, such as headphones or a game controller. It also has multiple USB ports and an HDMI port, making it easy to connect to other devices and peripherals.

One of the benefits of the Dynalink Android TV Box is its ease of use. The device is simple to set up and provides a user-friendly interface that is easy to navigate. The remote control is intuitive and allows users to quickly access their favorite content.

Additionally, the Dynalink Android TV supports high-definition video playback, including 4K and HDR content, making it a great option for users who have a compatible TV. It also comes with 2GB of RAM and 16GB of internal storage, which provides ample space for apps and other content.

Dynalink Android TV Box
Dynalink Android TV Box _ photo

Another advantage of the Dynalink Android TV is that it is regularly updated with the latest Android software and security updates, ensuring that it remains up-to-date and secure. This is important as it helps to ensure that the device is free from vulnerabilities that could be exploited by hackers.

One potential downside of the Dynalink Android TV is that it may not be compatible with all TV models. Some users have reported issues with connectivity, while others have noted that the device does not work well with older TVs that do not have an HDMI port. However, for most users, the device should work seamlessly with their TV, providing an excellent streaming experience.

In conclusion, the Dynalink Android TV is a high-quality set-top box that provides easy access to a wide range of streaming services and other online content. With its user-friendly interface, high-quality video playback, and regular software updates, it is an excellent choice for anyone looking to upgrade their home entertainment system.

Powered by Android 10, the Dynalink Android TV Box is a great option for users who want to access streaming services and other online content on their television sets. With its user-friendly interface and easy setup, it is a great choice for anyone who wants to upgrade their home entertainment system.

The Dynalink Android TV Voice Bluetooth remote is an optional accessory for the Dynalink Android TV set-top box. It is a voice-activated remote control that allows users to control their Dynalink Android TV using voice commands, making it easier and more convenient to navigate and control content.

The remote connects to the Dynalink Android TV Box using Bluetooth, which means that users can control the set-top box from anywhere in the room, without the need for a direct line of sight. The remote also includes a built-in microphone, which allows users to use voice commands to search for content and control playback.

In addition to its voice-activated capabilities, the Dynalink Android TV Voice Bluetooth remote also includes traditional buttons for controlling playback and navigating the interface. The remote is ergonomically designed and fits comfortably in the hand, making it easy to use for extended periods.streaming with Dynalink Android TV Box

One of the benefits of the Dynalink Android TV Voice Bluetooth remote is that it makes it easier for users to access the content they want to watch. By using voice commands, users can quickly search for content without having to navigate through menus or type in search terms.

Another advantage of the Dynalink Android TV Voice Bluetooth remote is that it is a great option for users who have mobility or vision issues. By using voice commands, users can control their Dynalink Android TV without having to use traditional buttons, making it easier for them to enjoy their favorite content.

Overall, the Dynalink Android TV Voice Bluetooth remote is an excellent optional accessory for the Dynalink Android TV set-top box. Its voice-activated capabilities, ergonomic design, and Bluetooth connectivity make it a great choice for anyone who wants to make it easier to navigate and control their home entertainment system.

Dynalink Android TV Box Tech specs:

System

CPU: Amlogic S905Y2-B

Flash: eMMC 8GB

Flash: eMMC 8GB

SDRAM: DDR3 2GB

Wi-Fi connectivity: 5GHz RF Specification/2.4GHz RF Specification

Adapter: Switching adapter AC 100~240V 50/60Hz input DC 5V/1A output

I/O Interface

Digital video: HDMI2.1, Type-A

Micro USB: DC 5V input

Tact Switch: Usage of BT Pairing/Recovery

Remote: BT Remote (include voice)

LED: Red/Green Color for Status indictor

HD Video

Video decoder: MPEG-2, AVC/H.264, HEVC/H.265

Resolution: (4K/2Kp60,1080p/i,720p)

Bluetooth Technology: Bluetooth V4.2 of 1, 2 and 3 Mbps.

How to fix Google Chrome going “Aw Snap” at every tab?

0

There are several possible solutions to try if Google Chrome keeps showing the “Aw Snap” error message for every tab:

  • Restart Chrome: Close Chrome completely and open it again.
  • Clear browsing data: Go to Chrome’s settings, click “Privacy and security,” then “Clear browsing data.” Select the time range and types of data to clear, then click “Clear data.”
  • Disable extensions: Type “chrome://extensions” in the address bar, then disable all extensions and see if the problem goes away.
  • Disable hardware acceleration: Go to Chrome’s settings, click “Advanced,” then “System.” Turn off “Use hardware acceleration when available.”
  • Update Chrome: Make sure you have the latest version of Chrome installed.
  • Reset Chrome settings: Go to Chrome’s settings, click “Advanced,” then “Reset and clean up.” Click “Restore settings to their original defaults.”

If none of these solutions work, you may need to uninstall and reinstall Chrome or seek further technical support.

Chrome
photo: Pixabay

In case the previous troubleshooting steps did not resolve the “Aw Snap” issue, you can try the following:

Step 1: Verify your internet connection

Ensure that your computer is connected to a Wi-Fi or wired network.

Attempt to reload the tab displaying the error.

Step 2: Clear your browsing data

Chrome may have stored information that is hindering the page from loading.

Launch the page in an Incognito window.

On Chrome, click “More” on the top right and choose “New Incognito window.”

Try opening the page on the Incognito window. If it opens, clear your browsing data.

Click “More” on the top right and select “More tools,” then click “Clear browsing data.”

Select “beginning of time” and choose “Cached images and files” and “Cookies and other site data,” then click “Clear browsing data.”

Try reloading the tab with the error.

Step 3: Close unnecessary tabs, apps, and extensions

Your device may have insufficient memory to load the site while running other programs, apps, or extensions.

Free up memory: Close all tabs except for the one showing the error message. Quit other running apps or programs and suspend any app or file downloads. Remove unnecessary Chrome extensions. Click “More” on the top right and select “More tools,” then “Extensions.” Click “Remove” beside the extensions you don’t use.

Try reloading the tab with the error.

How should I fix a “there was a problem resetting this PC” error in Windows 10?

0

There are several possible solutions for fixing a “there was a problem resetting this PC” error in Windows 10:

  • Try running the built-in Troubleshooter for Windows Update and the Windows Update standalone installer.
  • Disable any third-party antivirus or firewall software temporarily and try resetting the PC again.
  • Use the Windows 10 installation media to perform a clean install of Windows 10.
  • Use the System File Checker (SFC) tool to check and repair any corrupted or missing system files.
  • Check the health of your hard drive or SSD and replace it if necessary.
Fix Windows Boot Loop
photo: Pixabay

Or…

To fix the “There was a problem resetting your PC” issue on Windows 10, follow these steps:

  1. Open Settings and go to Update & Security, then select Recovery, and click on Advanced startup. Click on the Restart now button.
  2. In the new window, select Troubleshoot and then Advanced options. Click on Command prompt.
  3. Select the administrator account and enter the credentials for that account.
  4. In the Command Prompt window, type the following commands (in italics) and press Enter after each one: cd %windir%\system32\config, ren system system.001, ren software software.001.
  5. Close the Command Prompt window, and you will be taken to the Windows Recovery Environment screen. Select the Continue option to get back into your operating system.
  6. After the reboot, the “There was a problem resetting your PC” issue should be resolved.

Note: Before attempting any of these solutions, make sure to back up all important data on your PC to prevent data loss.

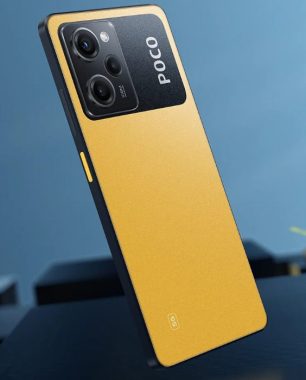
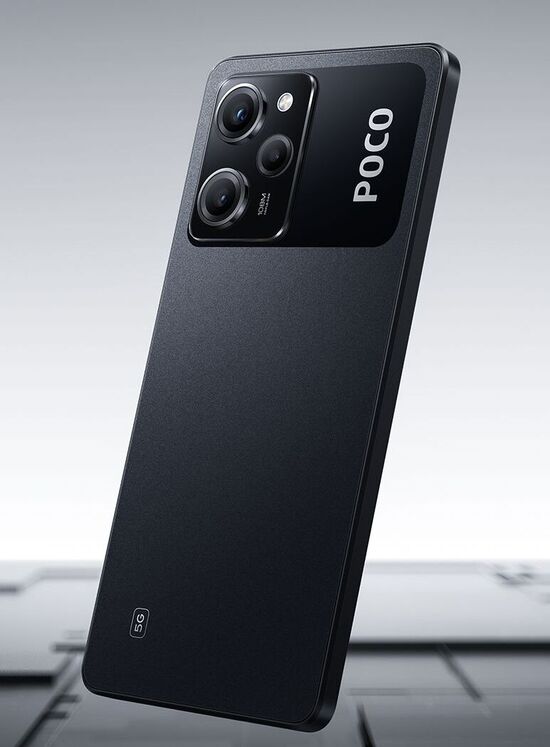
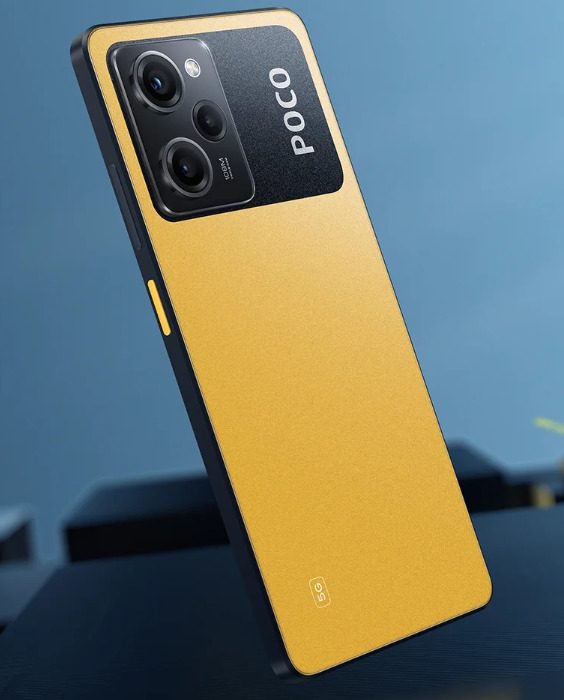
108MP camera & stunning display – it’s the POCO X5 Pro 5G

0

The display on the Poco X5 Pro is one of the best reasons to buy it. In the lower-end phone market, you usually have to make compromises in the display department, but the X5 Pro doesn’t seem to be significantly impacted. The display is bright, rich in color, and has smooth refresh rates that make it feel like using a high-end device. With a maximum refresh rate of 120Hz, scrolling through the interface and software is extremely smooth and clear. Although there are differences between this and a more expensive phone screen, most of them are not noticeable to the naked eye. For example, the X5 Pro switches between 60Hz and 120Hz to conserve battery power, instead of adapting at incremental steps.

When it comes to watching videos, the X5 Pro’s screen provides an excellent viewing experience, especially for its price bracket. The only downside to the phone is its software, as MIUI is one of the more intrusive Android skins, with confusing and sometimes nonsensical design choices.new Poco X5 Pro

The Poco X5 Pro offers a fast and fluid experience, handling tasks smoothly regardless of what they are. This is due to the combination of the 120Hz refresh rate of the display and the processing power behind it. The phone is powered by the Snapdragon 778G chipset, which is not Qualcomm’s top-tier platform, but it provides enough power for a responsive and fast experience. Loading games and apps is done quickly with little to no noticeable lag or delay. While it may not be as fast as a Snapdragon 8-series phone, you wouldn’t notice the difference unless you had both devices side by side. Additionally, the X5 Pro is equipped with plenty of RAM and storage to handle all your demanding tasks. Our review unit came with 8GB of RAM (plus an extra 3GB borrowed from storage) and 256GB of storage, which is a decent amount of memory that should last you a while. The entry-level model comes with 6GB of RAM and 128GB of storage, and still has the option to expand the RAM.

The Wi-Fi connection of the phone should be strong and stable, but during our testing, we encountered some instances where data seemed to freeze and the phone took a few seconds to load images on Twitter. It’s unclear if the issue was with the app or the phone, as Twitter has not always been known for its performance. In our use of music apps, we noticed some songs pausing and buffering, indicating a stop in the streaming data.

Battery life, on the other hand, seemed decent in our testing. It won’t last for two days, but even on heavy days with 3-4 hours of gaming, it still managed to last below the 19% mark. However, on a typical day, it has enough power to last the day with over 30% battery life remaining.

This is not surprising given the 5000mAh capacity of the battery. It’s more than enough to get most people through a full workday, and the included 67W fast charger means you won’t have to worry about running out of battery. In fact, you can fully charge the Poco X5 Pro phone from 1-100% in under 40 minutes. In a pinch, just a 15-minute charge will give you at least half a battery to get you through a few more hours of the day.Poco X5 Pro

If you are considering buying this Poco X5 Pro, the primary camera is the one to focus on. It features a 108-megapixel sensor, similar to those found on other budget-friendly phones. In good lighting conditions, you can expect high-quality shots with good detail, color accuracy, and HDR processing that effectively handles contrasting light. While it may not match the level of clarity and depth of field of high-end phones, it’s still suitable for social media sharing.

One of the strengths of the primary camera is its ability to zoom in 2x while maintaining sharpness and minimal blur or noise. When buying a budget-friendly phone with a triple camera system, it’s important to manage your expectations. In this case, two of the three cameras are of low resolution and one is redundant, like the 8-megapixel ultrawide camera that often produces blurry and distorted shots with unbalanced colors. The 2-megapixel macro camera also falls short, lacking sharpness and depth of field, and delivering dark, flat, and noisy images.Poco X5 Pro

The Poco X5 Pro is a budget-friendly phone ($358.00) that manages to perform like a high-end device, despite making some compromises. The screen is large and vivid, with fast refresh rates, making it a smooth performer. Fast charging and a quality primary camera are added benefits. There were instances of data hang-ups and the secondary cameras didn’t live up to expectations, but that is to be expected with a phone in this price range. The overall experience with Poco X5 Pro is one of getting a lot of phone for your money, but with some trade-offs. If you can tolerate a few quirks, you will love this phone. A more refined design and simplified software would make it even better.  photo: POCO

POCO X5 Pro 5G specs:

Storage & RAM
6+128/8+256GBLPDDR4X + UFS2.2Dynamic RAM expansion 3.0*Available storage and RAM are less than the total memory due to storage of the operating system and software pre-installed on the device.
Dimensions
Height: 162.91mmWidth: 76.03mmThickness: 7.9mmWeight: 181g* Data provided by internal laboratories. Industry measurement methods may vary, and therefore actual results may differ.
Display
6.67″ FHD+ Flow AMOLED DotDisplayRefresh rate: Up to 120HzBrightness: 500 nits (typ), 900 nits (HBM/peak brightness)Contrast ratio: 5,000,000:1Resolution: 2400 x 1080DCI-P3 wide color gamut10 bit color depth395 ppiSunlight displayReading mode
Processor
Snapdragon® 778G Mobile PlatformCPU: Octa-core CPU, up to 2.4GHzGPU: Qualcomm® Adreno™ 642L
Battery & Charging
5000mAh (typ)67W turbo charging
Camera
108MP wide cameraf/1.90.7μm, 9-in-1 binning into one large 2.1μm pixel1/1.52” sensor size8MP ultra-wide cameraf/2.2FOV 120°2MP macro cameraf/2.4Rear camera video recording4K 3840 × 2160 | 30fps1080p 1920×1080 | 60fps, 30fps720p 1280×720 | 30fpsRear camera video featuresVLOGSlow motionTime-lapse16MP front cameraf/2.4Front camera video recording1080p 1920×1080 | 60fps, 30fps720p 1280×720 | 30fps
Security
Side fingerprint sensorAI Face Unlock
NFC
Supports Google Pay Functions may vary in some markets.
Network & Connectivity
Dual SIM, dual standby: 5G+5GNetwork bands:Supports 5G / 4G / 3G / 2G5G: n1/3/5/7/8/20/28/38/40/41/77/784G: LTE FDD: Band 1/2/3/4/5/7/8/20/28/66(60MHz)4G: LTE TDD: Band 38/40/413G: WCDMA: Band 1/2/4/5/82G: GSM: 850/900/1800/1900MHz* B66(60MHz):TX: 1710~1770MHz RX: 2110~2170MHz and disable B66 for Mexico market.*5G connectivity may vary based on region availability and local operator support.Wireless NetworksBluetooth 5.2Wi-Fi Pro-tocol: 802.11a/b/g/n/ac/ax
Navigation & Positioning
GPS: L1 | GLONASS: G1 | Beidou: B1I+B1C|Galileo: E1|QZSS: L1
Audio
Dual speakers, 3.5mm headphone jack
Video
MP4丨M4V丨MKV丨AVI丨WMV丨WEBM丨3GP丨3G2丨ASF
Sensors
Proximity sensor | Ambient light sensor | Accelerometer | Electronic compass | IR blaster |Gyroscope
Operating System
MIUI 14 for POCO
Package Contents
POCO X5 Pro 5G / Adapter / USB Type-C Cable / SIM Eject Tool / Protective Case / Quick Start Guide / Warranty Card

Ensure better privacy on your iPhone – hide personal content

0

Maintaining your privacy on your iPhone is crucial in today’s world. To ensure that your personal content is protected, here are some simple tips you can follow.

  1. Passcode: The first step in protecting your privacy is to secure your iPhone’s lock screen. If you are not using Face ID or Touch ID, it is recommended to add a passcode. You can set this up by going to the Settings app, selecting Face ID & Passcode or Touch ID & Passcode, and then tapping “Turn Passcode On.” Remember to change your passcode regularly to avoid others from guessing it.
  2. Hide Personal Photos: To avoid having someone scrolling through your photo album, you can hide your personal photos. Instead of deleting them, you can create a designated album for these photos. This way, you can ensure that your photos are always protected and easily accessible.

    privacy on your iPhone
    photo: Pixabay
  3. Hide Purchased Apps: If you have downloaded an app that you don’t want others to know about, you can hide it from your App Store Purchased list. Simply go to the App Store, tap your profile, and select Purchased. Swipe right on the app you want to hide and tap the red “Hide” option.
  4. Remove Apps from the Home Screen: If there is an app that you use but don’t want others to see, you can remove it from your home screen. Simply tap and hold the app and select “Remove from Home Screen.” You can still access it in the App Library.
  5. Don’t Show Notifications or Previews on the Lock Screen: To keep your activities private, hide app notifications on your lock screen. This will ensure that others are not able to see what you are doing.
  6. Filter Unknown Senders in the Messaging App: To hide your text chats, you can filter messages from unknown senders. To do this, go to Settings and tap on Messages. Enable the “Filter Unknown Senders” option, and their messages will be filtered to the Unknown Senders list.
  7. Delete Recent Calls: Your recent calls list can reveal who you have been in contact with, so it is important to delete specific calls if you want to keep this information private. To do this, go to the Phone app and tap the Recents tab. Swipe left on the recent contact and tap “Delete.”
  8. Lock Notes with a Password: To keep your notes private, you can lock the Notes app with a password. You can also enable Face ID or Touch ID for extra security.
  9. Use Private Browsing in Safari: To protect your browsing history, use Private Browsing mode in Safari. This will prevent your search history and visited websites from being displayed.
  10. Turn off Siri Suggestions: Siri provides suggestions based on your iPhone usage habits, which can reveal your recent activities. To avoid this, turn off Siri suggestions.

In conclusion, while it may not be necessary to make your iPhone impenetrable, it is important to know how to control what is displayed on your device to ensure better privacy. By following these simple tips, you can enjoy better privacy on your iPhone.

Easy way to get WhatsApp on iPad

0

WhatsApp is a highly popular messaging app among iPhone users, connecting over a billion people globally every day. With this app, you can communicate with your friends or a group of friends via Wi-Fi or 4G/5G, which can save you money on your phone bill. (However, be mindful of your data usage as excessive usage may result in extra charges.)

Unfortunately, WhatsApp is only available for iPhones, and there is no app version for iPads, despite repeated requests from users. In an interview in January 2022, WhatsApp CEO Will Cathcart acknowledged the demand for an iPad app, but he stated that there is no immediate plan to develop one, though much of the necessary infrastructure is already in place.

WhatsApp on iPad
photo: Pixabay

Don’t worry, though! This tutorial will show you how to use WhatsApp on iPad using WhatsApp Web. This service connects to your WhatsApp account on your iPhone or Android device and forwards messages to your iPad, allowing you to send and receive messages, pictures, and videos. Although it’s not a native WhatsApp app for the iPad, it’s still a fantastic alternative.

How to get WhatsApp on iPad?

Here’s how to get WhatsApp on your iPad using WhatsApp Web:

  1. Open Safari on your iPad and go to web.whatsapp.com.
  2. Open WhatsApp on your iPhone.
  3. In WhatsApp, tap on Settings.
  4. Tap on Linked Devices.
  5. Tap on Link a Device.
  6. Use your iPhone to scan the QR code to pair with your iPad.
  7. The web page should now load and display all your recent WhatsApp messages and any media or voice notes.

Please note that there are a few limitations when using WhatsApp this way. Most importantly, notifications are not supported on iOS/iPadOS, so you won’t receive alerts for new messages. Despite these limitations and some small bugs, the service is easy to use and a great solution for WhatsApp users who want to access the app on their iPad.

In conclusion, WhatsApp Web is a free and convenient way to access the WhatsApp service on your iPad. Although notifications are not supported, it’s still a great option for easily accessing your messages on a tablet.

Namecheap Integrates StorPool Storage Into New Platform for Hosting Services

0

Namecheap, a leading provider of domain registration and hosting services worldwide, has adopted StorPool’s software-defined storage solution as part of its new hyperconverged infrastructure (HCI) platform. This move aims to enhance the speed and dependability of Namecheap’s hosting services and retain as well as attract more customers.

Namecheap
Namecheap – photo

Namecheap manages over 13 million domains and offers a broad range of hosting services to its customers. Previously, the company used a hosting platform with bare-metal servers and local storage, which often led to “noisy neighbor” issues where certain customers’ workloads consumed excessive server resources, causing disruptions for other users and causing problems such as single points of failure and downtimes during server upgrades.

To address these issues, Namecheap opted for an HCI deployment with StorPool’s software running on Supermicro servers with 64-core AMD EPYCTM 7742 CPUs and NVMe SSDs, delivering a next-generation hosting service with improved reliability and availability.

With StorPool’s solution, Namecheap can expect improved performance and achieve favorable results in important metrics. According to both Namecheap and StorPool, this approach provides high IOPS with minimal latency while using minimal CPU cores and memory, resulting in efficient utilization of hardware resources.

The new cloud infrastructure from Namecheap will provide the stability and availability necessary to retain existing customers and attract new ones. The company can now conduct scheduled hardware maintenance with minimal downtime, accelerate new virtual machine installations, and ensure optimal performance at scale, all thanks to StorPool. Additionally, Namecheap’s technical team no longer has to manage the storage system as StorPool’s operations team will offer quick assistance for all storage layer needs.

Monitor Review: QHD Dell S2721DS

0

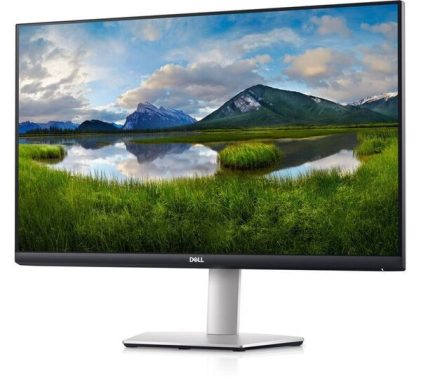
The Dell S2721DS has a Full HD (1920 x 1080) resolution and offers good display quality for general use, multimedia, and content creation. The monitor has a low input lag, which makes it responsive to user inputs, and a fast response time of 6ms, which helps to eliminate ghosting and trailing in fast-paced games and videos.

The Dell S2721DS has excellent color accuracy, with a wide color gamut that covers over 85% of the DCI-P3 color space. This makes the monitor a good choice for color-critical work, such as graphic design, photo editing, and video playback. The monitor also has good viewing angles, with minimal color shift or contrast loss when viewed from the sides or top.Dell S2721DS

In terms of performance, the Dell S2721DS has a refresh rate of 75Hz, which is sufficient for most general use and multimedia, but may not be fast enough for fast-paced games. However, the monitor’s fast response time and low input lag still make it a good choice for casual gaming.

The Dell S2721DS monitor boasts a basic design that is unassuming. It is constructed of full plastic material, which may seem a bit cheap in appearance. The stand is limited in terms of ergonomic adjustments and only allows for a tilt adjustment. The monitor features thin borders on three sides and a slightly larger bottom bezel. The stand base takes up minimal space and has a flat surface, allowing for items to be placed on top.  photo: Dell

The Dell S2721DS features a sleek design with ultra-thin bezels on three sides and a slightly thicker bottom bezel. It has a full plastic build, but it may look cheap to some. The monitor’s stand is easy to set up, and it offers smooth adjustments along the X, Y, and Z axes. Plus, the monitor can be turned vertically. However, plugging cables in can be challenging when the stand is attached. The monitor controls, including power, settings, and volume, are located on the bottom right, and the three-watt speakers are placed at the bottom. Although these speakers are an added feature, the volume levels may sound low even at the highest setting and the sound quality is not exceptional. Users will probably be better to use headphones or buy external speakers for good audio.

When it comes to performance, the Dell S2721DS offers a decent response time at 75Hz. It performs slightly better than at the maximum refresh rate and has only minimal overshoot. The best setting for overdrive is ‘Normal’, while the ‘Fast’ and ‘Extreme’ settings result in a significant amount of overshoot and are not recommended.Dell S2721DS

As an office monitor, the Dell S2721DS excels. Its IPS panel has wide viewing angles and is bright enough to counteract glare in most lighting conditions. The monitor’s large 27-inch screen and high resolution enable users to have multiple windows open simultaneously. The 75Hz refresh rate provides a smoother desktop experience when scrolling through documents or dragging windows.

For media consumption, the Dell S2721DS is a good option. Its 27-inch screen and high resolution offer an immersive viewing experience. The monitor provides good visibility in well-lit rooms and handles reflections well. However, its low contrast ratio, lack of HDR support, and poor ergonomics make it less ideal for sharing content.

The Dell S2721DS is a solid choice for casual gaming and office use. Its 27-inch screen offers ample space for multitasking, and its wide viewing angles make it easy to share work or content. The monitor has low input lag, a decent response time, and a 75Hz refresh rate, which adds a slight smoothness to motion compared to a typical 60Hz panel. It also supports FreeSync and is G-SYNC compatible, minimizing screen tearing. The monitor has excellent reflection handling and is bright enough for use in well-lit rooms, but its low contrast ratio, typical of most IPS panels, affects its performance in dark rooms. Additionally, it lacks HDR support and has poor ergonomics. On a positive note, it has a flicker-free backlight that can help reduce eye strain.Dell S2721DS

Dell S2721DS Tech Specs:

Display Type     LED-backlit LCD monitor / TFT active matrix
Diagonal Size     27″
Adaptive-Sync Technology      AMD FreeSync
Panel Type   IPS
Aspect Ratio    16:9
Native Resolution    QHD 2560 x 1440 at 75 Hz
Pixel Pitch      0.2331 mm
Pixel Per Inch    108.79
Brightness     350 cd/m²
Contrast Ratio      1000:1
Color Support      16.7 million colors
Response Time    4 ms (gray-to-gray extreme), 5 ms (gray-to-gray fast), 8 ms (gray-to-gray normal)
Vertical Refresh Rate     48 – 75 Hz
Horizontal Refresh Rate     30 – 115 kHz
Horizontal Viewing Angle    178
Vertical Viewing Angle    178
Screen Coating    Anti-glare, 3H Hard Coating
Backlight Technology    WLED
Audio Type    Speakers – stereo
Output Power / Channel   3 Watt
Connectivity
Interfaces   2 x HDMI, DisplayPort 1.2, Audio line-out

The mighty OnePlus 11 5G: performance, specs & review

0

In recent years, there has been some confusion and questions surrounding the changing brand image of OnePlus. Once known for producing high-quality phones at affordable prices, OnePlus has now become a sub-brand of Oppo and offers a wide range of devices.

In its flagship lineup, the company has gone from launching the 10 Pro with all the latest features, including wireless charging, to the 10T with fewer features, to the latest device, the OnePlus 11. The “Pro” naming has been dropped, and this device combines elements from both previous phones to create a balanced flagship. The journey from the OnePlus 9 Pro to the OnePlus 11 becomes clearer when considering these steps. The front of the device hasn’t changed much, except for slimmer bezels on the top and bottom of the display. The phone still has a similar display with curved edges, which has been around for a few years.

The size, thickness, and weight of the device are also similar, which can make it difficult to hold with one hand, especially if you tend to rest it on your pinky finger. This grip can cause strain and make it difficult to reach elements in the top corners of the display. The back of the phone features a large circular island with a shiny and shimmering surface, bearing the logo of Hasselblad. The island has some stainless steel plating that extends to the sides and joins the aluminium frame, which now includes the alert slider switch for easy switching between ring, vibrate, and silent modes.

OnePlus 11 5G features
OnePlus 11 5G – photo

The OnePlus 11 5G features a 6.7-inch LTPO3 AMOLED display with a 1440 x 3216 resolution and 525ppi, and a 120Hz adaptive refresh rate and 1hz always-on display. It runs on OxygenOS 13 based on Android 13. In recent years, the biggest advances in mobile display technology have been in adaptive refresh rates. Displays have gone from low refresh rates to very high, with the third-generation LTPO panel in the OnePlus 11 being evidence of this. This panel is an incremental update from the OnePlus 10 Pro and has the same QuadHD+ resolution, peak brightness, and compatibility with HDR10+ and Dolby Vision content. It can also shift from 1Hz to 120Hz and adjust to suit the content on the screen.

In the past, OnePlus AMOLED displays had a tendency to push reds and oranges, but this issue does not seem to be present in the latest device. The colour gamut support is wide, with a lot of depth and brightness, making it eye-catching and attractive. The display settings include a calibration option, allowing users to choose from different colour profiles, including Display P3 mode and a ‘brilliant’ mode, as well as ‘natural’ mode with an adjustable warmth slider. The phone also features several other display features, including ‘nature tone display’ which adjusts the white balance to match ambient lighting and ‘eye comfort’ mode which reduces blue light.

Customization is at the core of OnePlus’ software, which is a fork of Oppo’s ColorOS 13. There are many customizable elements, including the wallpaper, accent colours, always-on display, app icons, quick settings drop-down shade, system font, fingerprint animation, and edge lighting for notifications. The device is known for its smooth and responsive nature, and the combination of a 120Hz display, fluid software, and top-tier processor delivers the fastest and smoothest phone experience available. The device’s performance has also been improved, with an increase in processor speed, LPDDR5X RAM which offers a 30% increase compared to the OnePlus 10 Pro, and UFS 4.0-based storage with doubled read/write speeds.

In terms of battery life, the OnePlus 11 5G features a 5,000 mAh battery which can last for a full day with heavy use. The phone also supports fast charging, with a 80w charger included in the box. This means you can go from 0 to 50% in just 15 minutes and from 0 to 100% in just 35 minutes.

For those who love taking photos, the OnePlus 11 comes equipped with a 48MP main camera, a 16MP ultra-wide camera, and a 2MP macro camera. The main camera can take high-quality photos with good detail and vibrant colors, while the ultra-wide camera is perfect for landscapes and group shots. The macro camera allows for close-up shots and can take some interesting photos. The front-facing camera is 16MP, making it great for selfies and video calls.OnePlus 11 5G features

Finally, the OnePlus 11 is priced very competitively compared to other flagships on the market. It offers top-of-the-line specs and features at a price that is much lower than what you would pay for a similar phone from other brands. This makes it a great option for those who want a flagship phone without breaking the bank.

The new Snapdragon 8 Gen 2 processor is a powerhouse, with the option to choose from 8GB/128GB or 16GB/256GB of storage. The phone’s smooth and responsive nature, a hallmark of OnePlus devices, is further enhanced by this processor. Known for offering “fast and smooth” experiences, the 120Hz display, combined with a lightweight software, and the top-notch processor, delivers one of the quickest and most seamless phone experiences available.

Not only has the processor seen an improvement, but the supporting cast, including the LPDDR5X RAM and UFS 4.0-based storage, has also been upgraded. The RAM offers a 30% increase compared to the OnePlus 10 Pro, while the read/write speeds of the storage have doubled. The 5000mAh battery provides ample power to last through a busy day, and with the 100W SuperVOOC fast charging, battery life is no longer a concern. You can charge the phone for just 10-15 minutes, and it will be back to 75% power. A full charge from 1% takes only 25 minutes.

The OnePlus 11 5G phone is reliable, and the battery life is consistent. We didn’t experience any surprises or setbacks, and the fast charging capabilities make it easy to keep the phone charged and ready to go.

The OnePlus 11 5G is a well-rounded phone that offers a great balance of performance, features, and value. Whether you’re a power user or just someone looking for a high-quality phone, it’s definitely worth considering.

OnePlus 11 5G  specs:

Snapdragon® 8 Gen 2
80W SUPERVOOC
3rd Gen Hasselblad Camera for Mobile
Dolby Vision® HDR, Dolby Atmos®

Width    74.1 mm

Thickness    8.53 mm

Weight    205g

eSIM    Yes

Parameters

Size     6.7″ (measured diagonally from corner to corner)

Resolution    3216*1440 (QHD+), 525 ppi

Aspect Ratio          20.1:9

Refresh Rate     1-120 Hz dynamic

Type          120 Hz Super Fluid AMOLED with LTPO

Touch Response Rate     Up to 1000 Hz

Support sRGB, Display P3, 10-bit Color Depth

Cover Glass        Corning® Gorilla® Glass Victus

Features: Nature tone display, Eye comfort, Image sharpener, Video color enhancer, Screen color mode,

Color personalization, Color vision enhancement, Auto brightness, Manual brightness,

Screen Color Temperature, Bright HDR video mode, Night mode, Multi-brightness color calibration

Operating System    OxygenOS 13.0 based on Android™ 13

CPU       Qualcomm® Snapdragon™ 8 Gen 2 Mobile Platform

5G Chipset    X70

GPU    Adreno 740

RAM      8GB/16GB LPDDR5X

Storage   128GB UFS 3.1/256GB UFS 4.0

Battery    5,000 mAh (Dual-cell 2,500 mAh, non-removable)

SUPERVOOC 80W

Vibration

Haptic motor

Available configurations    8GB+128GB / 16GB+256GB

Sensor     Sony IMX709

Sensor Size      1/2.74″

Megapixels     32

Optical zoom    2X

Lens Quantity       6P

Aperture        ƒ/2.0

Field of View         49°

Autofocus         Yes

Front Camera

Megapixels      16

Pixel Size           1.0 µm

Electronic Image Stabilization           Yes

Autofocus

Fixed Focus

Aperture         ƒ/2.45

Video       8K video at 24 fps, 4K video at 30/60 fps, 1080p video at 30/60 fps

720p video at 30/60 fps

Super Slow Motion   1080p video at 240 fps, 720p video at 240/480 fps

Time-Lapse       4K/1080p at 30 fps

Video Editor      1080p video at 30 fps, 720p video at 30 fps

Time-Lapse

Ultra-wide Camera

Sensor    Sony IMX581

Sensor Size        1/2″

Megapixels        48

Lens Quantity         6P

Aperture         ƒ/2.2

Field of View          115°

Autofocus           Yes

Features:

Photo Mode, Video Mode, Portait Mode, Night Mode, Pro Mode, Panorama, Movie Mode, Slo-motion, Time-Lapse, Long Exposure, Dual-View Video, Tilt-Shift Mode, Xpan Mode, Auto macro, AI scene enhancement, Master Style Fliters, Retouch, AI Highlight Video, Ultra Steady Pro, Raw Plus file, Google Lens, 10bit Color, High Efficiency Image, etc.

Face Unlock, Selfie HDR, Screen Flash, Nightscape Selfie, Face Retouching

Main Camera

Sensor        Sony IMX890

Sensor Size           1/1.56″

Megapixels        50

Pixel Size          1.0 µm

Lens Quantity        6P

Optical Image Stabilization          Yes

Electronic Image Stabilization           Yes

Focal Length           24mm equivalent

Aperture             ƒ/1.8

Field of View         84°

Autofocus      Yes

Flash               Dual LED Flash

Autofocus         Multi Autofocus (All pixel omni-directional PDAF+CAF)

Other sensor(s)     13-channel Accu-spectrum Light-color Identifier