There are several ways you can increase the number of clicks on your video:
Use a clear and descriptive title: A title that accurately reflects the content of your video will help attract viewers and make it easier for them to find your video when searching online.
A clear and descriptive title is an important element of your video’s marketing strategy, as it can help attract viewers and give them an idea of what your video is about. Here are a few tips for creating a clear and descriptive title for your video:
Keep it concise: Your title should be concise and to the point, ideally no more than a few words long. This will make it easier for people to quickly understand what your video is about.
Use keywords: Include relevant keywords in your title to help people find your video when they search for those terms.
Be descriptive: Use descriptive language in your title to give people a sense of what your video is about. For example, instead of “Video on gardening,” try “5 Tips for Starting a Successful Vegetable Garden.”
Make it catchy: Use catchy language or a question in your title to grab people’s attention and encourage them to click on your video.
Avoid using clickbait: While it’s important to make your title catchy, it’s also important to avoid using clickbait, as it can be misleading and turn people off.
photo: Pixabay
By following these tips, you can create a clear and descriptive title that will help your video stand out and attract more viewers.
Use tags and descriptions: Add relevant tags and a detailed description to your video to help it appear in search results and make it easier for viewers to find and understand the content of your video.
Use annotations and links: You can add clickable links and annotations to your videos that allow viewers to click and access additional information or resources. This can be a great way to direct viewers to your website or social media channels, or to provide more information about your content.
Promote your videos: Share your videos on social media, embed them on your website, or send them to friends and colleagues to help increase the visibility of your videos and make them more “clickable.”
Use a thumbnail image: A visually appealing thumbnail image can help attract clicks and views, so make sure to choose a thumbnail that accurately represents the content of your video.
Engage with your audience: Respond to comments and engage with viewers on social media and other platforms to build a community around your videos and increase their visibility.
Optimize your videos for mobile devices: With the increasing popularity of mobile devices, it’s important to make sure that your videos are optimized for viewing on smaller screens.
Use paid promotion: If you have a budget for advertising, you can use paid promotion to increase the visibility of your videos and get more clicks.
There are a few different ways you can use paid promotion to promote your video:
YouTube Ads: You can use YouTube Ads to promote your video on YouTube. This type of promotion allows you to target specific demographics and interests, and you only pay when someone watches at least 30 seconds of your ad or clicks on it.
Social media advertising: You can also use paid promotion on social media platforms like Facebook, Instagram, and Twitter to promote your video. This type of promotion allows you to target specific demographics and interests, and you can set a budget for your campaign.
Influencer marketing: You can reach out to influencers in your industry and ask them to promote your video on their social media channels or through sponsored content on their blogs or websites. This can be a more expensive option, but it can be an effective way to reach a larger audience.
Email marketing: If you have a list of email subscribers, you can use email marketing to promote your video. You can send an email to your subscribers with a link to your video, or you can include a thumbnail image and a brief description in the email to encourage them to click through and watch the video.
Paid search advertising: You can use paid search advertising to promote your video on search engines like Google. This type of promotion allows you to bid on specific keywords, and your ad will appear in the search results when someone searches for those keywords.
Regardless of which type of paid promotion you choose, it’s important to have a clear marketing plan in place and to set a budget for your campaign. You should also track the results of your promotion efforts to see what’s working and what isn’t, and adjust your strategy as needed.
Mazda Motor Corporation has created a new unique color called Artisan Red Premium using its in-house painting technique Takuminuri. In their current lineups as well as upcoming releases in their Large Product group, this color will be offered as a high-end accent.
As a result, Mazda is concentrating its efforts on creating colors that emphasize a dynamic and delicate expression in line with the Kodo – Soul of Motion – design theme. Mazda thinks that color is an essential element of what gives form to a vehicle. The fourth Takuminuri color, Artisan Red Premium, was created to broaden the perception of red, one of the colors associated with Mazda, and to honor ten years since the debut of the first Takuminuri color, Soul Red Premium.
Artisan Red Premium
Artisan Red Premium conveys the connotation of a red color created by skilled artisans. This extraordinary red produced by Mazda designers, engineers and other artisans manifests a mature outlook that is more refined and sophisticated than previous special colors. The concept underlying design was to create the red found in a mature wine made with unsurpassed craftsmanship. Artisan Red Premium accentuates the strength and beauty of form that takes shape as highlights hit by light portray a fine-grained transparent red shining brightly and dominant shade produces a profound depth and richness, rendering high contrast.
A clear layer, a translucent paint layer, and a reflective/absorptive layer are the three layers that comprise Artisan Red Premium, just like Soul Red Crystal. It combines a superb visual look with a small environmental impact. A high-chroma pigment that is also utilized in the Soul Red Crystal and is perceived by people as the reddest of reds is used for the translucent paint layer. We used a technique that more smoothly aligns aluminum flakes at regular intervals for the reflective/absorptive layer. This was also leveraged for the third Takuminuri color Rhodium White Premium. In addition, we improved on the jet-black pigment, which renders shade in the second color Machine Gray. This combination of technologies developed over a period of 10 years conveys brightness in highlights produced by strong reflection and the richness of shades created as light is soundly absorbed so as to achieve a balance between transparency and a mature profoundness.
Artisan Red Premium Paint Layer Structure
In the belief that “color is an element of form,” Mazda will continue to pursue new color expressions and painting technologies to enhance the attractiveness of our products, aiming to be a company that shares a special bond with its customers. Photo: Mazda
The Garmin Instinct 2 is a rugged, outdoor GPS watch designed for activities such as hiking, running, and swimming. It features a durable design with a fiber-reinforced polymer case and a chemically-strengthened glass display. The watch is water-resistant up to 100 meters, making it suitable for use in the water.
Some key features of the Garmin Instinct 2 include:
GPS and GLONASS satellite support: The Instinct 2 can use both the US Global Positioning System (GPS) and the Russian Global Navigation Satellite System (GLONASS) to provide accurate location tracking and navigation.
Heart rate monitor: The watch has a built-in heart rate monitor that can track your heart rate continuously, helping you to monitor your fitness level and intensity of your workouts.
Outdoor sensors: The Instinct 2 has a 3-axis compass, barometric altimeter, and thermometer, which can be useful for outdoor activities such as hiking and climbing.
Connectivity: The watch has Bluetooth connectivity, allowing you to sync your data with the Garmin Connect app and share your workouts with friends and family. It also has a built-in GPS and GLONASS receiver, which allows you to track your location even when you don’t have a phone with you.
Overall, the Garmin Instinct 2 is a reliable and rugged GPS watch that is well-suited for outdoor activities. It has a variety of features that can be useful for tracking your workouts, monitoring your fitness level, and navigating the outdoors. The watch has a 3-axis compass with automatic calibration. The compass features and appearance change depending on your activity, whether GPS is enabled, and whether you are navigating to a destination.
Garmin Instinct 2
The Garmin Instinct 2 watch contains an internal altimeter and barometer. The watch collects elevation and pressure data continuously, even in low-power mode. The altimeter displays your approximate elevation based on pressure changes. The barometer displays environmental pressure data based on the fixed elevation where the altimeter was most recently calibrated.
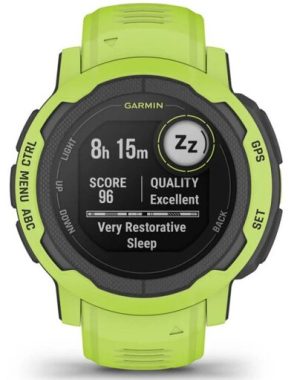
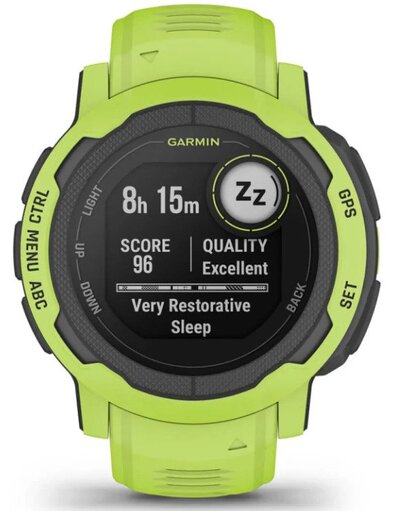
While you are sleeping, the watch automatically detects your sleep and monitors your movement during your normal sleep hours. You can set your normal sleep hours in the user settings on your Garmin Connect account. Sleep statistics include total hours of sleep, sleep stages, sleep movement, and sleep score. You can view your sleep statistics on your Garmin Connect account.
All watch models have excellent battery life, and ones with Garmin’s photovoltaic Power Glass are very difficult to surpass. Even if your way of life prevents you from getting enough sun to keep the watch operating permanently, it will still last for weeks rather than days between charges.
Similar to the original Instinct, the Instinct 2 also comes in specific Surf, Tactical, and Camo variants. The Surf edition includes additional tools including tide information and a special surf tracking mode that logs information like the height of the highest wave surfed and the total distance traveled. Additionally, it has the pre-installed Garmin Surfline software, which displays the conditions at the 5 surf spots closest to you.
According to a statement on Garmin’s website, the new firmware update adds some of the features of the greatest Garmin watches that were released this year to the Instinct 2. The capabilities will initially only be accessible to participants in Garmin’s early-access beta testing program, but they are scheduled to automatically roll out to all Instinct 2 users in late January. The following is a list of all the features that will be available on the Garmin Instinct 2 and is taken directly from the Garmin website: Morning report was added. Sleep Mode was added. Primary Race and Race Calendar glimpses have been added. Wrist-Based Running Power Added. Improvements to the Daily Suggested Workouts. Grade-Adjusted Pace was added. Backcountry snowboarding activity was added. Improved Training Status with Physio TrueUp. Activity notifications now support Real Time Settings. Added activity setting for temperature recording. updated PIN comparison process for phone app pairing. Fixed a problem where the daily active calorie total can be off. It was resolved that the Indoor Bike activity could begin on the incorrect data screen. Updated activity summary page for surfing waves.
The Morning Report is the main draw here and the function that we utilize the most. As soon as you wake up, The Morning Report sends a selection of curated information to your wrist, including data on your previous night’s sleep, the current weather, your Training Readiness score, and a suggested training intensity. Photo: Garmin
Another absolutely awesome feature is race calendar glances, which lets you view the races you’ve entered into Garmin Connect on your wrist and provides a countdown to the next significant event. A great technique to estimate the entire effort and physical strain imposed during a run is to use wrist-based running power.
The Garmin Instinct 2 upgrades the original Instinct’s best features, such as its incredibly durable case and high-contrast dual-screen display, to make the device more enjoyable than functional. The smartwatch is slimmer, more customisable, and comes with cutting-edge fitness training capabilities and personalized workout ideas, in addition to having a smaller 40mm casing option and a variety of jazzier new colors. It doesn’t do a great job at mapping, but that’s a tiny price to pay for its extraordinary battery life. This watch is for you if you’re looking for something that’s both useful and enjoyable to wear.
LENS MATERIAL
chemically strengthened glass
BEZEL MATERIAL
fiber-reinforced polymer
CASE MATERIAL
fiber-reinforced polymer
QUICKFIT™ WATCH BAND COMPATIBLE
yes (22 mm)
STRAP MATERIAL
silicone
PHYSICAL SIZE
45 x 45 x 14.5 mm Fits wrists with a circumference of 135-230 mm
DISPLAY SIZE
custom, two-window design; 0.9” x 0.9” (23 x 23 mm)
Smartwatch: Up to 28 days Battery Saver Watch Mode: Up to 65 days GPS: Up to 30 hours Max Battery GPS Mode: Up to 70 hours Expedition GPS Activity: Up to 32 days
To change your Netflix plan, you’ll need to follow these steps:
Go to the Netflix website and sign in to your account.
Click on your account profile in the top right corner of the screen and select “Account” from the drop-down menu.
Scroll down to the “Membership & billing” section and click on the “Change plan” button.
Select the new plan you want to switch to from the options presented.
Click on the “Continue” button to review the details of your new plan.
If you are happy with the new Netflix plan, click on the “Finish” button to complete the process. If you want to continue with your current plan, click on the “Cancel” button.
Keep in mind that changing your Netflix plan may result in a change to your billing date, and you may be charged for the new plan immediately or at the end of your current billing cycle, depending on when you make the change.
To change the billing date for your Netflix subscription, you’ll need to follow these steps:
Go to the Netflix website and sign in to your account.
Click on your account profile in the top right corner of the screen and select “Account” from the drop-down menu.
Scroll down to the “Membership & billing” section and click on the “Update payment info” button.
Enter your new payment information, including the expiration date for your credit or debit card.
Scroll down to the “Billing details” section and select the date you would like your subscription to be billed.
Click on the “Save” button to update your billing date.
Keep in mind that changing your billing date may result in a change to your next billing amount, depending on when you make the change and the length of your billing cycle. You may also be charged a pro-rated amount for the remainder of your current billing cycle.
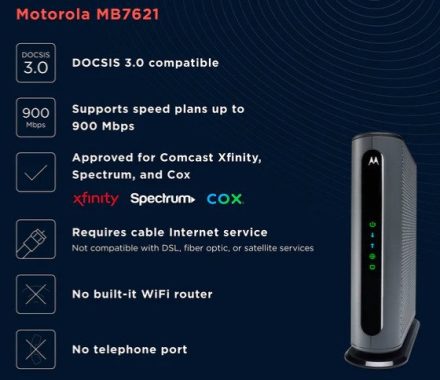
The Motorola MB7621 is a cable modem that supports high-speed Internet connectivity over a coaxial cable connection. It is compatible with most cable service providers and is certified for use on DOCSIS 3.0 and 3.1 networks. The MB7621 has 24×8 channel bonding, which allows it to support download speeds of up to 1 Gbps and upload speeds of up to 240 Mbps. It also has a built-in router with support for IPv4 and IPv6 networking protocols, as well as advanced security features such as firewall protection and parental controls. The Motorola MB7621 cable modem is designed to be easy to install and configure, with a simple web-based interface that allows users to customize their network settings and manage their Internet connection.
Motorola MB7621 cable modem
Here are some highlights of the Motorola MB7621 cable modem:
High-speed Internet connectivity: The MB7621 supports download speeds of up to 1 Gbps and upload speeds of up to 240 Mbps, making it suitable for a wide range of Internet activities including streaming, gaming, and browsing.
Compatibility with cable service providers: The MB7621 is compatible with most cable service providers and is certified for use on DOCSIS 3.0 and 3.1 networks.
Advanced security features: The MB7621 has a built-in router with advanced security features such as firewall protection and parental controls to help protect your home network from online threats.
Easy installation and configuration: The MB7621 is designed to be easy to install and configure, with a simple web-based interface that allows users to customize their network settings and manage their Internet connection.
Energy-efficient design: The MB7621 has an energy-efficient design that helps reduce power consumption and save on energy costs.
Support for IPv4 and IPv6: The MB7621 supports both IPv4 and IPv6 networking protocols, ensuring compatibility with a wide range of devices and applications
The price of the Motorola MB7621 cable modem can vary depending on your location and the retailer you purchase it from. In general, you can expect to pay around $60-$100 for the MB7621. It is important to note that the price of the modem does not include the cost of Internet service, which you will need to purchase separately from a cable service provider. It is also worth considering that purchasing a cable modem like the MB7621 can save you money in the long run, as renting a modem from your cable service provider can be more expensive over time.
The Motorola MB7621 cable modem is a popular choice among consumers due to its high-speed capabilities, compatibility with most cable service providers, and advanced security features. It is also known for its energy-efficient design and easy installation and configuration process.
One of the main benefits of the Motorola MB7621 cable modem is its value for money. It offers fast download and upload speeds, support for IPv4 and IPv6 networking protocols, and a built-in router with advanced security features, all at a relatively affordable price point. This makes it a good choice for users who want a reliable and high-performing cable modem without breaking the bank. photo: Motorola
It is worth noting that the value of a cable modem can depend on your specific needs and circumstances. For example, if you have a large household with multiple devices that need to connect to the Internet simultaneously, you may want to consider a modem with more advanced features and higher bandwidth capabilities. On the other hand, if you have a smaller household with fewer devices, the Motorola MB7621 cable modem may be a good fit for your needs.
There are several ways you can detect adware on your system:
Use antivirus software: Most antivirus programs have the ability to detect and remove adware from your system. Make sure you have an up-to-date antivirus program installed and run regular scans to detect and remove any adware that may have entered your system.
Manually check your system: You can manually check your system for adware by looking for unfamiliar programs or toolbars in your list of installed programs or extensions in your web browser. If you find any unfamiliar programs or extensions, you can research them online to see if they are known to be adware.
Check your browser settings: Adware may change your browser settings to display unwanted ads or redirect your search results. Check your browser settings to see if anything has been changed without your knowledge.
Be cautious when downloading software: Adware is often bundled with free software downloads, so be careful when downloading software from the internet. Always read the terms of service and pay attention to any checkboxes that are pre-selected to avoid installing unwanted programs.
Use ad-blocking software: Ad-blocking software can help prevent adware from being installed on your system by blocking the display of unwanted ads. Some ad-blockers also have the ability to detect and remove adware that has already been installed on your system.
Adware is software that displays advertisements on a computer or mobile device. It is often bundled with other software and can be difficult to remove. Adware can be annoying and can slow down your device, but it is generally not considered to be malicious software like viruses or malware. However, some adware can be used to track your online activity and may collect personal information about you without your knowledge or consent. It is important to be cautious when downloading software and to use antivirus and ad-blocking software to protect your device from adware and other unwanted programs.
photo: Pixabay
How to remove Adware Tracking Cookie
If you are a victim of Adware Tracking Cookies, follow these steps to get rid of them:
1. Remove unknown software
Start Control Panel by pressing Windows + R and typing Control Panel and clicking the OK button. If you find any unwanted program, consider uninstalling it.
2. Remove unknown extensions from the browser
Launch the web browser and check to see if there is any unknown extension, plugin or addon. Remove all unwanted and unknown addons as they can be a security threat.
To remove unknown extensions from your web browser, follow these steps:
Open your web browser and click on the menu button (usually three horizontal lines or dots) in the top-right corner of the window.
Click on “Extensions” or “Add-ons” in the menu.
A list of installed extensions will be displayed. Look for any extensions that you do not recognize or that you did not intentionally install.
To remove an extension, click on the “Remove” or “Uninstall” button next to it.
Confirm that you want to remove the extension.
Repeat these steps for any other unknown or unwanted extensions.
Note that some extensions may be required for certain websites or features to work properly, so be careful not to remove any extensions that you need. If you are unsure whether an extension is necessary, you can do a web search to find out more information about it.
3. Reset web browser
This process will correct all changes made by the Adware Tracking Cookie.
4. Run an anti-virus scan
Use a good antivirus program or Windows Defender. This process will remove all viruses, adware, spyware, malware, and other security threats from your PC. A free tool like Avast Free Adware Scanner Cleaner Tool, Spybot – Search & Destroy, AdwCleaner or Adware Removal Software for Mac Computers can also help.
5. Switch to incognito mode
If surfing the internet in incognito mode, all history data and cookies are automatically deleted when you exit. As a result, you will have a safer internet surfing experience in private browsing mode. You can also set your browser to delete all cookies on exit.
There are many useful Shopify apps that can help you enhance the functionality and features of your online store. Here are a few popular options:
Oberlo: This app allows you to easily import products from AliExpress and other suppliers and fulfill orders with just a few clicks.
Kit: This app is a virtual marketing assistant that can help you with tasks such as creating Facebook ads, sending email campaigns, and more.
Shopify POS: This app allows you to use your Shopify store to sell in-person using a mobile device or a card reader.
Yotpo: This app helps you generate customer reviews and use them to increase conversions and boost sales.
QuickBooks: This app integrates with QuickBooks Online to help you manage your finances, including invoicing, expenses, and inventory.
Aftership: This app helps you automate the tracking and delivery of orders, and provides your customers with real-time updates.
Privy: This app helps you grow your email list and increase conversions with targeted pop-ups, spin-to-win wheels, and other interactive campaigns.
Oberlo is a Shopify app that allows you to easily import products from AliExpress and other suppliers and fulfill orders with just a few clicks. It’s designed for e-commerce store owners who want to sell products online without having to worry about inventory management or shipping.
Using Oberlo, you can search for products on AliExpress and other supplier websites, and then add them to your Shopify store with just a few clicks. When an order is placed on your store, Oberlo will automatically place the order with the supplier and handle the shipping process for you. This means you don’t have to worry about purchasing inventory upfront or handling the logistics of shipping.
Oberlo also offers a range of features to help you manage your store, including order tracking, automatic pricing updates, and abandoned cart recovery. You can also use the app to customize the products you import, such as by adding your own branding or changing product descriptions.
Overall, Oberlo is a useful tool for store owners who want to sell products online without the hassle of managing inventory and shipping. It’s particularly popular with dropshipping businesses, which is a business model where you sell products without actually holding any inventory.
Kit is a virtual marketing assistant app for Shopify stores. It is designed to help store owners with tasks such as creating Facebook ads, sending email campaigns, and more.
Using Kit, you can create and customize marketing campaigns based on your store’s specific needs. For example, you can use the app to create and send email newsletters to your customers, promote your products on social media platforms such as Facebook and Instagram, and create ads to reach new audiences.
In addition to its marketing capabilities, Kit also offers a range of tools to help you manage your store, including integrations with popular apps such as Google Analytics and Mailchimp. You can use these tools to track the performance of your campaigns and get insights into your customers’ behavior.
Overall, Kit is a useful tool for store owners who want to automate their marketing efforts and save time on tasks such as creating ads and sending emails. It’s particularly useful for small businesses that may not have the resources or expertise to manage their marketing efforts in-house.
Shopify POS (Point of Sale) is a mobile app and card reader that allows you to use your Shopify store to sell products in person. It’s designed for businesses that want to sell both online and in brick-and-mortar locations, such as stores, markets, and pop-up shops.
Using Shopify POS, you can process orders and accept payments using a mobile device or a card reader. The app integrates with your Shopify store, so you can view your inventory and customer data in one place. You can also use the app to create and manage orders, issue refunds, and track sales.
In addition to its basic features, Shopify POS offers a range of tools to help you manage your in-person sales. For example, you can use the app to create custom receipts, apply discounts, and process returns. You can also use it to track inventory levels and receive alerts when it’s time to reorder products.
Overall, Shopify POS is a useful tool for businesses that want to sell both online and in person. It’s particularly useful for businesses that sell physical products, as it allows you to process orders and accept payments easily in a variety of settings.
Yotpo is a customer review and ratings app for Shopify stores. It helps you generate customer reviews and use them to increase conversions and boost sales.
Using Yotpo, you can ask customers to leave reviews and ratings for your products after they make a purchase. You can then display these reviews on your product pages and use them to build trust and credibility with potential customers. Yotpo also offers tools to help you manage and respond to customer reviews, such as the ability to filter and moderate reviews before they are published on your site.
In addition to its review management features, Yotpo offers a range of tools to help you market your products and increase conversions. For example, you can use the app to create social media posts and email campaigns featuring customer reviews, or to create landing pages that showcase your top-rated products.
Overall, Yotpo is a useful tool for businesses that want to use customer reviews to improve their marketing efforts and increase sales. It’s particularly useful for businesses that sell physical products, as customer reviews can be a powerful way to build trust and credibility with potential customers.
QuickBooks is a financial management software that helps businesses keep track of their finances, including invoicing, expenses, and inventory. It’s designed for businesses of all sizes and is available in a range of versions to suit different needs and budgets.
Using QuickBooks, you can create and send invoices, track expenses, and manage your inventory. You can also use the software to generate financial reports, such as profit and loss statements and balance sheets, to help you understand the financial health of your business.
In addition to its core features, QuickBooks offers a range of tools to help you manage your finances more efficiently. For example, you can use the software to automate tasks such as sending payment reminders or tracking tax payments. You can also use it to connect with other business tools, such as your bank or credit card accounts, to import financial data automatically.
There is also a QuickBooks app available for Shopify stores, which allows you to integrate your Shopify store with QuickBooks Online. This allows you to manage your store’s finances and accounting in one place, and helps you stay on top of invoicing, expenses, and inventory management.
Overall, QuickBooks is a useful tool for businesses of all sizes that want to manage their finances efficiently and make informed decisions about their operations. It’s particularly useful for businesses that sell physical products, as it can help you keep track of inventory and manage your finances more effectively.
Aftership is a package tracking and delivery management app for Shopify stores. It helps you automate the tracking and delivery of orders, and provides your customers with real-time updates.
Using Aftership, you can track orders from multiple carriers in one place, and receive notifications when an order has been shipped or delivered. You can also use the app to create custom tracking pages and email notifications to keep your customers informed about the status of their orders.
In addition to its tracking and delivery management features, Aftership offers a range of tools to help you improve your customer experience. For example, you can use the app to automate returns and exchanges, or to offer self-service options such as order tracking and delivery updates.
Overall, Aftership is a useful tool for businesses that want to streamline their order fulfillment process and improve the customer experience. It’s particularly useful for businesses that sell physical products, as it can help you manage the shipping and delivery process more efficiently and keep your customers informed about the status of their orders.
Privy is an email marketing and customer acquisition app for Shopify stores. It helps you grow your email list and increase conversions with targeted pop-ups, spin-to-win wheels, and other interactive campaigns.
Using Privy, you can create and customize email capture forms and campaigns to attract and engage visitors to your store. You can also use the app to segment your email list and send targeted messages to different groups of customers.
In addition to its email marketing features, Privy offers a range of tools to help you acquire new customers and increase conversions. For example, you can use the app to create pop-ups, spin-to-win wheels, and other interactive campaigns to capture email addresses and encourage visitors to make a purchase.
Overall, Privy is a useful tool for businesses that want to grow their email list and increase conversions. It’s particularly useful for businesses that sell physical products, as it can help you capture customer email addresses and encourage more sales through targeted campaigns.
These are just a several examples of the many apps available on the Shopify App Store. It’s a good idea to research and compare different options to find the ones that best suit your business needs.
Once the installation is complete, you will be able to access Pure Flix from the Kodi home screen by going to “Videos” and then “Add-ons.” You will need to enter your Pure Flix login credentials to access the content.
What is Pure Flix?
Pure Flix is a streaming service that offers a selection of movies, TV shows, and documentaries. It is geared towards a Christian audience and features content that is appropriate for all ages. Some of the genres of content available on Pure Flix include drama, comedy, action, and family-friendly programming. Pure Flix can be accessed through a web browser or by using a compatible streaming device, such as a smart TV, streaming media player, or mobile device. Users can sign up for a subscription to access the full library of content or rent individual movies or TV shows.
There are several steps you can take to protect and secure your Instagram account:
Use a strong, unique password: Use a combination of letters, numbers, and special characters to create a password that is difficult for others to guess. Avoid using personal information or commonly used words in your password.
Enable two-factor authentication: This adds an extra layer of security to your account by requiring you to enter a code sent to your phone or email when logging in from a new device.
Be careful what you share: Avoid sharing personal information, such as your home address or phone number, on your Instagram profile or in your posts.
Use a private account: If you don’t want just anyone to be able to see your posts, consider switching to a private account. Only users you approve can see your posts when you have a private account.
Be cautious about who you follow and accept follow requests from: Be mindful of who you follow and accept follow requests from, as they will be able to see your posts.
Avoid clicking on suspicious links: If you receive a message or see a link that looks suspicious, do not click on it. It could be a phishing attempt or lead to a malicious website.
Keep your Instagram app and phone’s operating system up to date: Installing updates can help protect your account by fixing security vulnerabilities.
photo: Pixabay
The best apps to keep your Instagram account safe and secure
There are several apps that can help you secure your Instagram account. Some options include:
Two-factor authentication apps: These apps generate a code that you can use to log in to your Instagram account, in addition to your password. Some examples include Authy, Google Authenticator, and Duo Mobile.
Password managers: These apps help you create and store strong, unique passwords for all of your online accounts, including Instagram. Some examples include LastPass, Dashlane, and 1Password.
Security apps: These apps can provide additional security features for your Instagram account, such as alerting you when someone logs in from an unfamiliar device or location. Some examples include McAfee Mobile Security and Norton Mobile Security.
It’s important to note that no app can fully guarantee the security of your Instagram account. In addition to using security apps, you should also follow best practices for securing your account, such as using a strong, unique password and enabling two-factor authentication.
By following these steps, you can help protect your Instagram account and keep your personal information secure.
Yes, it is possible to install Ubuntu onto a USB drive, making it a live USB that can be used to boot and run Ubuntu on any computer that is capable of booting from a USB drive. This is a useful option if you want to try out Ubuntu without installing it on your primary computer, or if you want to use it as a portable operating system that you can carry with you and use on multiple computers.
To create a live USB of Ubuntu, you will need a USB drive with at least 2 GB of free space, as well as a computer running Ubuntu or any other operating system that can create a bootable USB drive.
photo: Pixabay
Here are the basic steps to install Ubuntu on a USB drive:
Download the Ubuntu ISO file from the official Ubuntu website.
Insert the USB drive into your computer and open the “Startup Disk Creator” application.
Select the Ubuntu ISO file and the USB drive, and click the “Create Startup Disk” button.
Follow the prompts to complete the installation process.
Once the installation is complete, you can boot from the USB drive by changing the boot order in the BIOS or UEFI settings of your computer and selecting the USB drive as the boot device.
How to permanently install Ubuntu on a USB
You require two USB drives, PenDrive1 (OS Boot Files) PenDrive2 (work as hard drive)
1. Download a bootMaker, such as PowerISO, Rufus, etc., and the Ubuntu ISO file.
2. Create a bootable replica on the PenDrive.
3. select “Try Ubuntu”
4. connect PenDrive 2
5. Click “Disk,” then write down the names of the accessible disks.
Internal Hard Drive (likely dev or sda) Live-Boot PenDrive 1 (likely dev/sdb) Pendrive 2 (which might be a dev or sdc) to be used as a hard drive
6. Format and mount the second Pendrive ( do not eject or swithOff it, if nothing to unmount its OK)
7. Click “Install Ubuntu” to get to the screen asking where to install Ubuntu.
8. choose a blank place on the dev/sdc,
To create a new partition, click the “+” symbol, choose “ext4 journal,” choose “primary,” choose “start from the beginning,” choose “mount point as”/,” and then click OK. 9. Enter dev/sdc instead of dev/sdc1 in the “Install Boot Loader Location” field.